Acrylic bathtubs are popular among residents of Russia and beyond. They are lightweight, durable and inexpensive.
However, even with the most careful handling, scratches and chips may form on them, since acrylic has low resistance to mechanical and chemical influences.
Such damage spoils the appearance of the bathtub, leading to corrosion and deformation. Read the article on how to remove a scratch on an acrylic bathtub without ruining it.
How to remove minor damage?
Before you begin removing minor scratches on your bathtub, you need to thoroughly wash and dry it. It should be taken into account that acrylic is a porous material, so it takes at least 7 hours to completely dry it. It is not enough to simply wipe the surface with a dry cloth. It is necessary to give the moisture time for complete evaporation.
Instructions for removing minor scratches:
The first stage of processing is sanding the surface with fine-grained sandpaper.
The skin should be the thinnest, and the grain size should be P2500 units. Only if these conditions are met will it be possible to rub and not scratch the surface.- If after grouting the surface is smooth and no roughness is felt on it, then the work was done efficiently.
- The second stage is treating the damaged area with an abrasive polish. You can find special repair kits on sale, the average price of which is 600 rubles. The polish is applied to the surface of the bathtub and rubbed with a felt cloth.
- After 2-3 hours, the polish will be absorbed, after which you can begin the third stage of processing. It comes down to applying wax for acrylic baths (this component is also included in the repair kit).
- After an hour, the bath is washed using a liquid product.
If the size of the scratch does not exceed 0.5 mm, then simply rub it vigorously with felt. As a rule, such treatment is enough to remove shallow damage. Video tips will help you remove scratches on an acrylic bathtub:
Tools and materials
Different materials and tools are required to repair different types of damage.
To repair small scratches you need:
- sandpaper P80–P100;
- 2500 grit sandpaper for sanding;
- acrylic bath pencil;
- polish and flannel rag.
To eliminate deep scratches , in addition to the above, you will need:
alcohol-based degreaser;- repair composition or putty based on acrylic resin;
- masking tape;
- rubber spatula.
If the crack is very deep , a drill with thin drill bits is added to the list.
Valera
The voice of the construction guru
Ask a Question
To restore the bathtub in case of breakdowns and through cracks, it is recommended to use a ready-made repair kit. It includes fiberglass and a two-part acrylic repair compound. With their help, a patch is made, and then the defect is masked and painted or polished.
How to repair chips?
If a chip has formed on the surface of the bathtub, it will not be possible to rub it with sandpaper; more serious repair work will be required.
To do this, you need to purchase a repair kit, which includes:
- sandpaper;
- polishes;
- reducing agent (putty);
- napkins;
- gloves and applicator.
Instructions for removing chips involve going through the following steps:
First you need to wash and dry the damaged area, then degrease it with white spirit or acetone.- The perimeter of the chip is covered with masking tape. This is done to ensure that the polish does not get on the undamaged area.
- Using 1200 grit sandpaper, sand the surface of the bathtub. This treatment will allow the putty to grip more firmly.
- The dust formed after sanding is removed with a vacuum cleaner. After treatment, use the alcohol wipe included in the kit.
- The putty is prepared according to the instructions for use, which are included with the purchased kit. Sometimes it is included in the kit ready-made.
- Using a spatula, apply the mixture to the chip so that it is completely filled.
- 30 minutes after the manipulations, it is necessary to remove the masking tape.
- After 24 hours, the treated surface is sanded with sandpaper and polished with felt.
You cannot use the bathroom before 5 hours. This is the minimum time that must pass for the liquid acrylic to set.
Grouting tiles
Defects in the bathroom are formed not only on the surface of acrylic. Scratches often appear on tiles. She, like acrylic, does not tolerate mechanical stress well.
It is not possible to answer the question about scratches on tiles and how to remove them. Unlike acrylic, it cannot be completely restored, regardless of the size of the defect. There are two ways to return the wall to its original appearance:
- replace damaged tiles with new ones;
- erase the defect.
The first option is less practical, as it requires complex work, during which you have to remove several tiles from the wall.
The second method involves treating the damaged area with mastic or a special pencil. The material must dry completely, after which it is sanded.
It is relatively easy to remove defects from an acrylic bathtub. Most minor damage can be repaired and does not require professional intervention.
Recommended Posts
How to remove marks from a felt-tip pen, marker, pencil, plasticine...
Wood antiseptic: which one is better to choose
Sliding wardrobe: internal contents + photo
How to correctly write an application for roof repair
How to fight fungus
Golden ratio in construction
How to cover up cracks?
Getting rid of a crack is much more difficult than getting rid of a scratch, even the deepest one. This defect is end-to-end, so it can lead to water leakage in the bathroom and flooding of neighbors.
Another danger of a crack is its ability to increase in size. It spreads under the influence of weight, when using detergents and even when exposed to water.
Repair is carried out as follows:
- The defective surface is sanded.
- Using a drill, drill 2 holes: on one side and the other side of the crack. Its end should be in the center of the hole. This will create uniform pressure along the edges of the crack. It is necessary to control the force of pressing on the drill. The holes should not be allowed to be deeper than the crack itself.
- Then you need to open the crack and degrease it.
- The final stage of work is the application of the repair composition, its drying and subsequent grinding.
You should begin removing cracks immediately after they are discovered. Otherwise, they will spread out and repair will be impossible.
Why do people choose acrylic
This modern material is constantly gaining popularity. It does not make noise when drawing water, like its predecessor - enamel; it is not heavy like cast iron, so even one person can install the bathtub. At the same time, acrylic containers hold temperature well, and their coating does not peel off over time, so does not require regular restoration. And due to the original flexibility of the material, it is possible to make a “pool” of any configuration out of it - be it angular, even round, or even intricately shaped. Moreover, such bathroom equipment allows the installation of additional units, which greatly expands the functions of the purchase.
How to fix holes?
A hole can form due to a heavy object falling onto an acrylic bathtub. If it has sharp edges, then the likelihood of a through hole increases. Only small holes must be eliminated.
Repair instructions:
the bathtub must be cleaned, dried and degreased on both sides: internal and external;- fiberglass is attached to the reverse side using epoxy glue - its diameter should be 5-6 cm larger than the hole;
- the second fiberglass overlay is attached 2 hours after fixing the first one - its size should be even larger by 5 cm;
- the third segment exceeds the second by another 5 cm, it is also glued after 2 hours;
- after 1.5 hours, the inside of the bathtub is degreased and sanded;
- the damaged area is puttied and leveled;
- when the putty dries, it is sanded again.
If the hole exceeds 5 cm in diameter, then it will not be possible to repair it. The bathtub will have to be replaced.
When filling a hole, cracks may extend from it. To prevent them from spreading, they need to be drilled. Otherwise, they will go further, making the repair ineffective.
Fighting delamination
Sometimes the acrylic layer comes away from the fiberglass. Because of this, bubbles appear in the bowl, which eventually burst, exposing the inner surface. To eliminate such a defect, you will need a special glue with which the polymer layers are connected.
Work with damage begins with drilling a small hole in the center of the bubble. Through it, the space between acrylic and fiberglass is filled with glue. It can be administered using a regular syringe.
Next, the swollen part must be pressed down so that it comes into contact with the fiberglass. Any adhesive that appears should be removed immediately. The hole made in the acrylic is eliminated according to the scheme described above.
Prevention measures
Preventative measures to prevent scratches and chips on an acrylic bathtub:
- To care for your bathtub, do not use products containing acids or alkalis.
- Do not use abrasive cleaning compounds. Preference should be given to gels.
- Do not pour very hot water into the bath. Manufacturers do not recommend exceeding 60 degrees.
- After each use of the bathtub, it must be rinsed with soapy water and wiped dry.
- For preventive purposes, polishing gel should be applied to the surface 2 times a month. It will not only give it strength, but also refresh its shine.
- The surface of the bathtub should be free of rust and limescale. When they appear, you need to clean them with safe compounds, for example, hydrogen peroxide.
- When carrying out repair work, the bathtub must be removed. If this is not possible, then it should be covered with polystyrene foam and covered with polyethylene. This will avoid scratches and chips if a tool or building material is accidentally dropped.
Following these simple recommendations will extend the life of your bathroom.
Preparing the surface for repair
Before repairs, you need to remove the screen and dismantle the drain and overflow.
Preparation for restoration depends on the amount of future work. If you need to fix 1 crack or scratch, there is no need to treat the entire bathtub. It is enough to clean and degrease the area. If the entire bowl needs to be polished due to a large number of cracks and abrasions, preparation involves much more steps.
- They start by inspecting the bathtub . Before repairing the necessary one, make sure that there is free access to the drain, that the mixer is in working order and the ventilation is working. If the washing machine or sink cabinet is close to each other, you need to move them away.
- Toothbrushes, razors, a laundry basket, and cosmetics are taken out of the bathroom. It is impossible for anything to fall into the bathtub during renovation . The shower curtain, if there is one, is also removed.
- Dismantle the drain and overflow . Before doing this, block the sewer pipe with a plug or turn the elbow vertically. Place a container under the drain in the bathtub so that any remaining acrylic or repair compound flows into the drain.
- Before restoration, the surface is cleaned. Abrasives are used for this. You need to choose them carefully: too hard a composition will leave a relief. For an acrylic bathtub, fabric-based sandpaper P80–P100 is recommended. For secondary coating, it is better to take sanding discs with Velcro P40–P60.
- The bowl is thoroughly washed and cleaned using toothpaste. It is applied in a thin layer and rubbed in with a sponge in a circular motion. If there are traces of limescale, remove them with concentrated lemon juice: wipe the area with half a lemon.
After cleaning, dry the bath using a napkin, a towel, or you can use a hair dryer. Before repairing, the surface must be completely dry.
What cannot be used for restoration?
To remove scratches in the bathroom , do not use sandpaper with a grit rating below P2500 .
Even the P2000 is no longer suitable for repair work. Such paper will not sand, but scratch the surface.
Pumice stone and metal brushes are not suitable for removing scratches. Abrasive powders should not be used . They won't help solve the problem.
It will not be possible to correct the defect using ordinary putty. You need a professional composition based on acrylic.
Painting
This is the easiest way to fill (not polish!) scratches. To paint an acrylic bathtub, it is best to use enamel or acrylic paint. If the walls are scratched, it is easier to use an aerosol can. If there are scratches on the bottom of the bathtub, you can use liquid paint. The procedure is simple:
- Wash the bathtub with detergent, wipe it dry;
- Apply paint with a brush, roller or spray can;
- Wipe up spills if necessary.
Important
Acrylic paint dries from 30 minutes to 2 hours. Enamel paint can take up to 48 hours to dry. But it has a much longer service life (up to 20 years).
The big disadvantage of this option is the color selection. You can determine the exact shade of a bathtub using a colorimeter (spectrograph), but it is too expensive. Modern technologies will come to the rescue. To determine color, there are color matching apps for iOS and color matching apps for Android.
| Way | Cheapness | Simplicity | Efficiency | Durability |
| Toothpaste | ★★★ | ★★★ | ★★ | ★ |
| Repair kit | ★★ | ★ | ★★★ | ★★★ |
| Polishing | ★★ | ★★ | ★★ | ★ |
| Enamel painting | ★ | ★ | ★★★ | ★★★ |
| Acrylic painting | ★ | ★★ | ★★ | ★★ |
Helpful information
Tips for removing scratches:
- If a scratch has just appeared, it can be treated with a camouflage pencil with a waterproof compound. They are sold in online markets and cost about 170 rubles.
- You should begin removing any defects immediately after they are discovered. This will avoid their increase in size and complex repair work.
- If there are a lot of scratches, restoring the bathtub will be problematic. It is much easier to call specialists who restore bathtubs with liquid acrylic. You can find many similar advertisements on the Internet. The average cost of such services is 2,500 rubles.
All the most important and useful information about cleaning the bathroom is collected in this section of the site.
Rules for using the bathroom
How to prevent scratches on an acrylic bathtub and what needs to be done to preserve its aesthetic appearance for a long time? You can avoid the appearance of defects by following certain rules for using plumbing:
- It is not recommended to clean acrylic products with hard brushes and aggressive detergents containing alkali and chlorine, as this can damage the surface;
- It should also be taken into account that after using acetone-based solvents, the coating becomes cloudy and deteriorates over time;
- for hygienic care of the bathroom, you need to use gentle compositions, for example, liquid soap, dish soap or a solution based on vinegar and lemon juice;
- Tap water is highly hard; it can negatively affect the condition of the plumbing; in order to avoid defects, do not allow it to dry on the acrylic coating.
Use electrical appliances (irons, tongs) carefully, as they leave scratches and burns when they come into contact with the acrylic surface.
If you are going to wash any pieces of furniture or animals, first place a mat on the bottom of the bathtub, which will provide protection from damage.
Important nuances
The method for removing scratches largely depends on how severely the acrylic coating is damaged. Masking minor defects does not require the use of any compounds; they can be easily removed with a piece of felt. Scratches with a depth of more than 0.5 mm can only be eliminated with the help of special pastes and putties that completely restore the color and structure of the acrylic coating.
It is important to understand that mechanical damage occurs on plumbing fixtures only due to its improper use. If you follow the rules of caring for an acrylic bathtub, it will retain its functionality and aesthetic properties for a long time.
According to marketing research, 80% of the plumbing market is occupied by acrylic products. Lightweight, wear-resistant, inexpensive material began to be widely used for the manufacture of plumbing products at the turn of the twentieth century and quickly gained popularity.
Despite its many advantages, the polymer has one serious drawback - a low level of resistance to mechanical and chemical stress. For example, if you wash the surfaces of an acrylic bathtub with an acid-alkaline agent for a long time, the surface will become deformed.
Another negative factor is contact with abrasives. Long-term use of a hard brush when cleaning an acrylic bathtub is enough to cause defects of varying severity.
How to remove a scratch on an acrylic bathtub is the most frequently asked question. Of course, if irreparable damage has been caused to the acrylic bathtub, it is better to seek the help of specialists. Minor damage can be easily removed with your own hands at home.
Removing deep scratches
You need to be careful when removing deep scratches. The scratch will need to be made wider for the correction to be successful.
- Use a special restorative mixture, which can be purchased at any plumbing repair store. To avoid having to painfully remove the remaining product afterwards, you need to use a mounting knife.
- Sand the area to be treated.
- Degrease the surface of the product.
- Use professional mastic and cover the scratches with it.
- Sand and polish the surface.
The secrets to removing various types of scratches from a bathtub are simple.
Features of acrylic plumbing
Acrylic bathtubs appeared on sale about ten years ago. The invention has successfully taken root in everyday life, not inferior to cast iron and steel tanks. All products are produced using two technologies: casting and extrusion. In order to increase strength, plumbing fixtures are coated with self-leveling epoxy resin and installed on specialized metal frames. The item does not require special home care or expensive cleaning products.
Important properties of an acrylic standard bathtub are:
- light weight compared to metal competitors, no difficulties in transportation and no special conditions for installation;
- increased flexible properties allow the production of products of different designs, shapes, sizes;
- the ability to choose any shade and color of the bathroom, which does not lose its brightness and richness over time when using care products;
- acrylic material has high thermal insulation properties, which allows the water to remain hot for quite a long period of time;
- special coating prevents the proliferation of germs and bacteria;
- durability, strength of artificial material, you can care for your new bathroom at home without chemicals.
The disadvantages of acrylic products are:
- careful and careful use is required, the surface is easily subjected to mechanical stress;
- When caring for plumbing at home, you should not use cleaning compounds containing chlorine, acetone and acids.
Cleaning an acrylic bathtub should be done regularly in order to extend the life of the product.
Applying enamel
After the primer has dried (this takes from 12 to 24 hours), the surface must be sanded again. If you have experience with a grinding machine, you can use it. Next, wash off the dust and dry the surfaces of the bath.
When all the previous steps have been completed, you can begin preparing the enamel. After thorough mixing, apply the enamel in the same way as the primer. The enamel must be distributed carefully, without missing a single area.
Then we wait 7 days and you can remove the tape. The bath is ready! Photos will help you best on how to update an old bathtub; this will allow you to better understand the process itself. You can also watch the video clip.
Polishing a cast iron bathtub
When polishing a cast-iron bathtub with your own hands, the situation is more complicated. First of all, it needs to be cleaned of dirt and limescale.
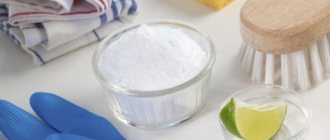
Cleaning with soda
The most accessible and common folk remedy for cleaning a cast iron bathtub is soda. With its help it is easy to remove dirt and soap scum:
- Mix baking soda with a small amount of water until you get a paste.
- Apply this paste to the contaminated areas with a sponge - you can rub it over the entire surface, leave until the soda dries completely.
- Rinse off any remaining baking soda with water.
Cleaning with soda ash and vinegar
If the surface is very dirty, and even with a limescale coating, then just soda will not help, you need to call for help from its “brother” - soda ash with reinforcement in the form of vinegar and powdered bleach:
- Mix both types of soda in equal parts, dilute with water, apply the composition to the surface of the bath and leave for 10 minutes.
- Mix powdered bleach and vinegar in equal amounts.
- Pour this solution onto the soda-treated surface.
- Leave for several hours, then rinse with water.
Removing rust with a solution of ammonia and hydrogen peroxide
As a rule, the biggest headache for a housewife is rust, which is very difficult to clean. You can get rid of it using ammonia and hydrogen peroxide:
- Pour 100 ml of hydrogen peroxide into a clean jar and add 50 ml of ammonia.
- Apply to problem areas using a sponge or cloth.
- After 10-15 minutes, rinse with water.
Cleansing with hydrochloric acid
The most effective way to get rid of all contaminants and rust is hydrochloric acid.
Application:
- Wrap taps, hoses and other chrome-plated items located nearby with cellophane.
- Put rubber gloves on your hands.
- Soak a rag in hydrochloric acid and treat all problem areas.
Stages of polishing a cast iron bath
Once you have cleaned the bathtub of all dirt, you can move on to the next stage of priming and polishing:
- The primer is applied after the surface has completely dried.
- To speed up the process, you can wipe it with a clean, dry cloth or napkin.
- For the primer you will need an aerosol can.
- After applying it, you again need to wait until everything dries. Now you can apply the enamel.
- The most popular is nitro enamel in cans.
- Apply it with a flat natural bristle brush.
- The enamel is applied in two layers, each of which must dry completely before the process can continue. For a glossy effect, the last layer is moistened with a solvent and the bath is left for a day.
- After all the layers have dried, you can polish the surface with a paste - you can use car polish. For polishing, it is best to use a grinding machine, as it will take a lot of time by hand.
- You can, of course, do without enameling and, after cleaning, proceed directly to the polishing process. In this case, it is better to purchase a couple of bottles of polish: one with a coarse grain, the second with a smaller grain. And also stock up on rags and patience.
- Rub coarse polish into the enamel and polish long and intensely. If you have helpers, such as a sander, then you are in luck. The process will not be so labor-intensive for you.
- Once you have completed this stage of work, rinse the plumbing with clean water and detergent. The coating should become smooth, without roughness.