Share on social media networks:
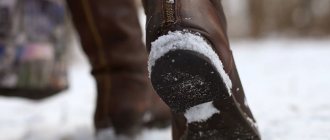
Agree, store-bought cream is not always suitable for shoes, especially since we don’t know what it is made from, and there are cases when such products spoil your favorite shoes. How to deal with this? It's simple - you need to make shoe polish with your own hands. This water-repellent composition will help extend its service life and protect it from external adverse factors such as snow or water. In this article we will share several ways to make such a wonderful product. Each of them is similar to each other, but differs only in the solvent, which is the basis of any shoe protection cream. If you're ready, let's get started!
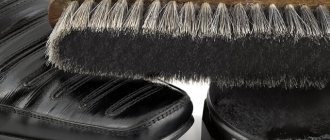
How to use homemade shoe polish
To prevent the composition from drying out, it is important to store and use it correctly. Here are some tips:
- store in a closed container with a tight-fitting lid;
- avoid exposure to direct sunlight;
- store in a dry, well-ventilated area.
It is recommended to use shoe polish even before you put it on for the first time. This will help protect it from dust and dirt.
For summer shoes, it is better to choose liquid creams, but for winter shoes, products with a thick texture are perfect.
Before applying the cream, it is important that the shoes are clean and completely dry. Also, for each color, determine your sponge or brush. This will help maintain the original shade.
Is it possible to inherit gold?
The most comfortable shoes in the world
Turpentine-based cream
It must be borne in mind that the production of turpentine creams poses some fire hazards, especially when open fire is used.
There should always be a lid under the worker’s hands to tightly close the pan in case the turpentine catches fire. There should always be an old carpet under the worker’s feet in order to extinguish the fire in time.
Eyes should be protected with goggles.
Smoking or lighting matches in the room where turpentine is being worked is not allowed. In case of burns, you should always have bicarbonate of soda on hand, which is applied in a thick layer to the burn.
The work does not require special utensils: a cast-iron enameled cauldron with a lid is sufficient. You should have separate dishes for different colors of cream.
It is also necessary to have a Celsius thermometer, i.e. with divisions from 0 to 100°C. The required amount of oleic acid is poured into the boiler (see below) and the required amount of aniline dye (black or colored), soluble in fats, is dissolved in it.
When the paint has dissolved, put the strained mixture of waxes into the cauldron and, stirring, melt it, while observing with a thermometer that the temperature of the molten mass does not rise above 95°C and does not fall below 90°C.
Then, if melting occurs on a primus stove, then, having first extinguished the fire, add the required amount of turpentine in a thin stream, stirring thoroughly all the time. If melting occurred on the stove, then you need to remove the boiler from the stove.
The temperature of the mass must be such that after adding turpentine it is not lower than 40°C and not higher than 50°C. It is necessary to ensure that the temperature of the mixture is not lower than 40°C, since such a mass, poured into cans, will not have a good pattern.
Warming up the cooled mixture will not improve the situation, and therefore you need to first find out on a small test what the temperature will be after adding turpentine, and in certain cases (especially in winter) it is better to warm up the turpentine by placing the bottle in hot water. The temperature of turpentine should be about 20-30°C in winter, and 10-15°C in summer.
Turpentine cream is usually poured into jars or flat tins. The lids of both must be tightly fitted so that the turpentine cannot evaporate.
In artisanal workshops they usually pour using a small saucepan with a spout, in large productions - with special bottling machines.
To prevent the cream from cooling below 40°C during operation, place the pan with the cream in a bowl of hot water (50°C). The room temperature should be about 15°C, then the cooling of the cream in the tins is better and a more beautiful surface of the cream is obtained.
Some varieties of cream have a characteristic pattern in the form of ring-shaped or zigzag lines running from the edges of the tin to the center.
Such a pattern is formed only if the creams contain materials of the best quality, such as carnauba wax.
Even a small amount of carnauba wax in the ointment can cause these characteristic lines on the surface of the cream. For this purpose, arrange a flow of air to the cream poured into tins, fanning the ointment with a fan.
It depends on the experience of the master to choose such a mixture of waxes in order to obtain the best quality and, at the same time, the cheapest ointment. Here are some tried and tested recipes for turpentine shoe polishes:
- 30 parts carnauba wax, 15 parts paraffin (48-50°C), 105 parts turpentine, 3 parts oleic or stearic acid, 2 1/4 parts aniline dye.
- 5 parts carnauba wax, 5 parts yellow beeswax, 5 parts Japanese wax, 17 parts paraffin, 68 parts turpentine, 1.5 parts oleic or stearic acid, 1 part aniline dye.
- 5 parts carnauba wax, 12 parts candelilla wax, 10 parts paraffin, 65 parts turpentine, 1.5 parts oleic acid, 1 part aniline dye.
- 8 parts carnauba wax, 8 parts candelilla wax, 12 parts paraffin, 68 parts turpentine, 1.5 parts oleic acid, 1 part aniline dye.
- 30 parts shellac wax, 15 parts paraffin, 105 parts turpentine, 3 1/4 parts oleic acid, 2 parts aniline dye.
- 10 parts shellac wax, 20 parts paraffin, 60 parts turpentine, 1.5 parts oleic acid, 1.5 parts aniline dye.
- 10 parts ceresin, 5 parts spermaceti, 30 parts turpentine, 1 part aniline dye.
Aniline dyes, as you know, are available in two grades: fat-soluble and water- and alcohol-soluble.
For turpentine creams, only aniline dyes, soluble in fats, are used, and for aqueous creams, aniline dyes, soluble in water, are used.
For black creams, the most commonly used are nigrosin WLA, WL, KS and C. For yellow creams, methanil yellow, orange II, yellow II, autol orange, persian yellow, persian brown. By mixing these colors you can get any shade.
Colored turpentine creams are prepared in the same way as black ones, with the only difference being that the materials for colored creams are lighter and purer.
For white creams, use zinc white of the best quality, and to destroy yellowness, add a little ultramarine (blue for linen).
Video material
Now you know how to protect your shoes from unexpected weather conditions so that they remain dry and intact. In this article, we have revealed the secrets of making high-quality and natural water-repellent shoe polish. You can rest easy, because your favorite boots are protected!
Efficiency of use
To protect your shoes as much as possible from the negative influence of external factors, you must use only natural beeswax.
The effectiveness of using beekeeping products for leather wardrobe items is undeniable. The product not only transforms your feet, but also keeps your feet dry and clean in inclement weather. It’s not for nothing that industrial skin products are made on a wax basis.
You can make your own shoe polish at home from a natural bee product. This product will be much safer because it is prepared from natural ingredients. By using it once a week, you can extend the wear life of leather products for a long time.
Liquid creams
Liquid creams or dressings
for shoes are colored aqueous alkaline solutions of shellac, which are applied to the leather with a brush or sponge and which dry to an excellent gloss.
The container in which the dressing is prepared must be copper or well-tinned; Under no circumstances should the solution come into contact with iron. The dressing should also not be stored in tins, since when combined with iron, shellac will separate from the solution in the form of flakes.
The water used to prepare the dressing should not be hard, but it is better to use distilled water.
Recipe
The dressing is prepared as follows: potash is dissolved in a copper cauldron, then shellac is gradually added to the boiling solution. Saponification occurs quickly, and when all the shellac has dissolved, the shellac wax is allowed to cool and float to the surface.
The wax is removed by filtering or simply removed with a spoon.
The removed wax should not be thrown away; it can be used to prepare turpentine and aqueous creams (see above).
Then add the required amount of water-soluble aniline paint to the still hot solution and stir thoroughly until the paint disperses.
Since the dressing can become moldy during long-term storage, it is useful to add a small amount of formaldehyde.
The dressing is poured into glass bottles, and a sponge is attached to the stopper using copper (not iron) wire, with which the dressing is spread on the shoes.
Here are a few tested finishes:
- 10 parts shellac, 2 parts potash, 2 parts nigrosine, 100 parts water.
- 68 parts shellac, 15 parts borax, 10 parts nigrosine, 400 parts water.
- 20 parts shellac, 8 parts ammonia, 4 parts nigrosin, 120 parts water, 50 parts castor oil soap.
Factory-made cream is not always suitable for shoes, besides, we don’t even know what it is made from, sometimes such products only harm your favorite shoes or boots. What should I do? Let's learn how to make your own shoe polish with your own hands!
Paraffin and gasoline
If it is possible to treat shoes outdoors, you can use the following composition:
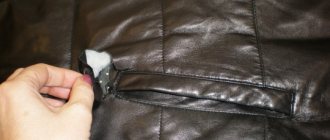
- Dry the pair well so that it is completely dry.
- Combine 1 teaspoon of finely grated paraffin and 100 ml of lighter gasoline.
- Shake the product until the wax dissolves, then apply it to the shoes with a cloth and leave overnight.
If the composition is poorly absorbed into the base, you can pre-treat the skin with hot air from a hairdryer, after which the impregnation will immediately penetrate into the structure of the material.
Important! You need to work with gasoline, strictly observing all safety precautions!
Advantages and Disadvantages of Using Beeswax for Shoes
Interesting to know.
Wax can be stored for hundreds of years without losing its properties, which is why in the old days it was even used instead of money. Wax is a beekeeping product. It is a yellowish-brown mass with a slight honey smell. Self-prepared shoe polish based on beeswax has a number of advantages, namely:
- Has a water-repellent effect. It does not allow moisture to penetrate inside, so in rainy or snowy weather you don’t have to worry about your feet getting wet.
- Prevents skin cracking. The material does not dry out in hot weather and does not harden in cold weather.
- Prevents the formation of unpleasant odors and salt stains.
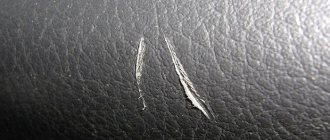
- Levels the surface of a leather product, filling minor cracks, scratches, and other mechanical damage.
- Gives a natural shine to the leather, making the shoes look like new.
- A colorless beeswax-based cream can be used for products of any color.
- Suitable for use with both leather and leatherette pairs.
Wax is a white or yellowish substance produced by young bees to build honeycombs.
The wax does not dissolve and does not sink in water, but from the heat it becomes soft, like plasticine, and very pleasant to the taste and touch. As for the disadvantages of wax, it should be noted that it is not suitable for products not made from leather - suede, nubuck, fabric.
The principle of applying wax to different types of shoes
If you need to protect your favorite boots or shoes from high humidity in order to extend their service life, you can prepare a special water-repellent wax cream.
You can use a cream based on a beekeeping product for both summer and winter shoes. The main thing is that it is a product made of leather or leatherette. Instructions for use:
- the mixture is evenly applied to the shoes; for this you should use a foam sponge or a velvet cloth;
- the product must be left overnight;
- In the morning, polish the surface with velvet cloth to give the shoes an attractive look.
The procedure should be repeated once a week.
The product does not need to be left overnight. You can polish the surface with wax for 15 minutes. This will help create a protective film.
Moisture-repellent wax cream can be an excellent alternative to chemical products sold in hardware stores.
In this case, you will know for sure that your favorite shoes are under reliable protection. If you use pure wax to process leather products, the procedure becomes a little more complicated:
- Apply the melted product to the surface using a clean towel; the seams should also be treated;
- the product gradually begins to turn white;
- for the best effect, the composition must melt on the surface; for this you need to use a propane torch;
- after melting, the wax is absorbed into the shoes, then they should be thoroughly polished;
- excess product should remain in the seams.
The result will be stunning - shoes or boots take on a new look, and the wax impregnation has a water-repellent effect.
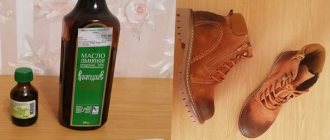
Oil impregnation
A good shoe polish is made from castor oil, which is sold in pharmacies. It literally repels water and prevents it from wetting the shoe material. In addition, castor oil cannot spoil either leather or leatherette; it can be used to treat seams and joints without harm to the products.
You can use castor oil in its pure form, but it is even more effective to prepare the following composition based on it:
- Melt 1 teaspoon of paraffin in a water bath.
- Add 2 teaspoons of castor oil and linseed oil into the bowl.
- Mix the whole mixture well and apply it to the shoes while still warm.
You should not use too much of the product - it can clog the pores, causing the shoes to become rougher. You can wear a pair 8 hours after soaking.