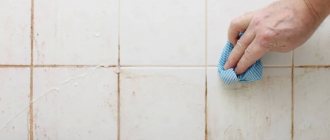
Tile finishing implies a long and high-quality service life of the coating. But sooner or later you will have to face the problem of how to clean the seams between the tiles. During operation, various contaminants accumulate in them, including the formation of mold and mildew. Therefore, the relevance of this task is beyond doubt.
Reasons for changing the color of tile joints
After finishing work, the tiles please with their perfection, but after a while, the gaps between the tiles begin to darken and spoil the whole look. Even the most expensive ceramic coating loses its attractiveness because of this. Contamination of seams is a natural process that cannot be prevented, but its consequences can be reduced.
Grout aging occurs under the influence of an aggressive environment:
- bathroom, toilet - high humidity, household chemicals for bathing;
- kitchen working area and floor - humidity, drops of fat during cooking, food residues, etc.;
- floor in the hallway - sand, dust, dirt from outside.
To these reasons are added non-compliance with tiling technology and a number of operational issues:
- The base is not treated with a primer that protects against mold and mildew;
- The grout is not coated with a special protective compound;
- Seams that were not cleared of glue were rubbed;
- Lack of ventilation in the room;
- No heating;
- The surface is not maintained in a timely manner.
Initial contamination is an excellent environment for the development of fungus and mold. Fighting them is much more difficult. Therefore, periodic wet cleaning using household chemicals is recommended.
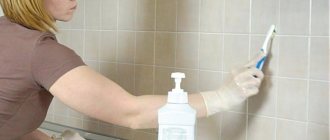
To protect the seams, special compounds are used, which are applied to the dried grout after finishing the facing work. Such measures reduce deep penetration of contaminants and ensure easy surface care.
Precautionary measures
Most often, various chemicals are used to remove glue, and they can be folk or commercial. They should be handled with care, as they can cause significant damage to human skin or mucous membranes, and they should not be inhaled.
When working, basic safety rules are taken into account:
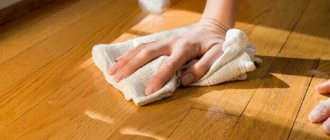
- the process is carried out wearing protective gloves;
- it is not allowed to inhale the products;
- After work, the room is thoroughly ventilated.
There are different ways to remove glue from tiles. Their choice depends on whether the product has dried or not. It is important to comply with certain safety requirements.
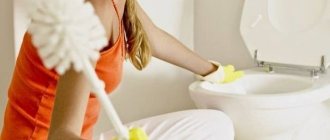
In the toilet
This is a less aggressive environment. You can clean the tile seams on the floor using a sponge and a regular soap solution. In case of deep contamination, abrasive substances are used.
Separately, it is worth highlighting the cleaning of the surface and seams from tile adhesive. If the gaps between the tiles were not cleaned before applying the grout, then in case of severe contamination you will have to undo the joints between the tiles and reapply the solution. If the glue is visible in several places, then they are carefully cleaned with fine-grained sandpaper or partially embroidered and rubbed over again. Another method is special cleaners, which are purchased at hardware stores. It is important to know the brand of grout and glue.
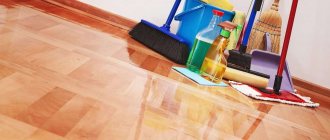
Depending on the type of contamination, the type of room where cleaning is carried out, cleaning products and work methods are selected.
Special means
Products are made to clean off any hardened composition. All chemical solutions are acid-based and anti-limescale. The chemical dissolves the remaining glue, you just need to choose it correctly.
For each composition, a tile adhesive solvent from the same manufacturer is used. The instructions indicate for what type of glue the remover should be used and the method of application.
Attention! If a chemical solvent gets on the grout, it will dissolve it. Masking tape or tape is applied to the seams.
Chemicals are aggressive and can damage tiles and ceramics. Before use, test chemical compounds in an inconspicuous place or on cuttings by applying a small amount of the product. If nothing happens, the tile does not collapse, the color of the cladding does not change - you can safely apply it. You should work carefully, not forgetting about safety precautions.
You should always look at the composition of the gel or solution. If there are abrasive components, it is better not to use it; it will leave scratches on the lining.
Chemical methods
This method involves the use of household chemicals. The composition is selected taking into account contamination. It is recommended to use chlorine bleaching agents for bathrooms. They will help get rid of fungus and mold if the stage of spread is not very advanced. For the kitchen - alkaline. These can be liquids, sprays. Oxygen bleaches are often used. They are diluted 1 to 2. You can bleach the seams using special markers, but this is a less effective method that will have to be repeated periodically. It helps get rid of stains, but not mold.
Tile care
The kitchen surface must be cleaned of grease droplets. In this case, special detergents are used.
Caring for bathroom tiles requires the use of disinfectants.
This is due to the fact that the humidity in this room is high, increasing the likelihood of fungus formation. Periodically, the tile surface is cleaned, the goal being to remove traces of water droplets. It is recommended to use a soap solution.
Don’t forget to also see - How to quickly and easily clean bathroom tiles from plaque at home
Some products are aggressive. Do not inhale vapors; use a respirator. It is recommended to carry out surface treatment using rubber gloves.
Traditional methods
This means washing with improvised means. Several compounds are used to remove pollution:
- Baking soda ¾ tbsp., hydrogen peroxide ¼ tbsp., dishwashing liquid 1 tbsp. l. The solution is applied with a brush using a rubbing motion. Waiting time 15 minutes. Wash off with water.
- Two solutions are made: soda with water 3:1 and vinegar with water 1:1. The first batch is rubbed into the dirt at the joints with a brush, and the second batch is sprayed through a spray bottle on top of the applied composition. After the reaction is completed, go through with a brush and wash off with water. Soda and vinegar achieve excellent results.
- Water 1 tbsp., citric acid 1/3 tbsp., soda ½ tbsp., vinegar ½ tbsp. The solution is mixed, applied to the seams with a brush, and left for 20 minutes. Wash off with warm water. Solutions with citric acid allow you to get rid of limestone deposits and rust.
Useful video: How to clean tile grout using home remedies?
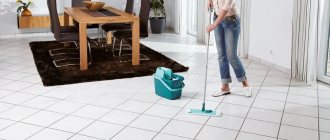
Features of cleaning walls and floors
Cleaning from dirt is easier on a horizontal plane (floor). You can lay rags soaked in special solutions on such a surface, wait for them to soften, and remove dirt.
It is difficult to do such actions on the wall. Here you need to constantly hold the dampened rags or periodically spray the product from a spray bottle.
It should be taken into account that the floor is covered with more stable coatings. It will be easier to clean them; they are less susceptible to scratching.
Oxygen bleaches
Mix with water in a ratio of 1 to 2. Rub on contaminated areas. Allow up to 30 minutes to react. Treat with a brush and rinse with warm water.
With chemical and traditional methods, you should check the effect of the product in small areas. All of the listed compositions can give a whitening effect, which is not good for colored grout.
Cleaning the seams on the floor using folk remedies is quite easy. But we must remember that the work involves active chemical reactions. Therefore, you should take care of personal protective equipment: rubber gloves, respirator, goggles. They will help avoid chemical burns. They are also recommended for use when cleaning grout with chemicals. All of these methods are quite effective if the degree of spread of fungus and mold is minimal. If cleaning does not help, take drastic measures - updating the grout.
Safety regulations
Care must be taken while performing the work, as the chemical may come into contact with the skin and cause burns. In addition, when using adhesive cleaners, aggressive fumes are sometimes released from the tiles. For this reason, you need to prepare a respirator, protective gloves, and goggles.
If permitted by the manufacturer (information on operating conditions on the label), the cleaning procedure should be performed in a well-ventilated area. In cases where work must be carried out indoors, deep breathing is not recommended.
Replacing grout between tiles
What to do if all of the above effective methods did not help to clean the seams in the bathroom from mold? There remains one proven method - removing the old grout and applying new one.
To begin with, the facing layer is washed from all types of contamination. Take a seam sealer and clean it up. To speed up the process, a power tool (drill, grinder, screwdriver) is often used, but this increases the risk of damaging the tiles. To facilitate the process of grouting, solvents are used, but you should know what kind of grout was used previously. Or folk remedies: a solution of citric acid or vinegar. After cleaning, dirt and dust are removed, and special compounds are applied to the gaps to protect against mold and mildew and allowed to dry.
New grout is applied to the seams with a special rubber spatula. Excess is removed with a damp cloth. The grout has dried, the lining is washed from contamination, and the resulting seams are treated with an additional protective agent.
How to remove glue from the back side?
Situations arise when the coating must be reused.
In this case, you need to remove most of the adhesive from the back of the products. If an error was made during installation and the tiles need to be removed to re-install, fresh mortar is removed with a spatula. Remaining substances can be washed off with water. If it is necessary to remove old glue, first remove the base layer. As a result, you need to get a tile with a smooth inner surface. To do this, use the following means:
- the surface is moistened with water and cleaned with coarse sandpaper;
- large contaminants are removed with a construction float;
- if the substance is not amenable to mechanical action, use a grinder.
When removing cured adhesive from the back side, minor defects may occur. Such errors during the work process are allowed.
Do not use tiles with large chips or cracks. This may cause a decrease in the strength of the coating material.
How to protect grout joints from contamination
Everyone chooses how to clean the seams themselves. Having achieved the original appearance of the grout, it is better to apply a special protecting solution to it. It will fill microcracks and pores in the putty. This ensures maximum ease of care. The joints will be washed easily, like cladding. The process of applying protective fluid requires precision. A thin brush is used for it, and the solution is distributed exactly along the seam. Do not stain the tiles. After the protective solution has dried, the surface of the tile is difficult to clean, and over time these places will turn yellow. Therefore, such processing requires accuracy and should not be rushed.
Another important protective factor for tile holes is constant care using household chemicals. This will keep the grout pristine for up to 10 years.
Types of adhesive materials
The choice of cleaning agent is made taking into account the properties of the tile adhesive. Some varieties are more reliable, others are more elastic. Accordingly, in each of these cases it is necessary to use suitable means: more aggressive or, conversely, soft. Types of adhesives for tile coverings:
- epoxy;
- cement;
- polymeric.
In the first case, before cleaning the tiles from this type of adhesive, you should select the most aggressive mixtures. This need is due to the fact that epoxy compounds are durable.
After application, the material will serve for a long time, while maintaining its properties. The composition of epoxy glue includes a resin, which has the same name, and a catalyst. The strength of the coating is determined not only by the components, but also by high adhesion to the surface. This means that the mixture immediately sets with the coating when applied. It's difficult to remove.
The advantages of this composition include elasticity, moisture resistance, and frost resistance. Considering that the adhesive mixture does not allow moisture to pass through, the use of non-aggressive liquids makes it difficult to clean the coating from such adhesive. This is another reason why in this case it is better to use chemical compounds that are stronger in their mechanism of action.
It is recommended to remove excess glue as you work.
Cement-sand mortar is considered the most popular. It is easy to apply, so it outperforms its analogues, and is also characterized by sufficient strength. Additionally, the composition includes various additives that help increase the elasticity of the mixture.
Additives strengthen the cement mortar, thereby increasing its resistance to moisture and deformation loads.
There are varieties of glue designed for interior and exterior use. To improve the properties of the coating, grout is applied after the mixture has dried.
The polyurethane composition is superior to the above options in terms of elasticity. This material is not subject to deformation loads in tension and compression. As a result, the coating lasts longer. Polyurethane adhesive is characterized by high adhesion when applied to any type of surface.
Polymer additives can be used as the main component in the manufacture of cement adhesive.
This allows you to improve its properties and reduce finishing costs.