Knowing how to starch a shirt, you can give an ordinary product an unusually solemn look. Just a few years ago, this approach to processing men’s and women’s shirts was used everywhere, even in everyday life. Today, the direction is undeservedly ignored by many housewives.
Most often they explain this by a lack of free time, but, as practice shows, additional manipulations only take a few minutes. Others simply don't understand the beauty of the approach.
In addition to the touch of festivity, starching shirts is considered beneficial from the practical side of the issue:
- If products intended for regular wear are constantly starched at home, you can count on a reduction in their wear rate. The texture of the fibers becomes denser, and they deteriorate more slowly.
- Treated items retain their neat appearance longer and do not wrinkle so quickly.
- During the starching process, an additional layer is formed on the surface of the fabric, which after ironing becomes denser and provides the fabric with additional whiteness.
- The starch layer is also a protective barrier that prevents rapid contamination of the garment. Under the influence of water, this film dissolves and allows you to wash the fabric without any problems.
Tip: Few people know that you can starch a shirt only from natural fabric. Synthetics do not have that unique porous texture that can pass the solution between the fibers and fix it there.
Despite the abundance of advantages, starching has one significant disadvantage - after such processing, the products no longer allow air to pass through. Therefore, it is not recommended to wear starched shirts all the time.
Why are shirts starched?
The starch penetrates into the pores of the fabric, thereby making your shirt stiffer, which is why it looks like you just bought it. In addition to this, there are other reasons why you should starch the collar of a shirt or the entire product:
- starched items retain their unsurpassed appearance longer because their texture becomes denser, thereby becoming more durable and wearing out less;
- after this process, things do not wrinkle much longer;
- the layer that forms during ironing of a starched shirt provides additional and more pronounced whiteness;
- starched products are covered with a kind of film, which serves as a dirt-repellent barrier;
- During washing, the film dissolves and the item is washed in the most ordinary way.
Important! Remember that only those shirts that are made from natural fabric are allowed to starch. Synthetic materials do not have the necessary porous texture, and that is why you will not be able to starch them.
Pros and cons of starched clothes
Taking into account the following factors, you will be able to correctly determine whether the products really need to be processed, or whether you can do without it.
Positive sides:
- the wear process slows down significantly - starch strengthens the fabric structure, making it denser;
- particles of the substance attract dirt, but after washing, clothes get rid of stains and starch more easily, remaining spotlessly clean;
- the applied layer becomes compacted and becomes thicker after ironing, which gives the shirt a boiling white color;
- The wardrobe item hardly wrinkles.
Among the significant drawbacks, there is only one: the fabric stops “breathing”. A starched shirt is dangerous to health if you wear it constantly, for example, to work.
Important : when putting on a starched shirt, remember that this is not an easy thing. It should be loose-fitting and not tight-fitting, otherwise wearing it will have a bad effect on the condition of the skin. The maximum safe time spent on the body is 5 hours.
Preparing the right composition
Before you begin to decide how to starch a shirt, you need to pay attention to the material from which it is made. The required composition and degree of hardness of the solution will depend on the type of fabric.
The following rules are followed here:
- a product made of chiffon or cambric is starched using a soft method;
- for cotton the semi-rigid method is used;
- Dense products or individual parts, such as collars and cuffs, can be starched using only the hard method.
Important! Even after using starch, you will still need to care for and clean things. Learn how to wash clothes made from different fabrics. This knowledge will never be superfluous.
Soft starching method:
- From 1 l. Pour a small amount of cool water into another container and dissolve 1 tsp in it. starch, without a slide.
- There should be no lumps, otherwise the effect will be incomplete.
- Boil the rest of the water and pour the diluted starch into it.
- Boil in this form for 3 minutes, and do not forget to stir continuously.
Important! The finished paste must be transparent and homogeneous.
Semi-rigid method of starching shirts:
For the semi-hard method, the technology for preparing the paste is exactly the same as for the soft one, but you need to take twice as much starch.
Important! Shirts - men's and women's - are perhaps the most difficult things to iron. To ensure that in future this process takes a minimum of time and effort, and that your clothes look neat, look through the step-by-step instructions on how to properly iron shirts.
The hard way to starch shirts:
- 2 tbsp. l. mix starch in 1 tbsp. l. water.
- Grind thoroughly until mushy.
- Separately, take a glass of hot boiled water.
- Add 15 g of ordinary salt to it, stir until the crystals are completely dissolved.
- Mix both solutions and boil for 2 minutes.
- Leave this paste for at least 1 hour to infuse.
Important! You don't have to starch the entire shirt, just the collar and cuffs. Thanks to this cunning move, the collar, as well as the shirt as a whole, will look much more presentable. Plus, it will be much easier to wash, and the collar and cuffs are the most difficult parts, as they quickly become dirty and are difficult to wash.
Preparation for the process
Regardless of the chosen processing method, it makes sense to carry out the procedure only after washing the product . Some nuances are taken into account:
- Hot water is suitable for washing cotton shirts. You should not add synthetic items.
- Cotton items are washed in hot water. In order to save money, you should not add synthetic things to them. An inappropriate mode can deform synthetics.
- For cotton shirts, it is best to do a separate wash with double rinsing and pre-soaking.
Chiffon or cambric items are washed at a lower temperature than cotton. You can do without pre-soaking or rinse things by hand.
Technology
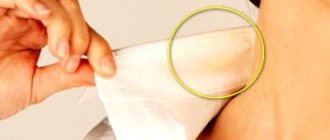
Before starching the collar, additionally go over the surface of the fabric with a napkin soaked in hydrogen peroxide. This action will eliminate yellow spots or other contaminants.
The very method of stiffening this part of the shirt is incredibly simple and accessible to everyone. So, in order to starch a shirt, you need to do the following:
- Prepare the paste as described above.
- Completely dip the product into the resulting solution and soak it for 35-40 minutes.
Important! If you only need to starch the collar of your shirt, immerse only this part of your item in the solution.
- Remove and carefully hang your shirt straightened out so that it is not wrinkled.
- As it dries, spray it with water several times using a spray bottle.
- At the moment when the shirt is almost dry, but still a little damp, iron it.
- Additionally, iron the collar and cuffs through gauze so that the fabric does not stick to the sole of the iron.
Important!
There is no need to hang a freshly starched shirt to dry on the balcony. There it will inevitably be exposed to direct sunlight, and this may cause the fabric to yellow. It makes no sense to dry such items on a radiator either, because there is a high probability that you will simply dry out your shirt, and then ironing it will be incredibly problematic. The most acceptable and effective method is drying on a hanger in room conditions.
Advantages of the method
Like any process for caring for things, treating things with starch has many advantages. That is why experienced housewives strongly recommend using this method.
Benefits of starching:
- the shirt will serve its owner much longer if the procedure is used regularly;
- You can achieve greater whiteness by ironing;
- after the process, the shirt does not wrinkle for a long time;
- starch helps protect items from contamination;
- Thanks to starch, the item acquires additional strength.
You should know that starched items do not allow air to pass through well, so they should only be worn on special occasions. Shirts with starched cuffs and collars are suitable for daily use.
Some interesting recommendations for using starch:
- You can starch a shirt even in an ordinary washing machine. In order to do this, you need to: pour diluted starch into the compartment that is intended for conditioner, and you should not use other laundry detergents in this cycle.
- To give your shirt a more formal and glossy shade, add a small amount of melted stearin to the paste.
- It is allowed to dry starched items in the cold, but it will be extremely difficult to do. Don't be afraid, this won't give your shirt any extra stiffness.
- You can add a small amount of salt to the paste to add shine to your shirt.
Important! If you decide to use this method for other clothes, use the information from our separate publication “How to starch fabric?”
Starching procedure
Microparticles of starch will fill every free cell on the surface of the material. Products made from artificial fabrics do not have such cells in their structure. That’s why it’s useless to starch them.
Clean shirts are placed in the prepared paste for half an hour.
After completing the cleaning procedure, the items are taken out, wrung out and hung out to dry:
It is not recommended to dry snow-white shirts or blouses on the balcony in direct sunlight.- It is much worse to lay out products on a heating radiator. The risk of drying things out is too great. After this, it will be very difficult to iron the shirt.
- Drying things in the cold is prohibited. They will not gain additional rigidity, but the likelihood of difficulties during ironing will increase several times.
- Use hangers for drying. Carry out the drying process at room temperature.
How to add stiffness to bulky knitted items
To add rigidity to bulky knitted items, you can use gelatin or PVA glue. You need to dry such things by stretching them over a three-dimensional object of a suitable shape: a glass, cup, bowl, dish.
You can use a tube or cardboard box for this purpose. It must be lined with polyethylene, otherwise the knitted product will stick to the cardboard when it dries.
Gelatin
A gelatin-treated item will be tougher than a starched item.
There are two recipes for preparing gelatin solution.
- You need to pour 1 teaspoon of gelatin with 1 glass of water. Let it swell for 1 hour, then the mixture must be heated without boiling. Immerse the knitted item in hot gelatin, then stretch it onto the mold.
- Mix a packet of gelatin, 1 tablespoon of salt and half a glass of cold water in a half-liter jar. Place in a steam bath and stir with a fork or whisk until the gelatin is completely dissolved. Dip the product into hot gelatin, then pull it onto the mold without squeezing.
Gelatin forms a transparent film on the fibers, leaving no traces.
PVA glue
Instead of gelatin, you can use PVA glue. It must be diluted with water in a 1:1 ratio and soaked into the wet object.
https://ostirke.ru/
More on the topic of starching - 7 ways to starch products
Series of messages “HOUSEHOLDING Cleaning, Washable”:
Part 1 - Lady Fly... Flying Housewife... Flylady System... Part 2 - HOW TO STARCH A PRODUCT. LOTS OF ALL VARIABLE RECIPES. Very useful. ... Part 26 - How to remove odor from carpet or upholstered furniture. A very interesting way Part 27 - 7 ways to starch products. Method 7 - the most unexpected and fastest Part 28 - More very important tips on starching. Three methods of starching. How to starch a knitted item or collar Part 29 - How to clean stainless steel cutlery
Synthetic starching agents
In hardware stores you can purchase ready-made compositions for starching textiles. There are 2 types of such household chemicals:
- starching sprays (Chirton, Dalli duo, etc.) are used for ironing, they allow you to add elasticity to individual areas of the shirt, making it easier to smooth the fabric;
- Washing gels are used for complete starching of large items (sheets, skirts, etc.).
Instead of starch, they use chemicals (carboxymethylcellulose, etc.), which, when ironed, behave in the same way as a potato or corn food component. The film dissolves easily in water the next time you wash it. Most household chemicals contain flavoring additives.
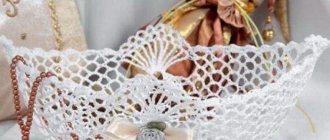
How to starch tulle
Decorative bows and other starched tulle products look simply gorgeous! Starch tulle, muslin, guipure, chiffon, muslin and other light fabric gently. Immerse the clean product in the prepared solution for 15 minutes. To ensure that the material is evenly saturated, stir from time to time. Wring out without twisting, straighten and dry. Before ironing, spray the product with water from a spray bottle and wait a little for the fabric to “come off”. Iron with a not too hot iron.
How to prepare the solution correctly
To give the desired shape to a voluminous object, for example, a vase, box, etc., starch is not suitable, since it does not provide enough rigidity, but for such things as a collar or a napkin, it can be used. In addition, after a certain time, starch turns a little yellow, as do gelatin and PVA glue, so it is better to use sugar for projects made from white and light yarn.
The ingredients for the starch solution are taken in the following proportions: for 1 glass of water, 1 tbsp. spoon of starch. Accordingly, for 1 liter of water you will need 5 tablespoons of starch.
To prepare a sugar solution, you need to take 3 tbsp per 1 glass of water. spoons of sugar (per 1 liter of water - 15 tablespoons of sugar).
The cooking method is the same in both cases. You need to pour the required volume of water into the pan, add sugar or starch and mix thoroughly. Then place the pan over medium heat and bring to a boil. After this, carefully remove from the heat and wait for the solution to cool to a temperature at which it will not burn your hands. Next, lower a knitted item, such as a collar, into it. The water should cover it entirely.
You should leave the product under water for 5-10 minutes, then remove it and gently squeeze it out. After this, lay the collar on a flat surface on a previously placed dry towel. This is done so that during drying the work does not curl up and retains its shape.
The edges of the openwork object must be attached to the towel using safety pins, having previously given them shape.