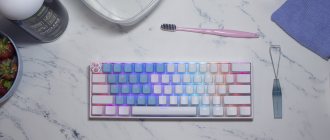
Types of fastenings
Let's look at the types of key mounts in a laptop keyboard
- membrane - the cheapest and most common;
- switches are a more stable, reliable, and at the same time expensive type of key. Much less common than membrane;
- capacitive - transmit a signal by closing contacts. The second most common type after membrane. Not the most reliable type of keyboard;
- touch is the most expensive type. In addition, to repair it, you will need to remove the entire touch panel, and this is impossible to do at home.
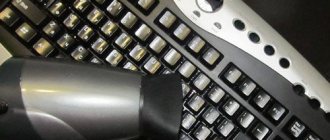
If cleaning is needed
If the laptop is left open for a long time, it may become dusty. During operation, a lot of hair, household debris and food crumbs get into the keyboard. If you need to clean up such debris, you can easily do it yourself by carefully vacuuming the device.
At the same time, the main thing to consider is that it is best to use a specialized vacuum cleaner with professional attachments and brushes; if you have to use a regular one, then you cannot use high power.
The laptop does not connect to wifi, it says limited access. Read on for what to do.
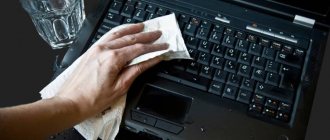
The keyboard is the main data input device. Most users like to drink tea or coffee while sitting at a computer or laptop, without interrupting work or entertainment. As a result, it suffers from damage from all kinds of liquids.
In this case, you cannot do without disassembling the device. It is necessary to dry and thoroughly rinse the keyboard, otherwise over time this will lead to “sticking” of the keys or complete inoperability of the device.
Video: remove the keyboard from a laptop
Removing regular keys
- Turn off the laptop through the “Start” menu: “Start” - “Shut down”.
Open “Start”, click on the “Shut down” option
- A thin, curved screwdriver is placed under the edge of the key.
A thin, curved screwdriver is placed under the edge of the key
- The screwdriver handle is gently pulled down until it clicks. After this, pulling out the key will not be difficult, since the key will already be removed from the mounts.
- If you need to clean the space under the key, you need to pry the lock at the top right with the sharp end of a screwdriver. Repeat the same on the opposite side.
Use the sharp end of a screwdriver to pry the lock at the top right
- Remove the fastener.
Removing the mount
How to remove a separate button on a laptop
Removal methods differ for different keys.
ATTENTION. We remember the order in which the elements are located. This will prevent confusion during reassembly. The fastest way would be to take a photo of the diagram.
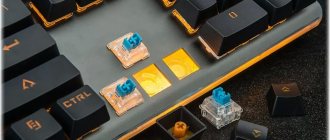
Types of push-button fasteners
There is a difference between regular and special keys.
Standard buttons are attached using a pattern of two latches and a rocker. The last part is often called the “sled” and consists of two parts (“antennae”) with a hinge in the middle. With the help of lugs it is held in two grooves.
Standard mount
The special buttons have an excellent design. They are kept from distortion by metal stabilizers. The pressing force is distributed by plastic guide elements. The clamp consists of two latches.
The Space key is reinforced with two brackets.
Standard keys
Let's prepare the tool first. You will need a screwdriver with a thin tip, preferably a curved one. Can be replaced with a bent paper clip, an awl, or a crochet hook. With their help, the elements are easier and faster to pull out.
Thin screwdriver with curved tip
Place a screwdriver under the top edge of the plastic (on the side). Press the opposite part tightly with your finger. Lightly pull the part up and to the side.
Screwdriver under the top edge of the key
ON A NOTE. The force should be minimal and applied to the central part of the component.
Then place the screwdriver under the near edge of the button.
Near edge of the button
Carefully pull the screwdriver handle down. A clicking sound indicates that the part has been removed from the fastener. Let's pick it up and pull it up.
BY THE WAY. There are situations when an element is removed along with the “swing”. This is not dangerous, but before reinstalling, do not forget to first separate the mount.
Special buttons Shift, Win and others
Manipulations with such keys have their own specifics.
First, carefully pry the element off on one side.
First latch
Let's pay attention to the location of the internal clamps in the resulting space. We reach for them with a screwdriver and snap them off.
Let's move on to the second clamp.
Second latch
We move the freed part up.
Removed key
Extracting the “Shift”, “Ctrl” and similar keys
- Pry off the fastener on one side.
We pry up the fastening on one side
- Pry up the second fastener.
We pry up the second fastening
- Pull out the released key.
Pull out the released key
- Remove the fasteners as described above.
Removing the plastic clips
Removing the "Space" from the mounts
- Detach the metal reinforcements from the sides.
We disconnect the metal amplifiers from the sides
- Open the latches on the front of the key (the one facing away from the monitor).
Open the latches from the front of the key
- Open the latches from the inside.
Open the latches from the inside
- Remove the key.
Installing regular keys
Important! Record the order in which the keys were located. Otherwise, they will have to be rearranged again.
- Install the “swing” on the membrane. First, place the antennae under the larger part, then - by applying slight pressure - they will go in on their own.
We place the antennae under the larger part and press a little so that they go in further on their own.
- Raise the “swing” using a fairly thin object (a paperclip, a thin knife, a screwdriver or a ruler).
- Place the button and press until it clicks.
We put a button
Find out detailed instructions on how to clean your laptop keyboard, as well as the best cleaning methods, in our new article.
Installing Large Keys
- Attach a stabilizer to the keyboard.
We attach a stabilizer to the keyboard
- Secure the ends into the grooves on the keyboard body.
We fix the ends in the grooves on the keyboard body
- Connect the clamshell and the bottom surface of the lid.
- Snap the top latches onto the swing and the lid.
- Press the key until it clicks.
Press the key until it clicks
Setting "space"
- Place the keyboard in such a position that the narrow part of the stabilizer faces down.
Place the keyboard in such a position that the narrow part of the stabilizer faces down
- Pass the wide part into the upper holes.
We pass the wide part into the upper holes
- Press the key twice from different sides until you hear a characteristic click.
Press the key twice from different sides until you hear a characteristic click.
Installing small keys, which can also be on the keyboard, is no different from installing regular ones. The only difficulty is that smaller parts require more care.
Important! The number of clicks when fastening corresponds to the number of grooves. If there are fewer clicks or the key is not fastened, there may be an error in the fastening and it is better to double-check everything.
Video - How to remove and install laptop keyboard buttons
Why film
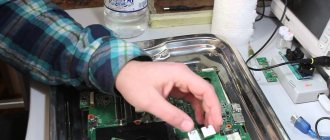
Anyone who has ever tried to clean a laptop keyboard on their own understands perfectly well that doing this is not as easy as with a personal computer. Due to the small size of the device and space saving, as well as due to different types of mounting, problems may arise.
Removing the keyboard in a laptop, disassembling the device completely and disconnecting the cable from the screen may be necessary in cases where it is necessary to perform one of the following operations:
- Solving problems with elevated temperature, including:
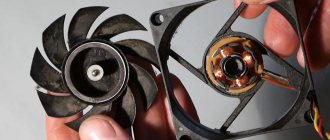
- disassembling the laptop to vent the cooling radiator;
- cleaning the fan from dust, hair and debris;
- replacing thermal paste, which promotes better heat transfer between the processor and radiator;
- checking the presence of oil to lubricate fan bearings;
- repair or replacement of a damaged system configuration element;
- solving keyboard problems such as:
- cleaning the keyboard from spilled liquids, dust, debris and hair;
- checking, replacing or repairing a damaged board or button.
Keyboard repair
Let's look at ways to repair keys on a laptop keyboard
There are two ways.
First way
If any fastening is broken, you can try to restore it using a needle from an insulin syringe:
- the needle is applied to the damaged part. It is better if it extends two to three millimeters beyond the edge of the breakage;
- Use a soldering iron to heat the needle and carefully fuse it into the plastic;
- Carefully bite off the excess plastic using side cutters.
Second way
If you don't have any tools, you can use superglue:
- heat the needle with a lighter;
- make a groove using lint from a comb or similar objects. The main thing is that the size of the groove allows the lint to enter;
- fix the lint with superglue;
On a note! The result can be checked in about an hour. Typically, the process takes about forty minutes to an hour.
Video - How to repair and insert laptop keyboard buttons
Method 4. arm yourself with a special kit
Currently, specialized computer hardware stores offer consumers not only the computer devices themselves, but also various care products.
Currently, you can find many different computer cleaning kits in specialized stores.
For example, special kits are produced for cleaning computer keyboards, and as for laptops, there are even special varieties of these products depending on the configuration.
Such a universal set usually consists of several items:
- special brush;
- napkins;
- cleaning liquid.
And, if this set is systematically used for its intended purpose, then general cleaning of the device may not be necessary at all, or it will not happen very soon.
Warning
- A malfunction resulting from the ingress of liquid requires high coordination, accuracy and attentiveness from self-repair. Too much force or the wrong cleaning agent can completely destroy the conductive path. If you are not confident in your abilities, it is better to entrust this work to a specialist.
- Removing and installing keys does not cost much (around 500 rubles), independent removal requires great skill, care and accuracy. Excessively sudden and careless movements can damage the fastenings. Carry out the procedures only if you have the necessary skills and are unable to take the laptop to a service center
- The fastenings in small keys are also small. If you are not confident in your vision and the necessary dexterity, it is better to entrust the work to a service center
- Working with a soldering iron requires not only care, but also knowledge, skills and experience. Careless movement can lead to damage to the entire device.
- Superglue can get on the conductive path, rendering it inoperative. Work very carefully.
Why you need to clean
The user is in constant contact with the keyboard while working at the laptop. But many people don't think about the fact that it needs to be cleaned. After all, the garbage is almost invisible from the outside. With active use, you can wipe the device after 10–15 days, then it will look like new. But after a year it is necessary to carry out a general cleaning. Over this period of time, not only dust, but also hair and crumbs accumulate under the buttons. And along with them are microbes harmful to health.
A lot of debris accumulates under the keys
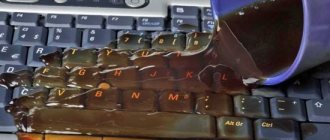
Tea, coffee and other drinks spilled on the keyboard are dangerous for the entire laptop. If now the computer works normally without cleaning, then after some time, for example, a couple of months, it can be thrown away. Why? The liquid penetrates through the keyboard into the case, ending up on the motherboard and contacts, which become shorted or oxidized. As a result, not only the board will suffer, but also the hard drive, processor and other components. The accumulation of dust on conductive elements also leads to a short circuit. Excess dirt and sugary drinks cause the keys to stick.
Liquid gets between the keys and can damage the electronics in the case
Cleaning the laptop keyboard
Devices that can be used to clean your keyboard
Deep cleaning can be done in the following ways:
- A USB vacuum cleaner is a compact device for cleaning your keyboard. Its disadvantage is its low power, due to which deeply stuck dirt cannot be removed;
USB Vacuum Cleaner for Keyboard Cleaning
- compressed air from a can. The air is in the cylinder under high pressure, which is why the escaping jet is powerful enough to not only blow off large contaminants such as crumbs from the keyboard, but also clean the contacts from dust;
You can use a can of compressed air to clean your keyboard thoroughly.
- stickers - suitable for processing small surfaces. It is impractical to clean the entire keyboard with them due to the large number of sheets.
With the help of stickers it is possible to treat minor dirt on the keyboard from a small surface
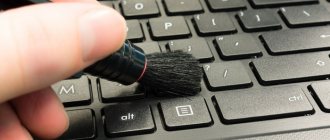
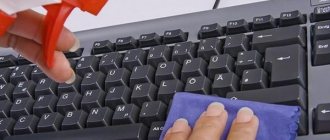
For surface cleaning, it will be enough to use a napkin or brush.
Cleansing moderate pollution
If you notice small debris under the buttons and the buttons are greasy, then this is a medium level of contamination. To eliminate such contamination you need:
- Promptly disconnect the PC from power. Disconnect the keyboard from the computer. Remove the battery from the laptop.
- Turn the keyboard of a regular computer over and shake it. This way, get rid of large crumbs. For a laptop, you don’t need to carry out this procedure.
- Use a vacuum cleaner or hairdryer to blow out dust and small crumbs. You can use a soft paint brush to remove dirt.
- Remove fatty deposits from the keys with a cotton swab dipped in alcohol.
It is advisable to clean the device with alcohol once a month. At the same time, you will get rid of not only fat, but also germs.
Important! Before cleaning with alcohol, make sure that the liquid does not erase the letters!