Do you want to add an original and stylish T-shirt to your wardrobe? You don't have to go to the store for this. You can, with just a little effort and imagination, transform one of your old things, breathing new life into it.
—>
How to act so as not to spoil your favorite wardrobe item, but, on the contrary, to make it better and more interesting? In other words, how to cut a T-shirt beautifully?
Beautifully cutting a T-shirt at home
Before you take your T-shirt to a studio or give it into the wrong hands to make candy out of it, it’s better to think about whether you could do the same or better. After all, you can change your image at virtually no cost. The main thing is to know how to do all this correctly and accurately.
What fabrics can be cut
There are no specific features in dividing the fabric into different pieces. We determine the cutting option ourselves, based on the structure, density and weave. They are more dense and slightly thicker than usual. But cotton and satin can be cut and torn. Thanks to its lightness and structure. However, you should not get carried away with this method; distortions may occur when sewing the product. It is better to tear silk and chiffon to avoid unevenness, since this fabric is very mobile and difficult to draw and then cut it evenly.
How to choose the right pattern to cut a T-shirt beautifully
The size of the design has a lot to do with cutting or altering a T-shirt. If the T-shirt already has some kind of design, then it is better to make cuts near it so as not to affect it too much. From the side, from above, from below, as your heart and imagination desire. The design that you want to make with your own hands - drawn, glued with an iron, sewn or cut out - can be done absolutely anywhere and using various tools. If the T-shirt is small, then the design should be small so that it looks beautiful, decent and feminine.
Important! If the T-shirt is large, and your size is smaller than the T-shirt, then the design can be large and voluminous. It all depends on tastes and desires.
How to cut a T-shirt in a stylish and modern way: top 5 fashion ideas
Idea #1: The easiest and most popular way to decorate an old T-shirt is to cut it into even pieces in a certain place. It is necessary to turn the T-shirt inside out, carefully draw out the necessary elements (these can be circles, ovals, lines, etc.) and cut along the contour. Use your imagination and create some kind of pattern using these cuts. Be careful when cutting around the seams of the product; if you touch them, the T-shirt may simply come apart.
Idea No. 2: An original decoration will be a cutout of some design on the product. You can use the same small cuts, but still cut out a beautiful design. The algorithm is the same: turn the T-shirt inside out, draw the pattern you prefer. Then, along the contour of this drawing, draw the elements that you want to cut out. If you are not sure that you will do it carefully the first time, then you can use cardboard. Initially, cut out the necessary elements there, and then use it to transfer it to the fabric.
Idea #3: You can make a unique T-shirt by cutting it at the bottom. Such stripes are very relevant today. You can leave these stripes like this, or you can braid something out of them. Just tie them together or put beads on them and tie them. There are many options, the main thing is to have ideas.
Idea No. 4: You can make an original thing from pieces of an old T-shirt. By cutting into even pieces and carefully tying them together, you can make an original scarf that will decorate any outfit.
Idea No. 5: If you are comfortable with a machine or know how to sew beautifully by hand, then you can replace some elements in an old T-shirt with lace inserts. At the same time, cutting, for example, the side parts or the back and inserting other material there. It looks beautiful and impressive.
Golden chain
Let's add some chic to a simple T-shirt!
We will need:
- t-shirt;
- gold chain;
- connecting rings;
- scissors;
- pliers;
- sewing machine.
I can’t believe it, but you need to start this alteration by cutting off the sleeves, bottom and neck. Create deep V-shaped cuts in the front and back. Measure three lengths: the first from the bottom of the neckline to the neck, the second from the waist to the waist through the middle, the third length along the midline of the back. Cut the chain and sew it onto the T-shirt. Connect them together using rings.
Now you are the most stylish!
T-shirt cutting technology
In order to cut a T-shirt evenly and beautifully, scissors alone will not be enough.
What tools will you need for your work:
Secrets of neatness
In order for the cuts to be neat and the design not to come out, you need to work exclusively with well-sharpened objects. Check that the scissors cut well and that the pins are not rusty.
Important! In order for the design to transfer smoothly, the T-shirt must lie neatly, and you can also iron it so that it does not come apart in the future.
Which T-shirts can't be cut?
T-shirts made of silk, lace and satin are very difficult to cut, much less to make any patterns on them. Such fabrics will simply be in puffs and nothing beautiful will come of it. Therefore, before you transform your favorite but old thing, make sure that this transformation will not harm it.
Bare shoulder
Double knot and open shoulders.
You also only need a T-shirt and scissors.
Trim the neckline and cut off the bottom seams on the sleeves. At each shoulder seam we cut out a semicircle. Cut off the lower part of the back, and cut out oval ties on the front half. We tie them with a double knot and put on a T-shirt.
Yes, you won't wear a basic white t-shirt anymore, but it's perfect for hot summer days!
What wardrobe items go with cut-up T-shirts?
Original T-shirts go with almost any style. This T-shirt can be worn under jeans or light-cut skirts.
Important! However, if you decide to wear such a thing under a formal business suit or to an important meeting, then you shouldn’t. Such things simply won’t work and people may simply not understand.
But if you like to wear a classic style on your free days, then such T-shirts can easily be combined with cropped pants or long stretch skirts - this is simply the squeak of fashion among young people.
Geometric sections
Geometry + fashion = YES!
All you need is a T-shirt and scissors.
Take scissors and cut off the sleeves, neckline and bottom seam. Then we fold the bottom part by about 5 cm. Cut out the triangles and unfold the T-shirt. We got diamonds!
Pair with this T-shirt: a high-waisted skirt or sheath dress. To play up the geometric look, add an interesting necklace.
How to make a boring T-shirt creative - 1
Do you have a t-shirt jam in your closet (or even your husband's or boyfriend's closet)? You haven't worn them for a year, but still refuse to throw them away? T-shirts that don't fit you well, t-shirts that are out of fashion, t-shirts that are too boring and plain, the wrong color, the wrong size, the wrong fabric?? All of them can be spent on new unique and creative things that will delight you and make you stand out from the crowd. Think of these clothes simply as a material and you'll quickly start coming up with new designs. Update your wardrobe for spring without spending money, and we will help you with ideas!
1. The most popular alteration of T-shirts usually comes from the back: a rectangle or oval is cut out from the back, length from the middle of the shoulder blades (or from the collar of the T-shirt, if it is low enough) to the lower back or even to the tailbone, the edges are hemmed, and then the void is filled with an ornament made up of strips (also with hemmed edges) from material from the same and/or second T-shirt. Of course, you can be more creative and cut out any shape on the back from individual triangles at the top and bottom with the vertices pointing towards each other to a whole series of chaotically scattered circles - this is your will and the principle of your design. The main thing is not to forget to process the edges so that your fashionable masterpiece can survive washing for at least 1 season, and choose the design wisely so that its individual parts do not sag after they are deprived of the support of the fabric on top.
For example, here the rectangle on the back is filled with an interlocking mesh of strips cut from fabric taken from the back of the same T-shirt. If your option is intended for the beach, the mesh can and should even be made about 2 times thinner.
And here a more elegant design has been chosen, more open for summer, but at the same time, undoubtedly, open in moderation.
It is not necessary to fill the cuts with the fabric of the T-shirt itself. For mesh, for example, thin braid (even with sparkles), wide ribbons, local inserts of beads, etc. are perfect. It’s just important not to forget that you will wash all this together, so choose materials with suitable characteristics.
2. Since the fabric of T-shirts tends to have frayed edges, if you don’t mind the T-shirt at all, you can do artistic cutting.
In these versions, several horizontal cuts were simply made on the back at equal distances. The model on the left has more of these cuts, the model on the right has fewer. Next, for the option on the right, we simply cut each of the resulting rectangles vertically in the middle, and then carefully stretched the right and left halves forward. In this case, the halves turned into ribbons with the edges turned outward, and after the ribbon you tie them together. Here the strips could be cut to length, and then carefully sewn, adding 3-4 light beads between them (so as not to pull the strips down).
In the case of the second model, they did not cut or stretch anything further, but simply gathered all the rectangles in the middle with ribbons of a color different from the color of the T-shirt. In place of these flagella, small bows or ribbons of beads could be sewn. You could run a string of beads vertically down the middle from the collar to the very bottom of the T-shirt, sewing it loosely to the gathered rectangles.
Here the whole point lies in a well-thought-out design and careful cutting out of small details of the image on the T-shirt. In both places, skulls were carved, but in different formats.
In this case, a sweater was used, but a similar design can be easily transferred to a T-shirt: cuts are made in a circle in levels. The longer the cuts, the more mesh-like the T-shirt will become. In this case, the cuts of each upper row are centered between the cuts of each lower one.
Here, perpendicular to the long slits on the sleeves, two strips of the same fabric as the T-shirt itself are running, with a vertical stripe-ribbon wrapped around each perpendicular one.
And again, but about the sleeves:
Side slits, side cut top and cut off sleeves. With a design like this, it is important to reinforce the side seams of the T-shirt after cutting, otherwise it will quickly unravel.
Heart shaped front slits with backing:
3. In the third most popular method, T-shirts are partially recut to create a more sophisticated design. For example, here a slightly too big T-shirt on the back was first cut from the shoulder seams to the very bottom along the lines of the letter "Y". Horizontal slits were then made in the top triangle. Afterwards, from the bottom of the right and left parts of the back, almost to the very top, a thin strip of fabric was cut along the perimeter. Then, along the lower perimeter of the triangle and the front edges of the same parts, thin slits were made parallel to the edge, and finally, zigzag strips were run through these slits, connecting the parts together. Or you can not cut the T-shirt, but braid the braids in a “Y” shape using the method described below.
Cut and rounded front with sewn ruffles from the same material, as well as gathered sleeves at the top.
Almost all the seams (including the collar) have been cut off the T-shirt, except for the shoulder seams - both back and front it has been cut to almost two rectangles. The T-shirt is gathered at the shoulders with ties, and the sides at the hips are connected at the bottom with relaxed lacing with a loose bow at the bottom on each side.
Here, the collar of a T-shirt is first widened, then hemmed, then braided as follows: “sun” cuts are made perpendicular to the hemmed collar; you get short “ribbons”, each lower one of which you thread into the upper one, starting from the top. At the top, you pass the second tape under the first, pull it up and lower it down towards the other cuts. Into the resulting loop you, just like at the beginning, thread the bottom, third strip, and so on. Weave the strips along the same pattern and then, slightly pulling the weaving down, you get an even “pigtail”.
DIY T-Shirt Remakes (44 Ideas)
We've taken a look back at all our T-shirt makeover ideas and wanted to bring you 10 fun ways to cut up white T-shirts and wear them all summer long! Our master class “How to remake a T-shirt” is, in principle, suitable for a T-shirt of any color.
The most important thing in this process is to constantly try on the item during alteration! On the table it may seem that it is too short or too little has been cut out, but when you put the item on yourself, everything changes. Mark the neckline or armhole (sleeve) line with colored chalk. White T-shirts aren't the only thing that can be repurposed. Clear out your closet - give t-shirts you no longer wear new life!
How to make them T-shirts: T-shirt twisted in the shape of a butterfly
You will need:
- wide, long T-shirt (preferably sleeveless)
- thread and needle or sewing machine.
1. Prepare a T-shirt. Cut out sleeves if necessary.
2. Turn the T-shirt inside out and cut it in half along the side seams.
3. Place one half on top of the other. Twist the half on the back side once.
4. Pin the rolled half and the front of the T-shirt and join with a stitch. Turn the T-shirt inside out.
How to make a T-shirt smaller?
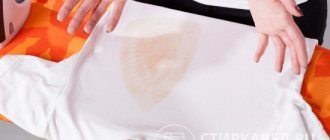
It's a shame when a new T-shirt doesn't fit. Don't rush to get upset. If the item is cotton, try shrinking the garment at home. It turns out that natural fibers can shrink when exposed to hot water. To reduce a T-shirt a size or two, follow a clear procedure. Let's consider the possible options.
How to reduce the size of a cotton T-shirt?
The first method involves immersing the product in hot water. The reduction procedure is carried out in several stages:
1. Prepare a large container, fill it with water, and put on fire. Bring the liquid to a boil.
2. Next, remove the pan from the heat. Now you can place the T-shirt. There's a little secret here. The more you cool the water, the more invisible the result will be. For example, if you want to reduce a cotton T-shirt by two sizes, then place the product in boiling water.
3. Leave the T-shirt in hot water. 20–30 minutes is enough. Then drain the liquid and wait for the product to cool. If you immediately grab the T-shirt, you can get burned.
At the final stage, squeeze the product by hand and dry it in the usual way. If it seems to you that the T-shirt has not changed enough in size, then wash the product in the machine using an active spin.
How to reduce a T-shirt size?
If you don’t want to bother with pots and heating water, then resort to technology. A washing machine or dryer will do the job perfectly. When the drum is actively operating, the fabric fibers are affected. They shrink, and the thing shrinks accordingly. To use this method, follow these steps:
1. Place the T-shirt in the washing machine, set to hot water. 2. Remove the item from the appliance and place it in the dryer. Set the temperature to medium.
Do not try to set the temperature in the dryer as high as possible. This effect affects the appearance of the T-shirt. It will indeed shrink, but it will no longer look new.
To ensure everything goes well, remember a few rules. Women's T-shirts of unusual shapes will lose their originality. To keep colored items bright, add vinegar to the water. The hot water method is not suitable for things with a pattern. It can float under high temperatures. As a result, the T-shirt will fade. The methods described are suitable for T-shirts made from cotton or wool. Don't try to make synthetic items smaller, you will only ruin the item.
A beautiful top made from a large T-shirt, without the use of threads or needles
You will need:
- t-shirt
- scissors
- chalk.
1. Mark with chalk on the front of the shirt what is drawn with red lines in the image.
2. Cut along the lines.
3. Mark with chalk on the back of the shirt the other lines that are drawn in red in the image.
4. Cut along the lines.
5. On the back, cut the middle section halfway lengthwise.
The front of the T-shirt after cutting.
The back of the T-shirt after cutting.
6. On the front of the T-shirt, tie two stripes into a knot, then move them back and tie them to the back stripes.
*If necessary, you can cut off excess parts of the fabric or tie them in a bow.
Boiling
To find the desired T-shirt size using boiling, you should follow the following procedure:
It is worth remembering that the size of its shrinkage depends on when the T-shirt was immersed in boiling water. So if you lower the T-shirt immediately after the water boils, it will shrink to size 1 or 2. If a T-shirt is placed in water that cools for 5 minutes after boiling, the T-shirt will shrink by half a size. For minimal shrinkage of the product, boiling water should cool for 15 to 20 minutes. It is also worth remembering that the longer cotton is soaked, the more it shrinks. Don't over-shrink the T-shirt. If you make it small, you will no longer be able to stretch it enough and perform the shrinking procedure again.
T-shirt with side lace inserts from an old T-shirt
1. Measure the side panels and, based on the measurements, cut the sides of the T-shirt (including the sleeves).
2. Cut each insert in half to sew onto the T-shirt.
3. Lay the T-shirt flat and sew on the lace inserts on the left and right using a machine.
4. Use pins to secure half of the lace inserts, leaving the areas where the sleeves will be untouched.
5. Using a machine, sew where you have marked with pins.
Re-wash
If the sweater contains a lot of synthetics, then the proposed method is unlikely to suit you.
Things made of acrylic stretch easily, often even for no apparent reason. However, pure wool items can be brought back to life by repeated washing. When exposed to high temperatures, the fur shrinks in size. The main thing is that the process proceeds carefully and evenly. Place the sweater in a mesh laundry bag. Set the special mode. Washing machines offer delicate washing for woolen items. In this case, the water temperature does not exceed 30 degrees, and the speed should not exceed 400. It is important to use special products for wool. After washing, lay the product on a towel and wait a little. Then roll it carefully into a roll and gently squeeze it out, twisting it slightly. Transfer it to a new dry towel and shape it into the desired shape. Sudden temperature changes are harmful to wool. Therefore, dry the product in the room, not outdoors.
Hemming on a sewing machine
Hemming a T-shirt, sweatshirt, top or anything else using a sewing machine is very easy. Need to:
- Measure the required length, mark and cut.
- Fold the T-shirt at the bottom, determining the distance at which the seam will be.
- Place the folded product under the machine foot with the wrong side up.
- Straighten and align so that the edge of the T-shirt is under the left needle.
- Install the stopper and start stitching so that the fabric does not tighten.
- Tie an end knot and hide it.
Braided back
Yes, we love to weave.
If you're ready to experiment, you can take T-shirts in different colors.
Cut off the neckline, seams at the bottom and on the sleeves of the first T-shirt. We cut off the side seams and the seams on the sleeves and use this fabric for the vertical stripes. We cut out a large rectangle from the second T-shirt and cut 8 strips, about 5-7 cm wide, not completely. We secure them with pins on the sides and sew them together. Don't sew the sleeves! We weave vertical stripes and sew them to the bottom horizontal one.
Very interesting, isn't it?
What to make from an old T-shirt: a scarf
You will need:
- t-shirt
- scissors
- fabric paint (if desired).
1. Cut off the bottom of the T-shirt. The width of the cut part is about 20 cm.
2. Cut the resulting ring to create one long strip of fabric.
3. Cut off the bottom seam.
4. At the ends of the scarf, make cuts about 10 cm long.
5. Pull the resulting strips so that they curl a little.
6. If desired, you can paint the ends of the scarf with fabric paint.
Do-it-yourself suturing: is it worth doing?
It should be understood that reducing the size using boiling water will not harm the integrity of the T-shirt. You should use a tailor’s tool if you are absolutely sure that the item will acquire the desired size and no one will notice your intervention in this later. To sew a T-shirt, you will have to cut it in the right place and sew it together. If you make a mistake, you will not only end up with a size you don't need, but you will also ruin the shape of the T-shirt. At the same time, inaccurate stitching, even with successful size compression, can lead to the visibility of your intervention due to sloppy work and visible seams. Therefore, it is best to add some stylish details in the form of stripes, inscriptions and the like at the suturing site.
What can be made from a large T-shirt: a beautiful pattern without threads and needles
You will need:
- t-shirt
- scissors
- ruler
- chalk
- rivets.
1. Using a ruler and chalk, draw straight lines to the right and left of the collar. In this example there are 11 lines.
2. Using scissors, make cuts along these lines.
3. Make one cut at the bottom of the T-shirt, on the left or right.
You can tie the halves in a knot:
4. Using rivets, start connecting the strips that formed on both sides of the T-shirt (at the top).
Ku-ku, who didn't hide, it's not my fault
We will need:
A very elegant cut!
Cut off the sleeves, neck and bottom of the first T-shirt. We take the second one and cut off the neck and sleeves as well. Fold in half and cut along a curve 10-15 cm from the sleeve and neckline. We unfold and cut off everything from the bottom, and also cut to the top. Overlap the halves front and back, insert the first T-shirt and secure with pins. We sew where necessary.
We can't miss this layered makeover! This is what we must do this summer!
What can be made from old T-shirts
Tank top with a bow on the back, made from a T-shirt
You will need:
- t-shirt
- scissors
- pins
- sewing machine or needle and thread.
1. First, wash and dry your T-shirt if it is new. Place her on a flat surface with her back to you. Make sure the seams are symmetrical and the T-shirt is pressed.
2. Using a pencil, draw a line along which you will cut. Choose the width and length of the future bow yourself. The shape of the line should resemble the Latin letter U.
3. Start cutting a U shape along the line on the back of the t-shirt. Be careful to only cut out the back portion, not both sides of the t-shirt.
4. Fold the cut piece of fabric in half and cut off half. You will use the larger half for a bow (folding it like an accordion), and you need to cut the second half in half - you will get two strips.
Tie one strip around the middle of the bow and secure with thread and needle. If necessary, cut off excess.
5. Attach the bow with pins and sew it to the back of the T-shirt. It is better to sew at the top so that the batik is a continuation of the collar.
6. Turn the T-shirt inside out and you're done. You can make several bows, but then you need to cut an even larger U on the back.
* If you couldn’t sew the bow evenly, it’s okay, you can always fix it. The main thing is to take your time and you will succeed.