Features of roller blinds
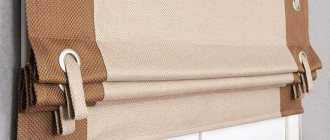
This type of curtain is very similar to blinds in terms of fastening method and functional features. They will reliably protect you from sunlight during the day and protect you from prying eyes in the evening. Very compact, takes up little space, does not draw attention to itself.
The design of roller blinds can be called universal, suitable for the stylish design of modern interiors
The design consists of a roll mounted on a rod and mounted on a bracket. A weighting element must be sewn into the lower part, usually a simple strip. The weighting agent allows you to create an evenly shaped canvas and also helps to fix it.
Roller blind device
A roller blind can be raised and lowered completely, and can also cover only the part of the window that is needed at the moment. Roll devices are easy to operate and maintain. The movement of the canvas occurs through a chain or spring mechanism. Recently, remote-controlled elements have become widespread; it is very convenient and practical. In this case, the curtain can be controlled from the far side of the room using a special remote control or even from a smartphone.
Open type curtain with chain control Cassette curtain with manual control Cassette curtain with spring mechanism
For the base of fabric roller blinds, a material based on polyester fibers is used. The fabric for roller blinds must have a high density and have a smooth surface. A smooth surface is necessary to ensure smooth folding, and high density is the key to even distribution of the fabric and excellent protection from external factors.
The roller blind fabric can be made of natural, blended or synthetic fabric. The last variety is the most practical in terms of care and cleaning
It is necessary to pay attention that during production the canvas is impregnated. The canvas, impregnated with a special mixture, has the ability to repel dust and dirt. Sometimes simple airing is enough to clean the canvas from dust and some surface dirt. Impregnation prevents dust and dirt from sticking to the canvas. If it turns out that there is a stain on the canvas, then it can be removed using a regular office eraser.
The roll element has several possible types of fastening. The structure can be installed directly above the window, separately attached to each window sash, or, if necessary, attached to the ceiling.
Fastening curtains with self-tapping screws Fastening curtains with tape Fastening curtains with brackets
Do-it-yourself roller blind repair
Roller blinds are functionally similar to horizontal blinds, but much more practical and easier to use . Their design is not complicated: brackets for mounting on windows, a rod on which the canvas is wound, a weight bar at its bottom and a chain for control.
But such simplicity of the mechanism does not always mean the absence of breakdowns. There are various reasons why blinds fail. The ability to repair roller blinds depends on the type of damage.
How to remove roller blinds
The method for removing roller blinds depends on the type of fastening
The products consist of the following components: fabric material, impregnated with compounds and protecting the fabric from dust settling; a cornice with caps on the sides, which can be open or closed; There is a control mechanism inside the cornice, and a control chain on the side of the product.
When it becomes necessary to wash the products or wash the window frame underneath them, they have to be removed. Before washing, remove the bottom strip from the product. We roll the fabric into a roll and only then remove it. First of all, we determine the type of fastening of the cornice.
Types of fastenings:
- the cornice is attached with self-tapping screws; When attaching the bracket with self-tapping screws, simply unscrew them
- a spring bracket is used as fastening;
- the cornice is secured with adhesive tape;
- on a magnet.
In the first case, you need to unscrew the screws and remove the product from the fastenings.
In case of mounting on a spring bracket:
- remove the plugs from the side parts of the cornice;
- from the edge opposite to where the control chain is located, pull out the gears;
- from the side of the control chain we move the cornice to the side;
- remove the product from the pipe.
If attached to adhesive tape, use a knife to pry up the tape and carefully remove it along with the cornice. The glue from the window is easily washed off with alcohol.
If the mounts are magnetic, there will be no problem at all in removing/hanging the product.
Rolled fabric cannot be washed in a washing machine, as their appearance may deteriorate. It is necessary to wash them with a soft sponge and soapy water, then rinse thoroughly.
How to remove other types of blinds
Manufacturers of blinds offer customers dozens of varieties of their products. The process of installing and dismantling them is very different, so you need to know the procedure for each product.
Rolled
The easiest way to remove roller blinds (such as roller shutters). They are often attached using a magnet, tape, or a bracket built into the cassette.
- Duct tape. Dismantling roller blinds with this type of fastening is quite simple. To do this, use a knife or scissors to carefully pry off the tape. Having grabbed the edge, slowly peel it off. If a mistake was made and traces of adhesive tape remained on the curtains, you can get rid of them using medical alcohol.
- Magnetic tape. This is the most popular fastening method, which allows you to remove the curtain and return it to its place in a couple of seconds. To dismantle, carefully pull the products away, breaking the magnetic connection.
- Bracket. To release the blinds from it, you need to pry the lever with a screwdriver and move it to the side. After this, the curtains can be easily removed from the clamp.
- Cassette fastener. Dismantling begins by removing the decorative plugs. Then the gears of the mechanism holding the curtain are moved towards. Pull out a special roller and carefully remove the blinds.
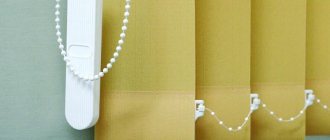
Vertical
In most cases, the slats of these curtains are made of durable materials, which simplifies the dismantling process. In order to remove vertical blinds for washing, you need to follow 6 simple steps:
- Raise the curtain and fix it in the upper position.
- The weights are removed from the gateway.
- After this, remove the chain used to raise and lower the slats.
- The product is taken by the upper edge and carefully pulled towards the cornice.
- Slowly turn the slats in the direction of the long part of the runner.
- After the click, carefully remove the loop from the hook.
Dismantling roller blinds
Regardless of where the roller blinds are located, on the balcony, kitchen, bedroom, and no matter how carefully they are treated, from time to time there is a need to thoroughly clean the roller blinds and wash the product. In this article we will tell you how to wash roller blinds at home.
How often should roller blinds be cleaned? This question can be answered - according to the pollution, but this is not the best solution
Make it a rule to do light cleaning along with washing the window, and try to remove heavy dirt immediately after it appears. This way you will preserve the original appearance of the canvas for a long time.
The washing process itself can be divided into four steps:
- Dismantling the fabric for further washing.
- Wash.
- Drying.
- Installation of a clean sheet in its original place.
Removing mini curtains
Actions:
- Remove the two end stops from the chain.
- Raise the curtain.
- Remove the chain lock from the window, if there is one.
- Using a flat-head screwdriver, turn the screws securing the guides from the fishing line counterclockwise, and remove the fishing line from the lower fastener.
- Open the sash and remove the lower line fastener.
- If the lower line clamp is screwed onto a self-tapping screw, remove the clamp cap, unscrew the screw and remove the clamp.
- If the curtain brackets are attached to the window through tape platforms, pull the left bracket to the left and remove the curtain with the left bracket from the window. Pull the right bracket to the right from the right tape platform. Using a knife blade, trim the adhesive seam holding the platforms and remove them from the window.
- Clean the surface of the plastic from glue residues with alcohol or lighter gasoline.
- If the curtain brackets are secured with screws, you need to pry the roll fastening clamps in the brackets with a flat screwdriver and remove the clamps or remove the decorative plugs holding the roll in the brackets.
- Remove the curtain assembly from the brackets.
- Use a Phillips screwdriver to unscrew the screws and remove the brackets.
- Seal the holes with white silicone.
- When placing the brackets on the brackets, you need to open the window sash, simultaneously press both brackets from bottom to top with your thumbs and remove the brackets from the sash.
- If plastic guides are glued to the window, they need to be removed using a utility knife from top to bottom. It is necessary to place the knife blade between the upper end of the guide and the bead, use leisurely rocking movements of the blade to trim the adhesive layer, and separate the guide from the bead.
- When attaching magnetic curtain elements to a window, use a Phillips head screwdriver. Unscrew the magnets.
How to remove curtains correctly
Of course, there are no particular difficulties here. Many people think so. When it comes to practical steps, problems arise. To prevent them, you need to foresee everything.
General removal instructions:
- If the installation of curtains on the windows was carried out by a specialist brought in from outside, then it is better to invite him again to dismantle them. This applies to the installation and removal of expensive large metal and electrically driven structures. Typically, organizations that deal with roller blinds provide a guarantee on installation. Take advantage of the right enshrined in the service contract and invite a specialist to your home.
- Before removal, it is necessary to refresh your memory of the structure. The drawing included with the curtain at the time of purchase will help with this. If the drawing is lost, you need to contact the manufacturer’s website for help. As a rule, company managers do not refuse such a request from consumers and provide a drawing or diagram for free.
- Consider the design drawing, understand the methods of fastening the parts and decide on the sequence of actions.
- Prepare your instrument. In most cases, this will be a stationery knife with a quick-release blade, a screwdriver with a thin flat tip, a screwdriver with a Phillips tip, and tweezers 7–8 cm long. It is not recommended to use a screwdriver to remove curtains. If the mounting screws are rusty, the screwdriver bit may flare the screw head and will have to be drilled out. Prepare a can of rust-fighting liquid. Very often, when installing curtain structures, the fastening screws are embedded in the reinforcing metal profile of the window and can rust if there is high humidity. A multifunctional liquid will help remove such screws.
- If the curtains were installed with screws, be sure to prepare a gun with a bottle of sanitary white silicone. After removing the structure, all the holes left by the screws must be filled with silicone.
- Clear the table surface from foreign objects to place the removed curtain , prepare a small plastic container for collecting fasteners and small parts.
- Place a stepladder next to the window. It will provide additional support for your feet while working.
Dismantling a cassette with aluminum guides secured with self-tapping screws
Actions:
- Disengage the chain from the holder.
- Remove the two end stops from the chain.
- Raise the curtain all the way up.
- Remove the cassette plug from the chain mechanism side. Place your fingers on the side surface of the cassette plug, rest your thumb on the top of the plug and pull the plug from the cassette towards you. Leave the plug hanging on the chain.
- Remove the second plug in the same way.
- Unscrew the two bottom screws or self-tapping screws securing the cassette using a Phillips-head screwdriver. Unscrew the two top screws or self-tapping screws securing the cassette.
- Lift the cassette and remove the blade from the guides. Place the cassette aside.
- Remove the guides glued to the tape. Using the blade of a stationery knife, pry the guide from above and cut the layer of glue with smooth rocking movements, moving the knife from top to bottom.
- Remove the chain holder. Remove the plastic cap. Unscrew the screw or self-tapping screw with a screwdriver.
- Seal the remaining screw holes with silicone.
- Remove the adhesive from the tape from the window with alcohol or lighter fluid.
Dismantling a cassette with aluminum guides secured with tape
Actions:
- Disengage the chain from the holder.
- Remove the two end stops from the chain.
- Raise the curtain all the way up.
- Remove the cassette plug from the side of the chain mechanism, leaving it hanging on the chain.
- Remove the second plug.
- If the cassette is attached to the adapter, rest the fingers of your right and left hands on the casing, pry the casing from below with your thumbs and separate the cassette with a twisting movement from bottom to top. Remove the adapter, glued with double-sided tape, using the blade of a stationery knife.
- If the cassette is attached to the window without an adapter, pry its upper left or upper right edge with the tip of a knife blade and break the adhesive connection with cutting movements. Alternately cutting the left and right adhesive seams of the cassette from its ends, tilt the cassette towards you until it is completely free.
- Remove the guides glued to the tape using the blade of a utility knife.
- Remove the chain holder. Remove the plastic cap. Unscrew the screw or self-tapping screw with a screwdriver.
- Seal the remaining screw holes with silicone.
- Remove the adhesive from the tape from the plastic surface of the window with alcohol or lighter gasoline.
Curtain repair. Step by step instructions
Sooner or later the mechanism will break down. In order not to buy a new curtain, or even two or three, if there are canvases of the same color on the window, when buying curtains, it is worth buying 2-3 repair kits for all the curtains in the house or apartment. Then, in a few years, when changing the model, it will be possible to quickly and efficiently carry out repairs.
Chain replacement
The usual length of the chain is 2 meters. If there is nothing to replace it with, then the torn thread does not need to be immediately pulled out of the fixing drum. We need to see what length will have to be thrown out to restore its functionality. If it is 10-40 centimeters, then the actions will be as follows:
- Remove the vertical movement limiter from the chain.
- Remove the decorative strip from the lock connecting the ends of the thread.
- Remove the broken end from the lock.
- Use scissors to trim the remaining thread so that at the end there is only a ball without a tail.
- Insert the end of the thread into the lock and snap the bar onto it.
- Check the rotation of the curtain lifting and lowering mechanism to determine the possible cause of the break. If the lifting and lowering mechanism jams and considerable effort must be applied to the chain, it is necessary to disassemble or replace it.
- If the torn end was long, then there is no need to install a lowering limiter for the blade. With good springs, making several turns with the remaining chain, you can get the same result as with the limiter.
When replacing a chain, the following steps are necessary:
- Compare the diameters and spacing of the balls on the torn thread and the spare thread. If the diameters and pitch match, replacement can be made.
- Unscrew the screws in the lower brackets of the guides from the fishing line, remove the fishing line, pull the fishing line out of the holes in the weight strip of the blade.
- Using a screwdriver, remove the clamps holding the roll rotation drums from the upper brackets.
- Remove the web roll along with the drums from the upper brackets.
- Pull the drum with the chain out of the metal tube with the curtain panel wound around it.
- To check the operation of the lifting and lowering mechanism, pull the torn thread forward and backward. If the effort applied is small and there is no jamming, you can pull the chain out completely. When pulling, you need to pay attention in which direction it is easier to pull out, and in which direction the drum with gear rotates more easily.
- Place 2-3 balls of the new chain into the grooves of the gear and lightly turn the drum 2-3 clicks. When turning the gear, you can use the back of tweezers to avoid breaking the springs. Insert it between the balls and lightly turn the gear until the end of the chain comes out of the restrictive casing.
- Pull out the end of the thread with the balls and secure both ends in the lock, putting a decorative strip on it.
- Insert the drum with gear and chain into the metal tube of the curtain.
- Insert the curtain roll into the brackets. Snap the latches.
- Pull the guides from the fishing line.
- Check the rise and fall of the curtain.
- Place the curtain lowering limiter on the chain.
Removing the Uni Cassette with Spring Mechanism
Actions:
- Turn the lock by the handle to a vertical position. Raise the curtain.
- With the blade of a stationery knife extended 3 cm, trim the adhesive layer at both ends of the cassette.
- Separate the cassette from the frame or sash.
- Remove the lower plugs of the aluminum guides.
- Using the blade of a utility knife, trim the adhesive layer that holds the guides on the frame or sash beads.
- Remove the guides.
- Use alcohol or lighter gasoline to remove traces of tape from the window.
Removing the cassette with a spring mechanism located on the bottom bar of the sash or window frame
Actions:
- Turn the curtain lock away from you by the handle and lower the curtain fabric down.
- Place your fingers on the top of the cassette casing, resting your thumbs on the bottom of the cassette. Turn the upper part of the casing towards you, removing the cassette from the adapter. Remove the remaining part of the blade with the lock from the guides.
- Trim the adhesive seam with the tip of a knife from the left or right end of the adapter. Pull the knife blade out of the body by 4 - 5 cm. Place the blade behind the adapter strip and cut the glue along its entire length with cutting movements up and down. Remove the adapter from the window.
- Remove the guides glued to the tape
- Use alcohol or lighter gasoline to remove traces of tape from the window.
Features of washing roller blinds at home
It is necessary to pay special attention to the fact that the fabrics used for roller blinds are very specific. They are impregnated with a special substance, so caring for them must be extremely careful; inept washing can completely destroy the impregnation, which will lead to complete unusability of the fabric covering.
Attention! It is strictly forbidden to wash roller blinds in a washing machine!
Almost all manufacturers of roller blinds recommend dry cleaning their products. To maintain curtains in perfect condition, dry cleaning should be carried out regularly and avoid heavy contamination. Dry cleaning is carried out consistently every two to three weeks.
Dry cleaning is done using a vacuum cleaner or soft brush
You need to understand that dry cleaning is necessary not only to care for the fabric and maintain a pleasant appearance of the product. It also helps maintain a functional mechanism that may become unusable due to clogging.
Regular dry brushing will help you avoid more drastic cleansing methods in the future. Cleaning must be carried out in compliance with basic rules. Do not apply bleaches, stain removers or other cleaning chemicals to the fabric base.
To remove heavy dirt, use a soft bristle brush and soapy water.
Attention! It is strictly forbidden to bend the product or rub the fabric base with hard sponges or washcloths. Any mechanical damage is detrimental to the curtains.
To clean, the curtains must be laid out on a flat surface.
Before washing roller blinds, you need to know what not to do during washing:
- Bend the product and use force when cleaning.
- Use regular detergents or cleaners, washing powders, bleaches and stain removers. Some of these products can be positioned, but in most cases they will simply ruin your curtain.
- Use a washing machine to wash the curtains and a hot iron to smooth them out. This may be obvious, but many people still ruin their roller blinds this way.
- Heavily moisturize the coating. Any moisture will not benefit the fabric covering. Humidification is an exceptional, last resort measure, as it washes out the impregnation.
- Use hard sponges and hard-bristled brushes.
To remove residual moisture from the curtain fabric, use a soft cloth
Care Tips
Proper care is the key to long service life of products. It provides not only the need to open or close the blinds, but also regularly apply preventive measures. These include the following:
- To maintain the appearance of your blinds, you need to clean them every month.
- If fabric curtains are used in the kitchen, they should be replaced with metal or plastic ones. They are much easier to remove dirt and grease from.
- The planks should be checked regularly for damage. If necessary, these structural parts can be replaced with new ones.
- If it is not possible to remove the blinds, they should be cleaned using a vacuum cleaner.
- To avoid the accumulation of dust and dirt, you can apply a special composition to the slats.
- You need to carefully monitor the condition of fabric blinds and avoid creases in the material.
Removing blinds from windows is quite simple. To do this, you need to understand the mechanism of their fastening and carefully perform all actions. If you manage to complete this job, you can easily wash the curtains and restore their attractive appearance.
Cleaning methods
You can clean roller blinds with a vacuum cleaner at low power.
Curtains must be kept clean. There are several ways to clean the canvas:
- Removing dust with a vacuum cleaner, turning on low power.
- Cleaning using a steam generator.
- A natural stain remover can remove stains by very carefully washing them off. But if you rub hard, the impregnation will be erased from the canvas.
- If it is heavily soiled, you can wash the fabric, rinse it in the shower, and dry the unfolded fabric in a horizontal position.
- The optimal, but more expensive method is dry cleaning.
What detergents should I use?
- Before washing, you need to lay out the dismantled fabric on a flat surface and try to remove dirt from it using a soft brush or a vacuum cleaner with a fabric attachment.
- If this does not help and the fabric does not look presentable, it should be lightly wiped with a damp sponge. To do this, take a basin, bowl or other small container and dilute the soap solution.
- The easiest way to prepare a working solution is based on liquid soap.
- But you can take a bar of ordinary soap and grate it on a fine grater
- It is better to use soft water. If your tap comes out with hard water, buy a bottle of plain drinking water
- Dissolve the crushed soap completely in warm water until foam forms.
- Soak a sponge in it. Please note - the sponge should be slightly damp, but not wet. To do this, you need to squeeze it well. After the washing procedure with a damp sponge, the curtain should not be wet, it can only be slightly damp.
- Before bringing the sponge to the curtain fabric, wring it out over the basin each time
Remember! Excess moisture is detrimental to the canvas; moisture destroys the impregnation. Without impregnation, the fabric will lose its shape and become unusable.
This is especially true for products with a pattern that can be hopelessly damaged.
Note! When washing roller blinds yourself, you cannot add other cleaning agents to the soap solution.
- When using a sponge, remember to wet the soft side of the sponge, not the hard one. Firstly: it cleans better, and secondly: it is better to avoid contact of the hard part of the sponge with the curtain.
- It is much more difficult to damage a curtain with the soft foam side than with the hard side with a float
- After cleaning, the fabric base must be left in a horizontal position until it dries completely. Drying should occur gradually, slowly and independently. Using household appliances, including a fan, iron or hair dryer, to speed up the drying of the fabric can completely ruin your curtain.
- Simply leave the curtain in a shaded room until completely dry.
Also, to speed up drying, do not leave the material in direct sunlight. Drying too quickly can ruin the shape of the product, so it is better to simply leave the curtain for a while in a dark, dry and well-ventilated room for drying. While the curtain is drying, you can clean its functional mechanism from dust (and hair, if there are pets in the house).
How to hang roller blinds
When purchasing roller blinds, installation instructions should be included in the kit. You need to remove the curtains in the reverse order. You can see that even a girl can hang a roller blind by watching this video:
Instructions for standard models (mounting possible to a wall, window frame, ceiling):
- We fix parts 2.3 to the surface with screws, making sure that the canvas does not warp
- Use a screwdriver to press the axle into the plug.
- We insert the curtain into the mounting brackets, install part 1.1 in 2, then 1.2 in 3.
- We unfold the canvas using the control chain to the required height.
- We put a locking lock on the top of the chain so that the curtain does not unfold below the set limit.
When installing, there should be one turn of fabric left on the roll.
The most common types of breakdowns and their elimination
In most cases, roller blinds can be repaired yourself. In some situations, a master will help. And sometimes it makes more sense to make a new purchase than to pay the same money for repairs.
Latch malfunction
With this problem, the canvas is not fixed at the required height - it constantly lowers. This nuisance will not prevent those who have a chain lock on the window frame from using blinds - it is often used for these purposes and they do not see a big problem here. But manufacturers do not always include it in the package, and buyers do not want to drill extra holes in plastic windows.
How to change the fabric leaving the control mechanism
There are times when it is necessary to remove the roller blind system to replace the fabric in it. For example, the old material has become unusable after an unsuccessful wash, or you have made repairs and need products of a different color. In any case, it is necessary to remove the old fabric blinds. To do this, completely remove all components from the fastening elements, remove the gear and control chain, and remove the shaft from the roll. Then, before purchasing a new fabric, it is advisable to take measurements from the old one.
When purchasing, it is important to choose a size with a technical margin, so that with the curtain completely lowered, at least one turn of fabric remains on the pipe. In addition, the method of attaching the blade to the pipe should be taken into account. There can be two options: the edge is glued to the shaft using adhesive tape, or a special groove is provided in the tube for installing the material. Pay attention to the options for the lower weight bar. When installing it, make sure that the fabric is fixed evenly.
If components break during removal, you will have to purchase a complete system kit. This will cost more than a separate fabric sheet. To prevent this from happening, carry out the work carefully.
Roller blinds can maintain an attractive appearance for a long time if they are used carefully. It is necessary to ventilate the room more often, clean the material and wash the windows. For longer operation of the mechanisms, it is recommended to lubricate them with a special compound. All removal and installation operations should be carried out carefully without sudden movements.
Types of breakdowns and their causes
In order not to create an increased load on plastic windows and not cause premature wear of rotary and folding window hinges, most manufacturers of roller blinds make them from plastic. There are aluminum structures with a long service life, but their high price is unacceptable. Plastic, which gradually degrades under the influence of ultraviolet radiation, high humidity and sudden temperature changes, has a limited service life specified by the manufacturer. This period can be significantly reduced if the curtains are installed or used incorrectly.
- The chain breaks. The reason is sudden jerks when opening and closing curtains, chewing of the plastic chain by pets, jamming of the mechanism due to constant misalignment in the guides or due to drying out of the lubricant in the mechanism.
- The canvas is not fixed in any position. This occurs as a result of breakage of the springs in the lifting mechanism - lowering of the web due to sudden jerks by the chain or due to pulling the web out of the roll or cassette by hand by the weighting agent. Pets that like to hang on curtains can also be a source of damage.
- The upper mounting bracket breaks when the window sash is suddenly opened all the way to the window slope. This does not happen when the sash is tilted for ventilation, but if you open the sash during ventilation and forget to secure it in the lock, then a gust of wind can break the bracket. A similar nuisance can happen when washing external glass. You can accidentally push the sash with your foot, which, resting against the slope, breaks the bracket.
- Mechanical damage, ruptures and cuts of the panel, preventing its raising or lowering. The culprits of this trouble may again be pets, for whom roller blinds prevent them from observing what is happening on the street. To prevent this, you need to leave the curtains slightly open during the day by 10-15 centimeters.
We change the fabric, leaving the control mechanism
Perhaps you are making renovations and the fabric does not fit the new interior of the room, or stains that cannot be washed off have appeared on the fabric. In this case, you can replace the fabric, leaving the cornice. The fabric can be purchased in specialized stores; you need to know the required size for the roller blind. When purchasing, you should choose fabric with special impregnation that does not absorb dust, grease, or moisture. It is necessary to fix the canvas evenly with the lower clamp, otherwise when lifting and lowering the canvas will be uneven.
To protect the fabric from excessive contamination, you need to roll up the curtain when there is no need to use it.
conclusions
As you can see, roller blinds are very difficult to clean at home, so they require careful handling. If you plan to cook food near the curtain, it is advisable to temporarily roll it up, which will prevent dirt from getting on it, the formation of grease stains and other contaminants. The fabric wound around the shaft will be reliably hidden from contamination.
If a stain does form on the curtain, do not let it settle there. The sooner the first measures to clean it are taken, the higher the likelihood of success. First, try cleaning the stain using a regular paper eraser. Soft stain removers can be used on fabric bases, but only organic ones.
A stationery eraser is convenient for erasing small stains
Remember! The main task of cleaning roller blinds at home is not to damage the fabric. It is very easy to spoil, so extreme care must be taken.
If there is a need to iron fabric roller blinds, this can be done using the tip of an iron (very carefully!), but under no circumstances touch the seams with the iron. The surface temperature of the iron should be minimal. Ironing should only be done using gauze or other thin fabric; this will protect the material and its impregnation from excessive thermal effects.
Before ironing the curtains, set the temperature control to the minimum temperature.
To summarize, let’s say that cleaning roller blinds yourself at home is possible, but in the process you will have to face a number of difficulties and limitations. Pay attention to your roller blinds and they will not only last a long time, but will also look great. The main thing is to adhere to the simple rules described in this article and handle the fabric carefully so as not to damage it as a result of washing.
How to remove horizontal blinds
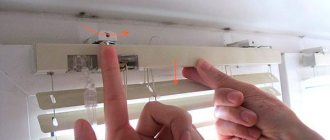
Dismantling blinds (horizontal aluminum) comes down to removing the fasteners holding the curtains. This work can only be carried out with the window closed, so as not to accidentally damage the product. To remove horizontal blinds from a window, just take any screwdriver.
Methods for removing curtains from various fastenings:
- Plastic fasteners. With their help, only small-sized curtains are attached. To dismantle them, you need to move the special fastener from the central position to the extreme position. Thanks to this, the products will be released from the fasteners and can be easily washed.
- L-mounts. They are a structure of 2 plastic clamps that go under the side of the cornice. You can remove the curtains from them by bending the fastening elements with a screwdriver. An alternative would be to move the cornice wall away from the window.
- Twist holder (narrow). It consists of a lock that rotates around a special bolt, which prevents the curtains from falling to the floor. To dismantle it, it is enough to move this part of the structure in the direction away from the window. If you can’t do this work by hand, you need to use a screwdriver.
- Twist holder (wide). This is the most reliable clamp that is used to hold dimensional blinds. Despite its strength, this part can be removed quite easily. The dismantling process is similar to that used for narrow twist holders.
