An inkjet or laser printer requires periodic cleaning of various units and parts. For inkjet devices, problems with cartridges are more pressing and the most difficult thing is to clean them from dried paint on the nozzles. There are no such problems for laser ones, but other troubles await you there in the form of problems with the drum and the cartridge waste compartment.
We will tell you in detail how to clean the printer without damaging it in our article.
Here you will find working instructions for properly cleaning devices from companies such as HP, Kyocera, Brother, Canon, Epson and others. All the procedures described are quite applicable to any model. How often do you clean?
Causes of pollution
In most offices, printer maintenance is carried out from time to time, often immediately after a breakdown. The appearance of dark stripes is one of the main reasons for employees to look under the printer cover and find out what’s wrong. As a rule, clogging and contamination of parts in equipment occurs due to unsuitable ink. Therefore, before purchasing a new ink kit, check whether they are compatible with your printer model.
There are many reasons why a printer gets dirty.
The second common cause of device malfunction is its periodic downtime. Then the pigment thickens and gradually dries out. Ink fragments become clogged in the print head and impair its performance. An option to solve this problem is to periodically clean all parts, especially if the equipment has not been turned on for a long time.
Clean your printer often!
Print Cartridge
This special device, filled with ink, is used as a carrier to supply ink to the printing device of the printer. The quality of the printed image directly depends on it.
Inkjet Printer Cartridge
If the cartridge is clogged, color rendering and overall print quality deteriorate and some colors may not be printed.
When should you clean it?
Regular cleaning of equipment extends its service life. No matter how expensive and high-quality office equipment is, it needs periodic “airing” of its parts.
Printer maintenance should be performed at least once a year.
But there are several factors that should alert you and immediately begin a technical inspection:
- Extraneous sounds that are not typical for the printer should alert you. This means that some part is clogged, displaced, or is wearing out.
- Deterioration in print quality. The printer is designed to print high-quality text and images. Any discrepancy between the result obtained and the production capacity of the device will be a reason to begin prevention.
- There should be no ink stains on the printed sheets. If the printer “spits” ink pigment, start cleaning the equipment.
- Pay attention to any deviation from the norm in the operation of the equipment. This will help you respond quickly and even prevent serious damage.
Is it worth cleaning it yourself?
Equipment can be repaired and cleaned at home. It is enough to understand the device of printers and have all the necessary tools at hand. The master's constant assistants will be cotton swabs, soft brushes with natural bristles, paper napkins or towels.
If you don’t know how to clean the printer, then entrust this task to a specialist.
If possible, you will even need a technical vacuum cleaner to collect dust, toner and paint in hard-to-reach places.
What you will need
Since laser printers use powdered toner during the printing process, you will need to use several special tools to ensure complete removal of fine particles. Below we have outlined the special tools and equipment needed to effectively clean your laser printer.
Microfiber for collecting toner:
is a kind of disposable cloth that, when activated by stretching the fabric, has a non-oil coating that traps particles for easy removal.
Isopropyl alcohol:
- if not then regular alcohol, isopropyl alcohol is ideal for cleaning mechanical equipment as it evaporates quickly, leaving no liquid on the surface. Use it to ensure that there are no residues left after cleaning.
An air atomizer can be used to help reach hard-to-reach areas and blow out toner particles.
Dust mask:
- If inhaled, although not dangerous, powdered toner can sometimes cause irritation. Before opening the toner cartridge compartment, make sure the room is well ventilated and wear a dust mask to make sure you don't have any problems.
Latex gloves:
— when exposed to skin, the toner may cause irritation; wear latex or rubber gloves to prevent this.
— a toner vacuum cleaner (vacuum) is a powerful, portable device that can gently remove toner from inside a laser printer. It's extremely useful, although toner vacuums are expensive, which is why we've listed it as an additional tool. You can also use a regular vacuum cleaner, but be sure to use a disposable dust bag; this is very important so that it can be disposed of later.
How to clean a laser printer
The laser printer cannot be cleaned by running a special program. Everything must be done manually, checking the performance of each part.
You can clean the printer yourself.
Internal cleaning of dust and toner
During the cleansing procedure, it is important to protect the respiratory tract, mucous membranes and skin from the ingress of petroleum products. Wear a respirator or gas mask and take protective gloves.
- Disconnect the equipment from the power source. Even a small drop of cleaning fluid can cause a short circuit.
- Wipe the outer casing with a dry or damp cloth. Often, office equipment accumulates dust for months, which then clogs the working parts.
- Remove the cover, press the latch and pull out the cartridge. Use cotton pads or swabs to draw out the toner.
- Inside the device, clean all corners of dust, paint and dirt using a soft brush. Wipes soaked in a special liquid will also help you here.
- Once the inside of the printer is clean, you can move on to the next parts.
- Do not use aggressive solvents, acetone, nail polish remover, or vinegar for cleaning.
Be sure to wear gloves when cleaning the printer.
Cleaning the cartridge
Instead of ink, laser cartridges use a special toner powder. This is convenient because the problem of drying of the coloring pigment is eliminated. But the print head itself often collects dust and dirt, which impairs its performance.
During active use, cleaning is carried out every three months or at least six months.
There are several alternative ways to clean the cartridge:
- Glass cleaning agent is poured into the cartridge. Using a special clip tool, the remaining toner is pulled out. The procedure is carried out until the outgoing liquid is colorless.
- Soaking in window cleaning liquid. The cartridge is immersed to a level of no more than a centimeter overnight. As soon as the cleaning liquid darkens, stop the procedure.
- Hot method. The essence of it is to hold the working surface over hot steam for 3-5 seconds, and then wipe off the emerging pigment with a damp cloth.
Refill the cartridge or add toner periodically.
The classic method for cleaning cartridges is to separate the pins using an awl, a thick needle or a thin screwdriver. All elements must be cleaned of adhering debris, dirt and toner using a brush and napkins. Ideally, use microfiber that does not leave lint.
Be careful when assembling and disassembling the printer.
After assembling the cartridge and returning all the components to their place, you can refill the equipment with toner.
Image drum
There are several reasons why the photodrum gets dirty:
- strong temperature changes in the room can affect the quality of the part;
- constant high humidity in the office;
- entry of foreign objects, such as paper clips;
- accumulation of dust and dirt.
There are several reasons why the image drum becomes dirty.
The image drum requires cleaning when dark stripes, chaotic dots, and a general gray background appear on the paper when printing.
- After you have removed the cartridge, carefully remove the protective shutter. A part of the photo wall will open to you.
- As you rotate, you can gradually, step by step, clean all visible areas of the drum part.
- If you move it carelessly, waste toner may scatter. Take care of personal protective equipment in advance and cover the floor with unnecessary newspapers.
- To wipe the image drum, use a soft cloth that does not leave threads, lint, or cotton fragments. This will make it difficult for the printer to work properly in the future.
- Do not use sanitary wipes, solvents or alcohol-based liquids. This will ruin the element.
- Specialized stores sell cartridge cleaning kits. This is the optimal solution to a pressing problem.
- At the end of the cleaning procedures, place the image drum in the cartridge and return it to its place in the printer.
If you notice streaks in the photo, clean the printer drum.
Waste bin cleaning
The waste bin is often unfairly overlooked when cleaning the printer, considering the item to be insignificant and not worthy of attention. Toner that is not used during printing accumulates here and is no longer suitable for use.
It is always recommended to clean the printer after a long period of inactivity.
If the hopper is not cleaned, there will be too much powder. It begins to get into the cartridge and onto the photo roller, deteriorating the quality of printing on paper. The hopper also collects dust from the room, which enters the printer along with the loaded paper.
- Depending on the printer model, the waste toner bottle is located in different places. Open this door.
- You can throw away the waste bin along with the accumulated waste. A new container usually comes with purchased cartridges.
- You can save the old container. Then throw its contents in the trash. The bunker must be cleaned using a special vacuum cleaner.
- Remember that toner is toxic, so follow all safety precautions.
Clean the printer carefully.
Need for cleaning
Cartridges need cleaning; printing with them produces defects on the output sheet of paper:
- paint gaps appear;
- the sheet is filled with ink not completely or unevenly around the entire perimeter;
- a color cartridge is characterized by loss of color rendition of one or all shades;
- The printer prints blank sheets without any ink.
The listed problems should be considered as a reason to clean the cartridge only if the ink level in the containers is sufficient. When the ink runs out or the ink level approaches zero, printing may also become worse.
Therefore, first of all, check to see if the ink is used up. You can look at it in the software that is installed along with the printer drivers.
In some models, the amount of ink can be controlled visually by eye, since the containers are made transparent.
Rules for cleaning inkjet printers
The design of an inkjet printer is slightly different from a laser printer. There are more parts that need to be disassembled and cleaned individually.
How to clean the cartridge and CISS
Cleaning the cartridge depends on the printer model. How to clean a printer cartridge if sometimes several elements with coloring pigment are found at once? Each of them must be cleaned separately using a special program or manually. As with inkjet printer cartridges, alternative methods of "hot steam" and soaking work.
After cleaning, allow the cartridge to dry.
The continuous ink supply system (CISS) helps the equipment owner save on original production pigments. As soon as you change the ink manufacturer, you need to wash the CISS. Otherwise, the printing will be of poor quality, and the printer may suddenly break down.
It is recommended to wait a day before putting the cartridge back into the printer.
- Using a medical syringe, use a medical syringe to remove any remaining coloring pigments through the filling holes.
- Using a screwdriver, unscrew the chips and data blocks. Use a syringe to remove the ink from the cartridge and remove the cable.
- Pour washing liquid into the microwave tanks, and then drain into any container.
- The filling agent can be refilled several times until it is completely clean.
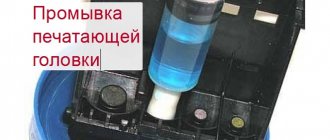
Cleaning the rollers, tray and nozzles
Window cleaner is often used to clean the nozzles. This is a budget and effective option.
- Remove the cartridge and immerse it in a container of glass cleaning fluid.
- The level of cleaning fluid should be such that it does not touch the contacts, but the nozzles are submerged.
- Secure the cartridge so that it does not accidentally tip over, and leave it in this position for a day.
- Dry the cartridge. He's ready to go.
The main thing is to follow safety precautions and use nozzle cleaners that are harmless to the nozzles.
The roller feeds the paper for printing. This is where dust, dirt and remnants of coloring pigments accumulate most actively. Since it is freely accessible, the printer does not need to be disassembled. Simply spray a piece of paper with window cleaner and run it through the roller to print.
The use of acetone and other aggressive compounds is not recommended, as they can “burn” the nozzles.
Cleaning the tray or internal components of the printer is carried out using a software method.
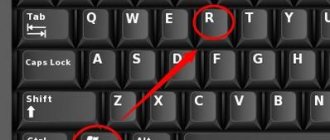
- Load a sheet of paper folded in half into the rear tray.
- Using the settings button, press + until the number 9 appears.
- Select Black mode.
- The paper will pass through the printer and clean the tray along the way.
Cleaning the diaper
A diaper is a special felt pad that absorbs ink while the printer is operating. As soon as the absorbent element is overfilled, the equipment is blocked. The used diaper can be thrown away and replaced with a new one.
Contact your service center if you do not know how to clean the printer.
If you don't want to wait or contact a service center, try washing it yourself.
- soak the diaper in a bucket of warm water for half an hour;
- Wring out and rinse the accessory under running water;
- repeat the procedure if the paint is not washed off on the first try;
- dry well and insert into the printer.
Inkjet machines have hardware cleaning capabilities, which simplifies the maintenance process.
After cleaning yourself, the adsorbent element may become slightly matted and decrease in size. But it is serviceable and can perform its functions.
Fault prevention
Any equipment requires proper care and operation. This helps to avoid many problems. In order for the printer to serve for a long time and without failures, it is enough to follow the following recommendations.
- The room in which the printing equipment is located should be kept clean. Wet weekly cleaning is necessary, since dust is the worst enemy of a printer or MFP.
- You should carefully clean the printer with a vacuum cleaner once a month. This will collect dust particles and ink (for laser printers). Areas wet from paint should be removed with a rag.
- Every printer has a software method for cleaning the printer head. How to start it can be found in the instructions for the device. This cleaning should be done regularly.
- If the printer is color, and most often only black text is printed, then it is worth doing a color test print once a week. Otherwise, the paint may dry out and clog the nozzles.
- When refilling laser printers, experts recommend cleaning the waste ink bin regardless of its filling level.
When cleaning the cartridge, you do not need to do any complex manipulations, but the procedure itself is quite labor-intensive. The easiest option when working independently is to use special built-in programs. If none of the methods considered will lead to the desired result, then it is necessary to remove contaminants from the equipment involved in printing . When this does not help, you should contact the service center specialists. They will accurately determine the cause of the problem and advise options for eliminating it.
Features of devices from different companies
Each printer manufacturer has its own characteristics and hides production “secrets”.
Prevention won't take long!
- HP. The printer is practically not subject to manual disassembly and cleaning of parts. It is trusted to professionals. To remove the cartridge, you need to perform several manipulations: remove the cover, separate the toner compartment.
- Epson. To remove the cartridge, you need to open the front panel and remove the cover. The diaper is secured with several screws. The equipment is difficult to disassemble, especially for beginners.
- Canon. You can easily understand the device of printers. The cartridge can be removed by unfastening the top cover latches.
Each printer requires a different cleaning approach.
What you will need
Since laser printers use powdered toner during the printing process, you will need to use several special tools to ensure complete removal of fine particles. Below we have outlined the special tools and equipment needed to effectively clean your laser printer.
Microfiber for collecting toner:
is a kind of disposable cloth that, when activated by stretching the fabric, has a non-oil coating that traps particles for easy removal.
Isopropyl alcohol:
- if not then regular alcohol, isopropyl alcohol is ideal for cleaning mechanical equipment as it evaporates quickly, leaving no liquid on the surface. Use it to ensure that there are no residues left after cleaning.
An air atomizer can be used to help reach hard-to-reach areas and blow out toner particles.
Dust mask:
- If inhaled, although not dangerous, powdered toner can sometimes cause irritation. Before opening the toner cartridge compartment, make sure the room is well ventilated and wear a dust mask to make sure you don't have any problems.
Latex gloves:
— when exposed to skin, the toner may cause irritation; wear latex or rubber gloves to prevent this.
— a toner vacuum cleaner (vacuum) is a powerful, portable device that can gently remove toner from inside a laser printer. It's extremely useful, although toner vacuums are expensive, which is why we've listed it as an additional tool. You can also use a regular vacuum cleaner, but be sure to use a disposable dust bag; this is very important so that it can be disposed of later.
How to clean the print head in a Canon printer
Cleaning the print heads of a Canon printer can be done using software or manually.
Hardware flushing
When performing hardware flushing, the print head does not need to be removed. The cleaning program is found by the system when the device is connected to the computer or downloaded from the disk included in the package.
This printer requires special cleaning.
A short instruction on how to clean the print head of a canon printer:
- connect the printer, place the paper;
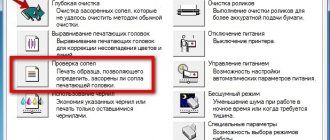
- Through the “Control Panel” on your computer, go to “Devices and Printers”;
- in the “Properties and Services” item, click on the selected icon with the type of cleansing;
- the cleaning system will start via printing;
- print a test page after completing the procedure.
Manual
How to clean a canon printer if you don’t have access to a PC. Only manually.
Manual printer cleaning is the most common.
- place any absorbent material under the head, for example, a napkin soaked in cleaning liquid;
- clean the intake holes, seals and housing;
- after removing all the paint from the head, leave it for several hours;
- clean the head with a cloth and cleanser;
- dry and return the head to its place.
The efficiency of manual cleaning is quite high.
Software cleaning
Many inkjet machines are equipped with built-in automatic cleaning programs. To carry it out, proceed as follows:
- open the control panel;
- go to the printing equipment settings;
- there select the required section - “Remedies and cartridge cleaning”;
- make a test print of a blank sheet.
The operation can be repeated several times. Built-in tools allow you to get rid of minor dirt.
If the function is missing, you can download the program from disk or the Internet and install it. Then in the print settings, select the “Printer Maintenance” section, then you will need to open the print settings and start cleaning. In this case, you must follow the instructions of the program. Most often, the procedure must be performed repeatedly.
When the software method does not help, then you can get rid of the problem in several other ways. For different models of inkjet technology, the algorithms are the same, only the method of accessing the cartridges differs . To do this, you may need a set of screwdrivers with different bits.
The operation scheme, regardless of the chosen cleaning method, is as follows:
- removing the cartridge;
- soaking;
- washing;
- drying;
- gas station;
- installation in the printer;
- control printout.
You must work carefully so as not to smear surrounding objects or clothes with ink.
Dismantling the bunker with mining
We take the part with the waste hopper and pull out the metal axis from the photodrum.
Then remove the photodrum by pulling slowly up and then to the side by the end opposite to the gear.
In the same way, remove the rubber shaft of the primary charge.
Using a Phillips screwdriver, unscrew the two screws on the sides of the metal squeegee.
Remove the squeegee by pulling up on one side.
Underneath there is a waste toner bin that needs to be removed.
Bunker assembly with mining
We assemble everything in the reverse order, first install and screw the squeegee.
Then press the charge shaft on one side and the other in turn, after returning the bushings to their places.
At the end, we return the photodrum to its place or replace it with a new one.
We return the metal axle, previously cleaned and lubricated with graphite grease, to its place.
Lubrication is needed, since this axis simultaneously acts as an electrical contact.