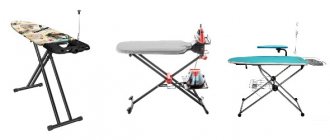
It is impossible to walk around in wrinkled clothes - everyone needs an ironing board. On the one hand, a standard floor device is functional, because it is convenient to iron, but on the other hand, it is irrational: every time you need to lift it, move it apart, walk around it, fold it, and hide it. It takes up a lot of space and is a lot of hassle. Where to iron, how to unload the living space? There is a solution - purchase or make a built-in ironing board.
Types of built-in ironing devices
There are plenty of options for ergonomic, practical ironing devices that relieve space and fit seamlessly into the interior.
Folding
There are several types of folding ironing boards, including the following:
- Classic wall-mounted version of the ironing board. The tabletop-lid (solid wood, laminated chipboard or moisture-repellent plywood) is attached to a frame-frame with a simple folding mechanism, and it is attached to the wall (at two or four points). When folded, the board is positioned vertically; when working, it is positioned horizontally on the floor. There are two possible methods of fixation: without a supporting leg or for (reinforcement) on a stand resting on the floor.
Important!
When installing the classic wall-mounted version of a built-in ironing board, the frame to which the lid is attached remains open. Metallized frame pipes will fit perfectly into a loft or industrial style, emphasizing its deliberate simplicity; disharmony with others is possible.
If the ironing device is hidden in a box with a sliding decorated panel or a hinged door, imbalance can be avoided.
- Ironing board with wall mirror. A two-in-one variation: on the outside there is an elegant reflective surface of any shape or size, on the inside there is an interior device for ironing clothes. The mirror sheet can be hinged - sliding to the side, or hinged - a traditional single-leaf structure using canopies, a box and a movable sheet. An additional advantage of combining two functionalities is unloading the scarce space of a small apartment and its visual expansion. A built-in ironing board with a mirror can be integrated into any interior style by framing the reflective surface with a suitable finishing or decorative material (baguette, molding) - natural wood, wild or ornamental stone, stucco, plastic.
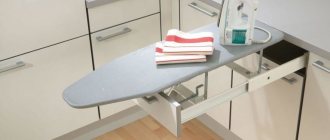
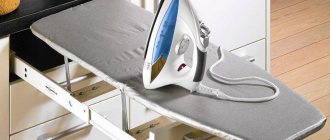
Retractable
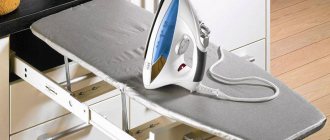
A folding version of the ironing board, placed inside a furniture box (in a cabinet, chest of drawers). It is fixed on the guides by the widened part of the base, the tabletop “breaks” in the middle, folding in half - the narrowed part is laid on the wide one - face to face. The dimensions of the retractable ironing board are proportional to the size of the drawer, stability depends on the quality of the guides.
Built-in
Maximum space saving. The optimal variation for small apartments. It is usually made to order when purchasing a wardrobe or installed with your own hands in both a wardrobe and a kitchen cabinet (a labor-intensive but functionally rewarding process of filing partitions, installing a fastening system and fixing structures).
Important!
In a large ironing wardrobe, it is more advisable to install not a static board, but a rotating or folding board with a built-in socket. In the classic variation of the cabinet with swinging doors - with a folding device and a light weight structure.
Assembly
Now you need to connect the two structures to each other.
To do this, you need to attach one side of the legs (one pipe along the length) to the wooden sheet using self-tapping screws (they should be much shorter than its thickness).
To ensure that the second part is secured, clamps are installed on the opposite side, several can be used to adjust the desired height.
Thus, by performing a minimum of actions, using basic materials, you can get an ironing board that will be no worse than a store-bought one, and even much cheaper.
DIY built-in ironing board
Several built-in variations are possible in the cabinet:
- retractable - a complex design for homemade craftsmen with specialized telescopic mechanisms;
- hidden - in a niche behind shelves or a mirror - requires stable carpentry skills;
- folding - with a simple and reliable fastening and fixing mechanism.
The folding option is easy to implement. The structure consists of:
- ironing surface (you can use a modernized base of a folding floor board);
- folding device;
- frames;
- support attached to the rear wall of the cabinet.
For a DIY installation, it is better to use the practical installation of a static board to the middle shelf (at lumbar level) using door awnings, piano hinges or butterfly hinges (ideally hidden hinges). The upper shelves above the ironing tabletop are filed down so that it can be placed freely when folded behind a closed cabinet door.
The support must be attached to the wall with the same hinges that were used for the table top, and hooks must be installed under it on the bottom (back) side of the board. During operation, the lower support is folded back and secured with hooks to the board lowered onto it.
This version of a hand-made ironing device is stable and maneuverable.
How to determine how high-quality raw materials a manufacturer uses?
The surface of high-quality WPC decking boards has a smooth appearance, the geometry of the product is uniform and symmetrical.
Severe deformation of the profile indicates a violation of the technological process during the manufacture of the product and reduces strength, therefore:
- on the end sections, you need to check the absence of voids and “swelling” of the inner surface;
- there should be no wavy bends on the profile;
- in places of breaks and cuts there should be no foreign inclusions (they are usually gray, greenish or dirty blue), stains - this indicates impurities of low-quality secondary raw materials.
When directly inspecting the product, convince yourself of how high-quality the board is being offered to you.
Rules for choosing functional ironing boards
When preparing to purchase or accept the ordered and installed drawers and built-in ironing boards on the wall, check:
- folding mechanism - smooth lowering, no noise, there should be no doubt about the quality and durability of the material;
- reliability of fastening of the support to a box, shelf or wall and stability of the structure - swaying, dangling in a horizontal position will unbalance the fastener, leading to injury during ironing and breakage;
- weight of the structure - the wall thickness should not hold, but calmly hold the total mass of the ironing board, linen and iron;
- warranty promises and obligations of the manufacturer and installer: no guarantees - refusal to use.
Materials and tools for work
The tools can be as varied as the ones you are most used to. The main one is a saw, but the best option would be to use a circular saw, since thanks to it you can cut the plywood sheet evenly. You can also use a jigsaw.
Anyone who has used a simple saw knows how difficult it is to cut something in a straight line, leaving a perfect edge. Therefore, it is best to use a special tool for these purposes. It is imperative to have a certain number of screws, a hammer, a furniture stapler, piano hinges, bars, and upholstery fabric.
There is not always a need to run to the construction supermarket for planks. If a man is a housewife, then there will always be remains of furniture panels or parts of timber in the house. And this is enough to start work.
The shield must be at least 18mm thick. Planed timber is suitable for the legs. You will have to discard plywood, as it is afraid of water and steam and can warp under the influence of a certain percentage of humidity.
Basic materials
The list of basic materials looks like this:
- board with dimensions 18mm x 1220mm x 300mm (will be used as an ironing board);
- 3 pieces of blocks measuring 35mm x 40mm x 100mm;
- blocks in the amount of 2 pieces, dimensions 35mm x 40mm x 300mm.
To fasten individual components, you need to acquire M10 screws and bolts. To make upholstery, you will need foam rubber and a piece of fabric.
Instead of foam rubber, you can use Armotex covering geotextile fabric, which is recommended to be folded in four layers. The fabric must have non-stick properties and be waterproof. You can use thick cotton fabric.
Devices and tools
Making your own ironing board is impossible without the following tools:
- milling machine;
- drills with drills (0.8 cm - for working with wood and 25 mm - cork);
- electric jigsaw;
- construction stapler;
- planed beams (necessary for the manufacture of supports and folding mechanisms);
- furniture board 18cm thick;
- screws in large quantities;
- soft upholstery material;
- bolts (M10);
- cotton, linen, calico upholstery fabric;
- scissors;
- sewing machine or needle and thread (for sewing a cover).
Some popular models from top-rated manufacturers
Among the available options for built-in boards, there are those that you can follow when making devices for ironing clothes/clothes yourself, or buy and use for their intended purpose - they will last a long time and faithfully. I am glad that they were produced mainly in Russia and the CIS - TriYA, IRON SLIM, Shelf-On, “Lubimy Dom”:
- wall-mounted ironing board “Mermaid” with a chrome-plated pipe frame and an automatic lock - installed quickly and easily, taking up only 8 cm from the wall;
- built-in “Rocket” board with variable installation methods (inside and outside the cabinet), mounting on the right or left rack, with a varied set of ironing surfaces and, what is especially valuable, its maximum permissible load is 70 kg;
- wide built-in ironing board attached to the wall with reinforced brackets with a mirror cabinet from IRON SLIM;
- compact ironing board Astra-mini Eco, built into a cabinet with hinged doors, with a plastic lock included - child protection.
Types and features of steam generators
Steam generators, which are used as separate devices or as components of modern ironing systems, come in two types: self-priming and closed type. In order to understand which one to give preference to, consider the features of each.
- Closed type.
In such steam generators, a boiler of a certain volume is designed for a certain amount of continuous operation. As a rule, these time frames are limited to an hour, and this is quite enough to complete a large amount of work. However, after the specified time has passed, the boiler must be turned off and cooled in order to refill the water, wait for it to boil and start working. - With automatic filling.
This type of steam generator is more practical for those who plan to work for a long time and do not want to waste time waiting. From the name it is clear that auto-topping is the ability to add the required amount of water directly during the operation, and the water is constantly heated, which means that the steam generator can perform a truly impressive amount of work.
Case
For comfortable use of the ironing board, it is necessary to keep its working surface clean. You will need a cover for your DIY ironing board. This will provide the following benefits:
- will protect the structure from contamination;
- will save a person from the need to clean it;
- will increase the service life.
As you can see, the case is a necessary element for proper storage of the above product.
By doing the work on your own, a person receives not only a high-quality finished product. He has the opportunity to enjoy the fruits of his labor and can brag about the work he has done.
Advantages of a homemade board
As practice proves: since people thought of an independent invention, it definitely has its merits. So here are some of them:
- You yourself can adjust the length, width, height of the product. Make an ironing board specifically for the dimensions of the device.
- Of course, one of the reasons for thinking about manufacturing is cost. Many people's budget can afford to create an installation. firstly, the components from which it is built are accessible. And secondly, some of them may already end up in the owner’s house.
- The user himself can verify the reliability and stability of the structure.
- There is no limit to your imagination. The work can be done the way a person wishes: cut out the upholstery to suit your taste and color, from any type of knitwear.
- Easy to use. There are no fancy features that would complicate the process. On the contrary, the “fold and unfold” mechanism is more convenient and does not require much time.
- The opportunity to decide for yourself: to attach the unit to one place so as not to rearrange it every time, or not.
Ease
Ironing devices should not be bulky and weighty, since they are mainly used by the fair half of humanity.
But it is not advisable to purchase products that are too light, for example, on plastic legs; they are often shaky and short-lived.
Reinforced legs are also not a very good option - it makes the structure heavier; the best option is aluminum supports.
What's good about this device?
The first time I saw a similar thing was in 2012 at a furniture exhibition in Moscow.
And if you make this device yourself, it will cost you 5-6 thousand rubles along with a luxurious facade.
You will always find a use for this product. It won't go to waste! Perhaps you have been thinking for a long time about what to give to your girlfriend for her birthday or March 8th, or, for example, to your friends for a housewarming... It can be a great gift made by your own hands.
And at the same time, it will strengthen your self-confidence and give you the impetus to start making furniture with your own hands.
Believe me, such a thing can decorate any interior just with its presence. And if you are smart, you can decorate the facade as a portrait of your beloved girl, a painting or a stained glass window. What will make this product a unique and very expensive gift.
In this lesson we will examine the question of how to make an ANALOGUE of the transformation mechanism for the “ironing board” from chrome-plated pipes d=25mm. with your own hands.
I have divided the manufacturing process into several parts to make it easier for you to find the information you need.
Since these lessons are primarily intended for beginner “do-it-yourselfers,” I filmed several videos explaining the technical aspects of non-standard solutions.
I ask experienced craftsmen not to “kick me for the collective farm nature” of the assembly methods used. But I assure you, the result and appearance of the product in the end is no worse than those products that are sold in the store. And considering that their cost is 5 times lower, you can close your eyes and smile. Because a person ignorant of furniture production will not understand what they have done there.
When cutting a pipe, a dilemma arises. If you cut with a hacksaw, then one blade is enough for 4-5 cuts. Then it becomes dull. The canvas costs 30 rubles. ($1) It takes a long time to saw, but when sawing, dust does not fly around the apartment. When sawing with a grinder, the sawing process goes much faster, but sparks and scale scatter throughout the room and the burning smell lingers for a long time.
Which method should I choose? I advise you to choose the sawing method with a grinder, but cut on the balcony or on the street.
Finally. Having made such a design and used it for a couple of weeks, the idea came to me that other products could be made on this basis.
For example, a folding computer desk or a workspace for a student in a small apartment. Depending on which facade opening system you use (sliding or hinged), you may end up with something like an impromptu office. If the design box is made 200 mm wide, the monitor can be hung on the wall, and shelves for books and all sorts of small things can be placed in the niche.
I will be glad to see your comments and constructive suggestions.
That's all
Thank you for your attention!
Niche preparation
In order to mount the board, you first need to make a niche where it will fit when folded. In other words, this is storage for the ironing board. In frame houses it will not be difficult to prepare a niche - just pull out the inner lining and give it a shape by limiting the space. For this you will need boards.
It is worth considering that the dimensions of the niche must match the dimensions of the ironing board. The lower part (lower limiter) should not be higher than 80 centimeters of floor level. This will allow you to install the board at an acceptable height when unfolding.
In houses made of brick, wood or blocks, this operation will take more effort.
Cutting the ironing board correctly
Acceptable dimensions for an ironing board are 40 in width and 125 in length. The ideal material for this part of the structure is a sheet of plywood. The width should not be less than 12mm. Furniture panels made from any type of wood are also suitable for this purpose.
Now you will need a 1m metal ruler and a pencil. With their help we make markings. In other words, we draw a board on the material. The leading edge needs to be made using a cylindrical object. This could be a saucer, a large roll of tape. Anything that will allow you to draw a curve in a given place. It would not be superfluous to resort to the help of a compass.
After applying the dimensions to the material, it’s time to cut out the resulting shape from it. For cutting curved sections, a regular electric jigsaw is suitable. Straight lines are cut using a circular saw that has small teeth at the end.
Next we move on to grinding the edge and both planes. There are two ways to do this:
- use an electric grinder;
- attach the skin to a wooden block by nailing it with nails, and sand it yourself.
It is worth considering that this type of work involves a lot of dust, so it is necessary to prepare the room. If possible, cut out the ironing board in a specially designated place (workshop, street). Don't forget about the hinges in the place where you plan to attach the board to the niche.
Fixing the board
Having prepared plywood, the thickness of which will not be less than 10mm, we make a retaining leg. This element is simple, and to construct it, it is enough to cut an ordinary stick.
Using a piano loop, attach the leg to the base of the board. Other types of hinges will also work in this capacity. This operation will allow, in the future, simple tilting of the legs when unfolding the structure. It will also be easier to hide when folded.
To make the support more reliable, we attach two equal-sized bars to the base of the ironing board (at the point where the board is attached to the niche). The thickness of the bars should be at least 40mm, and the width should be about 70mm. It is necessary to saw off the edges of these bars. And do it perpendicularly. Among them you can hide a retaining leg.
Covering the main part
An ironing board built into a wall is not considered complete without the last important operation - paneling. Otherwise, how can you ensure comfort when ironing things? For this operation you will need:
For this operation you will need:
- bath towel;
- furniture stapler;
- staples;
- scissors;
- hammer.
Remember that the wrapping occurs after the hinge fasteners are inserted into the board. We wrap a cloth (bath towel) around the surface of the board and fasten the corners with a stapler. The main thing is to stretch the fabric enough so that wrinkles do not form on the base of the board. Those staples that will not clog easily can be finished off with a hammer. Or try repeating the action with a stapler.
The next layer is the facing material - any fabric that suits your taste, but at the same time, is resistant to high temperatures. Using a stapler and a hammer, we carry out the fastening procedure as we did with the first layer (bath towel). Use scissors to cut off excess pieces of fabric.
Installation
Using hinged fasteners, we mount the ironing board in a niche. It wouldn’t hurt to install a swivel stop on top to hold the ironing board. The ironing board is ready!
The features of this design allow you to simultaneously make ironing comfortable and not create difficulties due to clutter in the room.
Cut out parts
The functional wall-mounted folding structure made of plywood sheets consists of the following parts:
- one part - 60*90 cm;
- another piece - 30*90 cm;
- two corners;
- seven strips 5 cm wide of different lengths, one of which is 90*5 cm.
To make parts, use a hacksaw with a fine tooth or a jigsaw, and pre-fix the workpiece in a vice.
