Preparing for work
- Before you begin restoring your favorite wardrobe items, you need to wash and clean the product.
- Select a needle in accordance with the thickness and density of the fabric: the lighter the fabric, the thinner the needle should be, and vice versa. If you use a thick needle to work with light cotton fabric, it will leave holes in the product.
- Threads are also selected according to thickness and color. Ideally, the color of the thread exactly matches the color of the product.
- The edges of the hole should be pre-treated to prevent fraying and further divergence.
Selection of threads and needles
In order to properly sew up tears in pants, as well as in any other clothing, you will need suitable threads and needles
The choice of tools and consumables should be given close attention to avoid deformation of the material, reliability of stitches, ease of stitching, and invisibility of the seam
Using various techniques, you can quite quickly sew up a small hole in a shirt, T-shirt, leggings, jeans or sweatpants. The thread must be selected based on the thickness, color and quality of the fabric.
- If you take it too thin, it will cut the material and tear. When stitching with a sewing machine, stitches may be skipped, the needle may break, the top of the stitch may be damaged, and loops and waviness may appear.
- Too thick leads to deformation of the material and seam divergence.
The balance of thread and needle thickness must also be maintained. If the finishing seam should stand out, then the thread is taken 1-2 sizes thicker. Needles are selected according to the thickness of the fabric, type of work, and type of thread. Thinner materials should be matched with a thin, sharp needle and vice versa. The longer and thicker the working tool, the lower its number on the size scale.
Choose a thread based on the thickness, color and quality of the fabric
Patch
To make a patch, you need to select a piece of fabric that is most suitable for the color and type of material of the product. Both the product and the intended patch must be clean and washed. The patch is sewn on the wrong side. The edges are finished with a hidden seam.
After finishing work, the product should be carefully ironed. If you want to make a trendy product, then you can choose a patch in a contrasting color.
How to raise the eyelets at the seam
Stages of work:
- Using a crochet hook, pick up the loops.
- Gather with a safety pin.
- Close them with a hook, pulling one loop through the other.
- Secure the last one with thread.
- Sew up the hole with the same thread.
If a hole appears like in the picture below, then take tone-on-tone threads.
- Pick up the loops with a crochet hook.
- Assemble the loops according to the pattern shown in the picture. For clarity, a thread of a contrasting color was taken.
- Having collected the runaway loops, bring the thread to the wrong side, pass it between the loops, as in the photo. Remove all scraps inside out.
Darn
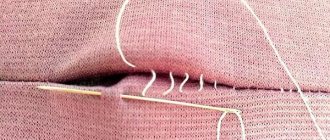
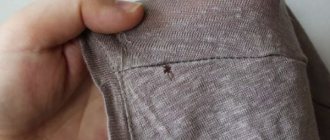
Often, after washing in the washing machine, small holes appear on T-shirts, T-shirts and other knitwear. Very small ones can be carefully pulled together using a thread and a thin needle.
However, if the hole becomes noticeable, it can be mended. In this case, the color of the thread is matched exactly to the tone of the product.
Work stitches around the hole in a circular motion, tie a thread on the wrong side so that the sewn hole does not come apart.
Teach your teenager to thread a needle
This can be more difficult for a teenager than it seems at first glance. First, the teenager needs to adjust the end of the thread. Make sure it is level. And it doesn't fluff.
If, while working with the thread, its tip begins to fluff, then let the teenager wet it. After this, the fluffy parts need to be squeezed with your fingers. So that they unite into a small stick. Which the teenager will subsequently have to insert into the eye of his needle.
If a teenager is unable to work with thread, he can use a special device. The so-called needle threader.
Plastering
This method is good mainly for thick, dense fabrics. To work, you need to select a patch exactly according to the size of the hole; the fabric should be as similar as possible to the main one in color, density, pattern and other characteristics. The product is fixed on thick fabric, the patch is inserted into the hole and leveled. The stitches go either to the main fabric or to the patch in accordance with the pattern. At the end, you need to iron the damp fabric from the back and front sides.
Blind seam
An indispensable technique for repairing textile products. Ultimately, the seam will be invisible and differ little from a machine one.
To make a blind hem:
- Thread the needle and tie a knot.
- Pass the needle through the wrong side so that the knot is not visible.
- Connect the edges of the hole with a stitch and stretch the thread.
- Tighten so as not to deform the fabric.
- Bring the needle inside out again and make a knot. This method is suitable for completing any work on a hole.
Application
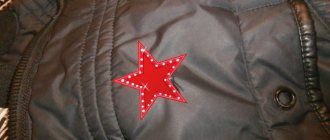
We can say that this is a kind of patch, which is a picture that is sewn or glued with an iron onto the damaged area. The convenience of this method lies in its ease of use and variety of options.
First, the edges of the hole are treated to prevent spillage, the product is washed, the applique is laid out evenly on the surface and ironed (if it is a thermal sticker) and basted and sewn (if it is just a patch).
How to mend jeans
If your pants are leaky, the easiest option is to make an appliqué.
For men - made of leather or denim material, and for women - the flight of imagination is not limited.
You can also watch a video on how to mend a small hole:
In parting: now all things will be saved, because there are many ways to sew up a small hole in any clothing.
Using a sewing machine
If you have a sewing machine at home, the process of sewing up torn items is greatly simplified. In this case, the seams are more invisible and neat, and the final result can be obtained in a shorter time compared to the manual method.
If damage to the product occurs along the seam, then there is nothing easier than restoring it along the existing holes from the needle.
Shirt repair
For home use, a men's shirt is easier to repair. It is enough to cut out the patch, glue it with hot-melt adhesive web and sew it on. But if the item is official, then men’s shirt repair may include:
- repairing cuffs;
- collar repair;
- complete restoration;
- use of patch pockets.
If the cuffs on your hands are frayed, then it is permissible to simply turn them over. Otherwise, the edge is cut off and replaced along the entire length. For single-color models, synonymous and contrasting fabric is used. For striped or checkered options, choose a material of the same shade as the pattern. Repair of shirt cuffs is carried out according to the following algorithm:
- completely strip off frayed parts;
- carry out cutting on new fabric;
- use old shirt cuffs as a pattern;
- sew new parts;
- sewn onto a man's shirt.
You can also repair a shirt if serious holes appear, when the patches and seams are too noticeable. In advance, purchase braid in a contrasting color, adhesive interlining, thread, and safety pins from a sewing store.
To prevent the damage from spreading, it is glued with non-woven fabric on the reverse side.
For repairs, a thick braid is used; it will help restore cuts on the surface.
Then the braid is applied to form a pattern. If it is next to a pocket, then you can “circle” the tape around it. It is permissible to sew a contrasting thin patch and then duplicate it on an undamaged surface for symmetry. Repairing a shirt is often complicated by unusual materials. In this case, you can use new material on the cuffs and collar. If the damage is on the sleeve, then the product can be radically altered:
- Take measurements up to the elbow. They are transferred to a man's shirt.
- Cut off excess fabric. Process the edges.
- Fold the edge over and stitch. It is permissible to apply braid.
- This makes it easy to turn a long-sleeved shirt into a short-sleeved one.
If only the elbows are leaky, then you can apply decorative patches from a material of a contrasting shade. The main thing is that the products are sewn symmetrically. The repair is easy to do yourself, without resorting to a sewing machine. There are alternative ways to repair such products.
Creative approach to renovation
If there are several holes, you can disguise them with beautiful satin stitch embroidery. Decorative stitches will quietly hide imperfections. It is permissible to use appliqués to match the fabric. This approach will not only hide the flaws, but will also seal the edges of the tears, preventing them from enlarging. In an inconspicuous place, a hole can be easily leveled with glue.
The glue will make the material rougher and less flexible.
The composition can also change the color of the product, so such procedures are carried out only in inconspicuous places. Use special glue or adhesive gel for textiles. It is not always possible to repair a men's shirt yourself. If in doubt, it is better to entrust it to a professional.
In most cases, thick tape is used for repairs. It will help restore frayed cuffs, the lower part of the product, sleeves, and cuts on the surface. The main thing is to make the markings in advance and carefully lay an even line on the sewing machine.
Holes in knitwear
After washing in the washing machine, small holes may appear on knitwear.
To sew them up you need:
- Choose threads to match the color of the fabric.
- In a circle, hook each loop from the wrong side.
- Fasten the thread from the wrong side.
This method is also suitable for knitted items.
How to repair a sock
This problem is familiar to every housewife.
Stages of work:
- After threading the needle, tie a knot. From the front side, pass the needle inside out to leave a knot there.
- When sewing up a hook, grab all the loops from one edge and the other.
- When finished, pull the thread so that it is hidden in the seam without being pulled out. Pull the seam slightly to the sides to straighten the thread. Pass the needle inside out and secure the thread.
Holes in jeans
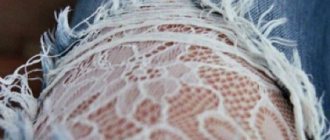
Jeans most often tear at the pockets, between the legs and at the bottom of the legs. To repair denim, it is better to use machine stitching. First sew the hole lengthwise with several lines, then crosswise, imitating weaving fabric.
You need to work on the wrong side; on the front side the darning will be practically invisible. If the location of the damage allows, you can use contrasting threads or make the weaving more “loose.”
Holes in outerwear
In the case of outerwear, you will most likely have to rip the lining to get to the wrong side of the damaged surface. But if the tear occurs at a seam, you can use a hidden seam and quietly sew up the jacket.
Or use a patch or iron-on sticker. If the damage is large and in the center of the product, it is better to contact the studio.
How to sew a lining
Many jackets use inexpensive material as lining - artificial silk, polyester, satin, satin, and less often viscose. When clothes are worn regularly, holes appear in the seam area, which over time turn into large holes.
How to repair a jacket lining:
- turn the jacket inside out;
- select the desired thread color;
- thread the needle;
- cut off the frayed part of the fabric along the edge of the hole;
- Sew the lining by hand using a stucco stitch.
If the fabric delaminates, carefully treat the seam with liquid glue - Moment, Second. If the hole appears in a visible place on the lining, the seam is masked. To do this, use a piece of adhesive non-woven fabric or a patch based on hot-melt adhesive.
In half of the cases, holes in the lining occur in the seam area. If repairs are not done in a timely manner, they increase every day. To repair a broken seam, use a sewing machine:
- set straight line mode;
- adjust the stitch length (optimally 1.5 mm);
- fold the two halves of the lining and clamp it under the machine foot;
- sew, making a 0.5 cm long bartack at the beginning and end.
To ensure that the lining made of artificial silk or satin does not come apart along the seam, sew bias tape.
Holes in bed linen
Holes may appear in the center of the sheet as it wears out. It will not be possible to sew them up effectively, since the tissue in this place is thinned and prone to new damage.
You can restore the product by cutting it in half and sewing the edges together. Hem the new edges.
- Tears in your favorite things are not always a reason to say goodbye to them.
- There are many ways to discreetly, beautifully and originally disguise damage.
- You just need to prepare the necessary materials and work a little.
Depending on the nature of the damage, the type of fabric and the purpose of the product, you can easily make repairs and breathe a second life into your item.
