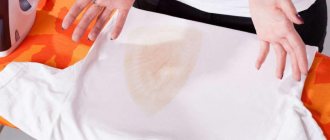
A hook in a visible place gives even a new item a sloppy look, and can also turn into a hole or arrow. Fortunately, removing puffs from clothes is quick and easy. To do this, you only need a sewing needle and another 5 minutes of free time. The main thing is not to rush and follow the rules exactly. For dresses, trousers, and different types of fabrics, the technique for removing puffs is slightly different.
Where do the clues come from?
Tights appear on almost any thing, and this happens for various reasons.
- Wool and other natural materials are fabrics with soft threads. Over time, they wear out, causing puffs to form on clothing.
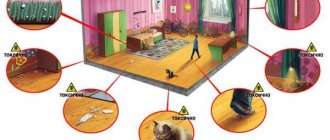
- Corners of furniture or heavy objects, protruding parts of fittings, poorly tightened screws or nails that are not driven in completely are the most common reasons for the appearance of puffs in clothes.
- Sometimes such unpleasant defects are formed due to cat or dog claws.
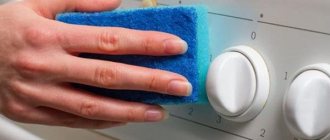
- Improper care: failure to follow the washing and drying regime, improper ironing is another reason that can lead to the formation of puffs. In addition, washing in a machine without using a reliable conditioner is a sure way to cause defects in things.
Installation steps
Regardless of the design option, how to hang a cornice on plasterboard or on a concrete ceiling, the stages of work will be as follows:
- Dismantling the old structure.
- Caulking or sealing unnecessary holes after dismantling. Under no circumstances use old holes for new fastenings, as... the entire structure may subsequently collapse.
- Measuring the length of the slopes from one edge of the window to the other to calculate how much the new structure will protrude on each side of the window opening. The future round curtain with rings should be longer than the width of the window covered with curtains and protrude symmetrically on each side of the window by at least 15-20 cm. In the case where the curtain has a design with hooks, this point with the indentation norm does not play a role.
- Assembling the cornice on the floor, determining its length.
- Drawing a marker using a tape measure and a building level to mark the future mounting location on the wall or ceiling. You need to draw with a marker carefully so that, if necessary, the marks made can be removed without leaving a mark on the surface of the wallpaper or ceiling. For the convenience of performing this manipulation, it is advisable to involve an assistant who will control the evenness of the line.
- Drilling holes according to the markings, into which the curtain will then be fixed to the dowels. If there is an error when drilling a hole, smaller dowels can be driven into it with gentle blows of a hammer.
- Fixing the device with dowels or screws.
How to remove strings on chiffon
Chiffon is a beautiful, but not the most practical fabric, which often causes snags. To remove them, you need to prepare a thin needle with a wide eye. Thread a thread through the eyelet so that it is double.
The needle is carefully threaded through the puff, and then the thread is pulled so that one of its tails passes through the loop and the other remains outside. The ends of the thread are tied in a knot. With a needle you need to pierce the fabric as close as possible to the place of tightening, best of all - into the loop from which it was formed.
Using a thread with a knot, carefully pull the puff to the wrong side. The fabric should not be stretched, as this may cause a hole to appear.
Thoroughly steam the repaired item with an iron in steam mode or through a damp cloth.
Removing pills from fabrics
Another defect accompanying puffs that forms on the surface of the dress is lint intertwined into a small ball. Knitted and synthetic fabrics are prone to this phenomenon. The pellets do not affect the strength of the material, but they spoil the beauty of the clothing: it gives the impression that the dress has been worn for a long time.
To remove formations from lint, small brushes with a sticky roller inside are made, which are sold in a sewing supply store. The mechanism is simple to use:
- lay out the dress on the table;
- run the machine from the top of the clothing to the bottom and back;
- repeat the procedure until all the pellets disappear.
To remove strands of lint from large knitted items, this method is not needed: the strands are simply cut off with nail scissors. Another source of pellets is pet hair.
A mechanical brush will also cope with them, but periodically the mechanism must be cleaned of the fibers accumulated inside. Regular washing will not get rid of puffs and pills.
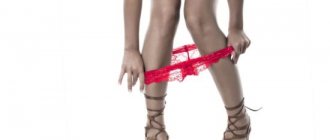
How to remove puffs on tights
Defects on thin tights or stockings occur very often, but they can be dealt with. The exception is very thin tights up to 40 D, on them traces of puffs are too noticeable.
The sequence of actions in this case is similar to repairing satin, chiffon, and silk. It is convenient to use not an ordinary sewing needle, but a surgical one: it is thinner, but with a larger eye, so it is easier to work with it.
If the loop on the tights is not only tightened, but also dropped, you can carefully pick it up, as if knitting it to the required height, and then bring the last loop inside out. It must be secured with a thin thread with a knot. For light-colored tights, needlewomen sometimes use long brown hair - it holds the material well and is almost invisible.
Prevention
It is unlikely that it will be possible to completely protect clothing from snags. But you can minimize the risk of their occurrence.
Prevention of puffs is as follows:
- Wash things correctly. Before washing, check the label information. For delicate fabrics, use the appropriate washing machine cycle. It is better to wash especially delicate items by hand. You should also use soaking and aggressive chemicals to a minimum. Improper care will cause the fabric to wear out quickly and increase the risk of snagging.
- Handle wet clothes with care. When wet, the material becomes especially vulnerable. It is unacceptable to twist things too hard or dry them with an iron.
- Store delicate items and expensive clothes in a case. It happens that puffs appear right in the closet from other clothes. They can be left behind by locks, brooches, rhinestones. The cover will protect your things from adverse external influences.
- Use conditioner when washing. It creates a protective film that improves the wear resistance of the fibers. Having lost their integrity, “fluffy” threads cling much faster than strong and smooth ones.
Almost any kinks can be repaired. The larger the threads, the easier it is to do this. Usually repairs do not take much time. On synthetics, the hooks are stretched; on knitwear, they are removed with a hook or a needle. If you doubt your abilities, you can take the clothes to the studio. They undertake to correct even complex defects.
How to remove a snag on knitwear
If the problem on a knitted product is limited to just a hook, then the method described above with a thin needle will help save the situation. If the thread breaks and the loops begin to fall down, the defect is eliminated using a special knitted hook.
The track is darned from the bottom up, and the last loop is secured from the wrong side. Finally, the knitwear is ironed and steamed. This is required to hide the renovated area.
How to iron trousers: the necessary technique and algorithm of work
In order to properly iron your trousers, you will need a good iron and a properly organized ironing area. Without all this, you won’t be able to get rid of folds and bruises, or make beautiful, even arrows. Ideally, the iron is equipped with a temperature switch and a steam supply system. If you have an old Soviet iron, it’s also not a problem. In this case, always use damp gauze, folded several times. If you are the happy owner of a vertical steamer, then with its help you will be able to smooth out even the most difficult bruises right on the spot.
Using a special attachment you can make straight arrows without distortions
It is better to iron trousers on an ironing board, but it can be quite successfully replaced with a kitchen table covered with a thick blanket. Auxiliary items will also come in handy:
- ironer;
- tailor's pins or stationery clips (binders);
- spray bottle with water;
- terry towel;
- sheets of cardboard or thick paper.
Trousers, like other types of clothing, are recommended to be ironed from the inside out or through an iron. This will protect the fabric from the formation of lasses, shine and scorching. Pins and clips are useful when ironing creases, as they are used to secure the instep and side seams. A spray bottle is used to additionally moisten the fabric so that folds can be ironed out better, and a terry towel makes ironing some hard-to-reach places easier. A sheet of cardboard is placed under the burlap pockets or seams so that they do not print on the outside of the trousers after ironing.
To iron trousers you will need an iron, ironing board, ironing iron and clips
Temperature conditions for ironing trousers made of different fabrics
Before you start ironing, you need to read the information on the label. The fabric composition and care recommendations should be indicated there. Depending on the material, you need to choose the optimal temperature regime.
The label shows pictograms indicating ironing parameters and product care
Knowing the composition of the fabric, it will be easier to select the correct temperature setting on the thermostat:
- wool, mixed fabric - wool mode, number 2 or two dots;
- polyester - silk, nylon mode, number 1 or one dot;
- cotton, linen — mode cotton, linen, number 3 or three dots;
- cotton + synthetic - iron like wool, but with pressure.
The wool is not ironed with pressure, but steamed, barely touching the fabric with the sole of the iron. Cotton and linen are ironed with pressure using a damp iron. Synthetic fabrics are ironed at a minimum temperature only through gauze. If it was not possible to determine the composition of the fabric, then ironing begins from the inside out at the hem of the trousers.
The type of fabric is also taken into account. If there is lint, the product should be ironed, if possible, only on the reverse side. If this is not enough, then the iron is moved in the direction of the pile, that is, from top to bottom, barely touching the surface of the fabric.
Table: recommended ironing parameters for different types of fabrics
| Material | Steam quantity | Steam quality | Temperature, °C | Features of the iron |
| Cotton | Average | Wet | 180–220 | Need pressure |
| Linen | A lot of | Wet | 215–230 | Need pressure |
| Cotton + linen | A lot of | Wet | 180–220 | Need pressure |
| Wool | A lot of | Wet | 160–170 | With steaming |
| Polyester | Very little | Very dry | 160–200 | Without water |
| Cotton + synthetic | Average | Dry | 160–170 | Ironer |
| Wool + synthetic | Average | Little moisture | 160–180 | Ironer |
| Cotton corduroy | Average | Less humid | 180–190 | Hem movement |
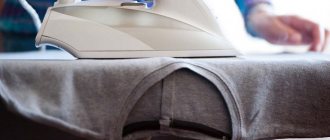
Turn it inside out. First they iron the upper part: the burlap of the pockets, underneath them. The burlap of the trousers is ironed from the inside out. To ensure that the trousers fit well on the figure and do not wrinkle at the seams, the side and crotch seams are ironed. The side seam is ironed from the waist down, the step seam is ironed from the bottom of the trousers upward. The trousers are turned on the face. Unfasten the zipper, open its different sides and iron the middle seam. Stroked in the buttocks area. To iron the middle seam of the trousers, you need to open the zipper. Iron the belt first on the front half, and then on the back
The trouser waistband is ironed from the outside. If there are folds that turn into creases, then we also pay attention to them. Iron side and back pockets. Side pockets are ironed from the front side, pulling the trousers onto the ironing board. Place a folded towel inside the trousers or put it on the edge of the board. Iron the codpiece and the front of the trousers
The codpiece is ironed with the tip of the iron. Fold the trousers in half and begin to form the arrows. After finishing work, the trousers are allowed to cool for 15 minutes, or preferably several hours.
How to remove puff from wool
Woolen knitted items are repaired in exactly the same way. If we are talking about clothes made from bouclé threads or products made with embossed knitting, then puffs and tracks from dropped loops can easily be eliminated even with a regular crochet hook. When there is no hook at hand, use a large needle.
If the hook is small, it is enough to pull it to the wrong side and iron it. If the thread that got caught and pulled out of the fabric breaks, you need to attach a thread of the same color to it, carefully pick up the dropped loops with a crochet hook, and knit the missing rows.
Lifehack 8 – toothbrush
A regular toothbrush will help remove pellets from a long-pile sweater.
- Lay out your clothes on any surface so that it is convenient for you to clean them.
- Then use a toothbrush to comb the areas where the pills have formed on the clothes. This should be done easily, without pressing hard on the fabric.
- After cleaning your clothes with a toothbrush, you will need to wash them with a special powder for delicate fabrics. If you can’t figure out how to remove pills from your pants, then take a closer look at this method.
Advice:
If you love angora and wool clothes, the easiest way is to purchase a separate brush for cleaning these clothes. It is best to use a soft toothbrush to avoid damaging the fabric or snagging threads.
How to remove puffs on outerwear or thick fabrics
This can be done quite simply. You will need a needle with a large eye - its size should be such that the craftswoman can work comfortably. It is best to choose a medium-sized tool.
- Insert the needle next to the puff - the distance between the defect and the tool should be about one millimeter.
- Press the needle in so that the eye is level with the hook thread.
- Pull the loose thread through the eyelet.
- Bring the needle and hook inside out.
You cannot cut the tightening thread - this may cause a hole to form. It is better to take a thin thread of a similar color and secure it on the wrong side with a couple of hidden stitches.
If this has led to deformation of the thread on the outer knitted garment, the ends of the break must be brought to the wrong side. There they are connected with matching thread, after which the loop can be tightened. This must be done carefully so as not to spoil the canvas.
General rules
Any fabric is susceptible to tightening, but the fleecy and thinner the material, the more often this problem occurs. The loose weaving of the threads causes them to cling to different surfaces and “jump out” out.
There are two ways to remove a snag:
- bring the thread to the wrong side;
- press it into the fabric, releasing the tension on both sides.
It is better to solve the problem in a radical way, that is, thread the thread into the fabric.
If you simply move it to the wrong side, it is likely that it will return back when you try to relieve the tension. If you put all the threads in place, this will not happen. There is also a third way to deal with puffs - stretching the material. However, it is not suitable for all products. Most often it is used when working with dense synthetic fabrics.
General rules to follow:
- Prepare the necessary tools in advance: a thin sewing needle, threads of a suitable color, a crochet hook.
- If the loops are small, it is better to use a magnifying glass.
- You should not try to remove the puff by weight. In this position there is a risk of breaking the thread. Once the integrity is damaged, it will not be possible to straighten it.
- You can finally put the thread in place if you go over the item with an iron or steamer.
Advice from Mobile Tailor
- Do not try to test the strength of a thing by stretching it in different directions, as when removing small puffs
- Carefully remove the curtain from the curtain rod and the clothes from the hanger, wrap them with the damaged part inward to avoid further injury
- Take it to a repair shop
We constantly have to deal with the consequences of sharp claws, snags from rhinestones, and tightening from “sharp” fittings. The Mobile Tailor technicians are guaranteed to help with clothing repairs.
What not to do?
In order not to completely ruin the thing, you cannot do the following:
- You should not pull the fabric in different directions, trying to restore its integrity. This method of returning the loop to its place is dangerous because the entire weave may come apart.
- Do not try to cut or rip the thread. The tightening will continue.
- It is forbidden to wash a product with puffs. If the drum rotates vigorously, the damage will only worsen.
How to prevent puffiness
It is not possible to completely protect clothing or home textiles from snags, but you can minimize the risks. Various tips like “spray new tights with varnish” or “keep them in the freezer” are useless. It is better to follow simple rules that will extend the life of your clothes.
- You should not wash things too often, choose an intensive washing mode, high water temperature or spin at maximum speed. This leads to wear of the fibers and accelerates the formation of puffs.
- It is better to wash delicate items (tights, underwear, chiffon or silk dresses) in a special bag that will prevent the formation of puffs.
- Try to wash clothes on a delicate cycle, without wringing too hard.
- Fabric softeners will help extend the life of clothes and protect the fibers from wear.
If a tightening appears, but it is impossible to eliminate it, embroidery or applique at the site of the defect will help.
<< Back to Lifehacks Studio
When is it not necessary to iron bed linen?
There are situations when ironing things for sleeping is not necessary. For example, when the washing machine has an “iron” mode.
“Easy ironing” means steam treatment
After washing, take out the items, spread the items out on a flat surface, and leave to dry
It is important that there are no folds. Smooth with your palms. Items washed regularly this way have been found to last longer.
They absorb moisture (such as sweat) better. It is also important to save money when paying for electricity, as well as saving time. Do you need to iron bed linen that contains terry fabric? No. Using an iron makes it less pleasant to the body.
If the bedding is made of terry fabric, you cannot iron such a thing - it will become hard, rough and unpleasant to the touch
Tips for those who iron bed linen:
- Check for stains;
- Try to iron things from the inside out; It is better to iron bed linen from the inside out
- If there are stuck-on applications, use a grid; Protective net for ironing clothes
- Iron items along the seam line, from beginning to edge; We iron things along the longitudinal and transverse threads to avoid their deformation
- Before you start, spray your items with a spray bottle. Leave for 5-10 minutes. The spray bottle additionally moisturizes the fabric.
Arguments for and against ironing are inappropriate in some situations. Bed linen must be ironed if:
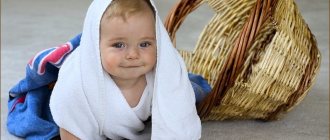
- There is a small child in the house. Sets for newborns up to 3 months should always be ironed. This is due to the small immunity of infants and interaction with many pathogenic microorganisms provokes frequent diseases.
- There are people in the family who have acute respiratory infections or flu. Additional heat treatment of bedding will help kill germs and prevent the spread of infection. Washing the kits after patients should also be done at a high temperature of 90°, if the kit is made from natural fabrics.
- After an infectious, protracted or skin disease. The bed on which the sick person was lying should be ironed well after washing and turn on the steam mode.
- Attacked by bed lice, bedbugs or ticks. Ironing in this case plays a disinfecting role and should not be neglected.
- There are guests in the house who stay overnight. Making a rumpled bed for them means putting the hostess on the bad side. Yes, this is not hospitable, because only the best is offered to friends and relatives.
We have discussed the pros and cons of ironing, now let’s list the situations in which it is necessary to iron bed linen:
- If you have a baby at home. Newborns have very delicate and sensitive skin, as well as immature immunity. Therefore, their bed linen and personal belongings need to be ironed after each wash, on both sides.
- If one of the household members suffers from a contagious skin disease, you need to carefully iron all household textiles;
- In case of ARVI or infections, you need to disinfect clean bedding to prevent the spread of the disease to other family members;
- If parasites are found at home - ticks, bedbugs, lice, etc.;
- If you bought new bedding.
Read more about the last point. No matter how clean and tidy a brand new set may seem, it definitely needs to be washed and ironed.
- Who knows how long it's been gathering dust on the counter?
- Some manufacturers, in order to improve the presentation and prevent paint fading, treat the material with chemical compounds that can cause allergies;
- The coloring pigments themselves may not be washed off well during the production process of the kit, so they need to be rinsed thoroughly;
- Before the bed came to you, it may have been touched and felt by dozens of hands. Brrr;
- The new matter itself is hard and even prickly. Wash it with conditioner and iron it - you will immediately feel the difference.
We suggest you familiarize yourself with the algorithm for washing clothes in a washing machine