How to stretch a fur hat at home in 5 minutes - practical tips
But if you are not considering buying a new headdress, let's try to stretch a hat that has lost its shape and size at home, this will take a maximum of five minutes. For this purpose you will need:
- tape measure,
- some round object as a blank,
- kettle,
- spray bottle and hot water.
At the very beginning, the head circumference is measured using a centimeter tape, then a round object is selected that will be as close as possible to the size of the head. You can use a jar, pan or lampshade. A prerequisite is that the hat should be pulled onto the base with difficulty.
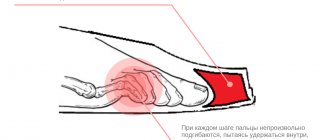
The water in the kettle is brought to a boil, after which the lid is opened and the cap is held over the steam, and in such a way that the steam gets inside the fur product. This procedure should not last more than five minutes. After the product has steamed perfectly, use force to pull the hat onto the prepared item and do not remove it until it dries completely. As a rule, this moment comes after a few hours, and after removal you can make sure that the product fully matches the selected block, and therefore has the desired size.
There is a simpler method, which also makes it possible to stretch a fur hat; it does not involve the use of steam. It will be replaced by a little sprinkling of the hat with hot water from a spray bottle. After this, the hat is also pulled onto a specific surface and remains on it until it dries completely.
All the above operations can be performed several times, constantly increasing the blank. If you are not sure that the product will retain its quality after this treatment, you can take it to a specialized workshop. Employees of such companies have all the necessary equipment and chemical compositions to achieve this goal, including. In this way, you can save your own time, as well as nerves, and at the same time be sure that the product will be returned not only in the right size, but also safe and sound.
In order for a fur hat to retain its shape and size for a long time after such a procedure, it is necessary to strictly follow the rules for caring for such products and storing them. For example, after the end of the winter season, it is imperative to dry the hat in the air, but in no case exposing it to direct sunlight. It is also worth periodically cleaning the hat of dirt and combing the fur with a special brush.
It is important to know for what reasons a fur hat can lose its shape and size. This may occur due to disruption of special processing technologies during the production process, which usually promote elasticity.
In some cases, the hat may shrink if the inner surface gets wet. Deformation of the product may occur due to improper storage in the summer.
If you couldn’t restore the hat, there’s nothing you can do, you’ll have to take our advice, written at the very beginning of the article, choose and order hats from the manufacturer
, thus, you will buy a hat cheaper than in one of the boutiques, and the choice of models differs significantly from what is presented in the store, for example:
Ushanka hats look stylish and respectable. They provide great warmth in cold and frosty winters. Such hats have become indispensable for use in the army and police. However, fur requires careful and thorough care, otherwise over time it loses its presentable appearance, wears out, shrinks and becomes deformed. This causes the headpiece to shrink and become small.
In addition, an earflap hat may shrink due to improper storage, use and washing. Fur and skin react sharply to temperature changes, humidity, hot water and various manifestations of bad weather. After an unsuccessful wash, heavy rain or wet snow, a headdress can easily lose its previous shape. And if stored for a long time in a humid or hot room, especially when folded, the product will become deformed.
You can stretch a winter fur hat with earflaps in a professional workshop. Or you can use home methods, but be careful not to completely ruin the material. Let's look at how to stretch an earflap hat at home.
How to wash a hat so that it shrinks
Hats that have lost their original appearance can be restored by washing and drying them, following the manufacturer's recommendations. You need to clarify the composition, and then familiarize yourself with the rules of care. When washing, you should use only those products that are used for delicate fabrics and woolen items. The temperature regime must be observed, and the water after rinsing must drain on its own; twisting must be completely avoided.
Attention! If the label indicates that machine washing is allowed, you need to put the hat in a special bag and set it to a delicate cycle. It should be dried on a terry towel.
The ancestors of modern caps
Modern materials that appeared on the market were adopted by fashion designers. Therefore, the cap has become one of the must-have purchases for fashionistas and fashionistas. Unique and completely new models of caps were developed, intended not only for young people, but also for older citizens.
The modern cap has erased age boundaries and restrictions. She fell in love and became accessible to almost all age categories, without exception. Caps, baseball caps and bonnets are popular among men and women of all ages.
The new cap looks great and pleases its owner with an interesting shape. However, like any item of clothing, after a short time it loses its appearance, gets dirty and urgently requires taking measures that will help restore its original appearance. The ones that need the most care are those worn by children, as well as summer caps. Weather conditions, which can change dramatically in a matter of minutes, can turn a wonderful, perfectly shaped cap into something unattractive.
Having succumbed to the desire to bring the cap back to life, it is important to choose the right method. For example, washing will only make the situation worse.
How to reduce the bulk of a felt hat
Finding the best hat for yourself is not so easy.
Sometimes everything fits perfectly: color, cut, style - and it’s impossible to resist buying. But the size is a little too big - and the entire expected effect from the model comes to nothing.
Unfortunately, it will not be possible to reduce more than a few sizes even in a special workshop, but you can reduce a felt hat the way professionals do it by half a size or a size even at home.
How to make a felt hat smaller at home
First, let's remember the properties of the material - this is dense, high-quality wool that has undergone special processing under production conditions. Take a look at the label: it is clearly not recommended to heat treat it, much less wash it. Even more, in such models it is not recommended to be exposed to any precipitation - snow or rain.
So you won’t be able to shrink a felt hat the way you would with a regular woolen item. By soaking it in warm water and drying it even in the most delicate way, you risk losing the shape of the model forever. You should also forget about the possibility of ironing the model with steam - as a result, you can only spoil the texture of the material.
The material is quite capricious, and instead of a silky and plastic texture after such an operation, you risk getting a texture that is rough to the touch and hard.
You should also forget about the method that works great with knitted hats: hold it over steam and let it dry, giving it the desired shape. The felt from such a procedure stretches perfectly, and you risk getting a completely unexpected and unwanted result.
First of all, the size itself reflects the literal circumference of the head. In different measurement systems it is calculated in inches or centimeters.
But the system is quite simple, for example, the Russian “56” corresponds to the international S. it exactly corresponds to a head circumference of 56 centimeters or 22 inches.
In English or American standards, this is size 7, but the difference or step is easiest to calculate in centimeters.
So, we will need: matching threads, a needle and a tailor's seam ripper - you can buy it at any craft store.
You will also need a foam rubber strip, no more than 0.5-0.7 centimeters wide, and no more than 60 centimeters long.
Instead of foam rubber, you can take any light and plastic material, for example, roll a piece of wool into a rope, giving it the desired shape. But as practice shows, foam rubber is more convenient.
Then carefully manually restore the ripped seam - this is what you will need for thread and a needle. A blind or “back needle” stitch with a minimal stitch pitch will not leave a mark on the outer surface of the model.
Do not use an iron under any circumstances. This is the way to reduce a hat by size, suitable for both models with narrow and wide brims.
Quite often the question arises: “how to reduce the volume of a hat?” Not only the size, but also the crown, and sometimes the brim. It is their dimensions that influence not only the correct “fit” but also the overall impression. As you know, the width of the brim and the height of the crown are a matter of personal choice.
Thoroughly moisten the towel with a spray bottle, fold the towel so that it takes on any soft and round shape. Place a hat on it and smooth it out with your hands. Leave to dry at room temperature. At this stage, you can make an elegant longitudinal “dent” (as in men’s models) - just form it with the edge of your palm.
Too wide brims don't suit many people. But there is an opportunity to correct this shortcoming. Moreover, a material such as felt does not require additional processing of the edge - it does not crumble and clearly holds its given shape. Using chalk and a piece of soap with a sharp edge, trace the circle of the margins to the desired size. Sharp tailor's scissors and even a good knife (or a utility knife) will cut the edge just fine.
Six ways to restore a felt hat
- If your felt hat gets wet, stuff it with crumpled paper and leave it to dry in a warm place. Wet material should be combed with a brush in the direction of the pile. This method will help maintain the shape and appearance of corduroy, velor and other fabric hats;
- If the brim of a felt hat is wrinkled, curved, or wavy, a hot iron will help straighten the material. When ironing, place a soft mat under the product. The brim needs to be ironed through a soft, damp cloth, and then immediately bent in the desired direction and given the product the desired shape;
- If the top of the hat is wrinkled, put crumpled paper or a bag of sand inside and then iron it with a hot iron. First place a soft cloth under the product, and iron the felt through damp cotton material;
- If the white or light-colored headdress begins to turn yellow, use a mixture of bran and semolina. Rub into the composition from the outside and beat the accessory from the inside. It will return its original color and take on a fresh look;
- White marks, scuffs and greasy areas can be removed with a mixture of lemon juice and water. Dilute the components in half, moisten a soft cloth and wipe the affected areas;
- Rubbed and shiny areas should be lightly rubbed with fine sandpaper, sprinkle the material with fine table salt on top and clean the product with a stiff brush.
Synthetic materials
Nowadays there are many hats made of synthetic threads on sale. These hats are comfortable, pleasant to the body and stretch well. But sometimes synthetic things stretch, and to fix this, you need to use the following tips:
- Soak a clean cap in ice water for 4-5 hours. Then squeeze lightly, rolling the product into a roll or blotting it with a terry towel. Synthetic hats should be dried on a horizontal surface in direct sunlight. In winter, use an electric dryer or heater, so synthetic threads will retain their soft structure.
- If you want to wash your hat in a machine, then set the temperature 10 degrees higher than what is recommended on the product label. The main thing is not to exceed the limit of 60 degrees. The machine wash cycle is suitable for synthetic and cotton.
Using these processing methods, you can reduce a synthetic hat by 1-2 sizes.
Might be interesting
It's hard to find a person who doesn't have jeans in their wardrobe. There are situations when they become...
Washing men's jackets is complicated by the difficult cut of the product. Its rigid shape makes cleaning difficult, making…
Even expensive hats can lose their chic appearance over time. To update the product, you can paint...
Friends of knitters often receive beautiful knitted wool hats as gifts. But sometimes they turn out to be too big for their owners. Fortunately, this annoying discrepancy can be corrected very quickly. We suggest you learn how to reduce a wool hat by one size or more so that it fits just right for you.
To make the header smaller you will need:
the woolen hat itself;
two large basins in which it can easily fit;
mild detergent;
two clean dry towels.
How to plant a stretched hat
The best way to return the hat to its normal size is to wash it. Detergents and water temperature should be selected depending on the material from which the product is made. Therefore, before washing, you should carefully study the composition indicated on the label.
The final result depends on proper drying. There are also a few guidelines to follow here. With the right approach, the hat will easily take the desired shape.
Washing options
The stretched cap can be washed either by hand or in a washing machine. However, the second method is not suitable for every product. It all depends on the material of the headdress.
Important: the label indicates the textures used and acceptable washing options. During the process, you must strictly adhere to the specified parameters
Woolen items can be washed in a machine or by hand. For the manual method, we fill a deep basin with water at a temperature 20 degrees higher than indicated on the label. Now the hat can be soaked in water for about half an hour, and then washed in the usual way. After washing, be sure to rinse in cold water.
For washing, the washing machine is set to the “wool” mode with a suitable temperature (30-40 degrees). During the process, it is recommended to additionally use a gel-like product suitable for woolen items.
Cotton materials are most often used for sewing children's products. Cotton is distinguished by its elasticity and quickly deforms. The material can be easily returned to its original form.
The manual method is easy and simple to perform. The headdress must be placed in a basin of hot water and left for at least 15 minutes.
You should watch out for colored items as they may fade. In this case, it is better to use a washing machine. We set the temperature no higher than 60 degrees and the maximum number of revolutions. This type of washing quickly transforms the hat into the desired shape.
Tip: In most cases, steaming an iron for a few minutes is sufficient for a cotton hat.
Many hats for warmer periods are made from synthetic materials. In this case, returning the product to its previous shape is very simple.
For washing in a machine, the “cotton” mode and the maximum number of drum revolutions are suitable. During the procedure, you should avoid using additional detergents (powder, conditioner or gel).
When washing by hand, it will be enough to soak the hat in ice water for several hours. Then dry thoroughly. This will help reduce the product by at least one size.
Suitable means
When washing (by hand or machine) cotton and synthetic materials, it is recommended to avoid using professional products. The volume reduction procedure should only be carried out with a clean product.
To wash a woolen hat, it is recommended to add a little gel suitable for such products. If you don’t have this product on hand, you can use regular liquid soap. You should avoid using powders with enzymes or chlorine - they can damage the structure of the wool fiber.
Proper drying
Proper drying contributes to the final result. If done incorrectly, the product can be stretched even more and damaged.
After washing, the cap should be carefully wrapped in a thick terry towel to absorb excess moisture. Squeezing and hanging the product on clothespins is strictly prohibited - the fibers will stretch even more. After treatment with a towel, the hat should be placed on a horizontal surface, under a dry cloth. Dry naturally. Such actions will contribute to the natural shrinkage of the product.
Useful: a damp mohair hat can be placed in a bag and placed in the freezer for several hours. After drying, the material will be more fluffy and voluminous.
Reasons why a hat may stretch
Like any woolen item, a hat can stretch and take on a shapeless, sloppy appearance.
The reasons why this may happen are:
- automatic washing. The knitting of hats is usually weaker than other woolen items and this can cause both shrinkage and stretching of the product. It is advisable to hand wash such items;
- time factor. After some time of wear, the garment may well wear down one or even two sizes;
- improper storage. Some people, after the winter period, in order to maintain the desired shape, pull the hat onto a jar or mannequin, which over time will cause stretching.
How to make a woman's jacket smaller?
Today I will tell you how to reduce the size of a women's jacket.
Many of you probably have a couple of jackets hanging in your wardrobe, slightly out of fashion, but still very decent. I understand that you may be sorry to part with them, so I will tell you about one way to adjust the jacket to your figure and fashion :).
So, if the jacket is too big, how to alter it?
First, we rip off the shoulder pads. If the jacket is lined, you can get under it by opening the side seam of the sleeve of the lining by 20 centimeters. Then we will carefully sew this seam and nothing will be noticeable.
It is advisable to do the following operation together. Ask your mother, sister or friend to help you. It is necessary to install the shoulder pad on the shoulder so that its thick part protrudes approximately 1 cm beyond the shoulder bone. Now your assistant should raise the sleeve cap (that is, the very seam where the sleeve is sewn to the armhole) so that it matches your shoulders. You need to pin the sleeve cap to the shoulder seam and make sure it sits in place. If not, try again and install the shoulder pad again.
Once the new high point of the sleeve cap is found, pin the cap to the front and back of the jacket in several more places, creating a new armhole line. This applies only to the top of the cover; there is no need to pin the sleeve under the arm.
When a new sleeve sewing line has been found, check whether the new shoulder fits you. At the same time, check whether the sleeve is too wide and whether there is excess fabric that can be tucked into the side seam. If desired, you can mark the undercuts along the front and back. On plain fabrics, try to mark the darts with maximum symmetry and accuracy. On colorful or variegated fabrics, small inaccuracies will not be noticeable, but on plain fabrics they will be.
At the same time, decide on the length of the jacket.
Now take off the jacket and mark with chalk on the front side the “sewing” line for the sleeve where it is marked with pins. Take out the pins. Reach inside the jacket and mark with chalk where the sides and sleeves will be sewn under the arms and in the darts.
Open the sleeve from the jacket, noting the highest point of the cap that was sewn to the shoulder seam and the lowest point that was sewn to the side seam. If the sleeve consists of two parts, mark out the guidelines by which you will install it in place.
Trim off excess fabric on the front and back of the jacket along the marked line, leaving a seam allowance. Line up the armhole line, all the way to the armpit. Measure the lengths of the shoulder seams and make sure they are the same. If you were planning to remove the width of the jacket from the side seams, now is the time to do it. Next, the sleeve is sutured, if planned.
Now we insert the sleeve back into the armhole, pin it and make sure that the sleeve cap is slightly larger than the armhole (the excess is placed at the top of the collar). If not, then you need to sew the jacket along the side seam or take it a little into the shoulder seam. We sew in the sleeve. We install the shoulder pad in a new place so that its thick part protrudes slightly beyond the line of sewing the sleeve. If necessary, the shoulder pad should be reduced. This can be done on both the thick and thin sides. We fasten the shoulder pad by hand, basting it to the protruding part of the seam of the sleeve cap.
Now it’s time to stitch the grooves along the marked lines, and also reduce the length.
To be honest, I hate shortening jackets, but I have to :).
Cut the bottom of the jacket along the marked line (leaving a hem allowance of 5-6 cm), pulling the lining up. Turn the jacket inside out through the open sleeve of the lining. Glue the bottom of the jacket with non-woven fabric. Check with the cut piece. Try to completely repeat what was done there. Sew the lining and main fabric with one seam. Secure the seams of the collar and the bottom of the jacket together so that the collar does not straighten out or come out from under the main fabric.
Turn the jacket onto your face, make sure you did everything correctly. Steam the new seams with an iron.
Try on your jacket. If everything is in order, you can sew up the torn sleeve of the lining. We sew either an overlay on a machine, or a blind seam by hand.
- How to decorate a white jacket Today in the article: the idea of decorating a simple white jacket. A white jacket (or any other color too) is of a simple cut or rather boring.
- How to make a blouse smaller? It happens that you have a favorite shirt or blouse in your wardrobe, which, unfortunately, has already gone out of fashion, or has lost its relevance due to more.
Master class “Cylinder Hat”
Lyubov Mantula
Master class “Cylinder Hat” Hello dear guests!
The Graduation Party is approaching. a top hat for boys . This accessory can be used for both performing and dancing. For anyone interested, I’m posting my master class .
We will need: Whatman paper, scissors, glue, compass, ruler, black paint, brush, white tape.
We begin production with the so-called pattern of our hat .
For the pattern, you need to know the length of the head circumference. Next, according to the formula r = c/2n (where r is the radius, c is the circumference, n is the number pi (=3,14)
find the radius r1.
Radius r2 = r1 + width of the hat brim (I took width = 4 cm)
.
The gluing area is highlighted in pink in Figure 2. the height of the cylinder whatever is convenient for you, I took 17 cm and also 1.5 cm for gluing, for a total of 20 cm.
We glue the cone and bend the upper part for gluing inward, and the lower part outward.
Then glue the bottom.
We put the brim of the hat on top and glue it on .
a hat like this . All that remains is to paint it, you can open it with varnish and put on a white ribbon. I painted the hat classic black and attached a white ribbon.
Didactic manual "Magic Cylinder" for children of primary preschool age didactic manual "Magic Cylinder" for children of primary preschool age Relevance Games and exercises for the development of fine motor skills.
"Cylinder". Summary of educational activities on FEMP in the middle group Synopsis of direct educational activities on FEMP for the middle group. Compiled by: Educator E. A. Bogatkina.
Source
Cap material
Before the procedure for returning the shape and volume of the headdress, it is necessary to determine what material was used for its manufacture and what additions or combinations of materials are present in it.
This will help not make the problem worse. Products made mainly from knitwear, wool and some synthetic materials are stretched.
A label sewn on the inside of the hat containing information about the composition of the product, acceptable washing methods, temperature, drying, etc. will help you find out this information.
Often, violation of these recommendations entails loss of the shape of the headdress and unpresentable appearance.
Some useful tips
To reduce the size of a woolen hat after it has stretched, not only the implementation of certain actions aimed at this will help, but also the following nuances:
- shrinkage using hot water is effective provided that the composition of the cap contains fibers from natural fabrics;
- acrylic hats may become matted due to temperature exposure;
- A washing machine should not be used to create smaller sizes. This will most likely simply ruin the product;
- It is always worth checking the headdress for color fastness; if there is a possibility of shedding, you need to take action.
The methods listed above for reducing the size of a headdress are the most effective and relatively safe.
Features of paper hats
Paper hats are a great option for decorating a costume.
Where can you wear these hats:
- New Year and Christmas carnivals;
- themed parties (hen parties, stag parties, corporate events);
- holiday evenings (Halloween, birthday);
- children's matinees.
Hats can be worn when spending leisure time with children. Another feature of such hats is the ability to securely attach them to hair and headbands using hairpins, which is very convenient for children's events and active games.
It’s also easy to make paper hats with your own hands, even if the finished product looks complicated.
Reducing the size of the hat so that it fits
The methods depend on the material. You can find out what the hat is made of on the tag.
Woolen
To reduce the size of a knitted wool hat, you will need:
- the hat itself;
- pelvis;
- water;
- ice;
- terry towel;
- wool detergent.
Pour hot water into a basin (temperature 20 degrees higher than indicated on the label) and soak the headdress for half an hour. If there is a special product intended for woolen fabrics, add it in a small amount.
After 30 minutes, the water in the basin will cool down. Now the hat can be gently washed. Do not apply too much force, do not rub or twist it.
Next, drain the water and fill the basin with cold water, you can additionally add ice. Leave for 20 minutes.
Rinse gently. Wrap your hat in a terry towel to remove excess moisture. Leave to dry on a flat horizontal surface.
High temperature leads to compression of the fibers, which causes some shrinkage of the product, while cold water fixes and consolidates the result.
There are two more options for how to reduce the size of a wool hat that has stretched after washing:
- If there is no lining inside, then sew it in. The best option would be to use fleece. The hat will fit tighter on your head and will become even warmer. The product will not stretch during subsequent washes.
- Sew an elastic band along the edge of the hat, about 2-3 cm from the edge. It will help keep the shape, but will not put pressure on your head.
Fur
In this case, downsizing is mainly necessary for the following reasons:
- Deformation.
- We didn't guess the size when purchasing.
But you don’t have such rubber bands, then there are two options left:
- Sew in the hat. The lining fabric is carefully ripped open with a sharp knife or razor. Then you need to rip open the fur trim and the seam on the back that connects all the parts. Then the area required for reduction is removed from both sides. Don't forget to take into account the seam allowance.
- Use additional insulation from batting or padding polyester. You will need to prepare a new lining fabric, since the new piece may not fit under the old material. After removing the old lining, the prepared material is hemmed. A new lining is then sewn on top. This is a labor-intensive option, but it will allow you to further insulate the hat and return it to its original size.
Cotton
Cotton changes shape very well, making it quite easy to size down.
You can iron it with an iron at maximum temperature using the steam function, or use the washing option, similar to wool.
Synthetic
To make a hat made of synthetic fabric shrink, you can wash it in a washing machine at a temperature 10 degrees higher than indicated on the tag, using a spin cycle at maximum speed.
Acrylic
Unfortunately, it is almost impossible for stretched acrylic items to return to their previous appearance, so it would be more advisable to replace the item with a new one.
Felt
Felt is a very finicky material, and after washing its texture becomes rough and hard. You can make a hat or cap made of this material smaller using a thread, a needle and foam tape. You can also use batting or padding polyester.
The outer seam of the tape, which is located at the border of the brim and the crown, needs to be unscrewed. Next, you should insert a foam ring around the circumference of the hat, and then sew up the seam.
Denim
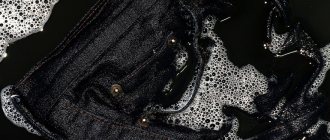
If you wash a stretched denim hat in a machine at a temperature of 80-90 degrees, it will become smaller.
If hand washing, soak the hat for 30 minutes in cold water and then place in boiling water. When the water has cooled, the headdress should be transferred again to cold water and rinsed.
You can dry it on a radiator, in an electric dryer or in a washing machine.
School repair. Design secrets. Stairs. Sewerage. Furniture
At some point I realized that for further work I simply needed a hat blank. Most often, I do not felt hats, but sew them, so the ability to create patterns and modeling directly on the form, with the possibility of further steaming, is important to me. After searching the Internet, I found a great idea.
I bought a roll of tape, pinned my hair up, put a plastic bag over my hair and asked my mom to tape it around the shape. Having removed the resulting soft form, I put it on a 3-liter cylinder, wrapped in a towel to the desired diameter, and adjusted the height of my form. I got 25 cm in height.
This soft form could simply be stuffed tightly, say, with fabric, or filled with polyurethane foam - then the blank can be used for felting - but I decided to do it differently. Having straightened the form, I glued it from the inside with papier-mâché - newspapers with PVA glue. Having made 5-6 layers, I dried the mold with a hairdryer and carefully pulled out the still damp, but no longer damp, blank from the tape mold.
Having glued and thoroughly dried the layers, I began to smooth out the unevenness on the outer surface of the mold. In the future, I plan to sand the mold in order to use it for working with felt caps - but I will need to think through the system of fields and upper crown attachments. For now, I limited myself to stretching a couple of hats to my size - my father’s bowler hat and my mother’s hat, converted into a bowler hat. I'm size 58, and standard hats are too small for me - I always had to wriggle out with a teapot.
You know that a felt hat can be made smaller or larger by a size or two? To enlarge, wrap a towel around a 3-liter bottle so that the diameter matches your size (or just use a blank of your size), heat the kettle and thoroughly steam the inside of your hat over the spout (of course, first you need to tear off the lining and hat band, leaving only the felt base.) After steaming the hat, pull it onto the “form” and let it dry. sew the lining back. or sew a new one.
To reduce the size, buy a grosgrain ribbon (gross tape will also work) and sew it to the crown from the inside. slightly placing the felt on the tape.
Of course, my form still needs some work inside and out, but I was so eager to try it out! I decided to try out a new base pattern that I spotted in a book on making hats from the beginning of the last century.
I assembled this cloche - a turban made of lace and satin lined with warm fleece in literally 4 hours, with breaks - without a blank, such a design was inaccessible to me. First, I sewed a fleece base - it is warm and does not blow out. Then, stretching everything onto the blank, I began to form draperies directly on it. At the end, I steamed the finished hat directly on the blank - it can easily withstand the iron!
This is what happened as a result. Of course, I will make the next hat on a blank taking into account the nuances that emerged during the process, but the new possibilities are simply breathtaking!
Cowboy hats are divided into several types, depending on the materials used for their production and special processing, and therefore you need to select their size differently. Hats are rolled or woven on special blanks that imitate a human head, but the blanks are absolutely smooth and do not take into account your hair. If you are bald, then this is one thing, but if your hair is quite wild, then this should definitely be taken into account.
Here is a classic size chart for choosing hat sizes
To measure your head correctly, you need to take the correct flexible tailor's centimeter (this is a strip of oilcloth with a centimeter-millimeter scale applied). And wrap it around your head at a distance of about 1 centimeter above the upper edge of the ear, not tightly and so that this tape does not dangle. Then see how many centimeters you got and determine the size using the table.
1) Hats made of felt or wool
These hats are selected strictly according to their size. Felt has the ability to stretch while being worn, and if you take the hat exactly to size, then at the beginning it may even tighten a little, but after a short time this hat fits exactly on the head of its owner and follows all its contours. This is why a real cowboy will not let anyone try on his hat.
2) Straw cowboy hats.
a) There are hats made from untreated straw, hay (dried grass), palm leaves and so on, for example these:
These hats are woven from fairly soft grass that may stretch a bit over time. But I still prefer to take these hats 1 size larger. This allows you to adjust the size of the hat depending on the fullness of your hair at a particular moment. You can easily reduce the size of a hat by sticking, for example, electrical tape on the hat itself under the inner stripe (“sweatband”), or by sewing a strip of fabric. If you take a hat exactly “in size”, then the hat will sit very tightly on your head, which can even cause a headache, but you can even hang upside down and the hat will not fall off you. It's not a bad thing if you only wear the hat to perform at the rodeo.
b) hats made of varnished straw, hay (dried grass), palm leaves and so on, for example these:
These hats are very tough. I prefer to order them one size larger and adjust the size (if necessary) by sticking them on the hat itself, under an inner sweatband such as duct tape, or by sewing on a strip of fabric.
3) Leather hats.
By and large, cowboys do not wear leather hats, with the exception of Australians. Leather hats are the prerogative of bikers. These hats can also be taken “true to size”, as the leather stretches very well. I hope my experience will help you make the right choice and buy a good cowboy hat
In any case, the choice is up to you.
There is a common belief that a hat is “not for everyone.” Many people think that hats don't suit them. But most likely, they simply did not find a successful model for themselves (which, in general, is not surprising, given the meager selection of hats in Russia). Remember the films that take place in the first half of the 20th century - almost all men wear hats, regardless of age and social status. And with a certain amount of persistence, everyone can now choose a hat successfully.
Like any other item of proper men's wardrobe, a hat should attract attention primarily not to itself, but to the face and must match and compensate for its proportions. A hat has several basic measurements that affect its proportions and how well it fits a particular face type: brim width, crown height, crown taper, and band width. All this can be wider, narrower, higher or lower and in general will give a good or bad effect.
There are no hard and fast rules that determine which hat shape suits which face type. Here you need to be guided by proportions, as if you were choosing a frame for a picture: it should frame the face, but not “outweigh” it; should not be both comically small and comically large. If you have a large face, then the hat should be large enough; for people with a narrow face, hats with a narrower crown and wider brim are suitable; people with prominent noses should choose wide-crowned hats to “compensate” for the nose; wide brims help hide protruding ears and so on.
The way you wear your hat also affects your overall impression. In most cases, tilting your hat a little to the side won't hurt—a couple of degrees can change the whole picture. Experiment with the angle, but don't forget about proportions: if you have a high forehead, don't push your hat back, and vice versa.
The size of the hat is equally important. It should sit on your head tightly enough so that it doesn’t get blown away by the slightest gust of wind and doesn’t fall when you bend over, but it shouldn’t put pressure on your temples or wrinkle your hair. Unfortunately, when ordering a hat online, you can often only guess what size it actually is. Like shoe sizes, hat sizes can vary markedly between manufacturers. You can roughly understand your size by measuring your head with a tailor's meter across the forehead, above the ears and above the base of the skull and comparing the resulting head circumference with the manufacturer's table. But even this does not guarantee a successful landing.
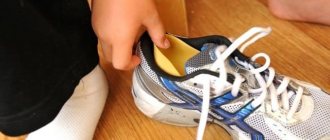
It is better to err on the large side in size, because any good hat has a special leather rim on the inside, which allows you to slightly reduce its size if you put a piece of cotton wool or foam rubber under it in several places. At the same time, if the hat is too small for you, it can be stretched in a hat studio, but the result will depend on the material of the hat and the rim.
Like any other item of clothing, it is desirable that the hat is in harmony with your clothes, but there is no need to select a hat to match the exact tone. The main thing is to try to combine colors at least along the spectrum: warm with warm, cold with cold. For example, a gray or black hat will go with a blue coat, and a dark green hat will go with a brown coat (although, of course, a green hat is quite serious in itself).
FELT HATThe most traditional material for hats is wool, or rather felt, which is made from wool. The fedora is the most formal of all (except for the top hat, but only the Freemasons and guitarist Slash wear that) and requires an appropriate wardrobe. It goes best with a classic suit or coat. But that doesn't mean the fedora is the exclusive domain of people like Don Draper. The softer the felt, the more dents there are on the front of the crown; The warmer the colors and more contrasting the ribbon, the less formal the hat becomes. A dark gray homburg hat with a satin-trimmed brim looks extremely formal, while a brown fedora with a rakishly creased brim and a braided cord instead of a ribbon looks great with a worn shirt and leather jacket (see Indiana Jones films). But no matter how relaxed a felt hat may be, you can only wear it with clothes from a work or classic wardrobe, forget about a sporty style. COTTON HATRecently, hats made of cotton and mixed fabrics have become popular - these are often sold in online clothing stores. They are more correctly classified as Panama hats - they usually have very short brims and a crown without dents. These hats are the least formal and can fit into almost any wardrobe. But at the same time, the chances of becoming like Pavel Volya unexpectedly increase. | TWEED HATA tweed hat is less formal than a felt hat and would be out of place with a business suit, but it goes great (oddly) with tweed jackets and other “country” style elements, such as waxed jackets or rubber boots. According to renowned men's fashion author Bernard Roetzel, "Tweed hats are favored by scholars and intellectuals who do not want their foreheads and thoughts to be encumbered by stiff hats." PANAMAThe Ecuadorian straw fedora - Panama - is made from special straw and has a very dense weave. The higher quality the Panama hat, the tighter it is woven and the smoother and softer it will feel to the touch. It can be worn with either a summer suit or a chambray shirt and chinos. Other straw hats are less formal than a Panama hat and are not suitable for a suit, but they can be worn with everything else - T-shirts, sandals and other summer clothes. The only exception is the boater hat - it's already so retro that it's only suitable for hat-wearing professionals. COWBOY HATCowboy hats are only allowed to be worn by cowboys, role players, system administrators and rockers. |
Don't think of hats as carnival costumes. After putting on a hat, choosing the appropriate angle, try to forget about what’s on your head, treat it the same way you treat shoes. Don't adjust unnecessarily, don't fiddle with the brim, don't look in the mirror at every opportunity - in short, act as if you're not wearing a hat. Then those around you will perceive it more naturally.
Finally, it is worth remembering one simple rule: you should take off your hat indoors if you are going to sit there - in a restaurant, at a movie party. In public places - for example, in a store or at a post office - this is not necessary. The same applies to the halls, elevators and corridors through which you pass, but when you reach your goal - for example, an apartment, you should take off your hat.
It is good form to slightly raise your hat when greeting acquaintances, especially if it is a lady. It may be a little old-fashioned, but a little extra gallantry never hurt anyone. And in situations where you say “thank you”, “you’re welcome” or “sorry”, you can lightly touch the leading edge of the margin - “trumping” is another good way to show respect for the interlocutor.
WHAT NOT TO WEAR
Reducing the size
hats. The hat you like may be too big, then how can you reduce the size of the hat? To do this, you just need to stick an adhesive patch on the inner tape. If necessary, glue 2-3 layers. And on hot days, the patch will absorb excess sweat.
Grabbing tools.
For wrapping the handles of various tools (hammer, sledgehammer, chisel, hacksaw, etc.) to make them easier to grip, there is probably no better adhesive plaster. Using a patch, the handles of tools are held in your hands more tightly, and when your hand sometimes sweats, it will absorb moisture. The handles must be wrapped so that the overlap of the turns is approximately half the width of the patch. It is necessary to make the required number of layers so that you can confidently hold it in your hand. Here are some useful examples of using the patch:
- Screwdrivers
often have a handle that is too thin and slippery, and it is inconvenient to hold, let alone work with them, turning in and out of stubborn screws. The handle is wrapped until you feel comfortable holding the tool. This becomes even more important for those who have arthritis of the fingers. - Carpenters
have a lot of things they can do, for example, they almost always wrap a plaster around the handle of an ax or the handle of a hammer. This is done to keep the handles in place when your hands start to sweat. Only the surface that is to be grasped is wrapped. You can wrap several layers of plaster directly under the hammer or ax to protect the shaft in case of a miss. - The Slesarchuks
also keep a plaster in the midst of their instruments. When the need arises to cut a pipe, but the hacksaw cannot reach the cut, they simply take a blade and make a mini hacksaw, wrapping one end with a plaster to obtain a handle.
We remove the splinter.
It happens that a splinter is so small that it is practically not visible, and even it can become deeply embedded and it is also practically impossible to pull it out using tweezers. Let's not suffer trying to remove it with a needle. The splinter can simply be covered with a sticky plaster for 2-3 days, after removing the plaster it should come out.
A little history.
The grandfather of the bactericidal patch was invented, again, by the notorious Americans, somewhere in the 20s of the last century. Housewife Josephine Dixon always got into stories and something happened to her. This ability of hers contributed to the invention, because her husband Earl, who worked at Johnson and Johnson, had to treat wounds and burns with something. He came up with the idea of gluing pieces of sterile gauze onto adhesive tape and rolling it up so that Josephine could cut it and stick the pieces on herself. Well, the company where Earl worked soon began industrial production of a bactericidal patch. In the year of Earl's death, 1961, he was already a member of the board of directors, sales of the bactericidal patch reached the notorious 30 million American bucks.
If the hat gets very wet,
it should be filled with well-crumpled newsprint and left to dry in a warm place.
While the hat is still wet, go over it with a clean brush in the direction of the pile. This advice applies to felt, corduroy hats and other headwear. After such drying, they do not lose their shape and appearance. The brims of felt hats
sometimes become wavy and irregularly curved.
In this case, they can be ironed with a moderately hot iron through a soft, damp cloth, placing a soft bedding underneath. The brim of the hat, still hot from the iron and damp from the steam, is carefully bent in the right places, giving them the desired shape, and a clean brush is passed over the felt to lift the crushed pile. You can also iron the top of the hat if you put a bag of sand or crumpled paper in it. Velor hats cannot be ironed. To protect the hat from sweat,
it is recommended to place a strip of blotting paper on the inside under the leather band and change it from time to time.
Sweat stains
on felt hats can be easily removed with a paste of burnt magnesia and a small amount of water.
After covering the stains with the paste, let it dry, and then remove the remaining magnesium with a brush. You can also use a solution of ammonia in water. Before cleaning a hat,
it is helpful to pre-fill the top with paper, just as you would when staring.
Felt hats are cleaned with half-diluted ammonia,
followed by brushing with a clean brush in the direction of the pile. You can also use gasoline, but then wipe the hat with vinegar water.
Brown felt hats
clean with tobacco decoction, but so that the hat does not get wet through.
When cleaning, the surface of the hat is carefully brushed in the direction of the pile. Light felt hats
are cleaned as follows.
The brush is slightly moistened and, dipped in table salt, the hat is processed in the direction and against the pile. The hat can also be cleaned with a stiff brush moistened with ammonia diluted with water. White felt hats,
if they are not very dirty, can be simply wiped with bran.
Lightly wipe stains or shiny areas with a piece of pumice. More dirty hats are first cleaned with a brush dipped in gasoline, and then washed with a mixture consisting of a liter of water, 2 tablespoons of hydrogen peroxide and a teaspoon of ammonia. White felt burkas are also cleaned in the same way. A velor hat
that has lost its appearance can be significantly refreshed by brushing it over the pile over steam.
White straw hats,
if they are very dirty, are washed with a small brush with warm soapy water.
Then rinse off the soap with clean water and wipe the hat with a white rag or towel. After this, they are evenly moistened with hydrogen peroxide, dried and ironed through a white cloth with a non-hot iron. A yellowed straw hat
can be bleached by cutting off the yellow part of the rind (zest) from half a lemon and evenly wiping it over the entire surface of the hat.
In this form, the hat is left for 30 - 40 minutes, then washed with a brush dipped in lukewarm water, dried with a towel and carefully ironed with a not hot iron through a dry white cloth. Instead of lemon, you can use a mixture of parts hydrogen peroxide and 2 parts ammonia. Before cleaning, the hat is first straightened, just like a felt hat. Old, unrecoverable felt hats can be used to make very good shoe insoles.
To do this, the felt needs to be wet and straightened under an iron.
It is good to glue pieces of felt to furniture legs: this preserves carpets and floors. When exposed to heavy rain, caps
usually lose their shape. You need to take a soft fabric bag, such as a small pillowcase, and, placing it inside the cap, fill it tightly with dry heated sand. Having tied the opening of the bag, the caps are turned over and placed on a flat surface, after laying down several sheets of paper. The sand in the bag is kneaded to give the cap the desired shape, after which its surface is carefully smoothed by hand. To make the cap dry faster, you can iron it several times through a cloth with a not very hot, light iron. You need to iron the visor especially carefully. If you want to do without ironing, then put several layers of paper on top of the visor and press it with an even, fairly heavy weight.
How to stretch a felt hat
Over time, due to various external influences, the felt may settle. Often, we receive a felt hat as a gift. In both cases, we are faced with the problem of a discrepancy between the size of the crown of the felt hat and the owner’s head. Also, the shape of the hat brim often deteriorates. In such cases, the question arises - how to stretch a felt hat? In order to give the felt hat the desired shape, you need to wet it. The fact is that felt can be easily edited when it is wet.
Therefore, in order to stretch a felt hat, you need:
1) Prepare a blank of the correct shape. In the simplest case, it could be a jar, pan, flower pot, or other everyday item of a suitable shape. But it is still advisable to choose a blank as close as possible to the shape and size of your head; you may have to carve it out of wood.
2) Thoroughly steam the felt hat at the base of the crown over steam from a kettle. Make sure that the fire does not get on the felt, we only want to steam the hat, not burn it!
3) Pull the headdress evenly onto the prepared blank. Make sure that the shape of the hat is maintained and the brim is not deformed. 4) After the hat has dried and fits well, you can remove it. Of course, in any case, it is best to contact a good hatmaker in your city.
He will definitely tell you how to stretch a felt hat, but if you are not sure that you will be able to do everything correctly, or the hat is very dear to you, then we still recommend that you contact a good hat maker. Felt hats are very easily soiled hats, so you must follow the rules for wearing and storing such a hat. But despite all the caution in using a felt hat, people still quite often ask the question - how to clean a felt hat? The most common enemies of a felt hat are street dust and sweat. In order to get rid of them, you need to mix table salt, ammonia and table vinegar in a ratio of 1.5:5:5. Using the resulting solution, use a white cloth to clean the hat and wipe dry with another cloth. For more serious stains, you can use a combination of ammonia and aviation gasoline.
After you clean the hat in this way, wipe it with a cloth soaked in a solution of vinegar and water in a ratio of 1 tbsp. for 1 glass respectively. If the hat has faded over time, it can be steamed in the same way as when stretching the hat. After steaming, you should clean the hat with a soft, clean brush in the direction of the hat's pile.
It is also worth considering the color of the headdress. So, if you have a white felt hat, then you can clean it with regular bran. To do this, you need to rub them into the surface of the hat, and then thoroughly knock it out from the inside. So, she will restore her previous appearance. If you have a brown hat, then a decoction of tobacco leaves is a suitable method for cleaning it. To do this, you need to boil tobacco leaves in the proportion of 1 tbsp. for 1 liter of water.
After cleaning, you should also wipe it with a clean, dry cloth. However, this method has one drawback - the decoction of tobacco leaves is very odorous and after such cleaning you should hang the hat in the fresh air for at least several days. Well, if you have serious, difficult-to-remove stains on your hat, then don’t despair. To do this, you can use special stain removers.
Dampen a cloth with the product and wipe the stained area, then wipe the treated area dry with another cloth. Be sure to read the instructions before using this product and do everything carefully! Under no circumstances should you use stain remover for white items on colored hats!
Well, in order to have as few reasons as possible for cleaning felt hats, we recommend that you store the hat in a place protected from dust, caustic gases and oil vapors.
Also, make sure that the hat is not subject to uneven stress, such as if it were hanging on a hook. Of course, felt does not like moisture and wearing such a hat in rainy weather would be very reckless. The ideal option for storing a felt hat would be a thick cardboard box in which the hat is wrapped in fabric and stuffed with soft, clean paper inside. We hope that now you won’t have any questions about how to clean a felt hat, and these tips will help you keep it in good condition for a long time.
Related materials:
- Phrasing in music What is melody motive phrase
- The effect of lard on the body: benefit or harm?
- VkOpt - browser plugin for the social network VKontakte
- RAM What characteristics relate to RAM
Making a fur hat smaller
https://youtube.com/watch?v=rG9n06Rfl3A
A fur hat is reduced for various reasons, it could be its deformation, or maybe it was an incorrectly selected gift.
It will be somewhat more difficult to make such a headdress smaller than a woolen hat.
Often, fur hats are made by the manufacturer in several sizes, using adjustable elastic bands that allow you to reduce it by a size and a half.
If this kind of convenience is not available, you can make the hat smaller in two ways:
- sew in a fur headdress. This option requires some knowledge and skills in sewing. To begin with, the lining fabric is carefully ripped off, then the fur trim and the seam connecting all the parts, which is located on the back of the head, should be ripped open. The next step is to remove the parts necessary for reduction from both sides. For example, when reducing the cap by two centimeters, one centimeter should be cut off on one side and on the other as well. Here you should take into account the seam allowance and, perhaps, remove not a centimeter, but 8 mm.
- This method involves reducing it using an additional insulating layer of batting or padding polyester. Having decided to use this method, you need to prepare a new lining, since the insulation blank may simply not fit under the old one. After tearing off the “native” lining, the prepared insulation is hemmed onto the insulating cap, after which a new lining fabric is sewn on top. This option is more labor-intensive, however, it allows you to give the hat even better thermal insulation and, if necessary, return it to its original size.
Taking measurements and cutting
The top hat (a pattern can only be made after taking measurements) must be the right size for the person. A cylinder that is too large will interfere with your eyes, and a small one will not fit on your head.
How to take measurements correctly:
- Place the ribbon behind the back of your head.
- Determine the most protruding point of the head from the back. Apply tape to this point.
- Stretch both ends of the linen over the ears.
- Bring the edges of the tape together at a point on the forehead, just above the eyebrows. There is no need to pull the tape too tightly.
Measurements for making a hat
Based on the results obtained, you need to create a pattern. Further, for example, the average volume of a person’s head – 56 cm – will be taken as the result.
Procedure:
- First you need to determine the height of the future hat, for example, 24 cm.
- Draw a rectangle, the width of which will be equal to the circumference of the head - 56 cm. The height of the rectangle is equal to the height of the hat - 24 cm.
- From the upper corners of the rectangle, move 1.5 cm up. Draw a straight line connecting these points. This strip will be the "seam allowance" as in sewing. Later, the paper in these places will need to be glued together.
- Draw the same stripe at the bottom and right edge of the rectangle.
- Using a compass, draw a circle equal to the size of the head - 56 cm.
How to properly close (reduce) the loops on a hat, depending on the model
There are two fundamentally different ways to knit these items of clothing:
- On circular knitting needles (the product is seamless).
- On straight knitting needles (it is necessary to sew a seam along the height).
Also, the model of the headdress may imply the need to decrease the loops towards the crown, knitting the fabric using the method of shortened rows, as well as the direction of knitting from top to bottom and bottom to top.
Let's take a closer look at the most popular models and the completion features for each of them.
Easy way
The simplest way can rightly be called the option using a needle and thread. This method is especially relevant for completing work on items knitted in one piece, without decreasing or with minimal decreasing loops towards the crown. The main advantages of such hats are the ease of knitting, the ability to knit on straight knitting needles with subsequent stitching of the fabric in height, as well as a sufficient variety of patterns used.
In order to finish such a thing, you just need to thread a large “gypsy” type thread, which is used to knit a hat, and thread it through the last open loops on the knitting needle. The needle is then pulled out of the knitting and the top is tightened with thread. Its ends are brought out to the wrong side and tied with a knot. The hat can be left as is, or you can attach a pompom to the junction of the loops.
Wedges
For a round hat
When knitting a product with a round crown, the main feature is the decrease of loops: they are decreased at a relatively short distance from the crown by knitting every two loops out of four in the first row of decreases.
Afterwards, several rows are knitted according to the pattern without decreasing, then two loops are decreased per row until 8–10 loops remain on the knitting needles. To complete work on such a thing, you should thread it through the loops using a hook or needle.
On a stocking cap
These models are also called beanie hats. The easiest way to knit them is to knit the fabric using shortened rows on straight knitting needles. With this type of knitting, wedges are formed on the hat. After knitting the required number of these elements, the product is sewn together using a hook along the height, and then the top of the hat is connected with the same hook.
With English rubber band
English rib is a very beautiful pattern, voluminous and suitable for knitting almost all models of knitted hats. You can connect it using the description given in Diagram 1.
Pattern 1 – Knitting an English rib
The main feature of working with fabric from this pattern is the method of closing the loops. In order to do this, you need to switch from English elastic to regular elastic, 1*1 format. This transition is made in the row in which the knit stitch ends up with a double crochet. After this, the loops are reduced and closed in the manner suggested by the model you have chosen.