Types and causes of cracks
Despite its apparent strength, the toilet is quite fragile due to the hollow internal structure of sanitary ceramics; anyone can accidentally damage it. In practice, the reasons arise for three main reasons:
- Mechanical impacts - a shelf hanging above the toilet broke and fell, the bowl was accidentally touched when installing a washing machine or other equipment, a heavy metal object fell during repair or other work;
- Temperature changes - ceramic surfaces are very sensitive to temperature changes, especially if exposure to hot water or air is immediately followed by exposure to cold water. A chip may appear if hot water is accidentally poured into the toilet or due to boiling water entering the water supply system due to a faulty faucet or water heater valve;
- Installation defects - the floor on which the toilet is mounted must be perfectly level and level. If there is a misalignment, the equipment will be subject to an uneven load and in the future, due to improper weight distribution and fastening bolts that are too tightly tightened, fractures and chips may form.
The causes of cracks and deep chips can be eliminated by following simple rules:
First of all, do not pour hot water into the plumbing; it is not designed for this. Entrust installation of equipment to a specialist. And of course, exclude the possibility of mechanical impact. To do this, it is enough to close the lid while the toilet is not in use, cover it with something hard during repairs to avoid falling tools or finishing materials.
How to repair a crack that appears depends on the complexity of the problem. For example, external scratches are not critical and you don’t need to pay attention to them at all. The broken parts from the rim or other areas not in contact with water can be easily glued back together.
But if the base of the bowl, which is constantly in contact with water and experiences mechanical stress, is damaged, it will not be possible to properly glue the fracture or glue the ceramic that has broken off in a large piece.
Precautionary measures
Plumbers note that the work associated with gluing is temporary. Repeated repair may cause further damage. The device must be handled with care, following certain rules.
It is better not to place shelves with objects above the toilet. This will prevent them from falling and being damaged. Construction tools must not be used near ceramics. In cases where this is necessary, precautions must be taken that involve covering the product with soft cloth in several layers. After installation work is completed, no additional fastening can be carried out. When assembling the product, be sure to loosely tighten the bolts. You also need to be careful to avoid possible distortions.
It is forbidden to pour boiling water into the toilet. This precaution will prevent the appearance of cracks inside the plumbing. You also need to make sure that the toilet lid is closed, which will prevent foreign objects from getting in. Following these rules will avoid possible damage to the toilet and extend its service life. If damage is detected, you can repair it yourself. Repair work must be carried out competently to prevent repeated damage. If you do everything following the recommendations, you can get the desired result.
Currently reading
- Features of installation of corrugations on the toilet and under the hood
- Is it possible to paint a bathtub with acrylic paint?
- How you can and cannot clean porcelain stoneware sinks
- Is it possible to clean the pipes in the bathroom yourself at home?
How to glue a cracked toilet
You can seal the toilet using the same method as any porcelain or ceramic products. For this purpose, specialized adhesives or universal reliable glue are used. Epoxy resin and other moisture-resistant binders are also suitable.
The disadvantage is the relatively smooth texture of the chip, which does not have a high enough level of adhesion for gluing to be carried out quickly. So don't be discouraged if something goes wrong the first time. You may have to repeat the procedure, completing all the individual steps better.
What you will need
In order to seal a crack on a toilet, you will need a fairly simple set of accessories:
- Fine polishing sandpaper;
- Wipes for removing excess adhesive;
- Acetone or gasoline to degrease the surface;
- The adhesive composition itself, which can be selected in accordance with the recommendations given below;
- Adhesive tape for fixation.
Before carrying out work, you need to turn off the water, remove excess water from the toilet, and dry the work area. This is a general recommendation for all types of gluing jobs.
Surface preparation
Before gluing, you will need to carefully treat the surface to improve the quality of adhesion of the materials.
One-sided damage - clean the gluing area from any dirt that may have accumulated inside. You can use a stiff brush for cleaning. After cleaning, it is necessary to degrease the ceramics using acetone or alcohol;
The gluing areas on the fragment and on the toilet are cleaned of dirt and loose parts. Next, the surface is degreased with acetone and glued;
Double-sided cracks - in this case, preparation is more difficult. To do this, you need to drill a hole at the end of the crack, this will prevent further splitting. Use thin ceramic glass for drilling.
Next, you need to embroider the ditch with a grinder to half the thickness of the ceramic. Then you need to degrease the surface. In this case, gluing is done using a two-component epoxy resin.
Preparation is an important step. The strength of the connection subsequently depends on the quality of the work performed.
Seam gluing
When gluing a crack, it is important to choose the right composition:
- Universal waterproof adhesive for ceramics and glass - suitable for gluing a broken part from a rim or other place where there is no contact with water. Waterproof glue bonds sanitary ceramics well;
- Epoxy Resin – A two-part epoxy that can handle through-hole joints, sealing them for a long time. Can be used in areas in contact with water;
- Silicone sealant or liquid welding is used to seal the resulting scratches and prevent their further growth.
The listed materials do an excellent job and can extend the life of the tank or toilet for a long period. However, in practice, with end-to-end splits, all measures are temporary.
Top 5 best glue brands
A wide range of brands from different manufacturers sometimes leaves the consumer with a difficult choice. The presented rating of the most popular adhesive mixtures from imported and domestic manufacturers, which have proven quality and reliability in industrial and household use, will help you make this choice.
Moment Crystal
The most famous waterproof adhesive from Henkel. Polymers from the polyurethane group are used for gluing individual fragments. The universal compound instantly provides a high-strength connection. The elastic seam is transparent and invisible. The absence of toxic toluene makes its use completely safe.
MAKROFLEX SX101
Silicate paste sealant, based on rubber, for sealing seams, cracks, joints in conditions of high humidity. Ideal for bonding minor chips on the outside of the toilet. The transparent seam makes the joint invisible. Five undoubted advantages particularly distinguish it among sanitary sealants:
- strong adhesion to complex materials;
- immunity to chemical influences;
- good elasticity,
- UV resistance;
- the presence of antiseptics, antifungal fungicides.
Tytan Ceramics and stone
From the “Liquid Nails” series. Water-acrylic dispersion, no pungent odor, due to the absence of organic solvents. The advantages of glue are environmental friendliness and reliable fixation. Super strong adhesion occurs within 5 seconds. Used in places not in contact with water.
Diamond press
Leader from the “cold welding” group. The consistency of plasticine, based on various resins, iron accumulators and hardener. Recommended for gluing one-sided uneven damage, due to its plasticity, it fills voids well. Inexpensive and convenient material for emergency repairs, requiring long drying, up to 5 hours.
EPD
Epoxy resin. A clear, toxic mixture with a pungent odor. Despite this, the universal resin is suitable for restoring any damage, not only broken ceramics, but also heavy marble. Completely waterproof. It is not afraid of vibration, shock loads, its strength is comparable to concrete. Crystallization time after mixing is 20 minutes.
When working with epoxy, you should be careful and careful when using protective equipment.
There are many accidents in life, one of them is accidentally damaging the toilet. If the damage is not critical, try to put the advice to good use by choosing the right repair tool. This will help save money and time.
Cracked tank: how to seal it
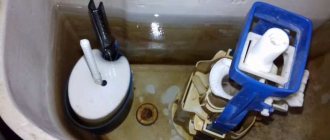
If you are thinking about how and with what to glue the toilet tank, you can use the same tools and technologies as when working with the bowl. However, an important condition is high-quality cleaning of the tank before gluing, especially if the crack is through or has formed on the inside.
Since the tank is constantly in contact with water, limescale forms on its walls, reducing the adhesive properties of the ceramics. You can clean it with regular sandpaper. Work is carried out until the ceramic layer is completely removed and appears. After cleaning, the resulting surface defect is repaired.
Work order
For preliminary surface preparation you will need materials: sandpaper, clean rags, degreaser.
First, the breakage site is cleaned with sandpaper. Then wipe with a clean cloth and degrease. The solvent used as a degreaser is acetone.
The surface is dried with a hairdryer. One of the split parts is coated with glue and immediately pressed against the second with maximum force (but you need to feel the pressing force so that further cracking does not occur). The interlocking parts are fixed.
These steps are used for gluing small chips and cracks. If a split occurs inside the toilet, it is better to use epoxy resin for gluing.
If the fragments occurred on the tank, then they can be sealed in the same sequence. Only the material of the tank is thinner and it undergoes gluing much faster.
When using resin for gluing, after sanding, the surface is wiped with felt material and dust is not allowed.
Adhesive recipes
Now on the market there is a sufficient amount of professional materials and ready-made glue for ceramic restoration.
There is no need to invent a bicycle when you can buy a ready-made product that is optimally suited to the given adhesion parameters - resistant to water, vibration and other mechanical loads.
You can glue the toilet with epoxy resin, seal the seam with silicone sealant or liquid welding, and attach the broken part using industrial-type BF 2 glue. Using a ready-made adhesive composition, you will save your time and get a high-quality result.
Filling a crack with epoxy resin
Epoxy resin is one of the most effective and reliable compounds for sealing seams. As a rule, two-component polymer epoxy is available for sale - the kit includes two containers containing a hardener and a filler.
To prepare, you need to mix both components in one, clean glass, ceramic or metal container. Mixing is carried out in accordance with the recipe specified by the manufacturer on the product packaging. After mixing, the composition needs to sit for some time.
The gluing process itself is carried out as follows:
- The crack is thoroughly cleaned of debris and contaminants;
- If the chip is large or deep, you can try to treat it with sandpaper folded in half using the edge of a folded sheet, after which you need to clean the surface again with a brush;
- The gap is treated with acetone or alcohol to remove fats and other chemical contaminants, and dried with a napkin;
- Next, you need to cover the clean gap with epoxy. When applied, it is better to immediately remove excess epoxy protruding outward with a napkin;
- After drying, which can take from 30 minutes to 4 hours depending on the type of material, the surface must be treated with sandpaper with the finest grain.
If the work is done correctly, the gluing will withstand contact with water, and the toilet will last for a long time without leaking. The seam will not be as noticeable as when processing with other materials.
Bonding cracks with silicone sealant or cold welding
Silicone caulk can be found at hardware stores. It is sold in flexible tubes of various sizes, including small tubes. This is exactly the kind of sealant we will need to save our budget on materials. Cold welding can also be found at hardware stores. In appearance, it is an elastic material of a metallic color.
Bonding cracks with silicone sealant or cold welding
These products also work well on shallow cracks and broken pieces of earthenware. Together with the universal silicone adhesive-sealant, prepare a silicone solvent and laundry soap. It is convenient to carry out application work with a plastic spatula:
- Sand the crack with fine-grit sandpaper. The procedure requires caution and thoroughness: there should be no small things left on the surface that will reduce the quality of the gluing.
- Degrease with solvent the parts to which the sealant will be applied.
- Saturate surfaces with silicone. Remove excess with a spatula.
- Lather your hand and walk over the glued area, smoothing it out.
If the procedure is correct, the sealant will harden in 20 minutes, and the toilet can already be used.
Silicone sealant
In the case of “cold welding” you will have to wait at least 4 hours. The process is similar:
- Clean and degrease the gluing area.
- Cut off part of the substance and knead it in your palms (put on gloves first). The result should be a homogeneous color mass.
- Apply the paste to the surface, compacting it into the cracks if necessary.
- After 4 hours, the seam becomes accessible for sanding.
Advice. After the seam has dried, it can be painted over to match the color of the toilet.
Gluing large cracks: methods and materials
What to do if the toilet or cistern is cracked and the crack is through? For gluing you will need a two-component epoxy resin. To carry out the work - a drill with a drill for ceramics and a grinder with a diamond-coated disk. The sequence of work occurs in the following order:
- Holes are drilled at the ends of the crack - this is necessary in order to stabilize the load and prevent further propagation of the fault;
- Next, you need to walk along the contour of the fault with a grinder so as to widen it. You need to act carefully so as not to aggravate the problem with additional chips;
- The fault area is cleared of remaining particles after cutting and drilling, and degreased with acetone;
- Next, epoxy is applied - the mixture is added in small quantities and spread with a spatula to eliminate the appearance of excess. If the resin is liquid, and a crack has formed in a vertical section, you can seal it with tape to create a recess for the resin, which will not spread over the surface.
- After complete drying, you can sand the surface with fine sandpaper.
Using the methods described above, you can repair a toilet with a flush cistern with minimal investment and in the shortest possible time.
What is needed for repair
The selection of adhesive for the toilet is a crucial moment on which the strength of the seam and the further use of plumbing depend.
How to choose glue
It is possible to glue the surface so that the seam is invisible. Silicate glue is often used, as it is resistant to water, temperature changes, has a long service life, and prevents the spread of fire.
To secure the seam, you can resort to using liquid nails. Ready-made adhesive mixtures are also purchased:
- BF-2 is a viscous reddish liquid containing an alcohol solution of polyvinyl acetate with a resin complex. Waterproof, does not form fungus or mold on the surface. The composition is flammable, for this reason it is necessary to operate away from direct flames and heat devices, in a thoroughly ventilated area. Bonds ceramics, glass, plastic, etc.
- Unicum is a one-component adhesive containing rubber and reinforcing additives. Scope of application: gluing ceramics, glass, leather, rubber, etc. viscous mass of beige color. The seam can withstand temperature changes from –40 to 70 degrees. Method of application: the surface of the toilet bowl is cleaned, the glue is applied in a thin layer, after 10 minutes a second layer is applied, after 10 minutes press the surfaces to be glued. The product is put into operation within half a day. The operating temperature should not be less than 10 degrees. The mixture is flammable, for this reason it is necessary to operate away from direct flames, heat devices, and in a thoroughly ventilated area.
- Rapid is an adhesive in the form of a solution of nitrocellulose with resins and organic diluents. Used for gluing leather, wood, porcelain. During operation, the planes are degreased, dried, a layer of glue is applied and dries for up to 20 minutes, after which a second layer is applied, the planes are pressed firmly and secured. Complete drying is achieved after two days.
Homemade adhesive composition
For the purpose of gluing a toilet bowl or toilet cistern, an adhesive mass is made independently. To do this you need to follow these recipes:
- Durable, but not easy to use, proportions: one part of crushed glass, two parts of sand (pre-sifted), six parts of sodium silicate.
- Durable, but hardens quickly, for this reason it is prepared directly before use, applied to cleaned surfaces: one part lime, ten parts chalk, two and a half parts sodium silicate.
- Glue mixture: one part turpentine, two parts shellac. Mix well, melt over low heat, cool. The mass is divided into parts. Melts before use. Apply a thin layer to the prepared surfaces, press tightly and fix. If excess mixture appears through a seam, it must be wiped off immediately.
- Gypsum composition: gypsum is soaked in alum for 24 hours. Afterwards it is dried, calcined, and crushed. To prepare the glue, the dry mixture is diluted with clean water until a creamy mass is formed.
If other elements are damaged
Often it is not the toilet itself that is damaged, but one of the nearby parts - the corrugation. It is a tube that connects the toilet and sewer system. If a crack forms in it, water will run out onto the floor. This is often discovered very late because the damage is very minor.
The situation can only be corrected by replacing the corrugation:
- Turn off the water.
- Remove the old corrugation and clean all the elements from mucus and dirt.
- Remove old sealant with a knife and apply new one.
- Connect the new corrugation to the toilet and sewer system, apply sealant to the outside.
A simpler element, the seat, can also be damaged. It is worth listening to the advice of experienced people and refusing to repair. After gluing, the seat may become uncomfortable to use and very unreliable.
Cracks or chips are a common problem for ceramic and porcelain toilets that must be addressed. Every person can make repairs on their own. The main thing is to purchase a high-quality adhesive solution and strictly follow the instructions.
We carry out the final finishing
It may happen that the seam ends up inside the toilet. In this case, it needs to be strengthened. You need to let the seam dry, and then sand it again using sandpaper. Then you need to thoroughly degrease and dry the prepared surface with a hairdryer, and coat it again with adhesive.
A strip of amplifier is placed on top of the glue layer (soft metal or thin plastic is used for this purpose). After this, the gluing area must be thoroughly dried again.
This is followed by external treatment of the repaired damage using grout specifically designed for tile joints. For this purpose, it is also possible to use a solution based on epoxy resin. Similar compositions can be purchased at construction stores. They can be of different colors, so they can be easily matched by tone.
Answers from experts
Sidorov Mikhail:
The side of my tank cracked all the way to the bottom. I put it on silicone and coated the wall inside and outside. Two years without problems. But I did it for a while, I thought I’d replace it later. No need.
Veronica Ivanova:
Cold welding
Torpedo boat base:
qualitatively - nothing
Roman Mikhailov:
Use epoxy resin, then rub the seam with zero and cover the top with a thin layer of enamel.
Demitros:
can be glued with liquid nails for plumbing
Izbiratel:
I assume that initially water was dripping or flowing there, and instead of unscrewing and changing the gaskets, you decided to clamp it... I bought another toilet!
Anton Antonenko:
Here
Lilya Kalide:
If “only silicone sealant,” then you lubricate the split with sealant and attach it. then you fill everything with this sealant from the floor and walls to the broken piece, allowing the layers of fill to set so that there is support. as glue the sealant is no good, but as a replacement for the support it might last for a while
Gda:
Someone climbed in with their feet...)))) Change.... or don't change it
Sergey Drozdov:
Previously, we did it ourselves, but now there seem to be adhesive mixtures containing liquid glass (especially for ceramics) on sale. You just need to look for them. All the fragments will stick together perfectly. In some magazine from “Young Technician” from the 80s there was a recipe for such glue. You can google old collections.
GT:
stick a piece of pipe into the tank with sealant and take it out into the toilet, the place where the degrease broke off and glue it to epoxy or silicone.
Vasilevich:
Glue this piece with EDR glue (epoxy resin), I fixed the sink this way, it’s been in use for 10 years now.
Vladimir Nikitin:
A broken toilet shelf under the cistern cannot be repaired. Replacing the toilet.
Design features of the device
The microlift is sold together with the toilet lid, but it can also be purchased separately. Covers equipped with closers are made of plastic or its modern version - duroplast. Although this polymer looks like plastic in appearance, its quality characteristics are closer to ceramics.
Fix the device to the toilet in a rigid way. The main structural elements of the microlift:
- A rod that securely holds the rigid plastic installation.
- Spring to balance the weight of the structure.
- Hinged micro-lift mechanism that allows changing the position of the lid.
In more expensive functional systems, the basis of the mechanism is not springs and rods, but pistons and cylinders. Structures of this type are classified as non-removable.
Functional systems, in which seats and covers are supplemented with a built-in microlift, are produced by many manufacturers of sanitary equipment. If desired, you can purchase and install a universal system, which includes, in addition to the microlift, other devices.
They are capable of providing several functions at once:
- adjusting the temperature of incoming water;
- possibility of seat heating;
- high-quality washing, enema and massage;
- extraction of unpleasant odors followed by deodorization.
Many models are often equipped with a convenient self-cleaning function, thereby minimizing the participation of household members in the process of using the plumbing fixture. The presence of a microlift is just one way to make your living conditions more comfortable.
