Designers use natural or decorative (artificial) stone or in combination with other finishing materials to decorate a room:
- individual elements: columns, arches, fireplaces, stoves, countertops;
- bathrooms, showers;
- kitchens;
- hotels;
- offices;
- saunas, baths.
The main advantage of natural material over artificial material is durability. But in terms of safety, color variety, ease of gluing, cost-effectiveness, load on the surface, transportation, and the ability to make tiles yourself - choose synthetic artificial stone.
But this finishing material has minor drawbacks:
- quality of a smooth surface on the back side;
- you need to ask for a product certificate;
- has a long service life, but is not eternal, like its natural counterpart;
- may fade under the influence of sunlight - additional treatment is required.
Types of adhesives for gypsum tiles
All types of ready-to-lay gypsum tiles have the same characteristics, except for geometric and artistic ones, so the choice of adhesive for installing selenite depends on the type of base being tiled and the volume of finishing work. Adhesives for alabaster cladding can be divided into the following groups:
- Special mixtures based on gypsum.
- Compositions suitable for laying selenite tiles.
- Available materials used for installation of gypsum stone.
Let's consider these groups of adhesive materials.
Special gypsum-based adhesives
To glue gypsum stone to the most common types of base (brick, concrete, plaster, plasterboard), manufacturers of adhesive compositions offer specialized mixtures, combined into a group called “gypsum assembly adhesives.”
Mounting gypsum adhesive is a dry mixture of building alabaster and plasticizing additives, which is mixed with a certain amount of water and is used for installing selenite tiles, as well as sealing cracks, seams, sinkholes and chips on brick, stone and plastered surfaces.
Let's look at which glue is better and what you need to pay attention to when purchasing it.
- Quartz sand content
The dry mixture may contain white quartz sand, which is added by the manufacturer to reduce the cost of the material. The presence of this additive in the glue must be indicated on the packaging of the material, and when choosing a composition, it is better to give preference to a mixture without sand or with minimal inclusion of it, since sand impairs adhesion.
- The ratio of the weight of the dry mixture and the amount of water required for mixing it
The degree of adhesion of plaster adhesive depends on the percentage of alabaster in the mixture. The quality of the adhesive composition can be assessed by analyzing the required amount of water indicated on the packaging in the instructions for preparing the adhesive - at least 300 ml of water should be required for 1 kg of dry mixture.
If less than 300 milliliters of water is required, then there is little gypsum in the glue, and there are a lot of cost-saving additives.
Knauf gypsum plaster mixtures
For example, well-proven gypsum adhesives from the manufacturer Knauf require 0.5 liters of water to mix 1 kilogram of dry mixture.
- Setting time of prepared glue
The duration of fixing the tiles on the surface by hand after installing the product in place and, accordingly, the speed of finishing depends on this indicator. The shelf life of the solution in a bucket, depending on the manufacturer, ranges from 30 minutes to one hour. When choosing glue, you should give preference to a material whose shelf life is as close to half an hour as possible. This will reduce the portions of the prepared mixture, but will allow you to glue the parts at a fast pace.
Preparation and use of gypsum-based adhesives
Instructions for preparing the mixture for laying alabaster tiles are available on the packaging of the material.
A measured amount of dry mixture is gradually added with constant stirring to the required amount of water. If you do the opposite - pour water into the mixture, then the formation of lumps is inevitable when stirring.
After achieving a homogeneous mass, the glue is allowed to stand for several minutes, then the composition is mixed again, after which the solution is ready for use.
Alabaster glue on a gypsum basis - a specialized dry mixture
Depending on the manufacturer, preparation methods may differ in the amount of water required to mix a unit weight of the dry mixture, and the time the mixed solution is left to rest before re-mixing before use.
The surface to be covered (brick, concrete, plaster) must first be primed with a hydrophobic primer to retain moisture in the adhesive upon contact with them, and the seams of the brickwork must be rubbed with a leveling compound.
To lay gypsum tiles, glue is applied with a flat spatula to the base and back side of the product, after which its excess is removed with a comb spatula. To prevent lumps of hardened composition from forming on the tool, it is necessary to wash it in water more often. The total thickness of the layers of the adhesive mixture after pressing the product at the installation site should not exceed one and a half centimeters.
Full strength is achieved by the mixture, usually one day after installation of the tiles. The final drying time of the composition, depending on the manufacturer and the air humidity in the room, can vary from four to seven days.
Adhesives suitable for laying selenite tiles
An alternative to special gypsum-based mounting mixtures are the following materials:
- adhesives for ceramic tiles;
- "liquid Nails".
Liquid nails for repair work
Let's consider the methods and feasibility of using these products when facing surfaces with alabaster.
Adhesives for ceramics
Since gypsum cladding is not used for finishing rooms with difficult operating conditions, alabaster parts can be glued using almost all types of glue for laying ceramics. The technology for using tile adhesives for gluing alabaster tiles does not differ from the methods of using them when tiling with ceramics. If the surface is prepared correctly, gypsum tiles can even be laid on ready-made polymer adhesive mixtures.
It should be noted that mixtures for laying tiles have higher physical characteristics than compositions based on selenite. But in the case of facing with alabaster tiles, these materials have no advantages over gypsum glue; their use is acceptable, but not advisable for the following reasons:
- when using glue for ceramics, the selenite cladding must be primed, since gypsum, due to its hygroscopicity, will draw moisture from the glue necessary for curing;
- Tile adhesive takes longer to completely dry than gypsum mixture;
- Due to their high characteristics, the price of adhesives for ceramics is higher, and their advantages remain unclaimed.
Adhesives for laying ceramic tiles
If you use a two-component epoxy-based mixture, then gypsum tiles can even be glued to a metal or plastic base, but for this you will have to reinforce the back surface of the alabaster products, which will significantly complicate the work. In addition, the high cost of strong and durable reactive compounds does not favor their use when laying gypsum tiles, which are usually not planned to be used for a long time.
Installation of alabaster with “liquid nails”
This method of laying alabaster products is quite acceptable when finishing small areas of the surface and making spot repairs of gypsum cladding. The glue is applied dotted or in the form of strips to the back side of the tile, after which the part is left for 10-15 minutes to dry the applied composition. Then the alabaster product is applied to the base to be coated at the design location and is evenly pressed to the required level.
Attaching selenite finishes to bricks without first grouting the masonry joints is impractical due to the high consumption of glue.
“Liquid nails” provide strong fastening of tiles, without requiring professional skills. In addition, “liquid nails” are a completely ready-to-use adhesive that does not require any tools other than a mounting syringe. Gluing parts onto “liquid nails” is also convenient because the process creates almost no contamination of the finish or room associated with the work.
Manufacturers
Let's look at the main manufacturers of adhesives for decorative stones.
- PLUSFIX. One of the most inexpensive options, as it is cement mixed with sand. It can only be applied to concrete and brick walls. It is also only suitable for small tiles (with sides less than twenty-five centimeters).
- PERFLIX is a more preferable option, since the adhesive is made from gypsum and special additives that increase its elasticity and drying speed. The prepared solution must be used within half an hour. Glue is sold in bags weighing thirty kilograms. And this amount will require fifteen liters of water.
- Satyn PKG-28 is a better option for those who are laying tiles for the first time. Due to the addition of special substances, the glue is very plastic. And the solution remains useful longer than the remedy described above - as much as fifty minutes. Sold in bags weighing twenty-five kilograms.
- Gypsum is another mixture of gypsum and minerals. The finished solution should be used within half an hour, and it dries on the wall faster than the previously listed products - within a day. A package weighing thirty kilograms will require approximately eighteen liters of water.
Laying decorative stone
How is decorative stone laid?
Laying decorative stone is very similar to tiling walls, but the process is still slightly different.
Adhesive for decorative stone
A stone made from gypsum is laid on glue with the same base for better adhesion of the surfaces.
Cement and natural stone can be glued using DSP.
However, a stone set on an adhesive mixture of cement will look more aesthetically pleasing.
If the area to be covered with decorative stone is small, it is possible to use liquid nails.
If you need to decorate the entire wall, it will be more economical to buy special glue.
Preparing the walls
Any decorative stone has its own texture, and when pasting it, it is impossible to level the cladding.
Experts recommend doing at least a rough leveling of the walls, that is, filling up noticeable depressions and cracks, and removing the most prominent protrusions.
This material is glued like regular tiles and therefore can highlight all surface imperfections. If the stone has a shape close to natural stone, then minor defects can be missed. In the case of old finishing, it is necessary to remove the old plaster and remove the wallpaper.
Features of laying stone on different surfaces
For wallpaper
If the plaster or wallpaper was applied relatively recently, but you want to decorate a small piece of the wall with stone, then you need to do the following.
Carefully trim the coating along the contour slightly smaller than intended.- Remove the wallpaper inside the outline, trim the outer edge and roll it up. This is done in order to hide the joint between the wallpaper and the stone.
For paint
We do this with a paint coating: if the paint holds well and does not peel off, then you should try gluing the stone directly onto the painted surface. If the stone element holds, then we continue to glue the stones onto the painted surface.
Laying gypsum stones
Before laying gypsum stone, it is necessary to treat the walls with a deep penetration primer. Before laying cement or natural stone, the walls and the back side of the stone are sprayed with water from a spray bottle.
Stone laying process
It is very important to do this before facing with free-form stone, so you can see how it will look on the wall.
At this stage, they also pay attention to the color design.
Gluing ceramic tiles is a boring and monotonous process, but decorating the surface with stone is a creative process.
But the rule of decorating with stone still exists. If the wall you want to decorate has a corner, then start laying the stones from there.
- To begin with, lay out a guide from a small number of elements.
- From the guide, the rest of the stone decor is laid out.
- Experts place the decorative stone on top; this method avoids staining the already glued elements. And whole stones will be visible, and sawn ones will go to the floor.
Decorative stone can be glued in several ways. Some stones are glued almost without gaps. But if you suddenly decide to leave the seams, then you need to insert special crosses into them. The glue is applied to a small area of the wall in a thick layer of about six millimeters.
The decorative stone is applied to the wall and pressed into the required place. If glue comes out, it must be removed immediately with a damp sponge.
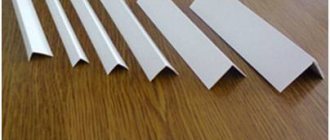
Stone for decoration can be cut with a grinder or electric jigsaw. To make your work easier, you can immediately purchase corner elements.
The seams between the stones are unstitched if they are very wide. After you have finished decorating the walls with decorative stone, the glue has already hardened and you have sorted out the seams, the decorated surface must be treated with a special moisture-resistant compound if it is outside the building, or with varnish if the work took place indoors.
Now we have come to the end of our article, we hope that you have learned something useful for yourself. Good luck!
Self-production
For self-production, you will first need molds. The mixture will be poured into them, which, after hardening, will become a full-fledged element of the decoration of the room.
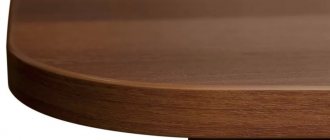
In order to make plaster tiles with wood imitation, you will need a wooden die processed by brushing. Soft fibers are burned out in such wood, causing the surface to acquire a pronounced relief. After filling the die with silicone, the mold will follow the texture of the wood.
Tiles with imitation wild stone are made in a similar way. In this case, fill in any stone you like. To produce slabs in large quantities, several molds will be required. To attach self-made finishing material, use the same glue for gypsum boards as when laying store-bought products. The criteria for choosing a mixture are the same:
- sufficient period of mobility;
- minimum amount of quartz sand;
- presence of modifying additives.
It’s easy to make gypsum tiles with your own hands. All the necessary tools for installing gypsum tiles are inexpensive and almost every owner has them. The main thing in this process is to make beautiful forms for pouring the mixture. If the installation technology requirements are met, the wall finishing will be of high quality and durable.
How to glue decorative stone with your own hands
The gluing process depends on the design.
- Usually the procedure is performed in a checkerboard pattern, and the rows are measured vertically.
- If cutting is required, use a hacksaw rather than a grinder, which produces a lot of dust.
Those who are interested in how to glue decorative stone with their own hands should be careful. If you are working with plaster, it is worth remembering that this material is fragile, gets dirty easily and does not like moisture very much.
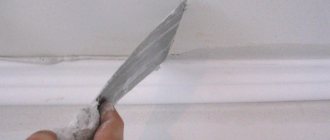
After installation, the joints between the joints and in the corners are puttied.
If you do everything carefully and correctly, the result will please you for many years.
What mistakes are usually made?
If you do not follow the rules of work, you may, unfortunately, not achieve the desired result. In addition, you can spend a lot on products if you leave a lot of leftovers and damaged decorative coating. In case of missteps, it’s worth saying this:
- not cleaning adhesive drips before they harden (then cleaning them without harming the elements will be a difficult task);
- careless creation of seams (or too wide seams);
- skipping the primer treatment step from inside the tile and using protective mixtures;
Of course, ideally, avoid these flaws, and then the result of your work will be much better, and the coating will please the eyes, as if it was made by a super pro!
Preparatory work
All preparatory work is divided into several stages:
- preparation of the working surface;
- calculation of the amount of material;
- choice of glue;
- preparation of material (adjusting the required shapes and sizes).
Let's look at each of them in more detail.
Preparing the work surface
To ensure that the gypsum material holds securely, any type of surface will do. The main condition is that the working surface must be clean and dry. To fulfill this condition, it is necessary to carry out the following work:
- Remove the remains of the previous finishing material.
- Remove remaining glue and plaster from the surface.
- Use a wire brush to sand the surface of the wall.
- If necessary, install reinforcing fiberglass mesh for the wooden base.
- Prime the walls with acrylic solution for deep penetration.
Important! For further work, you need to wait until the solution has completely dried. Check the exact time in the instructions for the material.
Quantity calculation and material preparation
In order to correctly calculate the amount of material required, you need:
- Determine the surface area of the finish.
- Subtract the area of window and door openings.
- Calculate the amount of material in accordance with the resulting cladding area.
- Add 10% of the standard overrun to the resulting figure.
What to glue decorative gypsum stone to?
In modern construction, artificial stone is widely used both for interior decoration and for external cladding of facades. This material looks very similar to natural stone and at the same time has many advantages.
Preparing the area and material for work:
Before laying gypsum tiles on the wall with your own hands, follow a number of steps:
- Clean the surface of the wall or other area from traces of previous decor and level it.
- Prime the wall with impregnation. It is also advisable to prime the stone itself. The primer will help reduce the absorption of the inner surface of the stone and remove dust. Let the primer dry.
- Start laying gypsum tiles by laying out several rows on the floor. Based on the resulting pattern, make markings and cut off the required pieces. Perform pruning with a hacksaw or grinder.
Surface markings:
To achieve perfect evenness of the masonry, use a building level or an electronic level. Don't forget to leave room for baseboards, floor coverings, etc.
Choosing adhesive for gypsum tiles:
The choice of adhesive for gypsum tiles depends on the installation method:
- With the seamless laying method, liquid nails, silicone sealant, polyurethane foam or other contact adhesives are applied pointwise in the middle of the tile.
- When laying decorative tiles under brick under jointing, use special gypsum glue or polymer putty, which are evenly applied to the entire surface to be decorated and to the tile.
- It is not advisable to use cement mortar. It takes longer to dry and during this time the plaster absorbs excess moisture. If you still use this glue, then you definitely need a priming step for high-quality installation.
Rules and subtleties of the gluing process:
Decide in what order you will lay the stone. If the stone is of different sizes, alternate large, medium and small tiles. In the second row, change the order. If the stone is the same size, then to start the second row, part of the stone needs to be sawed off with a hacksaw so that the seams of the top row do not coincide with the bottom.
In order for the corner to look beautiful, the tiles need to be cut using a miter box and a hacksaw at an angle of 45 degrees. Wall tiles are glued mainly horizontally. Gluing is done both from above and from below. Work starts from the corner. The edge of the furniture adjacent to the installation site is covered with masking tape. It is removed in small parts immediately after gluing two or three tiles, until the glue has dried. The nuances of installation depend on the chosen method:
- Seamless masonry. Before gluing gypsum tiles to the wall using this method, you need to check its geometry. Sometimes the dimensions of the parts differ from each other. In this case, the middle of the wall is laid out as perfectly as possible. After all, she is the one who always comes into view.
- Masonry for jointing without filling the seam. Often the seams are not filled, since gluing gypsum bricks to the wall using this method is cheaper and faster. The main difficulty is to apply the adhesive very evenly and thinly to the wall. Use a spatula without teeth for this. If the glue comes out from under the tiles, spread it evenly along the seam with a wet brush.
- Masonry for jointing with joint filling. The seam is filled with a mounting gun or a special bag for unstitching.
- To fill the joints, use a special grout for gypsum brick tiles. Dilute the powder according to the instructions, place it in a cone bag and fill all the seams. The width of the opening in the bag is less than or equal to the width of the seam. After application, leave to dry to the consistency of softened plasticine. Then use a special spatula to remove the excess. A relief characteristic of such masonry should be formed. After drying, clean the tiles with a medium-hard brush to remove grout residue. Treat the entire lined surface with polyurethane or acrylic varnish, or any moisture-repellent agent to create reliable waterproofing protection and ensure long-term operation.
Difficulties and nuances of the main installation stage
Despite the light weight of gypsum stone, for its installation you should purchase a special adhesive composition that can ensure the required adhesion of the material to the wall surface. The glue is applied to the wall in a uniform layer of 0.3 to 1 cm, and several convex “cakes” are placed on the back side of the stone. If the installation will be carried out in a “seamless” way, a thin layer of glue must be applied to the side edges of the tile.
But in order to subsequently form beautiful decorative seams, installation is carried out using special wedges, and the ends are not smeared with glue.
The most important element of gypsum stone masonry is the corners. To ensure beautiful and even joints, you can purchase ready-made corner elements of the same type as the main body of the tile. If such elements are not represented in a given stone collection, the corners are overlapped or butted. In the latter case, stones with pre-cut cuts at an angle of 45° are used. Having ensured the “correct” angle, it will not be difficult to continue the rows in a linear direction to the left and right.
Grouting and finishing decoration
Having laid out the entire planned volume of stone and waited a day until the glue is completely fixed, they begin to finalize the almost finished interior element. At this stage, the seams are cleaned and, if necessary, rubbed and the stone is tinted using a brush or airbrush. After this work is completed, it is recommended to protect the surface of the stone with a thin layer of acrylic varnish.
The home master has the right to decide: to engage in all these intricacies, or to leave everything as is. Since correctly selected and laid gypsum stone is beautiful in itself, and does not require additional protection when used indoors.
Glue selection
There are different types of glue for decorative gypsum stone. This can be a special gypsum-based glue or glue for clinker tiles, which is also well suited for decorative stone. You can purchase glue in the form of a dry mixture or a ready-made solution.
The dry mixture is diluted with water in the proportion indicated in the instructions. The dry mixture contains alabaster and plasticizing additives. And although the composition of the mixtures is approximately the same, they have different properties. Initially, you should pay attention to the speed of its hardening.
Useful tips
Decorative stone looks good without any tricks. However, there are several secrets on how to give the final finish a designer look:
- The tiled surface looks harmonious if the sequence of laid elements of different shades and sizes is chosen correctly. When using slabs of the same size, it is necessary to accurately maintain the evenness of the lines diagonally, vertically and horizontally.
- Trimming the corners of individual fragments will give maximum attractiveness to the finish.
- The seams must be sealed with extreme care and a special bag for filling voids or a syringe gun must be used for this. The fact is that the solution that gets on the front surface of artificial decorative slabs is extremely difficult to remove.
Installation of artificial stone is simple and does not require significant costs, but work at all stages should be done as carefully as possible. In addition, you need to pay close attention to the compatibility of color shades and sizes, only in this case the finish will be pleasing to the eye.
Gluing instructions
Gluing artificial stone to the wall must comply with the requirements for the installation of coatings of this type. There should be no voids or uneven areas under the tiles, as the thin layer of gypsum above them will be especially vulnerable to impacts. The gluing technology is simple and does not require special skills.
Surface and Material Preparation
For work, you need to prepare all the necessary materials and tools to speed up the process of installing stone elements. Required:
- artificial stone made of gypsum (you should buy the entire amount of material needed for finishing at once);
- tile adhesive or special gypsum composition;
- primers;
- measuring instruments, building level;
- putty knife;
- hacksaw;
- metal brush;
- brush or roller;
- a narrow blade for filling the seam (6-8 mm).
Work begins with preparing the base: it needs to be leveled and rubbed, eliminating large differences in surface height. Small irregularities can be filled with glue during the installation of each element, so alignment is done on your own, without calling in professionals:
- Remove the old coating from concrete and plastered surfaces and eliminate potholes; after drying, treat the wall with a wire brush;
- stick a fiberglass reinforcing mesh onto a wooden wall;
- Apply the primer solution according to the manufacturer's instructions, maintaining the drying time of the composition.
What glue is used when working with decorative stone?
Depending on the material of the surface to be finished, different types of glue can be used:
- putty, tile or cement-sand mixtures - for brick, concrete, plastered walls;
- PVA, acrylic, Bustilat - for installation on drywall under putty;
- liquid nails, thick rubbed paint, sealants and mastics - for fastening to metal, plastic and similar partitions and architectural elements.
When choosing an adhesive, you need to pay attention to its suitability for use on existing surfaces. The manufacturer indicates this information on the packaging. Gypsum brick tile adhesive can also be used to fill joints.
How to glue a decorative stone with your own hands?
When choosing a method for interior decoration, take into account the need to leave a gap between the elements. There are:
- Installation without jointing. Used for finishing to resemble torn or chipped stone, trying to create a uniform surface without joints. The masonry elements are installed close to each other.
- Masonry with jointing. It is used to imitate a brick wall, flagstone or cobblestone paving, pebble mosaics, etc. A gap of 0.5-1 cm remains between the individual stones, which, after gluing the coating, must be filled with grout mixtures.
In addition to these differences, laying decorative stone from gypsum is carried out according to general principles:
- Open several packages of stone from the purchased batch. The material may differ slightly in shade, and mixing different elements will allow you to obtain a coating with a subtle color transition, like natural stone. It is advisable at this stage to lay out the outline that will be on the wall. This will help match the tiles to each other so that they best resemble staggered brickwork or the uneven texture of geological rock. You can cut off part of the slab with a hacksaw (with small teeth).
- Wipe the back side of each tile with a wire brush and coat it with the same primer used for the wall. Prepare the glue in advance if the manufacturer of the mixture recommends infusing it before use.
- Adhesive compositions are applied depending on their type. Putty or gypsum-based tile adhesive is spread over the back surface of the part with a notched trowel. Sealants and liquid nails are used according to the manufacturer's instructions: applied pointwise or in strips, waves, etc. Cement-based mixtures are applied to the wall in a layer of up to 6 mm (in separate sections of 1 sq. m).
- Glue the tiles using a pressing and rotating motion. If any composition other than cement is used, it is better to glue from the top corner, gradually lowering towards the floor. It is more convenient to attach tiles to a cement-sand mortar applied to the wall, starting from the bottom. If a seamless technique is used, the elements are rubbed close to each other. To imitate brickwork, you can use thin, even sticks, placing them in the joints. They will make the seam uniform.
- After finishing, the wall must be dried according to the instructions for the glue (usually about 24 hours). Then grouting compounds are applied to the masonry with jointing, filling the gaps between the tiles. A wooden spatula 6-8 mm wide will help to rub the compound into a narrow seam. For seamless masonry, grout is not used, since the space between the tiles is often filled with excess glue during installation. If they are squeezed out, the composition must be removed immediately, before it hardens.
After drying the walls in a room with high humidity (kitchen, bathroom), it is necessary to treat them with moisture-proof varnish. A shiny or matte finish is sometimes used to decorate a wall in a room with normal humidity.
How to paste on wallpaper?
A fashionable method of wall decoration, combining the use of wallpaper and fragments paved with gypsum tiles to look like stone, requires compliance with special rules. It is not recommended to glue tiles directly onto the wallpaper: the mass of parts can tear the panel from the wall.
To properly complete the finishing, glue decorative stone to the wall in combination with wallpaper as follows:
- level the wall and mark its parts where different materials will be mounted;
- stick the wallpaper in the traditional way, leaving bare areas intended for the stone;
- if the wallpaper is already pasted and does not need to be changed, remove part of this coating in the right places;
- when gluing or removing part of the wallpaper, the line of matching textures should extend 2-3 cm onto the pasted surface, then the junction of different parts will be invisible;
- You need to prime the wall and glue the decorative gypsum stone according to the principles described for installing such tiles, slightly placing the edges of the parts onto the wallpaper.
If you have to change the wallpaper after the stone laying has been done, it is recommended to join the edges, overlapping the panel onto the tile (3-5 cm). In this case, it is important to glue the joint well. After gluing, use a sharp knife to cut off the excess directly along the edge of the stone. If necessary, the edges are glued, and a decorative baguette (plinth) can be attached to the straight joint.
Installation features
You should know that rooms where the foundation is already established are suitable for finishing with decorative stone; at least six months must pass after construction, otherwise your finishing will fly off.
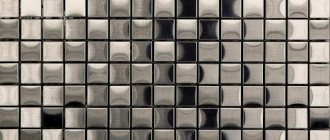
Decorative stones, based on their appearance, are conventionally divided into bricks and slate.
The slate is fixed on the wall without gaps, the row is leveled using plastic wedges.
Decorative bricks can be glued close to each other, or at a distance - jointing.
Load calculation
The load depends on the type of decorative coating. The slate is laid closely, so you need to know:
S st. – wall area, sq. m.
S tiles, sq. m.
1 sq. m / S tiles = Number of pieces per 1 sq. m.
K pcs/sq.m x S art. = Total number of tiles.
For bricks, you need to know the dimensions of 1 piece, laying close together or with a seam (joint), the planned thickness of the seam.
If you lay it without a seam, you will need more consumables; with a seam, you will need less.
Calculation formula for bricks with a seam:
It is necessary to add the height of the seam to the length and width of the stone and determine S of the brick with the seam (height x length).
1 sq. m/s brick. with seam = Quantity per 1 sq. m.
K per 1 sq. m x S walls = Number of total.
But they advise taking with a small margin.
The formula for the number of bricks without a seam is similar to slate.
Preparing the surface and stone for laying
The walls should be smooth, like wallpaper, and cleaned of previous finishing material. Carefully prime the surface to be decorated using a deep penetration primer. Leave to dry.
While the walls are drying, lay out a preliminary pattern of tiles on the floor. Take decorative stone for the wall from different boxes, alternating, to make the masonry look natural. Some experts recommend coating concrete-based tiles on the back side with the same primer.
For gypsum, tile adhesive, liquid nails, and waterproof finishing putty are suitable for fixing white bricks. There is white glue, but it often has a green tint, although it says white on the label.
Concrete-based concrete is fixed with silicone glue (for interior work only), special adhesive mixtures and liquid nails are used.
Rules and principles of installation
Mix the glue, apply it to the tile with an angled spatula, level it with a jagged or even layer and spread it around the perimeter with silicate glue. Apply markings to the wall. Laying begins from the corner, from bottom to top, next to each other. Level with plastic wedges. Use a grinder (for concrete) or a hacksaw (for plaster) when you need to cut off excess or saw out for sockets. If the tiles are glued to cement mortar, then at the beginning of installation, a painting mesh is glued to the wall with cement mortar, plastered, then bricks are glued with a joint of 1–2 cm. Subsequently, they are filled with jointing mixture.
We recommend that you watch a video about the rules for laying bricks:
Finishing
When the decorative material is glued, any random adhesive mixture, construction dust is removed from it, and excess jointing mixture is removed. They begin painting, grouting the joints, and cover them with a protective layer to better preserve the finish.