Poor quality printing refers to various defects on printed sheets of paper. For example, the printer prints in stripes, smudges the sheets, only half is printed, and other possible symptoms. Even the most expensive and modern printer can become poor at printing over time or after certain actions. Moreover, the brand does not matter; the problem is relevant for manufacturers HP, Canon, Epson, Brother, Samsung, Xerox, Pantum and others.
Below we will take a closer look at why the printer prints poorly, as well as what to do to identify and correct the situation. If you go through all the points, you will definitely restore the print to its previous level, which cannot be distinguished from the original one after purchase.
Utilities for adjusting color
This measure is, in fact, the simplest to implement. It is recommended to use it after checking the paint level in the tank. If the red ink has not yet run out and the printer does not print, then the driver for cleaning the PG is launched. This measure is effective if the Canon, HP or Epson inkjet printer is rarely used for its intended purpose.
Color setting
But neither software cleaning nor other restorative measures will help those cartridges whose jaws have hardened, the electronics are damaged, and the sealing of the nozzles is broken.
Rinsing a cartridge containing an absorbent sponge
To begin with, the sponge is brought back to its normal state. To do this, you need to remove the PG from the printer, which is not printing, and place it in a pre-prepared solution of distilled water or cleaning liquid. The cartridge is placed with the nozzles down.
The next step is to refill the cartridge. It is advisable to do this using a special suction cup or syringe. It is slowly pulled back through smooth movements. Before installing the element back into the peripheral device, it is cleaned of excess paint.
At the same time, pay attention to the condition of the contacts. They must not be damaged or stained with ink.
Cleaning the print head
If after 3 cleanings the printer does not print or the quality of the resulting print is poor, then all that remains is to replace the cartridge. Unfortunately, Epson printers with a similar design require frequent replacement, since they cannot be restored. The procedure is shown in the photo.
Remanufacturing of vacuum ink cartridges
What to do in this case? PGs characterized by vacuum paint retention are easier to revive. To begin, 10 ml of cleaning solution is poured into the cartridge. After a couple of minutes you should shake it out. The procedure is repeated 3-4 times. Afterwards, the cartridge is placed in the rinsing solution for a day (nozzles down).
Refilling the printer
Next, you need to fill in the ink, stop the air from entering the cartridge, and use a special suction to extract no more than 10 ml of ink through the nozzles. If the process occurred without complications, then all that remains is to carry out 3 cleanings of the PG and check the result by means of a test print.
Cleaning separate steam generators
If problems are diagnosed with the ink tank, then there is no point in repairing it. The print head can still be revived. This is done using special utilities that are on the installation disk included with the Canon (Epson) printer when you purchased it.
If this is useless, the PG is dismantled. In this case, you must follow the instructions. Otherwise, it is useless to hope for further operation of peripheral equipment. Afterwards, 10 program cleanings are required. If the printing result is not satisfactory, then replace the main element of the Epson inkjet printer.
Epson printer
Ultrasonic cleaning of a separate print head is considered effective, but it is used only in a service center. If the situation cannot be corrected at home, then they turn to professionals.
The print head is dirty
If the damage is not confirmed, but serious contamination of the print head has been detected, then you can clean it as follows:
- Check the ink level in the printer. If there are few or none at all, then add to the required level.
- Make a test print.
- If unsuccessful, rinse the head with a special liquid (sold in computer hardware stores) and leave for 10-20 minutes.
- In the printer settings, activate the automatic head cleaning mode.
If the problem was really a dirty print head, then after these manipulations the printer will begin to print well.
If the printer has not been used for a long time
A printer is equipment that does not like downtime. If it is not used for a long time, the channels through which the ink circulates may dry out. When you try to print another document, the sensor will detect a lack of ink supply to the print head, as a result of which a corresponding error will occur. To solve this problem, it is enough to perform two steps:
- Clean the cartridge nozzles.
- Clean the print head.
Cleaning cartridges
Cleaning cartridges involves washing the nozzles, from where the ink is supplied to the printer. These nozzles are very small - thinner than a hair, so they are very easy to damage. Mechanical cleaning should be avoided immediately, because... It is hardly possible to find an object that would fit inside the cartridge nozzle. Therefore, another method is used to clean ink tanks - soaking in a special solution.
The procedure itself can be performed as follows:
- Prepare a shallow container large enough to hold the cartridge, some clean paper napkins, and cleaning liquid (you can use bottled still water).
- Place napkins at the bottom of the container.
- Fill them with cleaning liquid so that it just saturates the napkins.
- Place the ink tanks on top of the napkins with the nozzles facing down.
- Wait until the ink begins to spread across the napkin. This may take a few minutes or several hours.
- After washing, let the cartridges dry slightly for 10-15 minutes, then replace them.
- Try printing the document.
The same procedure should be carried out if cartridges that have not been used for a long time are installed in the printer.
Cleaning the Print Head
As the printer is used or left idle for a long time, the print head may become clogged with dried ink, which also leads to the problem in question. To resolve this problem, you can try running the print head cleaning function, which is present in any modern printer. To launch it, you can use the buttons or display on the front panel of the device, but it is easier to do this using software (driver) installed on the computer.
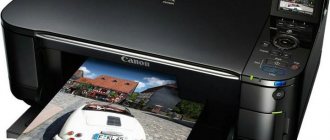
Here is an example of cleaning the print head on Canon printers:
- In the program from which the document is printed, press the key combination “Ctrl+P”, then click on the “Properties” button opposite the name of the printer model.
- Go to the “Maintenance” tab, then click on the “Cleaning” button.
- In the window that opens, you can select a group of cartridges that will be used in the cleaning process.
- Clicking the “Run” button will start the printhead cleaning process.
- Upon completion of the procedure, a new “Check Nozzles” window will open, click on “OK” to start the test.
- The procedure is completed.
In most printers, starting the head cleaning procedure follows the same principle.
Software cleaning
After a long period of inactivity or recent refilling, the print head or the cartridge itself may become clogged and thus create gaps between the lines. First of all, you should clean it using the built-in tools. Go through the control panel to the printers section, select your model and select “Print Properties”. Then go to the Maintenance tab and run Deep Clean. This can be done several times.
Setting up a print queue
Sometimes the printer does not print from the computer due to a problem with the print queue setup. In such cases, the document is queued for printing, but the action does not occur. Sometimes the reason is a simple voltage drop.
However, this often happens due to a software glitch. For example, if the equipment is connected to several computers and is used as a network one. Then the reason for the printing failure is a damaged file that the system creates when sending the document for printing. arises precisely at this moment.
To clear this message, you must perform the following sequence of actions:
Open Control Panel and reduce the size of the icons to small ones. Click on "Devices".
- In the window that opens, select the equipment used for printing. Right-click on it.
- In the menu that opens, select “View print queue”.
All files sent for printing will be visible in this window. Cancel printing by right-clicking on each file and selecting “Cancel”.
In most cases it is renewable and can be used for printing. However, sometimes it is impossible to clear the print queue using the specified method, and the printer reports an error.
Then you should use the following method:
- Remove the cables connecting the device to the PC from the socket and disconnect it from the power supply;
- Following the path described above, find “Services” and click “Stop” in the “Print Manager”;
- Then enter the following entry into the Windows Explorer address bar: C:\Windows\System32\Spool\PRINTERS. Press Enter.
- In the window that opens, send all files to the trash;
- Turn off your computer;
- Plug in the device. Please note that at least 1 minute must pass from the moment you remove the plug from the socket.
- Connect the equipment to the PC using a special cable. Press the device's power button.
- Click on the PC power button and wait for Windows to finish loading;
- Send the document to be printed.
What to do if the printer does not restore its operation? Then you need to use programs created by equipment manufacturers to print files. If your HP printer does not print, use HP Print and Scan Doctor. This program is downloaded absolutely free from the manufacturer's official website.
Method 1: Use the troubleshooter
The operating system's built-in troubleshooter can help you resolve common problems when sending a document to print. It should be used primarily to eliminate these most common faults.
- Launch the Settings app by clicking its icon in the Start menu.
Go to the Update & Security menu.
From the menu on the left, select the “Troubleshooting” category.
Find "Printer" in the available troubleshooting tools and click on that line.
A “Run the troubleshooter” button will appear, which you need to click.
This will run a check of services and other printer-related settings in Windows.
When a list appears with all installed hardware, find the problematic one, select it and continue.
Now the selected device is scanned, which will take less than a minute, and when it is done, the result will be displayed on the screen. If corrections can be made, confirm the action and try printing to this printer again.
This procedure is not always effective, so if you have not made any changes to the printer, consider the following methods.
Solving a problem with an inkjet printer
So, if the printer prints blurry, then select “Printers and Faxes” in the control panel and right-click on the desired device to open its properties. Next, go to the “Maintenance” tab and find the following option there: “Print Head Alignment”.
According to the instructions that came with your printing device, calibrate the consumables, i.e. cartridge. To solve this problem on some devices, you can do the following: press the “Ok” and “Cancel” keys. While holding them, also click on “Black”/“Color” - you can find them on the front panel of the device. After holding it for about 5 seconds, reboot the device.
In addition, you can solve the problem of blurry printing using the so-called mode. self-cleaning, which can be launched directly through the computer. To do this, launch your printer software and click on “Options”/“Settings” in the utilities tab. Then all you have to do is find the self-cleaning option and run it.
Try reinstalling the printer driver or updating it to the latest version currently available. You can find and download the driver on our website or on the official website of the manufacturer of your office equipment.
Be sure to check that the cartridge is securely fastened inside the device. The fact is that perhaps the fixing elements are slightly damaged, which, in turn, negatively affects the quality of the print. Carefully inspect them for various damages and, if necessary, buy new consumables.
Sometimes the problem of blurry printing that occurs with inkjet printers is associated with the positioning tape, which is also called an “encoder”. The fact is that if in any place this part is stained with grease or ink, then the device carriage will simply pass by this area. To troubleshoot a printing problem, you first need to make sure that the encoder tape is actually dirty. If this is the case, then open the cover of the device and, unplugging the power cord, find this tape
This part must be wiped carefully, without using unnecessary force, otherwise it will come off its fastenings, and it will be very difficult to put it back in place - disassembling the device will be required. As for wiping itself, use alcohol or a special liquid for washing cartridges and lint-free material or even toilet paper.
Economy mode enabled
The described mode is designed to consume less ink consumables when printing. It can turn on automatically or manually. In the first case, this is a software function that is activated when the ink level approaches zero. This is designed to not just save ink or toner, but to print more sheets with the remaining ink material.
Many devices on the body may contain a separate button that turns on the economy mode. You just need to press it to turn the mode on or off.
It often happens when the user accidentally presses a button, which leads to a bad print on the paper.
The mode can also be activated or deactivated from the printer software. Try going to the device properties or printing settings and find the function with the required name there.
It is not necessary to look specifically for the saving function; see if the low print quality is worth it.
Technical reasons
There are several reasons why the printer does not print. Conventionally, they can be divided into software failure and technical reasons. Technical reasons include cases when the printer, due to current circumstances, is a priori unable to perform the tasks assigned to it.
No contact between PC and printer
No matter how trivial it may sound at first glance, very often inexperienced users fall into the trap of asking to print material, but forgetting to connect the device itself. Without a connection to the power supply, looking for the reason why the printer does not print, although there is ink, is certainly not only stupid, but also useless.
Likewise, some users forget to connect the printing device to the computer using a special cable.
If all the indicated connections are established, the ready buttons are lit, but no action occurs, you should try to figure out why the printer does not print from the computer.
It happens that the USB cable fails, then a message should appear in the lower right corner of the computer screen that the USB device is not recognized. In specialized stores you can purchase a high-quality cable with additional noise immunity, thanks to which you can establish excellent contact between two devices and forget forever about the unfortunate problems when there is ink, but the device mercilessly refuses to print, although the user makes every effort to correct the technical failure.
Paper Feed Problems
In some cases, paper may be the problem. The most common reason is its absence in the tray, which is also indicated by a special indicator on modern devices. By adding white sheets and clicking on the continue printing button, everything will work safely.
When the user, not understanding why the printer stopped printing, asked to print several times, he himself complicates the operation of the device in the future. Having already dealt with the paper, you have to perform additional manipulations related to canceling established tasks and clearing the queue of documents that previously needed to be printed.
In some cases, even if there is paper, the device refuses to work, indicating a sheet jam. The user must carefully inspect the tray on which the sheets are placed, as well as the roller where they go when printing starts. Often a small piece of paper gets in the way and acts as a serious obstacle.
If there is ink, the sheets are prepared and laid out on the tray, there is no jam, but the printer does not work, and the indicator indicates a problem with the paper, you will have to take the device to a service workshop, since a possible cause will be failure of the paper feeding mechanism or sensor.
Cartridge problem
A printer is a device whose operation is entirely dependent on cartridges. Therefore, it is quite simple to understand why the printer prints white sheets, just by first inspecting the cartridges.
If there is ink, but the device still produces white sheets of paper, although all contacts have been checked, then the problem may lie in low-quality ink. Sometimes users mistakenly refill ink that is not suitable, or the paint sold in specialized stores was not of very high quality, and therefore caused the printer to stop printing or produce only blank sheets, although there is ink in the cartridges.
If the printer stops printing, although the request from the computer is carried out correctly, the reason may lie in a malfunction of the cartridges themselves. However, the correctness of such conclusions can only be confirmed by a service center.
In this regard, if the printer has stopped printing without responding to requests coming from the computer, it means that there is some more serious reason that only qualified craftsmen can recognize. Therefore, the best option is to take it in for repair or maintenance.
Poor quality filling
It happens that after adding high-quality black ink, the equipment still refuses to print. This may be due to poor quality refilling: the cartridge was inserted incorrectly or sealed. Then the problem can be easily resolved:
- the cartridge is removed and reinserted until it clicks;
- before or after installation, seal the hole from the syringe needle with tape (adhesive tape);
- then check the functionality of the device.
All manipulations should be done carefully so as not to accidentally break anything.
Streaks when printing on a laser printer
What is the reason for the stripes
- Toner level is low.
- Cartridge depressurization.
- Filling the container for waste powder dye.
- Incorrect squeegee installation.
- Damage to the magnetic or photo shaft.
How to fix
When the amount of toner is low, uniform white streaks appear on the paper.
It is better to buy certified powder, and when refilling yourself, carry out all work in a well-ventilated area due to the high toxicity of toner.
To identify leaks in a cartridge, remove it from the printer:
- then inspect for cracks, chips, and loose areas;
- check the places where the bolts are screwed in;
- Gently shake the cartridge to check if the powder is falling out;
- pull the curtain near the photo roller and see if there is toner on it.
Often the printer streaks due to lack of periodic cleaning of the waste toner compartment. If cleaning is not done after each refill or at least once every two refills, then continuous wide stripes will be printed on the paper.
When the photo roller wears out, stripes will be printed on the side of the sheet: on the right, on the left, depending on the side of wear, or on both at the same time.
Example of worn-out photoconductor No. 1
Example No. 2
You need to act in the same way if the magnetic and photo shafts do not fit well together or the dosing blade (squeegee) is faulty. The blade changes along with the magnetic shaft.
If the blade is just dirty with toner or a foreign object has gotten under it, cleaning it will help correct the situation.
- The cartridge is removed.
- On its body, 8-9 screws located on both sides are unscrewed.
- The top cover is removed, under which there is a magnetic shaft with a blade.
- Excess objects are removed from under the squeegee, and the surface of the blade is carefully cleaned with detergent. It is better to clean the sharp part with a wooden stick.
Reinstalling the driver
If all else fails, you should also try the driver reinstallation method. The older version may not work when working with non-printing text. Visit your printer manufacturer's website for support and downloads.
- Unpack the archive with the “firewood” onto one of the disks.
- Go to your PC's Device Manager through the Control Panel.
- Find your printer in the list.
- Select it with the mouse button.
- At the top, click the Update Driver icon.
- In the window that opens, select the second manual installation option.
- Provide the exact path with the unpacked package.
Sources
- https://printeru.info/pechat/ne-propechatyvaet-nekotorye-stroki
- https://pixme.ru/printer-ne-propecatyvaet-cast-teksta
- https://4systems.ru/inf/printer-ne-propechatyvaet-chast-teksta/
- https://turbocomputer.ru/printery/printer-pechataet-cherez-strochku-chto-delat-canon
- https://oprinterah.ru/ploho-pechataet-hotya-kraska-est.html
- https://PoPrinteram.ru/ploho-pechataet.html
- https://www.officemag.ru/info/guide/index.php?ID=13190647
- https://highscreen-support.ru/pochemu-printer-ne-propechatyvaet-nekotorye-stroki/
- https://media-digital.ru/printer-pecataet-cerez-strocku-kak-najti-i-ustranit-problemu/
[collapse]
The printer prints poorly even though the cartridge is full
As for inkjet printers, first of all, even if you are absolutely sure that everything is in order with the cartridge, you need to pay attention to the presence of the replacement unit itself and the ink level. It happens that the computer thinks that there is no ink
So it’s better to check again – both hardware (using appropriate computer programs) and physically. If all indicators are in order, but printing is poor, or the printer produces a black and white image instead of a color image, try using the following troubleshooting algorithm.
- Is the ink you have available compatible with your specific brand and maybe even model of printer? You can check compatibility by knowing the type of ink (this information is usually indicated on the packaging) and the model of the printing device. If your printer cannot handle this ink, the solution is obvious: replace it.
- Print a test print page (this can be done through the printer settings window). If it is made poorly, there are stripes, uneven, blurry lines - most likely, the cartridge will have to be replaced, it has already exhausted its service life, there is damage on the head.
- The absence of one of the colors on the diagnostic print page requires another check of the ink level of that particular color. If everything is in order, you need to inspect the print head, it could be clogged. You can do the cleaning yourself or contact a service center. This problem is typical for inkjet printers that have not been used for a long time.
- What ink was used to refill it? Always the same ones or suitable ones, but from different manufacturers? In the second case, the cause of the problem may be chemical incompatibility of different types of coloring materials.
When consumables may be affected
- Fake or non-original consumables. If the cartridge is filled with non-original ink or toner, then print deterioration is not the worst thing that can happen. Counterfeits or poor quality dyes can cause damage to other printer components. You can only purchase consumables that are fully suitable for a specific cartridge model. It is better to use only original materials. Compatible ones are also allowed for use, but the quality of the printed image is likely to decrease.
- If at some point you decide to change the manufacturer of consumables, then before refilling, be sure to completely clean the cartridge and head. Mixing two different consumables can lead to chemical reactions. reactions between them. This is due to the use of different components in production, which can give a reaction when interacting.
After changing the manufacturer, it is advisable to update the color profile. This is done using a file that contains information about the exact proportions for mixing ink of different colors to obtain the desired shade when printing. The file is available for download on the manufacturer's official website.
Computer and printer diagnostics
If the printer stops printing, this is not always due to replacing the ink in the cartridge. If you are sure that the problem is definitely with the cartridge, skip this section and move on to the next one. If there is a possibility that other factors are to blame, do the following procedures first.
Reboot and reconnect
Restart your computer and printer. Disconnect and reconnect the cable first to the computer and then to the printer. If the USB cable is connected to the front of the system unit, connect it to the rear panel directly to the motherboard. Check to see if there is an indication that the printer is working.
Checking the printer settings
Right-click on the “Start” button and open “Control Panel”. Select the “Hardware and Sound” section and the “View devices and printers” subsection. Find the Epson printer connected to your computer in the list and open its settings by double-clicking. In the “Printer” tab, check if there are checkboxes next to the “Work offline” and “Pause printing” items. If there are any, remove them. Check the box next to “Use as default”.
Print a test page
Depending on the Epson printer model, this function may be on the printer itself. To activate it, you only need to press one button. However, you can also print a test page programmatically. This can be done through the user interface of the Epson printer program.
This can also be done through the “Control Panel”. Select the “Hardware and Sound” section and the “View devices and printers” subsection. Find the Epson printer connected to your computer in the list and right-click on it, select “Printer Properties” and go to the “Basic” tab. Select Print Test Page. If the page passes, then the printer is configured correctly, but if not, read the following tips.
Clearing the print queue
Right-click the Start button again and open Control Panel. Select the “Hardware and Sound” section and the “View devices and printers” subsection. Find the Epson printer connected to your computer in the list and open its settings by double-clicking. In the “Printer” tab, click “Clear print queue”. Check the printer's functionality.
Reinstalling the driver
Update or reinstall the Epson printer driver. To do this, you need to download the latest version of the driver from the manufacturer’s website and install it on your computer. It is best to first disconnect the printer from the computer and remove the old driver. If the installer tells you that the printer needs to be connected, connect it.
If nothing interferes with the printer's software, but it still does not print, this may be due to a malfunction of the printer itself or its cartridges. If the cartridges are refilled, but the printer still does not want to print, there may be several explanations for this. Let's look at some of the possible reasons.
Low ink or toner
The reason for the lack of text on the sheets can be quite simple: the cartridges are simply running out of ink.
To check this, you can turn off the printer, then remove the ink tanks and do a visual inspection. If they are made of transparent plastic, the paint level is clearly visible. If one of the cartridges is less than half full, it needs to be refilled. There is another way to find out the amount of consumables remaining. The corresponding menu is available in the software settings of printing equipment, but not for all models. This option is not ideal, since it uses software rather than physical verification.
You can shake the laser print cartridge several times and try printing again. If it starts printing normally, you should add toner now.
Dried ink
If the user has not printed for a long time, the ink in the nozzles may dry out, which will undoubtedly lead to printing problems. Streaks may appear, or the image on the sheet of paper may be completely absent. To solve this problem, you need to clean and rinse the cartridge.
To check if the ink is truly dry, touch the ink cartridge nozzles to the paper. If there is a fingerprint, immediately proceed to the next section of the article. If the print is missing or very unclear, then the cartridge needs to be restored:
- Cleaning the nozzles. Use recovery fluid to clean the nozzles. If you don’t have it, you can get by with a window cleaner (it should be alcohol-based and dissolve stains and dirt well). Soak the nozzles in the liquid, leave for a few minutes and wipe off with a napkin. After that, check if there are any fingerprints on it.
- Soaking. If the first method does not help, move on to soaking the nozzles. Take some of the restoration fluid into a small container (warm distilled water or alcohol will also work) and place the cartridge in it with the nozzles facing down. Leave it to soak for an hour or two. Take out the cartridge, wipe it and check the print.
- Blowing out the cartridge. To clean dried ink, you can use a regular syringe and a rubber seal. Place the nozzle cartridge on a napkin or toilet paper (the nozzles should be free). Fill the syringe with air, trim the needle, put a rubber band at the base of the needle and insert it into the filling hole. The rubber band will prevent air from escaping back through the filling hole, and the resulting pressure will blow the cartridge through the nozzles.
- Cleaning the interior compartment. If neither method works, remove the top of the cartridge cover and fill the sponge inside with restoration fluid. After settling, pour out the liquid and refill the cartridge; Check to see if ink is flowing through the cartridge nozzles.
If none of the above helps, we recommend replacing the cartridge with a new one. To prevent the problem from recurring in the future, print regularly from the printer. If there is a possibility that the printer will not be used for a long time, remove the cartridge and place it in a small airtight container.
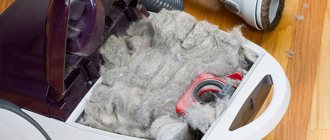
Cleaning the feed rollers
Signs of poor feed roller function:
- the printer prints crookedly, that is, initially one of the rollers begins to pull the sheet earlier;
- There is dirt visible on the page.
In both cases, one or two rollers may either wear out or become dirty. If wear occurs, the rubber cover should be replaced with a new one. A smooth surface indicates wear.
If traces of dirt are visible on the roller, you can clean it yourself. To do this, soak a cotton swab in clean water or a special cleaner and carefully wipe the rollers around the entire circumference.
You can also take advice from manufacturers. For example, Epson shows a method where a regular sheet of paper is lightly sprayed with blue “Mr. Muscle” from the bottom. Then the sheet is inserted into the tray, printing starts, and the sheet is held with your hands, preventing the rollers from catching on it. The latter scroll along the bottom of the sheet, thereby cleaning themselves.