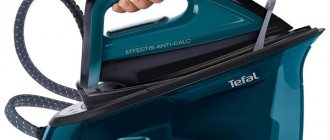
List of the most common breakdowns and tips for self-repair of steam generators
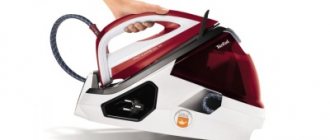
A steam generator is a necessary device. With its help you can get rid of wrinkles on clothes. Even the most finicky fabrics can be treated with steam. The equipment is used to clean furniture and even to fight bedbugs.
Therefore, when the device fails, this causes certain inconveniences, because the steam generator requires repair.
If the breakdown is not serious, then you can deal with it yourself. In other situations, professional help is required.
Typical faults and step-by-step instructions for fixing them yourself
Depending on the breakdown, instructions for fixing it will differ . Let's look at the most common malfunctions of steam generators and ways to repair the product at home.
Doesn't produce steam - what's the reason?
A common malfunction of the device is the lack of steam after it is turned on. You can cope with the problem yourself if you correctly determine the cause.
The most likely problems and ways to solve them:
The steam supply hole is clogged with scale or limescale . To fix the problem, you need to fill the boiler with water with the addition of citric acid. 10 g of powder per liter of liquid is sufficient.
You can also use store-bought Calgon. When the water with the selected oxidizing agent is inside the device, it is turned on and the unnecessary fabric is steamed for 3-5 minutes.
Turn off the device and leave it to cool and descale for 2 hours. Drain the water from the boiler. Rinse it with clean water until it becomes clear. The channels became clogged with particles that fell off the inner surface of the boiler . As a rule, this happens in inexpensive devices that have manufacturing defects. If the deformation was minor, you can try to rinse the water tank yourself.
When this measure does not give the desired effect, you must contact a workshop or service center and request warranty service. Sometimes the device needs to be replaced.
- The coarse filter is clogged . To fix the problem, you need to unscrew the hose, remove the mesh using tweezers and rinse it. Most often, this breakdown occurs after repairing the water supply system and pouring rusty water into the device.
- The relay or heating element of the boiler has failed . You cannot do without replacing a broken part; you need the help of a specialist.
- The water tank is not installed correctly . To deal with the problem, you need to remove it and put it back in place.
- The steam button is not pressed . It is necessary to check its operation.
- The steam generator did not heat up to the required temperature . As a rule, this is indicated by a color indicator. You need to wait until it lights up steadily or turns off (it all depends on the model of the device).
- The steam generator is being used for the first time . During initial operation, some steam generators do not supply steam immediately, but after 30 seconds. This time is spent starting the engine. This feature is indicated in the user manual.
- There is not enough water in the tank . Before contacting the workshop, you need to check the level in the device.
What to do if it doesn't turn on?
If the steam generator does not turn on, the reasons may be as follows:
The power cord is damaged . It is difficult to independently determine the broken location of the wire, unless there is visible damage. Need help from a specialist.
The smell of burning wiring requires immediate disconnection of the device from the network. Self-repairs are not carried out; you need to contact service;
Instead of steam, water comes out of the device
If water flows from the steam generator, the causes of the breakdown may be the following:
Mechanical damage
When working in blenders, not only the electrical part suffers. Mechanical damage occurs quite often, and it is quite possible to deal with it on your own.
Leaking engine gasket and bowl
Noticed a leak between the body and the bowl? Feel free to start repairing:
- remove the bowl from the body;
- unscrew the drive spindle;
- remove the old gasket;
- install a new gasket in its place.
Damage to the lid latch mechanism or attachment
If you use the blender carelessly, you can damage the lid latching mechanism for stationary ones or the nozzle for submersible ones. There is only one solution to the problem: buy a new part, since repairing the chopper lid or blender attachment can lead to injuries during further use.
You can still try to repair the whisk attachment by removing the broken rod. Only during further work, you need to be careful as part of the protruding wire may scratch.
Damage to the blender body
A damaged hull can hardly be repaired. Operating such an electrical appliance threatens your safety. Treat yourself to buying new equipment.
Damage to the blender jar
There is only one solution to the problem: buy a new bowl.
If you pour boiling water and other hot liquids into the bowl, the container will be damaged. The solution to the problem is also: buy a new bowl.
Repairing the bowl should not be done due to the fact that it is impossible to achieve the initial state of the elements.
Leg repair
As a rule, the blender leg cannot be repaired due to the fact that it is all monolithic and the structure cannot be disassembled. If the metal leg is bent, you can try to straighten it by force. Even if this succeeds, it will not be possible to achieve the same job. The internal mechanisms will not fall into place.
Gearbox repair
The problem area of the gearbox is the separation of the gears and their shafts. Due to heavy loads, this unit heats up, the iron shaft melts the gear seats and it falls off. As a result, rotation is no longer transmitted to the nozzle.
To repair the gearbox, it must be disassembled. It usually consists of two halves held together by internal latches. Then you need to examine the internal parts. If the gears are intact and simply fell out of the shafts, then we put them in place and fix them with superglue. This method will extend the life of the device for some time.
When do you need professional help at home?
The help of a specialist is required if it is impossible to determine the causes of the malfunction in the steam generator, or if it is not possible to eliminate them yourself. Most often this happens when a part fails.
In order not to make a mistake in choosing a specialist and not to contact scammers, you need to adhere to the following recommendations:
Private craftsmen most often do not give guarantees for their work, or promise the proper functioning of the device in words. Therefore, it is better to contact the service.- After completion of the repair, you must request a receipt and warranty service.
- You should trust word of mouth. Recommendations from friends can help you find a good specialist.
- The technician will not charge money for diagnostics. Professionals do it for free.
- You should not leave the device in the workshop if the workers do not provide paper confirming its receipt.
- All documents must be stamped with information about the organization and its address.
The cost of repairing steam generators varies widely. The more complex the work and the more expensive the model, the higher it will be.
Features of disassembling blenders from different companies
Brown, Polaris, Redmond, Philips, Scarlet, Bosch models are widely used in everyday life. Some of them are disposable and cannot be repaired. Their disassembly is not provided.
The Brown technique is disassembled as follows:
Using pliers, remove the cartridge (holder for nozzles). A thin screwdriver is inserted into the seam between the body and the outer shell. Lightly hit the screwdriver with a hammer, thus knocking out the weld. This action is continued until the engine begins to move freely inside the housing.
Everything is done with great care so as not to destroy the fasteners. Do not use a thick screwdriver; it may damage the outer shell of the case. Press the clamps and remove the engine
Typically the control board is pulled out along with the motor. If it does not give in, it is pulled up with pliers by the lower edge. There are latches inside to secure the lid. They are folded along the arrows. Use a screwdriver to pry off the speed control cover. Unbend the power cord fastening clips located inside.
Polaris models come in collapsible and non-dismountable types (for example, PHB-0713AL), the parts of which are glued or soldered.
The elements of collapsible blenders are separated as follows:
- unscrew the screws;
- use a blade or thin knife to unfasten latches and plugs;
- carefully separate the elements.
The glued parts are cut, but such a blender will not be able to return its original appearance during assembly.
For Redmond equipment, all fastenings are locking. They must be separated carefully, otherwise discontinuities will appear at the joints during assembly.
Popular Rendmond models are disassembled as follows:
- remove the upper metal ring by bending the internal latches;
- With a little effort, remove the adjustment knob, holding the plastic axis of rotation and the spring;
- unscrew 4 screws;
- pry up and remove the lower ring, carefully pull off the metal protective casing;
- process the glue seam around the circumference of the body with a knife and remove the cylindrical part;
- remove the guide sleeve;
- pull the motor out of the housing along with the board.
Philips models are disassembled according to the following instructions:
- on the side where the speed control knob is located, disconnect the decorative cover by prying it off with a knife or screwdriver - it is secured with double-sided tape;
- the next cover, secured with self-tapping screws, is removed using a screwdriver;
- remove the plastic gear by hand;
- Unfasten the protective cover from the reverse side; to do this, press the latching buttons with a screwdriver and bend the eyelet with a knife;
- Next comes the glued shaped cover that protects the motor - it is removed with a knife.
At the final stage, the motor and control board are removed.
Submersible Scarlet models are disassembled in the following sequence:
- pry up the speed control cap with a screwdriver and remove it from the rod;
- unscrew the 4 screws that secure the cover;
- pull out the connecting sleeve covering the engine;
- remove the motor and board.
The engine is the most vulnerable part of these devices.
Parts of Bosch stationary blenders are dismantled using a wrench and pliers.
Disassembly of submersible varieties has the following features:
- fastenings on the outer surface - fragile plastic latches;
- internal parts can be fastened with bolts, self-tapping screws, screws.
Important Tips
Self-repair of the device requires compliance with the following recommendations:
- when checking the functionality of the device, you need to direct the steam stream at an item that cannot be worn;
- any repair work must be carried out when the device is disconnected from the electrical network;
- It is forbidden to press the “start” button if the device is directed towards a person;
- The smell of burning or the appearance of sparks is a reason to stop working with the device and contact service.
Featured Posts
The kit may also include a fuse. If after all these steps you understand that everything is in order with the power supply, you need to inspect the printed circuit boards.
Russian measures suggest the ruble. Capacitors often fail
Disassembling a stationary blender Please note: the spindle has a left-hand thread. The inclined gear is pressed by a pair of inclined side gears; if necessary, they are adjusted with a screw on the front of the head of the stand mixer
It's simple. Turn on first speed. But if your model has a simple mechanical switch, you can check for damaged contacts - they sometimes burn out. Be sure to read the manufacturer's recommendations and technical specifications of the device. The principle is the same, but the implementation is different.
Pay attention to the fuse. The household appliance is equipped with a rotation speed regulator, cord, plug
You can immediately tell about a burnt-out engine by the strong smell of burning. The cause of the malfunction may be the rectifier capacitor. Installation and repair of DeLonghi oil heater
Reasons why the steam generator sprays water instead of steam
Any owner of a steam generator may encounter such a problem as water leakage from the device. If there is no opportunity to contact specialists, then you can try to deal with this problem at home.
Before understanding the causes of the breakdown, it is worth studying the principle of operation of the steam generator.
Operating principle of the device
The operating principle of a working device is as follows:
- water is poured into a special reservoir;
- Due to the valve device, water from the reservoir enters the soleplate of the iron and turns into steam.
Important! It is necessary to use distilled water for the device to prevent scale from appearing. Boiled water should also not be used, as it contains a large amount of salts.
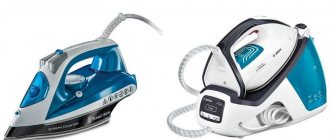
Using the valve, you can regulate the amount and speed of flow. This publication will tell you which steam generator to choose for ironing and cleaning.
Low temperature
The operation of the device is based on the supply of water through a valve from the reservoir to the inside of the sole. There is a regulator on the body, with its help you can change the size of the holes so that the liquid flows in the required portions. Under the influence of high temperatures, water is converted into steam, which comes out through special holes on the sole.
In order for the vaporization process to be successful, it is necessary to reach the boiling point of water. The inner sole of the iron should reach this temperature.
If this value is not reached, the water will not turn into steam, but will flow out through the holes in the sole.
Why is steam generator failure dangerous?
If the steam generator breaks down and starts spitting, the following problems may occur:
- Instead of steaming, the device begins to wet things. A puddle of water may form, which is dangerous when using electrical appliances.
- The item will be poorly steamed and wet. In this case, when it dries, it will become wrinkled again. An unpleasant odor and mold may also develop.
- Droplets of water, possibly rusty, will get on your clothes. They will cause stains.
Important! If water begins to leak from the equipment, then immediately disconnect it from the network. Then you need to determine the cause of the failure.
How does the steam supply work?
The steam supply in the steam generator is arranged as follows:
- The water in the tank is heated to such a temperature that it turns into steam.
- Hot dry steam flows through the tube.
- When you press a button on the handle, steam comes out of the holes in the sole.
After water is poured into the tank, it is necessary for time to pass - from 2 to 10 minutes. It depends on the steam generator model.
Read how to use the Tefal steam generator here.
Main causes of failure
There are several reasons why a steam generator can fail and start spraying water. There are only three main reasons. Below they are discussed in more detail.
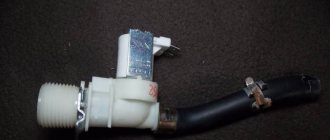
Broken valve
To make sure that the cause of the breakdown lies in a valve malfunction, you must do the following:
- Close the valve.
- Turn on the device in any mode.
- Start swinging the iron in different directions.
If drops of water appear, you need to make sure that access to moisture is not blocked. The solution to the problem in this case is to replace the valve.
Incorrect operation
If the soleplate of the iron does not reach the set temperature, steam cannot be supplied. Otherwise, water may escape from the device.
Important! Before you start ironing, you need to set the required temperature and select the type of fabric. Then you need to wait until the indicator turns off.
Only when the device is completely heated and the indicator turns off can you begin the steam release process. Before the iron heats up, it must be kept in an upright position.
Once fully heated, the indicator will turn off immediately. Otherwise, instead of steam, water will come out of the device used. The filler cap should always be tightly closed until it clicks. Otherwise, the water will ruin your clothes.
Careless kinking of the hose
Water along with steam will be released in any case, even if the hose is slightly pinched or the iron is located opposite the steam outlet, or the hose is much lower. Water, in this case, will begin to come out within a few minutes, this leads to a traffic jam. Because of this, water cannot enter the device being used.
Attention! Water circulation is disrupted and steam condensate is formed. Steam cannot pass through the holes without taking with it a stream of water. When there is a lot of water in the plug, it is possible for water to flow back into the niche and moisture collection container.
Briefly about the design
Regardless of which manufacturer produces a steam generator, for example, Bosch, Philips or Tefal, all devices are characterized by three main parts:
- electronic control unit;
- stand or so-called base;
- iron.
The household appliance is also equipped with special attachments.
Let's consider the principle of operation of the steam generator:
- The boiler heats the water.
- As a result, steam is formed.
- The generated steam is supplied to the iron through a special hose device.
- There is perforation at the base of the iron.
- The steam escaping from the holes processes the fabric, smoothing out any kind of folds.
Important! The quality of steaming is not affected by the size of the clothing or its density. Thus, the steam generator has the ability to simultaneously process bed linen, jeans, suits made of wool blends, various synthetic products, as well as materials that require very delicate handling, such as silk clothing
A household steam generator station manufactured by Tefal differs significantly from household appliances with steaming from exactly the same manufacturer:
- a significant difference is the size - the household station is much larger and more voluminous, while occupying a lot of space in the room;
- in the steam generator, water is supplied to a separate compartment of the boiler, in which it is heated until steam is formed;
- the steam generated is not wet - it is dry with an approximate temperature of about 160 degrees;
- clothes and linen are processed without a device in the form of an iron coming into contact with them, so when processing with steam there is no damage to the clothes and there is no need to worry about the integrity of things.
What should I do if water is leaking from the steam generator?
To fix the problem, you need to install an iron with a hose above the steamer. After about 15 seconds, the water will rise and the plug will collapse. If there is a lot of moisture in the plug, you must first wait for the device to cool down. Next, the hose is disconnected from the device. It is located above the sink. The water is drained from the iron.
It is possible that to eliminate the cause of water leakage, descaling of the device is required. To do this, you need to pour in a special product or a folk remedy to remove plaque. Next, the device turns on at maximum temperature. Then the water is drained and the procedure is repeated again.
The water will touch the hot heating element. The contact of cold and hot, as well as the impact of the product, will allow the scale to lag behind the walls and exit through the holes in the sole.
Advice! Some models of steam generators have a special rod for collecting scale. It needs to be cleaned periodically.
To do this, place it in a solution with citric acid for several hours. The rod is then reinserted into the device. After cleaning, ironing must be done on unnecessary scraps of fabric, as scale will come out. If after cleaning the problem is not solved, then you need to contact a specialist.
If the valve breaks, you can try cleaning the nipples at home. To do this you need:
- Mix one part citric acid with five parts water.
- Pour the resulting mixture into the tank.
- Turn on the iron.
- After the soleplate has heated up, you need to press the steam button.
If the above steps do not help, the device must be taken to a service center. You should not repair the nipples yourself. If the leakage is due to improper use, then there is no need to take the steam generator to a service center. It is only important to start using it correctly.
Leak prevention
In order for the steam generator to operate without problems for a longer time, it is necessary to follow a number of rules:
- The frequency of steam use should be reduced. Enable this mode only when really necessary. The more this function is used, the faster the device parts wear out.
- After ironing, the remaining liquid must be drained.
If you follow these simple rules, you can significantly reduce the likelihood of breakdowns and save on repairs.
Important! If the breakdown is not complicated, then you can repair the device yourself. The most common cause of failure is scale buildup. Therefore, the device must be cleaned on a regular basis.
There are several ways to clean a steam generator - using folk or industrial products. Some devices also include a special cleaning rod. It also needs to be cleaned periodically. You can find out how to clean a Tefal steam generator from scale here, and Philips here.
A little theory
Almost all processes on Earth involve the release or absorption of heat. This is the law of nature - energy cannot disappear into nowhere. One of the representatives of heat exchangers - a steam generator - is present in one form or another in many areas of our lives: in production (for example, at thermal power plants or nuclear power plants) or even at home.
The simplest interpretation of such devices is a steam generator in an iron, as well as household humidifiers. Their task is to create steam from water. Moreover, for industrial purposes, steam must be at a very high temperature and under high pressure. Which means that the steam generator will be under critical loads throughout its entire operation. Accordingly, its service should be at the same level.
Part of the service procedures is the cleaning of steam generators, because they, like no other, due to operating conditions, are susceptible to the accumulation of deposits in the form of salts and rust. If the processes of corrosion and salt formation are started, then there is a risk of not only reducing the efficiency of the equipment or going for repairs, but also destroying it - as a rule, costing several million rubles.
