BytTechService » Washing machines » Repair and replacement » How to check and replace the inlet valve in a washing machine
The inlet or fill valve for a washing machine is similar in principle to a regular water supply tap. The only difference is that a regular faucet opens manually, while an inlet faucet opens automatically.
How exactly it works and why the inlet valve is needed, you will learn in this article. You will also understand how to disassemble and replace parts yourself without calling a technician.
Characteristic
The water supply valve for a washing machine, also called a filler, inlet or electromagnetic valve, has one important characteristic - the reliability of shutting off water when it is not required to enter the tank. It should not leak or allow water to pass through when turned off.
Manufacturers pay special attention to its proper operation, since not every housewife will turn off the valve while the machine is not washing clothes.
This is interesting: All the indicators on the Indesit washing machine are blinking - what should I do?
Service areas in the Moscow region
Aprelevka | Balashikha | Bronnitsy | Vidnoe | Golitsyno | Dedovsk | Dzerzhinsky| Dolgoprudny | Domodedovo | Railway | Zhukovsky | Zvenigorod | Zelenograd | Ivanteevka | Klimovsk | Korolev | Kotelniki | Krasnoarmeysk | Krasnogorsk | Krasnoznamensk | Lobnya | Losino-Petrovsky | Lyubertsy | Lytkarino | Moscow | Mytishchi | Noginsk | Odintsovo | Podolsk | Pushkino | Reutov | Ramenskoye | Old Kupavna | Gangway | Troitsk | Fryazino | Khimki | Cheronogolovka | Shchelkovo | Shcherbinka | Elektrostal | Elektrougli | Anniversary
SHOW MORE
Location
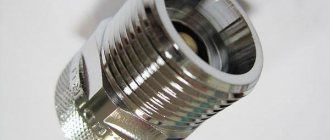
This shut-off element is located near the pipe connected to the water hose, through which water is drawn from the source. Being non-separable, the valve forms a single whole with this external pipe. Top-loading washing machines have a valve located at the bottom of the rear wall.
Intake Valve Check
To fully check this part, you need to remove it from the washing machine. It is usually located at the top of the back wall. Except in cases where laundry is loaded vertically. In this case, the inlet solenoid valve is located at the bottom of the structure, also on the rear wall.
Its performance can be checked by alternately applying voltage to the coils, after connecting the water hose. If it is working properly, the open inlet valve will allow water to flow freely. When the current supply to the coils stops, it will close and the water supply will stop. You need to take care of the container into which the water will be drained.
During this test, care must be taken as the work is carried out under voltage. Care must be taken to ensure that water does not get on exposed wires. The work must be carried out carefully and without haste.
Step
- This step-by-step Washing Machine Repair Manual shows you how to replace the water inlet valve assembly on a direct drive machine. If the machine does not fill with water or fills with water even when unplugged, replace the water inlet valve with one approved by the manufacturer.
Required parts:
• Water supply valve
Required tools:
• Phillips screwdriver • Slotted screwdriver • Pliers • Work gloves
Before you begin: As always, wear work gloves to protect your hands.
Replacing the water inlet valve on a direct drive washing machine
Turn off the electricity and water supplies
Unplug the power cord from the wall outlet. Turn off the water supply valves.
Disconnect the water supply hoses
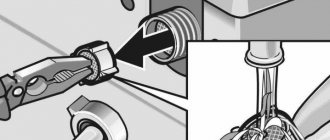
Move the machine so that you can disconnect the water supply hoses located at the rear of the washing machine. Remember which hose goes to the hot water connector and which goes to the cold water connector. Using pliers, carefully loosen and remove both hoses. Collect spilled water with a towel.
Open the management console
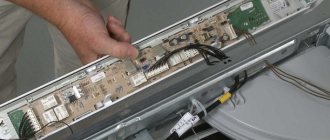
Remove the plastic plugs on both sides of the control console. Remove the screws at the base of the control panel. Pull the control console forward slightly and then, holding the sides with both hands, rotate and lift it up towards the rear panel. Remove the plastic plugs. Remove the screws. Open your console.
What happened to the inlet valve?
There may be several reasons why the valve stops functioning normally. To repair the element and return the machine to working order, you will have to find out what happened to the device. Let's talk about the main types of breakdowns that can occur.
- Filter clogged. Immediately after the inlet hose, at the entrance to the valve, there is a mesh that traps various impurities present in tap water. Over time, it becomes clogged and begins to leak liquid poorly. The mesh can be removed without disassembling the machine. It is enough to grab its protrusion with pliers and pull it towards you. After washing, the filter is put back.
- Membrane contamination. The elastic band also moves up and down with each movement of the rod. If it becomes dirty, it begins to loosely adhere to the valve “seat” and allows water to pass through. To inspect the seal, you will have to disassemble the inlet device. If there is rust on the surface, it must be cleaned off; if there are cracks, the gasket must be replaced.
- Problems with the spring. Over time, the mechanism may break and the rod will no longer move freely up and down. Therefore, if the metal spiral is broken or deformed, it will have to be replaced.
- Cracks on the device body. Typically the valve has a plastic "shell" that can become damaged. If this happens, the water will partially flow out of the inlet element, ending up on the electrical components of the machine. Because of this, the washing machine may receive an electric shock, which can lead to a short circuit. In such a situation, it is necessary to change the part as quickly as possible.
Often the plastic valve body cracks on machines that are kept in a cold room. At subzero temperatures, water freezes and bursts the “shell” of the part. Also, the elastic membrane will no longer be able to retain liquid after such “freezing”. Therefore, if after winter the country washing machine begins to leak, you need to replace the inlet device.
After the water supply valve is removed from the housing, it should be carefully inspected. If you notice that the electromagnetic coils are deformed, immediately replace the element; in this case, it is not worth repairing it. We'll tell you how to diagnose a part.
How to replace a damaged part
For almost any reason that arises, you can repair this unit yourself. In most cases, this part is located at the back and top - near the lid.
Method for replacing a failed unit
Close the water supply valve.- Disconnect the supply hose.
- Remove the top cover. The solenoid valve must be accessible.
- Disconnect the electrical wiring.
- Disconnect the connecting hose of the valve and the fitting.
- Remove fasteners.
- Install fasteners (latches or screws).
- Dismantle the part that has become unusable.
- Change the valve.
The unit is assembled in the reverse order of disassembly, following a strict sequence of actions. After installation, the functionality of the entire mechanism is checked.
Features of replacing a unit in a SMA with vertical loading of laundry
On top-loading machines, the inlet may be located in the plinth area of the rear wall. Replacing the inlet valve on this type of washing machine may require removing the side wall.
On the Internet you can find detailed video tutorials on the repair procedure. SMA LG, Indesit and other brands have some repair features, but the principle of replacing a damaged part is almost the same for all models.
If replacing spare parts yourself is not possible, you should contact a reliable service center that services this brand of unit.
When choosing a service center, you must carefully study the experience and user reviews of the service provider. Public opinion, expressed in impartial customer reviews regarding the competence of the craftsmen, is sometimes much more valuable and objective than numerous certificates displayed for public viewing on the official website of the service center.
How to fix the situation?
In such a situation, you must immediately disconnect the washing machine from the network and turn off the water supply from the network. You can determine the exact cause of the malfunction by disassembling the case and identifying the faulty parts. You can do this yourself or use the services of a service center technician. Self-repair of a washing machine that is under warranty is completely excluded, since in this case the consumer loses the right to warranty service.
Call the master
The procedure for replacing the fill valve for a person with no experience can be quite complicated, despite its apparent simplicity. The right decision would be to contact a qualified specialist to carry out repairs. The service center technician will conduct a full diagnostic of the device, identify the cause of the malfunction and repair the machine as soon as possible. At the same time, you will be sure that the parts used in the repair are of high quality and original.
Self-replacement
Replacing the valve yourself requires skills in plumbing and assembly work, knowledge of electrical engineering and electronics. To carry out repairs, you need to prepare responsibly - purchase original spare parts, high-quality tools and study the design of your washing machine model.
Step
- Remove the machine body
Disconnect the electrical connectors from the top panel. Release the clips that secure the sides of the machine to the back panel. Using a slotted screwdriver, lift the clips forward to release them from the slots on the top panel. Lift the rear of the machine and slide it forward.
Move the body to the side - we won't need it for now. Disconnect the wires. Release the housing clamps. Remove the housing.
This is interesting: Decoding error F4 on the Atlant washing machine: causes of malfunction, solutions
Possible faults
The following malfunctions may occur:
- Filter mesh clogged. It must be carefully inspected and, if necessary, cleaned of dirt and rinsed with water.
- The coils should be checked for serviceability. If voltage is applied to them, but the valve is still in the closed state, then a break is possible. Or the part burned out. A multimeter will help diagnose such a malfunction. The device is switched on in resistance measurement mode and connected to the ends of the coil. The serviceability of the part will be indicated by a resistance of 2 - 4 kOhm.
- Be sure to check the plastic inserts in the fittings that restrain the water pressure; if they are broken or missing, the part must be replaced.
Repairing the inlet solenoid valve is most often not possible, since it is a non-separable part that requires complete replacement in case of malfunction. Although some craftsmen replace a failed coil with a serviceable one, if available.
The best option in this case would be to purchase a new inlet solenoid valve, and subsequently install it in the washing machine.
Principle of operation
Water supply valves are based on electromagnets - enamel wire coils placed on a core. The valve mechanism is connected to this core.
- Single-coil valves supply pressure to one compartment communicating with the drum space. Washing powder is poured into this compartment.
- With two coils - in two compartments (the second is filled with anti-scale agent on the boiler of the drum compartment).
- With three - to all three (the most modern option).
- It is possible that two coils can control the supply of water to the third compartment - they must be powered simultaneously.
The supply of current is controlled by switching relays controlled by an electronic control unit (ECU), in which, in turn, the microprogram (“firmware”) of the washing machine runs. As soon as current flows to the coil, it magnetizes the core, which attracts an armature with a plug that restrains the flow of water.
When closed, the electrical circuit opens the valve and water flows into the washing tank. As soon as the water level sensor detects the maximum permissible level, the supply voltage is removed from the electromagnet, as a result of which the spring-return mechanism of the valve closes its plug again. The valve remains closed most of the time.
Where is?
Most often, the inlet valve is located at the top of the machine, closer to the back wall, so to check and remove it you need to disconnect the back cover of the machine. Usually the cover is held in place by two self-tapping screws, after unscrewing which it is pushed from the front side and easily removed.
In models in which laundry is loaded vertically, the fill valve is also located at the rear of the machine, but at the bottom. To gain access to the valve, part of the side wall of the machine is disconnected.
Step
- Remove the water inlet valve
Take photos of the wire connections or mark them so that you can connect them correctly later. Pull the electrical wire connectors toward you to disconnect them from the solenoid valves. Remove and disconnect the water valve mounting screws from the back of the machine. Using pliers, release the hose clamp. Disconnect the water supply hose from the inlet valve. Remove the valve. Disconnect the plastic clamp securing the hose and remove the old valve. Remove the mounting screws. Remove the hose. Remove the valve.
Valve replacement
- First of all, the washing machine must be disconnected from the power supply and the water turned off. Then remove the back wall.
- All hoses and wires are disconnected from the inlet valve. Whatever you forget, where it goes, it’s better to write it down, sketch it or take a picture.
- Then the valve is released from the fasteners. The bolts that secure it are unscrewed or the latches are bent. They also have a place in some models.
- In order to remove the valve, it must be turned.
- Installation of the intake valve is carried out in reverse order.
After installing the new part, you should once again check that the wires and hoses are connected correctly, and only then turn on the washing machine.
Can it be repaired?
By their structure, filler valves are classified as non-separable parts, so their repair is often impossible. You can try replacing a burnt-out coil by removing a working coil from a similar valve. However, in most cases such actions do not bring results. The best solution would be to buy a new valve and replace it completely.
Step
- Reinstall the machine body
Place the previously removed machine body in front of its rear wall. Place your elbows on the front edge of the machine and tilt it slightly forward towards you. Now press a little and push the body of the machine forward with your feet to move it as close as possible to the base (base) of the washing machine itself. Now lower the back of the case so that the holes in the back of the case line up with the corresponding tabs in the base of the machine. Reinstall the spring clips on the top of the housing. Plug the wires back into the connector on the top of the machine. Reinstall the chassis. Reinstall the clamps. Insert the wire switch into the connector.
New washing machines from SMEG
SMEG washing machines are modern equipment, made in a stylish design solution and characterized by wide functionality. The combination of high reliability and relatively inexpensive prices explains the popularity of washing machines from this Italian brand. The catalog of models is represented by built-in and free-standing models of various capacities. The ability to choose a washing machine with vertical or front loading allows you to choose the model that is optimal for a room of any size and interior.
Depending on the model, SMEG washing machines are equipped with programs for washing various types of fabric, quick washing, rinsing and spinning, drying, hand washing, ensuring gentle care for household items. Control of temperature and spin intensity, the presence of a delayed start option, and the Aquastop leakage control system guarantee comfortable and safe use of the device. Various classes of energy consumption, the presence of the “Night” function ensures the efficiency of SMEG washing machines.
How does the filling system work?
The water inlet valve for the washing machine is equipped with a thin membrane on the inside and coils on the outside. The main control module signals that the valve is turned on. Then an electric current is supplied to its coils, which contributes to the appearance of a magnetic field. This causes the membrane to open, allowing water to flow in. After the voltage supply ends, the membrane closes again.
Thus, the water inlet (supply) valve has two positions - open and closed.
Number of coils: what does it depend on?
Their number depends on the model of the washing machine. In modern SMAs, the manufacturer installs from two to three sections, so that each of them supplies water to a specific compartment of the powder receiver.
- 1st section: powder section.
- 2nd section: rinse aid compartment.
- 3rd section: department for other funds.
If there are only two spools available to pick up detergent, they turn on simultaneously.
Older models used a fill valve for a single spool washer. It worked in conjunction with a command apparatus, the lever of which regulated the movement of the flow in a certain direction.
Where is the valve located?
Where is the solenoid valve located in the SMA? It is located under the top panel near the wall. You will see hoses connected to it that carry water to the detergent compartments.
Purpose and device
The main function of a washing machine inlet valve is to control the flow of water into the washing machine drum.
The principle of operation of the intake valve is based on the laws of electromagnetism. Therefore, it is often called electromagnetic. The command to supply water is carried out by applying voltage to the coil. A magnetic field is formed around it, which draws in a core made of metal called a rod. Due to this, a small hole located in the center of a special elastic membrane opens, and water rushes into the dispenser, washing away the powder intended for washing.
Once the required volume of water has been collected, a special sensor will operate. Voltage will stop flowing to the coil. A special spring will work, which will return the rod to its original position and the water supply to the machine will stop. When the intake valve is de-energized, the spring reliably presses the core, closing the diaphragm hole.
Solenoid intake valves come in three types and can have:
- One reel. It is mainly used in washing machines of outdated models. In these devices, the water jet is controlled mechanically using a command device. Water flows into the dispenser using a lever.
- Two coils. Used in modern models of washing machines. Control is carried out electronically. A special module is provided for this purpose. Each individual coil is responsible for supplying water to a specific section of the dispenser. When two coils are turned on simultaneously, the water flow will be directed to the third section of the dispenser.
- Three coils. Just like the previous version, they are used in modern washing machines. They use a dispenser with three compartments. A distinctive feature of this type from the previous one is that, due to the third coil, it is possible to direct the flow of water into the third compartment of the dispenser.
Signs of breakdown
The malfunction can be determined by external signs:
- Error code on the washing machine display.
- Water is drawn into the tank without stopping.
- When starting the machine, there is no sound of water intake.
- The tank is overflowing with water.
Read more about how to check and replace the inlet valve of a washing machine below.
How to find the problem yourself
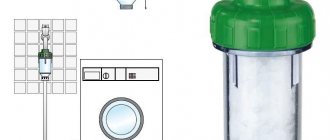
Before checking the solenoid valve, inspect the mesh filter. It is located between the intake hose and the inlet valve and serves to retain particles of debris coming from the water supply.
Since the filter could become clogged over time, we will describe the principle of cleaning it:
- Disconnect the CM from the power supply.
- Close the inlet valve.
- Unscrew the inlet hose and drain the remaining water from it into a sink or other container.
- Behind the hose you will find a mesh. Pull it out using pliers and clean it under running water.
Let's look at how to open and check the inlet valve in a washing machine.
- Remove the lid on the top of the washer. To do this, unscrew the screws from the back that hold the top cover.
- Inspect the valve for damage. If nothing is visible from the outside, remove the device.
- Disconnect the hoses leading to the valve. First you need to loosen the metal clamps, so use pliers.
- Now disconnect the wiring.
- Unscrew the bolts securing the part to the SMA body.
- Pull out the valve.
Inspect the hoses and the device itself for blockages. How to check the fill valve? Check over a container or sink to avoid getting wet on the floor.
Connect the intake hose to the valve and open the water. If the element is working properly, it should not leak water. If it leaks, then replacement is needed.
The next test option must be carried out quite carefully. You must apply a voltage of 220 Volts to the coils of the device. In this case, the section should open and fill the container with water. The danger of this method is that when electricity and water come into contact, a short circuit may occur. Therefore, you need to work very carefully.
You can accurately determine whether the washing machine valve needs repairs using a multimeter. Set the tester to resistance measurement mode. Apply probes to each winding one by one, measuring its resistance. A working part should show a result of 3 kOhm.
Necessary tool
Replacing intake and exhaust devices requires the availability of specialized tools:
- set of wrenches;
- heads;
- screwdrivers;
- crankshaft clamp;
- torque wrench;
- desiccant or spring remover (locking elements);
- grinding device - in order not to buy a special one, you can use a drill and a piece of hose;
- micrometer - will help to accurately measure the diameter of the rod and identify defects;
- a special key for installing the tension roller - required after a timing belt breaks, when installing a new belt and adjusting the tension.
You definitely need an oil seal remover if replacing them is not intended. Of course, the elements can be removed with ordinary pliers, but this option will damage the product, and in the future the engine will begin to consume a large amount of oil. It will also be possible to pull out the elements with a long end head, but it must correspond to the diameter of the cap.
In addition, you will need a certain amount of consumables:
- new valve stem seals - if they are meant to be replaced;
- cylinder head and valve cover gaskets;
- sealant;
- suitable quality bolts for tightening the head - should not be overextended;
- lapping paste or powder diluted with engine oil.
