How to glue a wooden chair - what glue to use
However, unlike plastic ones, these products consist of many small parts connected to each other with glue.
After a long time, you may notice the chair creaking and certain joints coming apart. If you find that the chair has begun to creak and crack, this is direct evidence that the leg has begun to separate from the harness to which it is attached with spikes or dowels.
As soon as this has been noticed, it is necessary to think about how best to glue a wooden chair. This does not mean that the chair is completely broken and should go to the dump.
Without spending any special money and putting in some effort, you can repair furniture and give it its former strength simply by using special glue.
What kind of glue to glue a wooden chair with ? First of all, you need to pay attention to the characteristics.
Signs of good glue are:
- Lightfastness;
- Strength of adhesive connection;
- Water resistance;
- No marks on the surface.
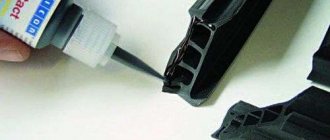
The ideal option for these purposes would be PVA-based glue. You can also use epoxy or two-part glue. But it is important to remember that buying glue does not mean the job is done.
It is important to properly prepare for the gluing procedure: the quality of the work done will directly depend on this.
VIDEO ON THE TOPIC
Restoration process: step-by-step instructions
If the “original” bolts connecting the supporting structure become loose, they are strengthened with an additional washer. For greater reliability, you can add a little universal glue to the grooves.
Replace the sea grass and horsehair used in the old days as fillers with foam rubber.
A leaky seat is updated by replacing the base with slats and/or the upholstery is completely restored. The worn surface is freed from old material. The chair is prepared for further restoration:
- cut a piece of plywood to fit the seat;
- glue foam rubber onto the base (width - 3-4 cm);
- fix the plywood around the perimeter;
- stretch the upholstery fabric onto the finished base;
- secure the material with a stapler and staples.
A chair that is updated at home can be designed better than it looked before.
You can completely replace the back with a curly one, if the design allows.
You don't have to place the fabric on the outer sides of the seat. Then the upholstery is folded inward around the perimeter. The seat frame will be visible.
The fabric chosen is resistant to abrasion and mechanical stress, and quite dense.
Replacing holey or worn upholstery is a matter of one hour.
When updating, you can use a variety of materials. With good carpentry skills, a restored chair acquires an individual style. This takes into account the material - wood type, density, texture.
You can independently clean the wooden surface of old furniture and cover it with a transparent or tinted composition, or introduce new elements into the decor.
The chairs included in the set must be decorated in the same style.
If the chair is antique, then it must be restored very carefully. Be sure to give the applied composition time to dry.
For an antique chair, choose decorative material with embroidery.
The costs of restoration at home are minimal.
Round the edges using a jigsaw and sand the edges with sandpaper.
How to glue a chair leg step by step
Most of the parts of a wooden chair, including the legs, are connected to each other using glue.
Over time, such seams tend to weaken and dry out, which is why very often chairs break. But don't despair about this.
To solve the question of how to properly glue a chair leg , it is enough to acquire the necessary tools, namely:
- A hammer with a rubber tip;
- Sandpaper;
- Durable adhesive intended for furniture;
- Press;
- With a sharp knife or chisel.
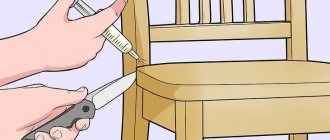
When these devices are prepared, you can begin the main process of gluing the chair legs. Furniture with a simple design is not particularly difficult to repair; it is only important to follow the steps in the work:
- First, you need to remove the wobbly leg from the socket, and its upper part, which is inserted into the groove (trunnion), should be cleaned of dried glue. If the previously applied glue is difficult to remove, you can steam it with water steam.
- If there is a thin layer of glue on the chair, it can be removed using sandpaper, and if it is thicker, you must first remove the layer of glue using a chisel or a sharp knife, and then sand the surface itself.
- After this, you need to apply a layer of glue to the pin, and also insert it into the seat socket. If the cord leg does not fit well into the socket, it is recommended to knock on it with a hammer equipped with a rubber nozzle. It is also allowed to apply some kind of press to the part.
- Visible adhesive residues should be removed using a piece of cloth.
- After 24 hours, when the glue is completely dry, you can use the chair.
Only by correctly gluing the chair leg can you count on its reliability and strength in the future. Without following simple rules, some tricks, desire and without resorting to the help of certain tools, it is simply impossible to achieve a positive result.
Review of the best adhesives for wooden chairs and furniture
Glue is the best tool for repairing wooden furniture. By adhering to the instructions written on the packaging and taking into account all the gluing requirements, everyone has the opportunity to achieve the effect with their own hands and make the gluing area more reliable and durable than the wood itself.
The following types of glue are used mainly for repairing furniture and, in particular, wooden chairs:
- PVA. This glue is resistant to temperature changes, easy to use and leaves no marks at all. It must be applied to a degreased surface and pressed at the junction. Complete drying should be expected after 24 hours;
- Casein glue. It often changes the color of the wood and is distinguished by its strength, but in places where it is glued it can leave a noticeable mark. The glue is a light powder that is diluted in water until it becomes thick sour cream, after which it is recommended to mix it with water for about 40 minutes. Dried glue is more resistant to temperature changes;
- Synthetic glue. This type of glue is used even on an uncleaned surface and is characterized by good frost resistance, moisture resistance and strength;
- Wood glue. It differs from other types of glue in its incredible strength and resistance to temperature changes. Almost always, its quality depends on the correct preparation process, which involves maintaining proportions when mixing it with cold water.
The best resin wood glue
Moment joiner
Glue from a domestic company, developed on the basis of epoxy resin. Allows you to reliably connect surfaces made of MDF, chipboard, plywood, wood of various species, as well as plastic with paper inclusions. The parts to be glued are pressed using a vice or clamp for 15 minutes to set.
Complete polymerization takes 24 hours. The composition does not change the color of the materials being glued (this helps to expand the scope of its application). The recommended temperature range for effective use of the product is +5 - +30 degrees.
Pros:
- transparency after drying;
- ease of use;
- quick and reliable setting, strong fixation;
- minimum time for polymerization.
Cons: low moisture resistance.
Titebond II Premium Wood Glue 5005
One-component composition for gluing wooden parts. The product has good water resistance. Can be used for repairing garden furniture, making birdhouses (birdhouses, titmouses), and mailboxes. The adhesive composition sets well, hardens quickly, forming a reliable seam. To increase the durability of the structure, it should be coated with waterproof varnish. Increased reliability is ensured by polyaliphatic components that penetrate the structure of the material.
Pros:
- wide range of use, possibility of use for wood of any species, as well as fiberboard, chipboard and MZF;
- reliability of connections;
- speed of setting. After complete polymerization, the strength of the connection is even higher than that of the wood itself;
- cutting tools used to process joints do not deteriorate;
- transparent packaging through which you can easily control the remaining composition;
- ease of use (a lid with a spout allows gluing even in limited space);
- various packaging options: 118, 237 ml and 3.8 l.
Minuses:
- high consumption;
- the need for rigid fixation of parts before setting;
- sensitivity to moisture;
- high price.
UHU 45640 Plus Endfest 300
A universal two-component wood composition with good gluing properties. An epoxy base allows wood to be firmly bonded to other materials, with the exception of glass. The hardening time of the composition is 1.5 hours. After half a day or two, the connection is completely ready for use. The seam is wear-resistant, impervious to mechanical stress and moisture. To prepare the working mixture, the two components that come with the kit are mixed until smooth.
The resulting adhesive composition is applied to the surface to be treated with a spatula or brush. The German company focuses on characteristics such as strength and moisture resistance. The product features reliable grip and a good level of adhesion.
Advantages:
- well balanced composition;
- exceptional moisture resistance;
- connection strength;
- the ability to glue other materials with wood (food grade plastic, tiles, concrete, metal);
- dielectric properties.
Disadvantage: the need to prepare the solution for working with your own hands, in strict accordance with the instructions.
Let’s identify the “champions” of our review by category to make it easier to choose:
- Titebond Polyurethane Wood Glue 2300 - indispensable for carpentry work;
- UHU 45640 Plus Endfest 300 - Of the epoxy resin products reviewed, this is the most reliable. This brand of glue is often used by professional carpenters;
- Kleiberit PUR-adhesive 501.0, D4 - a universal option, indispensable where quick setting is needed (as they say - tightly);
- Moment Super PVA D3 is moisture resistant - ideal for gluing wooden parts exposed to high humidity.
When choosing, the master, first of all, takes into account the type of work performed, as well as his own preferences. So, you can choose a universal or narrow-profile product used for wood and its derivatives.
How and with what to glue a chair? Tips and necessary tools.
Currently, some interior products are made from artificial materials.
But many people prefer wooden furniture.
Therefore, in some cases in everyday life there is a need for restoration or repair of wooden products (for example, chairs).
And it is not always possible to use traditional fasteners using nails, screws and other elements for connection.
Very often, during use, such chairs become loose and break.
Before you start working, you need to inspect the chair. If all the crossbars begin to come out of the grooves or wobble in the grooves, then it is better to disassemble the chair completely.
Often the best option is to glue the necessary fragments together.
The skillful hands of a home craftsman may well save him.
For this reason, you need to know which glue is suitable for repairing wooden structures.
Any type of glue should be chosen based on the specifics of its use.
Therefore, before purchasing, you need to get an idea of what properties it should have, that is:
- Drying time;
- Bonding density;
- Moisture resistance;
By following the instructions and taking into account all the gluing requirements, everyone has the opportunity to achieve the desired effect with their own hands.
It is necessary to first familiarize yourself with the characteristics of a particular product in order to make the right choice.
Peculiarities
This chair model is chosen by travelers, summer residents and artists. The practicality and compactness of this model does not require proof. Today, there are folding camping versions of almost all the pieces of furniture familiar to us: tables, stools, folding beds, loungers and the like. The main advantage of such products is, of course, compactness and mobility.
Traveling several tens of kilometers a day, it is pleasant for a tourist to land on a folding chair during a rest stop.
When you travel by car, it is important to have a compact chair, and if you move on your feet, then this becomes a necessity. Large items are not suitable for camping
Products with a back will be especially comfortable.
However, do not think that all folding chairs are a cheap and awkward spectacle that is only suitable for going to the forest, tinkering in the garage, or, at best, for country gatherings. Today you can buy or make yourself very stylish and cozy chairs for a modern kitchen interior. There is no shame in showing such products to guests, especially if the item of pride is made with your own hands.
No special carpentry skills are needed for this undertaking. You just need to know how to use a hacksaw and hold a drill in your hands. The folding chair is assembled according to the drawing, like a construction set.
There are three main materials used to make folding chairs: metal, wood and plastic. Plastic is a light and cheap material that is easy to clean. It is not able to withstand a large body weight and becomes deformed if it is located near heating devices. This material is short-lived, so for constant use it is better to choose something stronger. For example, chairs with a metal frame.
Folding models made of aluminum are reliable and strong. They are not afraid of rust and can withstand heavy weight. The best option is wooden products. They are safe, beautiful and reliable. Such a chair will cost more, but will also last a long time. In addition, even a beginner will be able to assemble a folding camp chair from this material.
Main types of adhesives and their characteristics
- PVA: no toxicity, fast acting, unlimited shelf life.
PVA glue is in demand in the furniture industry, the manufacture of interior items, and, if necessary, to join any wooden parts.
Epoxy glue has become massively popular because it firmly bonds almost all materials and perfectly levels the surface.
BF-2 glue is suitable for gluing wood; it has an optimal range of qualities - it is not susceptible to fungus, oils, gasoline, and is waterproof.
Syndeticone glue is excellent for gluing wood and gluing various materials to it.
Polyurethane waterproof wood adhesive is considered the most resistant to stress and vibration.
How to glue a chair
To repair a chair you will need the following tools:
To avoid damaging the chair, it is better to use a hammer with a rubber attachment.
Wood sandpaper is an essential tool when finishing wood.
Furniture glue should not only ensure a reliable connection. Sometimes the wrong glue can significantly spoil the appearance of the product.
A clamp will help firmly fix the glued fragments.
This type of knife is often used in construction and furniture repair.
The chisel is used for cleaning parts, trimming ends and removing excess.
First of all, you need to disassemble the chair.
If you have to make an effort when removing hardened glue, the best solution is to steam the solution using water steam.
If there are small adhesive residues in the form of a thin layer, it must be removed with sandpaper.
Remove the glue carefully so as not to damage the surface of the wood.
If the layer is thick, then you will need a chisel and a sharp knife, and only after that should you use sandpaper to process the surface itself.
Using a chisel you can easily remove glue residue from the wooden pins on the crossbars.
Then you need to apply glue to the parts of the chair that will be inserted into the grooves and insert them.
By tapping the inserted element with a hammer, bring it to its original position.
To achieve the best effect, depending on the type of repair, you should use a press, a clamp, a tightening belt, or other available auxiliary items.
Also, for greater strength, the pins in the grooves can be additionally secured with nails.
Remove any remaining glue. In the case of PVA, this is easy to do with a piece of fabric.
The glue must be removed after 1-2 minutes, otherwise it will dry out and remain on the chair.
After a day (if it is PVA), you should make sure that the glue has dried. And only after that you can use the chair.
By properly gluing the chair legs, you can be sure of its strength and reliability in the future.
A brief overview of the types of chairs
"Array"
These models are the most common, and they are also among the easiest to manufacture. There are no curly lines or changes in geometry, which is why these chairs are recommended for assembly by novice furniture makers. They are stable, reliable, durable and fit well into the interior of wooden houses or dwellings that are decorated in a rustic style.
The only drawback of this type of chair is its massiveness. But it is partially leveled out if you use low-density wood. And decorating it like a “heavy” species, such as oak, is not so difficult. Some technologies can be found by following this link.
For living rooms and dining rooms, you should focus on any of the modifications of a massive chair, which differs from the standard options in a soft seat. When assembling such a piece of furniture, it is advisable to combine materials. It is advisable to make the frame from solid wood, and reduce the parameters of all elements somewhat - carved legs, a more elegant back (not solid, but made of slats). For the seat, you should take plywood, which is sheathed.
Another variety is the armchair chair. It is somewhat more difficult to make, but for a living space, a recreation room, or a terrace, these are the most acceptable models. Such comfortable chairs can be additionally upholstered, with shock-absorbing material placed under the covering; here a lot depends on your own imagination.
If a chair is made for a child, then “solid” is the best solution due to its stability. It is guaranteed that a naughty baby will not roll over with the high chair.
"Cot"
These chairs are more suitable for use on the premises or in a country house. In addition to being easy to transport, they are convenient in rooms with a small area. Such a chair can, when folded, stand somewhere against the wall, on the side of the closet, and not take up useful space. If necessary, it is easy to transfer it to the “working position”. It is precisely these models that are most often used in garden plots, loggias, terraces and other places where the low weight of the product, size and mobility play a special role.
If the folding chair is assembled from multi-layer plywood, then additional ease of use will appear; it (given its light weight) can be hung somewhere on the wall or under the ceiling.
A lighter design can also be made. In such a “folding bed” the seat (and sometimes the back) is made of canvas. For example, from tarpaulin. For a summer cottage, going on a picnic or fishing - a good option.
"Transformer"
This is the name for chairs that can easily be turned into a multi-tiered shelving unit, stepladder, or something else (depending on the features of the design). These models are great for apartments. Whether it concerns cleaning, repairs, or attaching something to the wall (ceiling), you won’t have to look for a sliding ladder - it’s always at hand in the form of a “transformable” chair. And for those who like to grow flowers in the house, summer residents, who at the beginning of each year have problems placing containers with seedlings in their rooms, this is simply an irreplaceable thing.
How to glue a wooden chair? Do-it-yourself chair repair
In everyday life, situations often arise when chair repairs are required. DIY repairs are much cheaper than calling a professional. It is necessary to find out the cause of the breakdown and select the right tool. Many people are interested in how to glue a wooden chair. It is worth taking a closer look at the materials needed to repair furniture. Wooden chairs with upholstered seats require a different approach than products made entirely of wood. Let's look at how to restore this furniture yourself.
Causes of breakdowns
Before you look for how to glue a wooden chair together, you need to understand what caused the breakdown. This type of furniture consists of many parts that are attached with glue. Over time, the joints become unstuck. It happens that the legs move away from the harness. They are usually attached using spikes.
Some products may have manufacturing defects. A man sits on a chair with wooden legs and falls because one of the legs falls off. Don’t think that furniture is no longer usable and should be in a landfill. Breakdowns of this type can be easily repaired with your own hands without spending a lot of money on repairs.
Caring for wooden furniture
After gluing, wooden furniture needs care more than ever. Simple rules must be used. Even if high-quality glue is used, furniture should not be placed in the cold or exposed to sunlight. Humidity and temperature changes also have a negative effect.
There is no need to install structures near a balcony or window. To protect the product from sunlight, it is necessary to treat the surface with varnish and then wax. To prevent insects from infesting the wood, every summer you need to wipe the lower parts of the structure with a cloth with turpentine.
Furniture must be placed on a flat floor, otherwise deformation will appear over time. Cleaning should be done with a polishing cloth with a mixture of wax and antistatic agents. Vegetable oil, such as burdock, will help renew the product. You will need a few drops and a cloth.
In order for furniture to serve reliably for many years, restoration must be carried out with suitable tools and means. After this, you just need to follow simple maintenance rules, and then the structural parts will be fastened together with high quality.
What glue should I use for repair work?
If a wooden chair is broken, then it is recommended to use the best wood glue for repair. Nowadays the greatest demand is:
Professional carpenters put forward the following requirements for glue:
- It must be resistant to sunlight.
- Universal to use.
- The adhesive connection must be strong.
- It is recommended to use moisture-resistant glue.
- There should be no sticky residue left on the surface.
- Should not be toxic.
If you ask a professional craftsman how to glue a wooden chair, he will probably recommend using epoxy glue. It is best suited for wood products. PVA glue can be used. Some people use a two-component composition.
Tension
The glue must dry under pressure. Therefore, it is recommended to tighten the newly glued frame using clamps, zwings or cords and keep it that way for about 12 hours. At the same time, you should not create too much pressure, otherwise a lot of glue will leak out of the grooves. After some time, loosen the tension a little.
Make sure that when tensioning, the chair frame is at the correct angle and is not distorted. This requirement is easy to fulfill when repairing ordinary chairs. The situation is more complicated, for example, with English chairs or rocking chairs. However, at least the front of the chair can be controlled using a plumb line. Please also ensure that the newly glued parts are connected without excessive tension and with uniform pressure, as well as that the angles match exactly. Otherwise, the chair may warp under load and the seams will come apart.
Adhesive joints must be secured with clamps, zwings or cords until the glue has completely dried.
How can a leg be repaired?
When people ask how to glue a wooden chair together, they often think about repairing the legs. This part is easy to install; it is important to choose the right tool. You should follow the step-by-step instructions:
- The loose leg must be removed from the socket. You need to remove the old layer of glue from the surface. If it is firmly stuck to the leg, you can try to steam it using a boiling kettle.
- If the old glue forms a thin layer, it can be removed with sandpaper.
- It is necessary to apply a layer of fresh glue to the surface of the leg and install it in the socket. For better adhesion, you can tap with a hammer from above. It is important to use a rubber grip on the hammer.
- If the glue has leaked onto the visible part of the leg, it must be removed with a damp cloth.
- Before using the furniture, you need to make sure that the glue is completely dry. To do this, you should wait 24 hours.
Softening old glue with steam
Steam flows from the kettle on the stove through a rubber or plastic hose to the socket in the chair. Hot water will flow down the tenon nest wrapped in a cloth. This way the remaining glue will dissolve faster.
To thoroughly strengthen a loose connection, the individual parts must first be separated. To do this, especially on frames with crossbars, it makes sense to separate the still quite strong adhesive seams.
If the chair wobbles not only because the glue joint has become loose, but also because the legs are different lengths, you should wait until the frame is glued back together. Only after this will it be possible to accurately determine the difference in the length of the legs.
If the glue is very strong, try steaming it. Regular glue dissolves in water. Steam can soften the glue even in tightly closed seams.
For this purpose, use a rubber hose that is used for squeezing juices, or buy a thin gasoline hose with a diameter of 6 or 7 mm at an auto parts store. Attach a suitable metal tube to both ends of the hose, insert one of them into the drilled plug, and it, in turn, into the spout of the kettle. This way you can direct the steam to the right place.
Before you start steaming, move a chair closer to the stove and position it so that you can easily reach the area to be treated. Make sure that the water formed as a result of cooling the steam does not drip onto other places, especially the soft upholstery.
Wear a mitten on the hand with which you will hold the hose, as the hot steam will cause the hose to become very hot.
Direct the steam to the edge of the glue joint and try to move both pieces of wood apart after a while - it is likely that this can be done in a couple of minutes.
This method will help remove old glue on exposed trunnions. Steamed wood must first dry before it can be glued again.
This is what the connection between the drawer and the back (above) and front (below) legs of the chair looks like.
A more labor-intensive method is gluing a chair, in which the drawers located under the seat are inserted and tenoned into the legs, and to increase stability, all corner joints are secured from the inside with triangular or trapezoidal blocks made of solid wood. Here you are faced with a rather complex connection, where it is not enough to separate just one glue seam. In other words, in such a chair it is impossible to separate one part and re-glue it: the entire drawer frame must be separated, or at least one corner of the chair frame must be completely opened.
If you use force, you will break the thorn of the tsar, or even break it off completely. This is where hot steam comes in handy.
Make sure that the frame is subsequently glued at exactly the same angle.
Thin wedges can be inserted into the large tenons on the sides to ensure a tight connection to the chair leg.


