How to embroider on clothes with threads
- Select clothes
- Gather everything you need
- Determine the embroidery position
- Select a picture
- Think over the color scheme
- Prepare the fabric for embroidery
- Select embroidery threads
- Transfer the drawing
- Start embroidering
- Washing and caring for embroidered clothes
Below are all the details.
Threads
When choosing threads for embroidery, you should take into account their thickness, color and shedding ability.
First you need to choose the design that you are going to reproduce on the fabric. Based on this, select all the necessary colors. Next, select the thread material. There are three main types:
- Polyester. This type of thread does not fade when washed and does not deform when ironing and other influences.
- Viscose. Suitable for decorating thin materials, it adds elegance due to its slight shine.
- Cotton. Most often, this type of thread is chosen for use on a sewing machine. They are easy to use and give the desired effect. However, they can be deformed and fade slightly when washed.
How to hand embroider on clothes
You may have already decided what you want to embroider. But I will note that it is very important to choose the right fabric for your embroidery - especially if you are a beginner. Therefore, starting your first embroidery project on a thin fabric such as chiffon or mesh means facing challenges and ultimately dashing your ambitions of becoming dependent on this craft. Your disappointment will carry you away.
Cotton fabrics are best for any type of embroidery. But that doesn't mean you can't embroider on anything else. Moreover, you can decorate any fabric with embroidery.
If your fabric is very thin, such as cotton voile, it will not hold up to heavy embroidery or metallic thread. Especially if there are also beads and sequins.
You should also use stabilizers on the back of thin and/or delicate fabrics such as silk. You should also use them on regular fabric if you are using unusually heavy fabrics such as gold thread.
Never dare to embroider on multiple layers of fabric, such as collars, trims or hems of jeans. This is difficult for a beginner; you need practice on individual layers of fabric.
T-shirt embroidery is very popular, and it's tempting to embroider your favorite designs on clothes you'll wear every day, but let me warn you, it's difficult to embroider on the stretchy, thin fabric of T-shirts. If this is your first time embroidering, choose a simple, non-stretchy fabric such as cotton for a number of projects, then move on to T-shirts.
If you make your own clothes, you always do the hand embroidery on the garment first, after the design has been applied, of course, but before the fabric is cut. If you start embroidering after it has been cut, the edges of the piece will begin to unravel.
Basic types of stitches for cross stitch
Namely:
Embroidery threads are sold in special sets, so it won’t be difficult to choose the right colors. As for the fabric for the future product, preference should be given to cotton or linen material. Experienced needlewomen advise deciding on the fabric even before choosing a pattern.
Cross stitch is quite simple, the main thing is to arm yourself with the necessary materials and learn the technique.
Cross stitch is a counting technique, so you need to be careful when working with stitches. It is recommended to use a magnifying glass.
Thicker fabrics are perfect for creating paintings or towels, and with the help of thin material it is possible to beautifully embroider shirts and scarves.
There are several varieties of stitches for cross stitch. The choice of technique depends on the chosen scheme. The most common stitches are shown below.
There are many different stitches, so everyone chooses what they like best. Simple cross
It is applied to the canvas using two stitches intersecting diagonally. Stitch on the canvas fills only one cell. When you need to make horizontal or vertical simple stitches, first you need to embroider everything in one direction, and then in the opposite direction.
It’s worth learning the simplest technique first.
Elongated cross
It is used if you want to enrich embroidery with texture. This technique is indispensable when you need to fill large areas of canvas very quickly, because the cross fills several cells of the fabric.
Needlewomen use an elongated cross when it is necessary to embroider large sections of canvas
Half cross
These seams are usually combined with simple stitch. Thanks to this combination, it is possible to achieve an imitation of unusual watercolor lightness in the product.
The half-cross in needlework goes well with other types of stitches
Bulgarian cross
This seam combines 2 crosses. To do it correctly, you need the bottom seam to be a simple cross, and from the height to be vertical.
The technique of embroidering the Bulgarian cross is not complicated, the main thing is practice
Double cross (difficult)
Experienced needlewomen advise doing it on the canvas. Often such complex crosses are repeated and follow each other.
Double cross - the technique is quite complex, but it looks great on the canvas and in the finished product
Rice seam
Here a large cross of 3 or more cells is made, after which half crosses are applied to its ends. To enrich the background, use threads of 2 shades.
In addition to the above stitches for cross stitch, there are many other stitches (star stitch, as well as Algerian eye).
When you want to enrich the background, you can safely use a rice stitch
How to quickly and beautifully cross-stitch: useful tips
Due to the fact that cross stitching is considered a painstaking process, some nuances should be taken into account in advance.
This will ensure productive work and allow you to achieve the desired result:
Before using the embroidery base, it is recommended to wash the fabric and then iron it well. In addition, it is important to check whether the selected threads are fading. To ensure the durability of the paints, you should rinse them in a vinegar solution (3 tablespoons of vinegar per 200 grams of water). You can create your own embroidery pattern. The special Stitch Art program will help you with this. If the selected pattern is large, you can apply marks to the outline. This will prevent the pattern from shifting. When we are learning to make a complex design where there are many colors, it is better not to make random crosses; instead, they should be applied in a row. To achieve a neat and high-quality appearance of the product, the top stitches should be made in one direction.
To make the finished work look organic, stitches should be sewn in one direction. To make the finished work look organic, stitches should be sewn in one direction.
Interesting! For cross stitch, it is better to use a special tapestry needle. It will not pierce the fibers, instead gently pushing them apart.
Today, learning to cross stitch is not difficult even for an inexperienced beginner. Because there are a wide variety of patterns that can satisfy every needlewoman.
New options for embroidery patterns allow you to update outdated tablecloths or napkins with unusual patterns.
A huge plus of cross stitch is that this process relaxes and gives you the opportunity to relax. A huge plus of cross stitch is that this process relaxes and gives you the opportunity to relax
Thanks to such cross stitch, you can independently transfer your favorite movie characters onto fabric or create a wonderful novel. Modern interesting embroidery models come in a variety of themes. These can be festive New Year's products or lyrical, children's, or abstract designs.
Cross stitch: useful tips (video):
Thanks to painstaking and attentive work, cross stitching will become a real joy for creative people. Moreover, from an inexperienced beginner who ventures into such needlework, you can become a real professional, whose products will decorate your home for many years and pleasantly surprise guests.
I bow before the beauty and nobility of this type of embroidery. Meet! Magnificent cutwork in person. Just like hemstitching, this embroidery method is borderline with other types of needlework. Richelieu is very similar to lace. Cutwork is also close to knitting and macramé because it contains “hinged” (as I call them) elements over pieces of fabric that will later be cut out. These constrictions woven from threads, similar to rope bridges over an abyss, like Atlanteans, support the entire composition and the central fragments of openwork, end-to-end embroidery.
The next seam that we will look at is the stem stitch. With your permission, I will end there. But don't rush to leave. The most interesting things await you at the end of this article!
For an atlas, it is important to prepare the “flooring” - it is like a skeleton for musculoskeletal tissue, like a foundation for a future home. The flooring can be the outline of an embroidery detail (leaf, petal, etc.) “circled” by a chain stitch or other stitch (we will look at the chain stitch later).
If the embroidery piece is large in size, then flooring (as I call it) is necessary over its entire area, which is often done with threads to match the background. The flooring stitches can be quite rare; they should not cover the entire area of the part, but it is important that they are perpendicular to the future main satin embroidery. This “foundation” will support the top embroidery, make it voluminous, and give it a neat and even appearance. The knit (top) stitches of the satin stitch itself will not fall or sag. Also pay attention to the tension of the thread while embroidering so that the stitches lie tightly, but at the same time do not tighten the fabric.
For extra volume, the piece can be embroidered using satin stitch in two layers, the stitches of which will be perpendicular to each other.
The next number in our program will be the chain stitch. A “chain” or “tambour” seam is a continuous chain of loops extending from one another. The loops can be small or large depending on the thickness of the thread and the length of the stitch being performed. Using a tambour chain, various patterns are embroidered along a free contour or the entire plane of the motif is covered in rows. This seam also has its own variations and complications.
A “loop with an attachment” can be considered a type of chain stitch or, rather, a separate element of it.
And now on our stage the “French knot” is the cutest artistic means in embroidery! With its help you can easily add volume and charm to your work. You can see for yourself what different images you can create with the help of this small and remote knot.
Meanwhile, it is done very simply: a needle is wrapped around two circles of thread, stuck into the fabric near the end of the thread coming out of the fabric, and pulled through these loops. The knot is ready!
The next seam is rococo. This name reminds me of chicken. And if the “French knot” is a chicken, then Rococo is its mother, because Rococo is a complicated interpretation of the French knot, in my opinion. For rococo, the needle needs to be inserted at a distance from the thread exiting the fabric, and when the end of the needle appears next to the thread coming out of the canvas, you need to wind a little more loops of thread around it than for a knot. After you pull the needle and thread through the loops, you will get a “caterpillar” or “smile”, as you like. We lay it out as required by the design and composition of the embroidery, and fix it by sticking a needle into the fabric in the right place. Please note that the thread must be completely covered by the loops: the “caterpillar” should be dense. To do this, the number of turns of the thread around the needle must correspond to the distance between the thread exiting the fabric and the subsequent entry of the needle into the fabric. You can tighten and tighten the loops on the thread a little, but not indefinitely.
Rococo is most often used for embroidering flowers and leaves.
And now... My favorite hemstitch. When my mother taught “workshops” (labor) at a pedagogical school, she voluntarily mastered this type of needlework, although she already possessed and still possesses an impressive set of creative skills. In the evenings, I watched with rapture as my mother worked magic with the hoop and performed miracles with threads...
In my opinion, the most unpleasant thing about hemstitching is the boring and rather labor-intensive process of pulling threads from the fabric (pulling) in order to create a “springboard” for further creativity. And then you need to arm yourself with some kind of optics and provide good lighting (as for any type of needlework). If you have patience, you are guaranteed a masterpiece! Merezhka is the spirit of folk embroidery! It is incredibly beautiful, original and gentle! See for yourself:
There are different hems. There are types of hemstitching designed to work with “tracks” (as I personally call holey, perforated striped spaces on fabric). And there are types of hemstitching suitable for decorating and processing the corners of the future pattern.
To avoid disappointment, you need to start with a “short distance race” - with a simple type of running and a short “track”. When the positive result inspires you, you can take on more difficult versions of this end-to-end embroidery. Go for it!
In my opinion, hemstitching is the sister of weaving and a relative of macrame.
Therefore, be creative and be happy, dear sorceresses!
Every person has his own hobby. An activity that can relax you, distract you from everyday activities, from various thoughts and simply give yourself a rest. Today I would like to draw your attention to a beautiful type of needlework, like satin embroidery for a beginning needlewoman. Satin stitch embroidery is creativity and one of the wonderful activities when you feel joy and see the result of the creation of your hands, when, after completing the next project, a butterfly sitting on a flower “flies out”, or maybe a beautiful bird (as in the first photo). And finally, feel proud of yourself and your creations!
Chinese satin painting is simply amazing
Embroidery using the satin stitch technique has always helped to add a touch of sophistication to the home - extraordinary home textiles, original interior items, toys for small children, clothes, linen and many other things that will decorate any room. Satin embroidery when finishing clothes will be a unique individual highlight in any woman’s wardrobe.
There are many types of satin stitch embroidery, but we will look at the most necessary types of stitches for a beginning needlewoman to try her hand at this undoubtedly interesting satin stitch embroidery technique.
In order to begin this exciting process of creating your next masterpiece, you will need the following items: a hoop, canvas, a drawn drawing of the future project on canvas, floss, scissors, and so on.
Satin embroidery
this is the earliest technique. It was used in ancient times in the east. Therefore, another name for this technique is damask embroidery - a series of flat stitches that completely fill the free contour of the pattern, which is applied to canvas, fabric and secured on a hoop for further satin stitch embroidery.
Sketches of drawings for colored artistic satin stitch are usually black and white. This is done so that the embroiderer can choose a color palette to her own taste. This technique uses various types of seams and techniques.
Let's look at the basic techniques of satin stitch embroidery.
How to embroider on clothes step by step and what you will need for this.
- First of all, we need a suitable embroidery needle. Remember that the eye of the needle must be 40% larger than the diameter of the thread, otherwise your thread will start to break.
- Choose fine needles for delicate fabrics because large needles leave holes.
- We will also need suitable embroidery threads. More on this below.
- Embroidery hoop.
- Choose a method for transferring the design to the fabric and what you will need for this.
How to beautifully embroider on clothes: to do this you need to determine the position of the embroidery
How to embroider a pattern on clothes is a separate topic. You can embroider anywhere - on the back, on cuffs, on collars, on pockets, on one side of the yoke, on both sides of the yoke, diagonally at the front.
If you decide to embroider your design on the front of the T-shirt, place the design 5-10 cm below the neckline (be sure to be above the armhole line). In the center of the front bodice (exactly in the middle of the two side seams). If you have a large pattern, make sure it doesn't go below your waistline. Also, the design should be visible even when the T-shirt is tucked into the waistband of the trousers.
If you want to place the embroidery on one side of the T-shirt, do it on the left chest. To do this, find the center of the middle of the T-shirt (or placket) and the side seam. Mark a small vertical line. Then draw a small horizontal line down from the shoulder seam - for adults 17-23 cm and for children 7-10 cm. After this, place the center of the pattern at the intersection. Also, to embroider on the back of a T-shirt, sweatshirt, or hooded shirt, place the design 17–23 cm below the neck line. For the back of the jacket, a good location for the pattern is between the shoulder blades. You can place a monogram on the shirt collar. On the buttonhole placket, you can make a design between the 2nd and 3rd buttonholes. On short sleeves of a shirt, place the pattern 2-4 cm above the stitch line on the sleeve.
A new sweater is no problem!
Many girls have several plain sweaters in their wardrobe that they wear a lot.
Decorating them with embroidery is difficult! An embroidered applique is suitable for decoration.
Transfer the drawing onto tracing paper, which you sew onto the product. Observing all the lines and colors of the pattern, make a one-sided stitch.
Carefully cut out the design and sew it to the sweater. The applique can be made on the sleeve, this is very fashionable now.
How to embroider letters on clothes, as well as other types of patterns
As stated earlier, the choice of pattern largely depends on the fabric and type of garment you are making. Thus, a child's dress requires a child's embroidery design, not a skeleton image that you would embroider on your teenage daughter's T-shirt (if she really begged you)
How to embroider inscriptions on clothes
Use PowerPoint to create your own simple fonts. First of all, go to the format option on the blank Powerpoint page and create your own words in the Text Effects section - even curved letters are possible in PowerPoint. Now you will need to model them to match your fabric. Make a stencil and print it out. Any inscription will be exclusive to you.
How to embroider initials on clothes
You can also use the alphabet with flowers to embroider initials.
Letters can be embroidered with covering. This way they will be more convex.
Just a roller.
You can embroider with a chain stitch.
You can also embroider letters with a simple stitch - back needle.
How to learn to embroider satin stitch on clothes from small patterns
Of course, for small children's dresses, small flowers in the form of a French knot are enough and there is no need to create complex patterns.
Floral designs are always in demand, as are peacock feather or butterfly designs. Therefore, the patterns can be found in the article embroidery of insects, animals and birds.
Moreover, if you don’t know how to embroider small flower patterns, check out the article: 8 spring flowers for beginners.
How to embroider flowers on clothes
If you are looking for small hand embroidery samples, check out the article Flower Embroidery for Beginners
Sometimes you need to increase or decrease the size of an embroidery pattern. Therefore, you should draw the design as a grid and then copy it square by square in a larger size.
Basic types of stitches for cross stitch
There are several varieties of stitches for cross stitch. The choice of technique depends on the chosen scheme. The most common stitches are shown below.
There are many different stitches, so everyone chooses what they like best. Simple cross
It is applied to the canvas using two stitches intersecting diagonally. Stitch on the canvas fills only one cell. When you need to make horizontal or vertical simple stitches, first you need to embroider everything in one direction, and then in the opposite direction. It’s worth learning the simplest technique first.
Elongated cross
It is used if you want to enrich embroidery with texture. This technique is indispensable when you need to fill large areas of canvas very quickly, because the cross fills several cells of the fabric.
Needlewomen use an elongated cross when it is necessary to embroider large sections of canvas
Half cross
These seams are usually combined with simple stitch. Thanks to this combination, it is possible to achieve an imitation of unusual watercolor lightness in the product.
The half-cross in needlework goes well with other types of stitches
Bulgarian cross
This seam combines 2 crosses. To do it correctly, you need the bottom seam to be a simple cross, and from the height to be vertical.
The technique of embroidering the Bulgarian cross is not complicated, the main thing is practice
Double cross (difficult)
Experienced needlewomen advise doing it on the canvas. Often such complex crosses are repeated and follow each other.
Double cross - the technique is quite complex, but it looks great on the canvas and in the finished product
Rice seam
Here a large cross of 3 or more cells is made, after which half crosses are applied to its ends. To enrich the background, use threads of 2 shades.
In addition to the above stitches for cross stitch, there are many other stitches (star stitch, as well as Algerian eye).
When you want to enrich the background, you can safely use a rice stitch
How to quickly and beautifully cross-stitch: useful tips
Due to the fact that cross stitching is considered a painstaking process, some nuances should be taken into account in advance.
This will ensure productive work and allow you to achieve the desired result:
Before using the embroidery base, it is recommended to wash the fabric and then iron it well. In addition, it is important to check whether the selected threads are fading. To ensure the durability of the paints, you should rinse them in a vinegar solution (3 tablespoons of vinegar per 200 grams of water). You can create your own embroidery pattern. The special Stitch Art program will help you with this. If the selected pattern is large, you can apply marks to the outline. This will prevent the pattern from shifting. When we are learning to make a complex design where there are many colors, it is better not to make random crosses; instead, they should be applied in a row. To achieve a neat and high-quality appearance of the product, the top stitches should be made in one direction.
To make the finished work look organic, stitches should be sewn in one direction. To make the finished work look organic, stitches should be sewn in one direction.
Interesting! For cross stitch, it is better to use a special tapestry needle. It will not pierce the fibers, instead gently pushing them apart.
Today, learning to cross stitch is not difficult even for an inexperienced beginner. Because there are a wide variety of patterns that can satisfy every needlewoman.
New options for embroidery patterns allow you to update outdated tablecloths or napkins with unusual patterns.
A huge plus of cross stitch is that this process relaxes and gives you the opportunity to relax. A huge plus of cross stitch is that this process relaxes and gives you the opportunity to relax
Thanks to such cross stitch, you can independently transfer your favorite movie characters onto fabric or create a wonderful novel. Modern interesting embroidery models come in a variety of themes. These can be festive New Year's products or lyrical, children's, or abstract designs.
How to embroider on clothes with gold
It is very difficult to embroider on knitwear, your embroidery can easily become deformed. Therefore, most often you choose embroidery on your hands, but again it turns out skewed. I will tell you how to avoid this 100%. Using my technology, the design on your embroidered T-shirt will not sag and deform the fabric.
For you, I have prepared all the necessary life hacks and master classes that will help you embroider on thin fabric, such as a knitted T-shirt, which can stretch in different directions. It is important that the design you embroider will not look drawn out, and the embroidery itself will more closely resemble real gold jewelry.
If you want to embroider on any dense fabric, for example, on a denim jacket, you can also apply my gold embroidery technique on clothes and try to make an equally original embroidery with gold cord.
If you want to learn how to create stylish designer items, then the course on gold embroidery on clothes has already been created for you, all you have to do is follow the link.
Second life for outdated items
There is absolutely no need to spend money on expensive models with decorative embroidery. If a person is not deprived of creative abilities, he will create a unique design with his own hands.
Work done conscientiously will decorate clothes for several years, with proper care.
Place the right emphasis, show your imagination, and the end result will be a one-of-a-kind thing. Perhaps the result will be far from the ideal of fashion trends, but originality always wins over popular trends.
When a housewife is interested in needlework, she uses a sewing machine. The technique will create a durable and neat design that will delight the owner for many years.
If a person is not confident in his abilities, the best solution would be to give the item to a tailor. He will create a decoration according to the customer's preferences.
How to embroider floss on clothes in the chosen color
You can take a drawing you already have and use colored pencils to colorize your drawing. This way we can see what our diagram will ultimately look like in color.
First steps or how to embroider on clothes correctly
Wash the garment first to remove unnecessary seals and prevent shrinkage. This is important because if this is not done, creases may appear in your embroidery. Then dry and smooth out any wrinkles. If necessary, for thin and stretchy fabrics we use non-woven fabric. We glue it with a hot iron to the wrong side of the T-shirt or shirt.
For transparent fabrics, water-soluble interlining is required. Since ordinary non-woven lining does not always look beautiful after finishing work, water-soluble ones will simply dissolve after completion of work.
I advise you to look at the diagrams
Regardless of whether the needlewoman will perform computer embroidery or do manual work, she will need diagrams. It is worth considering the simplest and most unusual options.
How to embroider with satin stitch on clothes
First of all, before embroidering, wash your hands. After every break, especially if you went to the kitchen for a short time. Any oil stains, turmeric and even sweat can stain your clothes.
Cut a thread 60 cm long and thread it onto a needle.
The design area of the hoop should be taut to allow smooth stitching. Embroidering without a hoop is one big problem.
If you want fine and delicate work that is as smooth as satin, you should only use one strand of embroidery thread per needle. But if you are in a hurry or are embroidering on thick fabrics, such as denim, you can use three threads. But as a result, it will not be as good as with one thread.
For smooth fill stitches such as art satin stitch, use floss rather than cotton thread. But for textured stitches, cotton works well.
It is generally better not to tie a knot at the beginning of embroidery. Start from the front side of the design and tuck the end of the thread inside your embroidery. Make tiny stitches at the base of where you came out to keep the thread firmly anchored there. If you run out of thread in the middle of the work, and you always will, start embroidering in the same way as you started without making a knot.
There are so many embroidery techniques and hundreds of embroidery stitches to fill out your designs. But how to embroider on clothes with threads for beginners? For your reference, here is the article: basic stitches for beginners
It is quite easy to embroider any large flower or pattern using artistic satin stitch. Watch a video on how to embroider correctly.
I advise you to read : minimalist embroidery on a T-shirt
Embroidered patterns - old-fashioned or the last squeak
The idea of decorating clothes with embroidery is not new. However, it is still relevant today. Patterns have been relevant for a long time. Embroidery was a national traditional element. Previously, it was used to decorate all fabric items in the house: from the wardrobe to furniture and pillows.
Currently, the embroidery technique is returning to world fashion. Increasingly, famous designers from fashion houses are using this direction. Models with handmade embroideries appear on the catwalks.
The clothes of world stylists are not affordable for ordinary buyers, but now in stores there are quite a lot of models with embroidered patterns - the choice is huge.
Washing and caring for embroidered clothes
Don't forget to check the thread for color fastness. Wash embroidered clothing separately by hand, at least the first time after embroidering.
The washing process should go like this. Use a very mild detergent and mix it with a little warm water to wash the item first. If there are stains on your clothes, use a little dishwashing liquid to remove the stains. Now soak your clothes in a solution of one teaspoon of vinegar and a little cold water. Take it out and then rinse it many times in plain cold water. If the thread is dyed, rinse as many times as necessary to remove any remaining dye. Dry your clothes quickly enough.
Instead of wringing out the garment and ruining the embroidery, place it between thick towels to absorb the water. You can also use a hair dryer to speed up the process. Because while the fabric is wet, the thread color may bleed again. Now place the clothes somewhere flat rather than hanging them in the shade to dry.
After the first wash, you can wash the clothes in the washing machine. Use a laundry bag. Also, use the soft/delicate cycle with a mild detergent. Brighten the colors by adding a little vinegar to the final rinse.
It is possible to save texture stitching or beautiful three-dimensional flowers. To maintain the feeling of volume, never iron embroidery on a hard surface. You can lay out the embroidery with the wrong side up and press it.
Place the embroidery on a fluffy towel, wrong side up, to protect the textured surface and press the iron gently onto the embroidery.
What is the canvas for?
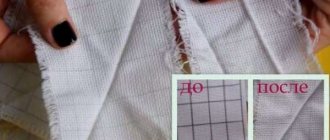
To cross stitch on clothes you will need a canvas. It will help make the drawing even and neat. This thick fabric, resembling a mesh, needs to be attached to the place of future embroidery. Its size is selected based on the size of the drawing itself plus a few centimeters on each side. Please note that there is no need to sew the canvas to the product, as this may damage the fabric. It is best to carefully secure it with a couple of stitches along the edges or with pins, after which you need to level the canvas.
After embroidering, the canvas should be removed. To do this, pull out the threads alternately from the vertical and horizontal sides. If the canvas cannot be pulled out, simply cut it with scissors to the root of the resulting embroidery.
How to embroider a design on clothes
How to embroider a design on jeans
Design on jeans above the pocket.
Embroidery on the bottom of the trousers.
Embroidery on back pocket
Embroidery along the line.
How to embroider a star on clothes.
We use hoops.
Step-by-step embroidery for beginners
Try decorating a plain T-shirt. For a more rigid fixation, you will need non-woven fabric, slightly larger in size than the embroidery itself.
Mark the boundaries of the drawing with chalk.
Glue interlining to the wrong side.
To start, choose simple designs with repeating motifs.
Sew the first motif in the center of the sleeve.
Just a few motifs and an exclusive item in your wardrobe!
Having learned how to depict a simple motif, move on to working with glass beads, beads and beads at the same time. Beautiful patterns from a casual blouse or dress will make a luxurious holiday outfit.
Motives for creativity.
The Butterfly pattern is the most expressive motif for velvet.
Pearl beads and green beads will come in handy here. First, embroider leaves and twigs, sew beads for the “clusters,” then surround them with a bright outline.
