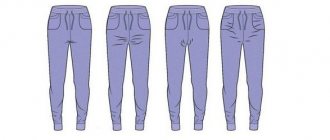
The master class teaches the technology of sewing children's pants with cuffs from knitted fabric with your own hands.
To sew such children's pants, you will need two types of knitted fabric, the main fabric within 80 cm (depending on the length of the pants) and a piece of finishing fabric within 20 cm. The width of the knitted fabric is 150 cm.
The construction of a pattern is not given in this article, but you can use patterns that are freely available on the Internet, or create a pattern with your own hands, using the calculations given in the article Pattern of women's trousers. You can do it even simpler - rip old children's pants at the seams, iron the seams of the front and back halves of the trousers and transfer their contours onto paper, checking the correspondence of the side and crotch seams.
For the waistband of children's pants, you will also need to buy a wide elastic band, within 70-80 cm.
Sewing technology for children's knitted pants
Sew the side seams of the trousers along the wrong side of the knitted fabric using a straight stitch on a regular sewing machine.
Knitted fabrics can be sewn using only one overlocker, but not everyone has this opportunity, so I give the technology for sewing on a regular machine. But if you also have an overlocker, then now you need to overcast the stitched side seams. If not, then sew with a zigzag stitch using a special foot on the machine.
Iron this side seam.
Length selection
Since many items shrink after washing, it is best to wash the items before hemming your pants and applying a basting stitch. After this, the person is asked to stand on a chair, where they determine exactly how many will be removed. There are different standards for men and women, so we will talk about this separately.
Women
To make the legs appear slimmer visually, the length of the pants is made up to the heel, but depending on the style, this parameter changes:
- For straight jeans and trousers, determine the length to half the heel.
- The loose pipes almost touch the floor, with only the toe visible underneath. A length that is too short will make your hips appear wider.
- The style with arrows is shortened to the middle of the heel.
- Models with stripes are hemmed where the decorative seam is located.
- Sweatpants are made short so that the ankles are visible.
Sports styles are the hardest to shorten because they are mostly knitted. In workshops, special installations are used for this, and at home this is done using an overlocker. It is better to use needles with rounded ends.
For men
When choosing a length, a man should wear the shoes with which he plans to wear trousers. Classic styles are made to the middle of the heel. Jeans usually touch the shoe lightly, while sweatpants sit at ankle height.
How to sew cuffs to pants
Now you need to cut out two strips for the cuffs from the companion fabric, in my case this striped fabric.
Place both fabrics with right sides facing each other and pin together. An inexperienced, novice seamstress can be advised to baste all areas.
Sew the cuff to the bottom of the trouser leg with a straight stitch, with an allowance of 1-1.5 cm. There is no need to sweep this area.
We continue to sew children's knitted pants
Now pin the side seams of both legs.
Sew on a sewing machine with an allowance of at least 1 cm.
Half of the work on sewing children's pants from knitted fabric is completed.
Step seams should be finished with an overlocker or zigzag stitch.
Stitch the bottom edge of the closed edge of the cuff.
After this, you need to turn on the iron and do a number of preparatory work.
Make the pants leg shorter
The pants are cut horizontally at approximately knee level. Excess fabric is removed from the top edge of the bottom. Next, the side seams on the top section are undone, right down to the elastic on the waistband. Excess material is removed along the outer side edge of this cut so that in the future the upper and lower parts of the trouser leg can be combined without wrinkles. First, the edges of the upper cut are sewn together, and then the two parts of the legs.
The initial cut can be made diagonally rather than straight. In this case, the seam will look more natural.
Wet-heat treatment of panty cuffs
Iron the seam connecting the cuff to the pant leg. For convenience, use a special block for ironing sleeves.
Then fold the cuff inside the trouser leg so that the seam of the fabric is on the rib.
Iron this area as shown in this photo.
In this form, the cuffs of the panties are ready for further processing on a sewing machine.
Shortening trousers without cutting
Usually a blind seam or web processing is used. Each method has its own characteristics, so the choice should be made after studying them all.
Blind seam
It is invisible on clothes, which becomes its main advantage. It is recommended to use threads slightly darker than the main fabric. It is done quite simply:
- Turn the trousers inside out and pin them up.
- Make sure the creases and side seams match.
- Insert a needle and grab a couple of threads from the trouser leg.
- Pass it through to the other side.
- Treat the entire surface. The interval between punctures should be no more than 5 mm.
Processing the cuff of children's knitted pants
If you have little experience, baste the edge of the cuff to the leg with contrasting threads, as shown in this photo.
Disconnect the sewing machine's removable table, if your machine has such an option.
Children's knitted fabrics can be sewn and overcast with white threads, matching the color of the wrong side of the fabric. But at this stage of sewing trousers, you need to wind a few threads on a bobbin, matched to the color of the front side of the fabric. The top thread remains white.
Sew a straight stitch along the wrong side of the pant leg, along the basted edge of the cuff.
Sew the stitch so that the needle does not touch the basting thread.
Sew the second cuff and remove the basting thread.
Processing the bottom of the trousers with a cuff.
Good day, dear readers of the milla-sidelnikova.com blog!
Another way to finish the hem of the trousers is to make cuffs along the bottom of the trouser legs.
A cuff is a decorative detail used to decorate the edge of sleeves, trouser legs, as well as the bottom of shoulder items (tunics, blouses, dresses, etc.)
Processing the cuffs of the bottom of trousers sewn in a classic style is significantly inferior in popularity to other types of processing. It is extremely rare to see such treatment on such trousers. But on trousers sewn in a sports style and others close to sports: joggers, cargo, breeches, shorts, etc. (for men, women and children) the cuff “realizes its potential” to its fullest. On these types of trousers, trimming the bottom with cuffs is very popular.
Cuffs on trousers can be:
- one-piece
- and stitched.
Processing of the bottom of the trousers with a one-piece cuff.
On the finished product, this treatment of the bottom of the trousers looks very similar to trousers with cuffs. But still, it is called finishing the bottom of the trousers with a cuff and is performed together with the trouser braid.
This method of processing the bottom is suitable for those trousers that need both braid and cuffs. (If the trousers will be heavily used, then to protect the bottom edge of the trousers with cuffs, it would be good to also sew on a braid. But sewing it on will be difficult. There are already many layers of material, and with braid, the bottom edge of the trousers will become too thick).
And I would like to note one more circumstance. Those trousers that are planned to be processed in this way should be either straight, flared or tapered, but only slightly, just a little. A clumsy and dense braid simply will not be able to “adjust” to the too “curly” bottom edge of the trousers.
Double cuff.
As usual, the first thing you need to do is deal with the allowances. To make a double cuff we will need:
1) allowance for the cuff of the required width;
2) allowance for the cuff (as the width of the cuff);
3) allowance for the bottom of the trousers (not less than 0.5 cm, but not more than the width of the tape minus 0.5 cm).
The allowances for making a double cuff at the bottom of straight trousers will look like this:
The principle of constructing allowances on a trouser pattern in the hem area, for flared and tapering models, can be seen in the article “Lapel on trousers”.
Let me remind you that the type of processing of the bottom must be determined at the stage of making the pattern in order to “have time” to allocate the allowances necessary for the selected processing.
One-piece double cuffs are made on trousers after all the seams “flowing” into the bottom of the trousers have been completed, and the seam allowances of these seams have been processed to prevent fraying.
Along the line of the upper edge of the cuff (on the finished product), we turn the bottom of the trouser leg to the wrong side
and sweep it up.
It is better to do the basting in two lines so that the lines of the bottom edge of the cuff (on the finished product) and the bottom line of the trousers match perfectly.
Iron the resulting fold.
We already have a clear, even upper edge of the cuff. You can no longer return to him.
Now let's start sewing the trouser tape. Laying the edge of the tape:
- The crotch seam has a 1.5 cm overhang;
- Thickened edge of the tape down;
- Covering the cut at the seam allowance of the bottom of the trousers with tape.
The bottom line of the trousers should coincide with the bottom line of the tape (you can check the pattern). The tape sewing line runs under the bulge in the tape. Or if there is none at a distance of 2 - 3 mm from the thickened edge of the tape.
We adjust the tape to the trousers.
Details of the process of processing the bottom of trousers with trouser braid can be found in the article “Processing the bottom of trousers with braid”.
Fold the cuff along the hem line (on finished trousers) to the front side
and sweep up
with the formation of an edging from the trouser tape.
After this, iron the fold along the bottom of the trousers. To avoid possible traces from the hot iron, it is better to iron the edge from the wrong side.
We secure the cuff in this position with stitches in the seam or hand stitches (along the step and side seams).
Well, the one-piece cuffs along the bottom of the trousers can be considered completed. As you can see, with this treatment along the bottom and trouser braid, there are also cuffs.
Next, after completing the one-piece cuffs along the bottom, you can do the final processing of the trousers...
One and a half cuff.
One-piece cuffs can also be one-and-a-half. Their implementation also begins long before cutting. By adding the required amount of allowance to the cuffs.
For straight trousers:
- Cuff (width according to model);
- Subcuff (1/2 cuff width);
- Hem hem (1/2 cuff width);
- Bottom hem allowance of at least 0.5 cm.
And here, too, only after completing the side and crotch seams on the trousers can you begin to make one-and-a-half cuffs.
Making this type of cuff begins with sewing on the trouser tape.
The tape is adjusted in exactly the same way as in the previous case, but this time we lay the tape with the thick side up. The stitch line, which in this case is used to stitch the top of the tape! should coincide with the bottom line of the trousers (on the finished product this is the bottom of the trousers). And the thickened edge of the tape should protrude beyond this line by 2-3 mm.
We process the cut at the bottom allowance to prevent fraying.
Folding the seam allowance for the bottom of the trousers along the line (lower on finished trousers) for sewing the tape
we sweep it to the wrong side.
And then iron it from the side of the trouser tape.
After this, the line of the bottom edge of the cuff (on finished trousers) must be aligned with the line on the seam allowance of the bottom of the trousers.
And this needs to be done from the wrong side of the trousers.
We connect the sides of the future cuff with a hand stitch, laying it along the alignment line.
View from the inside.
View from the face.
And then we machine stitch it.
Now we bend the fabric along the line of the upper edge of the cuff (on the finished product).
We secure the bend of the material with hand stitching.
And iron: first, fold along the upper edge of the cuff (we iron from the side of the cuff),
then fold along the lower edge of the cuff (iron from the side of the trouser tape).
We secure the formed cuff to the trousers with stitches. Either by machine - in the seam (side and step), or by hand stitches with hidden stitches.
The one-and-a-half cuff is ready!
Well, dear sewing lovers, have you read the processing of the bottom of the trousers with a one-piece one-and-a-half cuff? Now you can forget! It’s complicated, confusing and the result, as you can see, is not so hot! The seam under the cuff is sealed no matter how hard you try.
Once upon a time, a long time ago, I tried to make cuffs on trousers in a similar way. It seemed to me that this was something new, complex, and therefore interesting. I did it! Did not like! After some time, let me think, I’ll try again. This time I will be more attentive and careful. No! No matter how hard you try, the seam still appears.
But such processing with cuffs exists, and it had to be shown. Who knows, maybe someone will like it...
In the next article we will talk about stitched cuffs. See you! Sincerely, Milla Sidelnikova!
Joining both legs together
Pin the seam of the seat of the pants, aligning the crotch seams together.
If there are discrepancies at the junctions of the two parts of the legs (along the waist line), cut them off with scissors, trimming and adjusting the waist line at a distance of 10-15 cm.
The seam of the seat can be connected with only one overlock stitch, since a straight stitch can burst while wearing panties, and an overlock stitch is more stretchable and can withstand greater loads. But if you also sew with a straight stitch, then perform this operation twice, setting the stitch length regulator to 4 mm.
In any case, the cut section of the seat seam fabric must be overlocked with an overlock stitch or a zigzag stitch.
The sequence of hemming trousers with a hidden seam
For example, for jeans, you can make a visible seam, because this is required by the product model itself. But for classic trousers, a hidden seam is required so that it does not stand out against the general background.
Often craftswomen do not perform an invisible seam because it is difficult. In this case, you can use the services of an atelier. But it’s quite possible to learn how to do it yourself.
Hand-made blind seam
This seam gets its name because it is not visible on the product, as it is hidden between the fabrics. You can take threads 2 tones lower. Shortening process:
Making an invisible seam
- Turn the trousers inside out and secure with pins;
- Check the side arrows, they must be aligned;
- Insert the needle to the other side;
- Sew until the end with a distance of 3 mm.
You might be interested in what are flat-stitch sewing machines?
The hemming is complete.
We sew trousers with a blind seam on a machine
Fold the excess fabric outward, mark the fold with a marker and secure with pins. If the body is asymmetrical, each leg is marked.
Before work, lay your pants out on the table or floor. The trouser legs are folded seam to seam, the waist line also coincides. To prevent the material from fidgeting, you can pin it with safety pins. Next, the machine is adjusted to the desired seam and work begins.
Working with cobwebs
Processing the waistband of children's knitted pants
Before sewing the belt to the top edge of the pants, you need to do a lot of preparatory work. And the first thing you need to do is to correctly measure the length (circumference) of the elastic band along the child’s waist. Do not tighten the waistband with an elastic band too much; the baby will be uncomfortable in such pants.
But, in any case, the elastic band should be smaller in volume than the strip of fabric cut for the belt.
Stitch the edges of the elastic together.
Connect the edges of the waistband with a straight stitch.
Now both of these parts need to be divided into four equal sections and marked with fabric pencil or chalk marks.
Steam press this seam.
Using a sleeve ironing block, fold the waistband fabric in half and iron it in the position shown in the photo.
Now you need to align the marks of the belt and elastic band and pin these areas with pins.
This is necessary in order to evenly distribute the elastic along the waistband.
In this form, the belt is ready to be sewn along the waist of the panties.
To prevent the elastic inside the waistband from twisting, and to make it more convenient for you to attach the waistband to your panties, sew four sections across the waistband, as shown in this photo.
To make the belt neat and beautiful, I advise you to do one more preparatory operation - secure the lower edge of the belt fabric with a straight stitch.
Sew along the bottom of the waistband so that the needle does not catch the elastic, but still be careful to stitch as close to the edge of the elastic as possible.
If the waistband allowance is too large, you can trim off the excess fabric with scissors.
Divide the waist circumference of the panties into four equal sections and connect the waistband, pinning the combined marks with pins.
Sew the waistband along the waistline of the pants, as shown in this photo.
While stitching, stretch the waistband slightly with both hands, keeping an eye on it. So that the needle does not move and passes into the hole in the needle plate. Otherwise, the needle may be bent or broken.
Finish the processing of the belt with an overlock or zigzag stitch.
This was the last operation of sewing children's pants with cuffs made of knitted fabric. Turn the waistband inside out and iron all areas of the panties.
How to make a one-piece belt with a wide elastic band for a children's skirt or pants.
This model of children's pants can be worn without cuffs
The advantage of these children's pants made of knitted fabric is that their length is designed for growth. When the child grows up, you can simply unscrew the cuffs and the length of the trousers will increase by 7-8 cm.
Well, while the child has not yet grown up, you can turn the cuffs up and even secure them with threads.
Cut off the elastic bands
Recent entries The best models of sneakers for all occasions: a review of trending brands, their new products and proven flagships Summer trousers 2022: choosing trending colors, styles and fabrics Fashionable clothing styles: trends 2021-2022 for women, men and children of any age and body type
This method is suitable for those who want to save time and do not want to maintain the original cut of the product. To obtain the desired result, simply cut off the excess length of the trousers along with the cuffs. Then you need to overlock the edges of the legs.
