Don't know how to make a patch without a machine? Is there anything cooler than decorating your clothes with your own hands? Perhaps not. When I first wanted to make a patch on clothing, I was very overwhelmed by the options available for making different patches and patches. But how to make a patch on clothes with your own hands? At this point I got a little stuck trying to learn how to do them correctly. This time investment worked for me. So I encourage you to do the same! See what you like, choose your design and let's get started.
\
You may ask, why make a patch if you can just do embroidery on clothes? I answer because by embroidering directly on your clothes you can get a pain in the butt. And so that we don’t have to try to fix something later, or try to smooth out the pulled fabric, or remove the embroidery, we just need to make a separate patch on the clothes.
A useful item with a lot of purposes
It would seem that what could be important in a banal patch? If everything is clear with the police and military, because this is part of the uniform, then why do civilians need such additions?
In fact, everything is very simple. There are a number of reasons for this:
- Belonging to subcultures. Often the most active in this regard are punks and lovers of alternatives. They are literally ready to cover and paste over everything, attaching the names of their favorite bands, abbreviations and other distinctive signs.
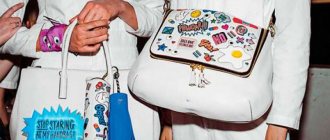
- Stylish things. Modern girls pay a lot of attention to fashion trends. Today, parkas and bright synthetic jackets are replete with badges and stripes.
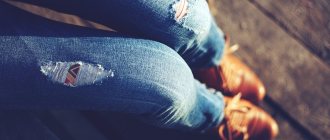
- Reluctance to part with a favorite thing. Some people are very reluctant to part with their favorite things. Just because your jeans or favorite sweatshirt are worn out doesn’t mean it’s time to throw it away. A cool patch or applique that hides a defect may be quite appropriate.
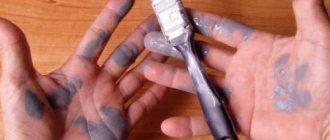
Important! To prevent the design from being displaced by the iron during the gluing process, it should be attached using safety pins.
Some Caveats
Mostly young, fairly brave girls who love to be the center of attention decorate their clothes with stripes. And although they are most often used to decorate everyday clothes, you can also find stripes on business suits and even evening dresses.
Still, you shouldn’t overdo it when using stripes as a decorative element, especially for women who are not of a young age.
By showing imagination, accuracy and perseverance, you can turn a completely ordinary item from your wardrobe into a fashionable and stylish outfit that will invariably be the center of attention of others.
Methods for making chevrons
The manufacturing features of chevrons have different methods of fixation to the product. Quite often, chevrons are used to replace regular embroidery on difficult-to-embroider fabric, such as lacoste or knitwear. This happens due to the poorly visible embroidery on the material described, as it is lost in the soft fabric - embroidered chevrons will look great and quite attractive. To strengthen and strengthen the product, you need to fix the embroidered chevron from the inside of a uniform jacket or other clothing with an adhesive solution. The adhesive base is used when gluing the chevron to the product using a hot iron. If you have a heat press, you can use it. Embroidered patches are of great importance for hats. Due to the miniature embroidered area, the embroidery process is too difficult. The process of sewing or gluing ready-made distinctive signs embroidered with bright threads saves the day. By using special glue, the prepared embroidered detail is placed on the cap, making it luxurious and magnificent. These manipulations can be performed on any small product; the embroidered patch is fixed easily, without complications of the work being done.
Benefits of an embroidered patch
Embroidered chevrons have the following advantages:
- Colorful, great color to match the base.
- Thread coloring is resistant to temperature changes and repeated washing, cleaning and wear.
Application of insignia
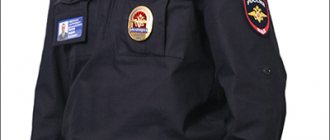
The chevron is part of the uniform equipment of various structural units:
- police
- police
- military
- security guards
- some enterprises
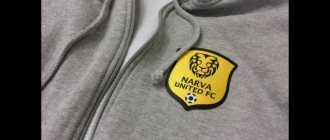
Often, insignia are used for uniforms of staff of huge network marketing, hypermarkets, or are used to designate brands. The chevron is used to distinguish enterprises or law enforcement agencies, or for the purpose of advertising a certain brand. Consumers quickly recognize by signs which company or power structure the employees represent. Clothing decorated with insignia looks representative and respectable. Sportswear is also decorated with certain signs that distinguish different sports enterprises.
How to sew an emblem on a school uniform and vest?
Currently, in our country there are no uniform rules regarding the type of school uniform. The need for a uniform is determined by each educational institution independently. An increasing number of schools are switching to compulsory school uniforms, and each school has its own. One of the most common items of uniform is a school uniform called a vest. A distinctive feature that emphasizes the students’ belonging to a particular educational institution, along with the color of the uniform, is a patch with the symbols of the school. The emblem can be made by embroidery in a specialized workshop or in the form of an applied chevron .
Patch
This application looks very original. How to make a patch patch? We will make it from two materials: the first is felt, and the second is thin faux fur. We make patterns of two rectangles with rounded edges. One of them should be larger, the other smaller. We cut out the part from felt according to a larger pattern, from fur - according to a smaller one. Now you should place the blanks on top of each other and stitch them on a machine or sew them by hand.
Let's move on to the most interesting part - the decor. In our case it will be a broken heart. Embroidering on fur is inconvenient, so the first step is to make a backing. Using a machine, we sew a rectangle in the center of the patch and make an edging for it. On it we draw a broken heart with a pencil. Now, using a typewriter or manually, fill the outline with red thread. To make the patch more realistic, small circles should be embroidered in a chaotic manner on both sides of the center.
Lemon
How to make a patch? The easiest way to make it is to embroider a beautiful design on thick material. For example, you can make an applique in the shape of a lemon. An outline should be cut out of felt. It can be a whole lemon or a slice. Cut out the felt and stitch it. The most convenient way to do this is with a sewing machine or overlocker.
A beautiful edge of the patch can be made by hand, for example, by crocheting the product or stitching it over the edge. If you are making an applique in the shape of a lemon, then you should embroider a highlight on the product. If the patch looks like a slice, then it is necessary to make white veins. They can also be embroidered in two ways: either by machine or by hand. Don't forget to use a few stitches to create the bones.
Video material
In fact, with the right level of skill, such an accessory can be embroidered and created manually, for example, from felt. True, this is much more difficult and time-consuming. But if you really want it and the goal is set, it is quite possible. After all, you can sew a patch on your favorite sweater, and it will sparkle with new colors! Now, having an idea of how to make a patch on clothes with your own hands, you can take care of the sketch and get to work. Such a hobby will be appreciated by friends, because hardly anyone can refuse such a stylish gift.
Advantages and disadvantages of handmade patches
Today, everything made by hand has special value. Patches are no exception to this rule. The advantages of such stripes include:
- unique design, because it is likely that a do-it-yourself patch will be the only one in the world;
- low cost due to the fact that remnants of previously used materials are often used to make the patch.
Among the disadvantages of such work, one can note the mandatory presence of experience in sewing, without which the work will not be accurate, and a significant investment of time.
Ice cream
Today it is fashionable to decorate clothes with images of food. How to make a patch of this theme with your own hands? You need to cut out the outline of the ice cream from felt. The material should be beige, as it will form the basis of the cup. Now you need to divide the workpiece into two parts. One of them will be a cup, the other will be ice cream. We start making the applique by sewing beads along its contour.
Now you need to draw a diamond-shaped pattern on the cup. Once it is ready, you can move on to decorating the ice cream. Beads and beads should be sewn on in a chaotic manner. If desired, you can even glue rhinestones. The main task is to fill all the space so that there are no gaps left. The finished patch can be used to decorate not only clothes, but even a bag.
How to sew a patch on clothes?
First you need to position the patch correctly and attach it with small pins. You definitely need to try on the item to make sure that the place is chosen correctly.
Editor's choice: Fashionable perfumes 2022: fragrances depending on the time of year
If you are satisfied with the location of the patch, you can proceed directly to sewing on the emblem. This should be done with small stitches, without stretching or creasing the fabric. At the end of the work, you need to try on the item again. If the fabric wrinkles, it is better to rip off the patch and do the whole job again.
Dog
How to make a beaded patch? First you need to draw the outline of the animal's muzzle and cut it out of felt. Now we should outline the main features. We draw the outline of the eyes, nose and ears onto the fabric with a pencil. Now we take beads of several shades (black and white) and get to work.
First we embroider the edging in white. Then we outline the circle of the muzzle with black beads. You need to embroider strictly according to the form. That is, the forehead should form a semicircle, the nose should form a drop, and the eyes should form ovals. Refer to the sample attached above and follow the shape.
Do-it-yourself patch on clothes: manufacturing features
- Take the main fabric and iron it thoroughly to remove excess creases and folds. After this, it is advisable to use the hoop throughout the entire work to ensure even embroidery.
- If your fabric is very different from the color palette of the threads you plan to embroider with, then draw and paint a sketch of the embroidery with slightly diluted gouache or acrylic paint.
- Let the paint dry and adhere thoroughly to the fabric base.
- If desired, the paint can be sprayed with varnish for stability.
- Start your satin stitch with one spot of color and then move on to the next. The stitches need to be done as close as possible so that the applied paint does not even show through them. This is the only way you will receive a high-quality product that you will not be ashamed to use in life.
- So, step by step, fill the entire patch with threads, and then complete the entire look with a contrasting color edging stitch.
- Cut out the embroidery with a small allowance of 5-8 millimeters.
- Then saturate the fabric edge with glue and fold it over to the wrong side so that it is not visible. The same thing must be done with protruding threads.
- How to make patches on clothes with your own hands so that they look really cool? Add slight wear or highlights in some areas using layering stitches or simple paint.
Now you can decorate all your clothes, since making stripes on clothes with your own hands will be very simple and quick!
Option for professionals
Making your own patches using a sewing machine can be considered aerobatics. Some machines are equipped with an embroidery unit, which opens up endless possibilities for decoration.
Important! With such technical support, you can realize any fantasy, and quite professionally and efficiently.
Before you make stripes on clothes with your own hands, you need to stock up on blanks in the form of:
- adhesive interlining;
- soft non-woven base;
- threads of the required shades.
Important! Before you start the main operation of the sewing machine, you need to set the outline. It will be easier to cut out the patch using it; no additional securing of the edges will be required.
Drawings with the form completely filled out are an excellent option for home execution. This applique holds up well, does not delaminate and looks good under any circumstances.
The secret to proper embroidery planning:
- We fix both layers of fabric - both the interlining and the non-woven base - in a hoop.
- Let's make the main drawing.
- When everything is ready, cut the thick fabric along the contour.
- Using a glue stick, we pass the lower part of the workpiece and tightly apply the adhesive base of the non-woven fabric.
- We put it back into the hoop and run the overlock stitch along the contour.
- Now the product has acquired a finished look, all that remains is to trim off the excess and attach it to the clothes.
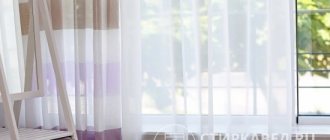
Why do you need curtain tape?
On sale you can find a large number of accessories that will help you quickly and easily hang curtains on the window, as well as give them amazing and beautiful designs. One of these elements will be curtain braid. It looks like fabric flaps of various widths, along the entire length of which a cord or thin ropes are stretched. In the center of the braid there is a thicker layer with loops necessary for hanging curtains to the baguette, and laces are used to create folds of the required type and size.
What is curtain tape used for:
- processing the upper edges of curtains or curtains;
- hanging them from the cornice without using rings or clothespins;
- creation of assemblies of varying complexity.
Main types of ribbons
Also, the ribbon can be sewn in other places on the tulle. After tightening the ropes, folds are formed on the surface of the tulle; they can be made in any form. In order to remove the curtains, you just need to untie the ropes and straighten the braid. This tape greatly simplifies the work of window styling, and anyone can sew it on. It is also called curtain elastic, mesh or belt.
Attention! Using drapery, you can create beautiful patterns and lines on the surface of curtains or tulle. But, unfortunately, some types of draping will be difficult for a beginner
To do this, it is recommended to watch several video tutorials to understand the essence of the work.
But, unfortunately, some types of draping will be difficult for a beginner. To do this, it is recommended to watch several video tutorials to understand the essence of the work.
Snowman
Children often tear their clothes, and buying new things all the time can be expensive. It’s easier to decorate holes with appliqués. How to make a patch on clothes? One of the easiest ways is to make an applique from felt. To do this, cut out a circle from the material, which will be the base, and the outline of the upper part of the snowman. We sew the parts to each other with the seam first, needle first.
To make the patch look organic, a decorative seam needs to be laid along the contour of the entire product. Now we cut out a scarf from pink felt, and a nose from orange felt. Sew the details to the applique. All that remains is to detail the product. You should embroider the eyes and mouth with black threads, and snowflakes on the scarf with white threads. If desired, the snowman's chest can be decorated with a button.