When using the keyboard for a long time, the buttons may break. But some breakdowns can be fixed without resorting to the help of specialists, but on your own at home.
The keyboard on laptops in general is no different from the keyboard of a regular personal notebook.
If suddenly your laptop button breaks, you can easily fix it by following the instructions below.
To work you will need: the laptop itself, a paper clip, a button.
Progress
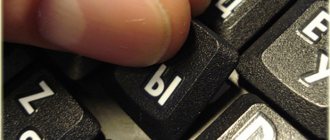
First you need to remove the old button. Take the violin, straighten it, then you need to insert a paper clip under the bottom of the key, and then pull it towards you. Proceed with caution. In almost all cases, the keys can be easily removed. Once you have removed the old key, you can easily insert the new one.
To do this, you should place the new button in place of the old one and press lightly, it will stand up on its own and be fixed with plastic fasteners. The work is ready!
How to remove a laptop key and their features
Compared to older device models, modern keyboards are equipped with flat keys. Moreover, almost all modern devices have a keyboard identical in design. You won’t be able to unhook the key just like that; most likely you’ll just break the fastening mechanism.
Before removing a laptop key, you need to prepare a suitable tool. Ideally, it is better to find a flathead screwdriver with a curved end; it will make it much easier to work with key latches. It is also worth preparing several toothpicks for more delicate actions.
Inserting a button
Now we’ll look at how to make a spacebar button on a laptop.
To work you will need super glue and a flathead screwdriver.
First we must pry the old key from the bottom on both sides with a screwdriver or a mild knife and pull it up slightly. In this case, the button should bounce off on its own. Malfunctions in operation could be caused by a breakdown of the system itself. If the system is really broken, then you should select some other button, for example Ctrl, Shift, CapsLock and remove it.
Carefully disconnect the spring mechanism, which ensures pressing the button, and insert it in place of the space bar. After the work has been done, return all the buttons to their place.
If suddenly the button fails to work due to the fact that it is broken, you should take super glue and fasten the parts of the button. Glue is applied to both surfaces in a small amount. The parts must be pressed against each other and held for 10-15 minutes. It is also important to remove excess glue before it dries so that you don't have problems with it later. Ideally, you should wait 12 hours before sitting down to work on your laptop again.
On almost all laptops, the buttons are repaired in the same way, but still, different manufacturers have their own subtleties and nuances. Now we will analyze them.
Why film
Anyone who has ever tried to clean a laptop keyboard on their own understands perfectly well that doing this is not as easy as with a personal computer. Due to the small size of the device and space saving, as well as due to different types of mounting, problems may arise.
Removing the keyboard in a laptop, disassembling the device completely and disconnecting the cable from the screen may be necessary in cases where it is necessary to perform one of the following operations:
- Solving problems with elevated temperature, including:
- disassembling the laptop to vent the cooling radiator;
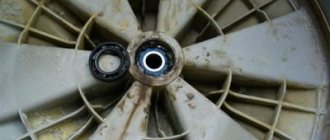
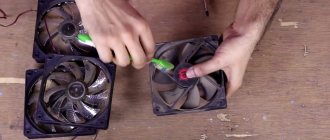
- cleaning the fan from dust, hair and debris;
- replacing thermal paste, which promotes better heat transfer between the processor and radiator;
- checking the presence of oil to lubricate fan bearings;
- repair or replacement of a damaged system configuration element;
- solving keyboard problems such as:
- cleaning the keyboard from spilled liquids, dust, debris and hair;
- checking, replacing or repairing a damaged board or button.
Buttons on laptops from different manufacturers
Acer laptops
The buttons on Acer laptops are arranged as follows: inside there are two frames connecting in the middle and forming a so-called clamshell. Two protrusions are also attached there, which serve as fastening of the button to the keyboard. The button designs are simple. You may have a situation where the connection between 2 frames is broken.
To solve this problem, you should take a thick needle with which you will push the small pins into the recesses. After the work has been done, you should put the button in its old place. To do this, you should fix the folding bed in a slightly raised position; this can be done using a paper clip.
How to disassemble a Samsung R510/P510 laptop
We disassemble the Samsung R510/P510 laptop. Disassembling laptops is, in principle, a tricky business, but, fortunately, the Samsung R510 is not the most difficult case.
This guide is a translation of the article: https://linuxtweaking.blogspot.ru/2010/07/how-to-open-samsung-r510-notebook.html
Warning
This article is not a guide to action! All responsibility for collecting and disassembling your device lies with you. Many manufacturers do not bear warranty obligations if the device has been disassembled by the user. If you do not want to lose the warranty for your device, check the terms of the warranty in the documentation or with the device manufacturer.
Tools used
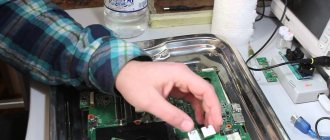
Before you start disassembling, be sure to turn off your laptop. Place the laptop face down on a flat surface. To protect the case, the table should be covered with a soft cloth. 1. Remove the battery, remove the CD/DVD drive and hard drive Remove the battery. Remove 2 keyboard mounting screws and 1 CD/DVD drive mounting screw. Remember that it is important to use the correct size Phillips screwdriver. Pull out the CD/DVD drive. It slides out easily. Unscrew the 2 screws securing the HDD compartment cover, slide and remove the cover. Slide the silver hard drive to the left and remove it. The disc can be pulled by a special black label. 2. Remove the keyboard Turn the R510 laptop over to its normal position and open it. There are 3 protruding plastic tabs along the bottom of the keyboard. These latches hold the keyboard in place. To remove the keyboard, you need to lift it while pressing and holding the latches. Once the keyboard rises above the latch, the latch can be released. And this must be repeated for each latch. In the picture below you can see the first latch: it is located between the Fn and Windows keys. The second latch is located below the spacebar. The last latch is located below the cursor keys. We used a small flathead screwdriver to press the plastic latches inward and carefully pry and pull up the keyboard. You can also use a piece of thin plastic, a guitar pick, or a credit card. After releasing all the latches, carefully lift the keyboard. Do not pull it out, because... the keyboard is still connected by a cable to the motherboard. To disconnect the cable, simply lift up the black hinged retainer of the cable connector, as shown in the picture below. The picture shows an open cable connector with the latch in a vertical position. With the latch raised, you need to pull and remove the cable from the socket, and then close the latch. Now you can completely remove the keyboard. 3. Remove the speaker, microphone, touchpad and top panel After removing the keyboard, you can see several more cable connectors. They need to be disconnected so that the top panel of the case can be removed. You can get to the cables through the holes in the panel. Be careful! Some cables are quite difficult to pull out. The following picture shows the touchpad cable connector. To detach the touchpad cable, slide the darker beige plastic part of the retainer down. The connector will unfasten, and you can pull and remove the touchpad cable. The following picture shows the connector with the dark beige part of the latch pulled out. Now you can disconnect the cable. The following picture shows the speaker and microphone cable connectors. They just need to be pulled and pulled out of the nest. These small connectors are more difficult to pull out. Close the laptop and turn it face down. Now we need to remove the top panel, but to do this we need to unscrew a lot of screws from the bottom of the case, circled in the picture below. Different types of screws are indicated by different colors. In order not to confuse them, it is better to unscrew them with screws of the same type one after another and fold each type separately. First, remove the 15 screws circled in yellow. Then remove the 3 screws circled in orange. These screws are shown close up in the following picture. Then remove the screw circled in blue in the previous picture. This screw is shown close-up in the following picture. Then unscrew the 2 screws securing the monitor hinges, circled in purple in the previous picture. The following picture shows a close-up of the left hinge screw. The right hinge screw is identical. Turn the R510 laptop over to its normal position and open it. Now that we have removed all the screws securing the top panel from the bottom of the case, it can be carefully pulled and removed. The left, bottom and right sides of the top panel are secured to the base of the case with latches. The upper part of the panel, located under the display, does not have latches and is attached to the base of the case with 3 screws, which were circled in orange in the previous picture. In the next picture we see the left corner of the top panel. This is the easiest place to start unpinning it. Separate the top panel from the chassis base by releasing the panel latches along the edge. When you hear a click, it means the latch has come loose. The top panel may bend slightly, so we proceed in this way: we insert one hand between the detached left corner of the top panel and the base of the case, and with the other hand we continue to separate the panel from the base. 4. Disconnect the LCD cable, remove the WiFi module, monitor hinge screws and monitor With the top panel detached from the base of the case, slide the monitor back until it stops. This will allow you to pull out the top panel completely. So, we have removed the top panel and we see the laptop motherboard. But we can't remove it because of the left hinge of the LCD monitor. Be careful! When handling the motherboard, avoid contact with electronic components. Let's take care of the display cable. The cable connector is sealed with orange tape. Orange tape is not very sticky. Please note that the white wire is also secured with tape, do not forget to unfasten it. Carefully peel off some of the tape, then disconnect the LCD cable and the optional small connector. Now you need to remove the WiFi module. The first step is to unfasten the black and white wires of the WiFi module, which are secured with strips of orange tape and squares of black foam. The tape must be carefully peeled off the wires, then carefully glued back. You will still need it when you reassemble the laptop. The wires are detached from pieces of black foam rubber without effort. There is no need to peel off the silver tape, but do not forget to detach the black wire from the plastic base of the case. Now use a Phillips screwdriver to unscrew the black screw securing the WiFi module. Then we remove the WiFi module and place it on the base of the case to the right of the motherboard. Now you need to unscrew the monitor hinge screws. There are two of them. Left hinge screw: Right hinge screw: Remove both screws. Let's move on to removing the display. Don't forget that it is still connected by wires, but it can be placed next to the case, as shown in the picture below. Simply lift the display and remove it from the case. So, we placed the display next to the body (it’s on the left in the picture), and put the WiFi module with wires aside. 5. Remove the motherboard Now we are ready to remove the motherboard, which is secured to the case with 4 screws. 1 black screw and 2 silver screws: 1 black screw, which also serves to secure the black cover: So, we unscrewed the screws using a Phillips screwdriver, and we can remove the motherboard. Try to grasp the motherboard only by the edges. Before pulling it out, prepare a place to place it. To do this, we placed an antistatic bag turned inside out on a flat surface. In the picture, the Samsung R510 motherboard is upside down. It's good when you have enough free space to work. We laid out all the parts: motherboard, case and monitor. 6. Remove the fan and radiator So, the motherboard must be upside down so that the cooling module is on top. The fan and radiator can be removed separately. Let's start with the fan. Let's consider the cooling module. It's good that all the capacitors are intact. The cooling system is small in size, but successfully performs its function. Disconnect the fan power connector, then unscrew the 2 screws securing the fan to the motherboard using a Phillips screwdriver. After this, the fan can be easily removed. Now we will remove the radiator. The radiator only needs to be removed if you decide to replace the thermal paste. We would have preferred the Artic Cooling MX-3 thermal paste, but currently only the older MX-2 is available. Artic Cooling MX-2/3 is an excellent thermal paste, especially considering that it is non-conductive and can be applied everywhere without serious consequences. The heatsink is secured in two places: 2 screws near the northbridge chip and 4 screws near the processor. Please note that these screws do not need to be completely unscrewed and pulled out. They just need to be untwisted. After this, you can unfasten the radiator. Looks like there was more than enough thermal paste here: 7. Cleaning and assembly We hope you enjoyed disassembling the R510 laptop. Reassembly is done in the reverse order, but you need to clean off the remaining old thermal paste and apply new one. We clean the processor, northbridge chip and radiator from thermal paste with a napkin, and then wipe with isopropyl alcohol. In the picture we see a cleaned radiator, all that remains is to polish the copper surface to a shine. The radiator part is sparkling clean. But why was it made of aluminum and not copper? After this, you need to carefully put the radiator in place, align and screw it on. Do not overtighten the screws, but make sure they are screwed in tightly enough. Reassembling the R510 is done in reverse order. If any parts become dusty, clean them. For example, the fins of the fan and radiator can be cleaned with a brush. Or you can use a can of compressed air. If the motherboard is dusty, use only compressed air to clean it, do not wipe it with a cloth. Otherwise, you may cause electrostatic charge and damage the board. I also recommend something interesting:
If you liked it, please take the time to click “like” or “share” or “+1” just below, or post a link to the article on your blog or forum. Thank you You can rate this article: Tweet |
Repair of Acer laptops in 1 day
Order repairs from our service center and receive a working device on the same day, with a warranty of up to 1 year
Find out the exact time and cost of repairs Thank you, no need
Comments (0)
Add a comment
Leave your question using the feedback form and the specialist will call you back and answer without imposing any services.
Sometimes, as a result of improper handling of the laptop or due to a strong impact, the keys fall out. While inserting it into place on a desktop keyboard is easy, it requires some skill. If you are not ready to put the key back in place yourself, then you should contact a service center. Specialists will be able to perform all the necessary actions within five minutes. And the cost of this service does not exceed 100 rubles.
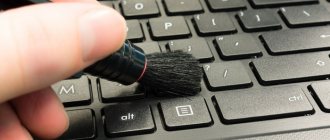
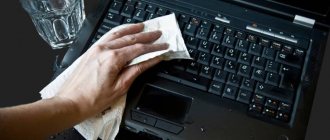
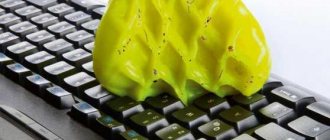
Cleaning the keyboard
As you know, during the use of a laptop, a huge amount of dust and dirt accumulates in the keyboard of the device. All this negatively affects the performance of the keys. Due to this, many users are interested in how to remove a key from a Lenovo laptop in order to carry out the necessary cleaning. It was already presented above how to remove the necessary keys, and all dust and dirt are removed using a vacuum cleaner at minimum power. Remove particles that remain after vacuuming with a toothpick or cotton swab.
You can also wash the keys in soapy water to remove any stuck-on dirt. This point is especially relevant when the keys are light and all the dirt is very noticeable.
What is required for self-repair
If you decide to insert the key yourself, then you will definitely need a needle and a paper clip or items that can replace them. If you need to make minor repairs, additionally take a soldering iron, knife, screwdriver, glue and small tweezers.
Important!
Incorrect actions may result in the need to completely replace the keyboard on your laptop. Therefore, if you do not have the skills to repair computer equipment, it is better to turn to specialists.
If cleaning is needed
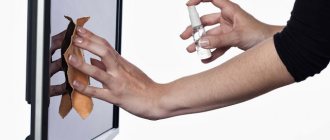
If the laptop is left open for a long time, it may become dusty. During operation, a lot of hair, household debris and food crumbs get into the keyboard. If you need to clean up such debris, you can easily do it yourself by carefully vacuuming the device.
At the same time, the main thing to consider is that it is best to use a specialized vacuum cleaner with professional attachments and brushes; if you have to use a regular one, then you cannot use high power.
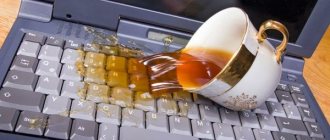
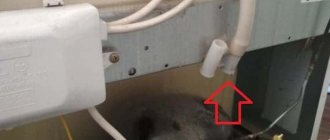
The keyboard is the main data input device. Most users like to drink tea or coffee while sitting at a computer or laptop, without interrupting work or entertainment. As a result, it suffers from damage from all kinds of liquids.
In this case, you cannot do without disassembling the device.
It is necessary to dry and thoroughly rinse the keyboard, otherwise over time this will lead to “sticking” of the keys or complete inoperability of the device.
Video: remove the keyboard from a laptop
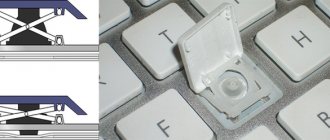
What is a keyboard button on a laptop?
Here are the elements that make up a button on a laptop:
- the lid itself is made of plastic with a lock;
Important! Make sure the swing is attached to the plastic part completely, otherwise it will fall out.
Self-disassembly of a Samsung laptop
Depending on the model, the process of disassembling the device may differ due to certain types of fasteners and the location of parts. Therefore, the diagram below is general and suitable for most models of this brand.
Preparing for disassembly
First, let's prepare the tools, the workplace, and the laptop itself for disassembly. Take care of the following points:
- Find a well-lit, comfortable place to work;
- Evaluate the size of the screws on the case, select a suitable set of screwdrivers. Sometimes several different sized screws are used to secure the cover, so more than one tool may be required.
- Make sure in advance that you have a brush or napkin to clean the internal surface from dust.
- Also make sure you have the necessary materials if you are going to replace anything, such as thermal paste.
After arranging the workspace, we proceed directly to work.
Disconnecting power from the laptop
Of course, before disassembling any mains-powered device, it must be disconnected from the power supply. Climbing inside a laptop connected to electricity is strictly prohibited!
After turning off the device, remove the battery. We won't need it during the process.
Rear panel disassembly
Fortunately, most Samsung laptop models allow you to access elements such as the hard drive or RAM without disassembling the back panel. They usually have their own lids that can be removed quickly and easily. To get to these elements, repeat the following:
- Remove the screw holding the back panel. If each element is hidden under a separate panel, repeat this step for each of them.
- Pull the cover in the direction of the arrows on it.
- Unscrew the hard drive and set aside its mountings. These are always different from the cover screws and must be visited or set aside separately.
- Remove the hard drive from the connector.
- If there is a separate screw near the drive that holds the drive, unscrew it and pull out the drive.
- RAM is not fixed, it can be pulled out if necessary.
Removing the back cover
If you need to access other parts and the motherboard itself, you will need to completely remove the back cover. To do this, repeat the following:
- Remove all visible bolts on the top cover. Look through the entire perimeter of the laptop so as not to miss a single screw. If you neglect this, the plastic cover, which is not completely detached, may burst when removed.
- Using a flat-head screwdriver, pry up the panel and disconnect the latches on its side edges.
- Now access to all internals, including the system board, is open. You can start cleaning and replacing parts.
Removing the Keyboard
You should only resort to this action on Samsung laptops if you need to disconnect the motherboard. It is connected to the keyboard using a special cable. Turn the laptop without the cover so that the keys are facing you. Use a knife or flat-head screwdriver to pry up the latches on the front of the case and carefully pull the panel with the buttons towards you, slowly, making sure not to damage the connection to the cable.
You will see a completely disassembled device. After carrying out the necessary procedures, all that remains is to sequentially connect the parts together and reassemble the laptop. By following these instructions and carefully sorting the parts and screws, you can easily clean the device and reassemble it
The process of installing a button on a laptop
Before installing the key, you must carefully examine the swing to ensure its integrity. If any part is damaged, you will need to change the button from specialists or order it yourself from specialized stores.
The installation process is as follows:
- Installing a swing on the metal part of the keyboard. Moreover, you must first place the antennae under the larger part, and then, by applying slight pressure, the two remaining antennae will fit into the grooves.
Important! If the cover falls out along with the swing, then it is necessary to install these parts separately from each other, as indicated above. If you do not disassemble these two parts, then there is a high risk of damage to the antennae by which the button clings to the keyboard.
Installation of large buttons occurs as on a regular keyboard. There is a small metal stabilizer that needs to be inserted into the grooves on the keyboard. And then you will need to lift it in order to install the lid strictly on it. If the installation is done incorrectly, there will be no springing effect.
If the key antennae are broken, but you manage to find them, you can use super glue to fix them.
How to remove the space key from an asus laptop
Using the method presented above, you can remove all the keys of a laptop computer with the exception of spacebar and shift. These keys have a slightly different fastening system, and accordingly they are removed differently.
As you know, the spacebar has an impressive size. Therefore, it is fixed not only with antennae, but also with a latch, which is located along the entire length of the button.
You must act extremely carefully and without sudden movements. To do this, we will use a screwdriver, which was previously used to disconnect standard keys. Next, in order to remove a key from an asus laptop without damaging it, we proceed as follows:
- First of all, disconnect the metal amplifier on the left side of the space,
- further on the right side,
- Now we remove the metal amplifier from the bottom of the space, moving from left to right.
Having released the amplifiers, all that remains is to remove the antennae from the grooves. To do this, we use the same method as with regular keys.
Is it possible to remove buttons from a mechanical keyboard?
You take a ruler or something similar and try to “pick” the key from below. The key itself sits on a “pin” from which it must be removed.
Interesting materials:
How to become a participant in the Housing Question project? How to become a medical scientist? How to install addons on wow shadowlands? How to put captions on photos on Instagram? How to set goals and achieve them? How to stimulate the reproduction of budgies? How to wash 2-thread footer? How to wash a terry robe so that they are soft? How to wash a knitted hat? How to stand on your head and on your hands?