Modern shoe models are often equipped with laces. These products are designed for comfortable, safe use of shoes or sneakers, taking into account the anatomical features of the foot. For comfortable wear, it is important to know how to tie the laces so that they do not come undone while moving. Thanks to a variety of lacing methods and options, the shoes not only fit perfectly on the foot, making movements comfortable, but also acquire a stylish, original appearance, looking different in each new look.
Lace-up zipper
Beautiful and reliable lacing.
It's very simple to do:
- Pass the cord through the bottom pair of eyelets and pull the ends out.
- Cross the laces in 2 turns and bring the laces to a new row.
- Continue weaving to the very top.
Tie the ends with a classic knot.
Lucky nodes
Most modern ties are synthetic. They are durable and less susceptible to friction. But unlike natural ones, they are more slippery and come undone faster. You can correctly and firmly fix the bow on the laces in the following ways.
- Yang node. You need to make a loop on both sides of the ties, pass each through each other, and tighten well.
- Secure node. The loops on each side of the lace need to be passed in different directions through the loop below them.
- Surgical node. First you need to tie the knot described above. Then pull the right loop through the middle one again.
It is impossible to firmly fix the laces on the sneakers without tying a knot. Otherwise, injury is guaranteed while walking or playing sports.
Army style
This lacing is done quickly and also secures the shoes well on the foot.
Procedure:
- Thread the cord through the bottom pair of eyelets.
- Insert both ends into the holes above without crossing them.
- Now you need to cross the ends and thread them into new holes.
- Next, the laces should be inserted into other holes without crossing them.
- Weave by analogy until the end.
This type of lacing is suitable for boots and boots with high legs.
For sports shoes
Fans of extreme sports should know different ways. The laces should be free to tighten, but not squeeze the leg. How to insert them correctly determines safety and comfort even after tiring activities.
For running
For runners and athletes, lacing with a hidden knot or conventional types of ties, complemented by a “loop-lock,” are generally preferred.
For regular exercise, sneakers with holes arranged in a zigzag pattern are recommended. These shoes provide good support for your feet, making training easier.
For bicycle
To prevent the tied laces from clinging to the bicycle wheels, the lacing is done crosswise, and the knot is made on the outside. It is also important to pay attention to the material: take not synthetic, but elastic shoelaces made of cotton.
For hiking
By lacing your boots correctly, you ensure your own safety, for example, during a hiking trip, branches or branches will not catch on loose ropes, and a person will not fall, as he will maintain his balance.
Choosing the right length
The easiest way to choose the length of the ties is by measuring old ones or taking them with you to the store. You can consult with a consultant. The table will also help you navigate:
| Number of hole pairs | Length with a distance between holes up to 2.5 cm | Length with hole spacing 2.6–5 cm | Length with distance between holes 5–7.5 cm |
| 2 | 60 | 70 | 80 |
| 3 | 60 | 80 | 100 |
| 4 | 70 | 90 | 110 |
| 5 | 80 | 100 | 130 |
| 6 | 80 | 110 | 140 |
| 7 | 90 | 120 | 160 |
| 8 | 90 | 130 | 170 |
| 9 | 100 | 140 | 190 |
| 10 | 100 | 150 | 200 |
You need to consider how tight the lacing will be. When, after tying, the edges of the underblocks are joined, you can get by with shorter ties. If it turns out that the length is too long, the tape can be cut, the agglets can be reinstalled, or the sections can be glued. The ends of synthetic products should be burned.
The correct shoe tie
For women's, men's winter and other boots, you can use classic cross lacing. You need to go through the holes that are located at the bottom and cross the ends so that they fit under the sides of the boots.
If we are talking about military boots, another scheme will do that will prevent them from coming undone. On one side you need to tie a knot, and only then start tying the laces.
In order for this to be done correctly, the product must be pulled all the way, and then make sure that the fixation is secure. The free end is passed outward, then through the adjacent loop. This is repeated until the length runs out.
Interesting ways to tie your shoelaces
There are many ways to lace sneakers, but today we’ll talk about options with 5 and 6 holes on each side.
Classic lacing
Classic lacing or zigzag is a method familiar to everyone. And most likely, you know how to do it yourself. But repetition is the mother of learning, so let’s remember how to do it again.
It is used as standard on all pairs of shoes.
- Thread the lace into the bottom holes of the shoe from the inside out, that is, the ends of the lace should come out “from the inside” of the sneaker.
- Pull the lace so that both ends are the same length. This will make the subsequent steps easier.
- Cross the ends of the lace overlapping and insert them into the higher hole of the sneaker from the inside out.
- Continue in this manner until the last holes. In this case, you need to ensure that the overlap always occurs on one side. For example, the part of the lace that comes out on the right will be on top, and so on at each cross.
- Tie the ends of the lace with a simple bow or loop, as you are used to.
Reverse Zigzag
This method repeats all the stages of a regular zigzag, with the only difference being that here the stroke of the lace will start from the outside and go inward. Thus, the cross itself will seem to be a little deeper. The change is minimal, but it looks different.
Parallel lines
An unusual lacing method, which is used for sneakers with 6 pairs of holes, or with another even number:
- The first "line" is made from the outside in. Please note that one half of the lace (blue) should be slightly shorter than the other. Otherwise, the ends that you will end up with will be of different lengths.
- The first step is carried out with the blue part - thread the lace up two holes and bring it out. The yellow part takes a step up one hole and also comes out.
- Next, throw both parts to opposite sides and then make movements like the first step of the blue honor - each time two up.
- Repeat until you reach the last holes. Here the yellow part will have a step of two holes, and the blue part will have a step of one.
- It is best to finish this lacing with an internal knot. The bow in this case will not look very stylish.
If your shoes have an odd number of holes, but you still really liked this method, there is a little secret. Follow the same steps for lacing, but leave the top hole empty. That is, you need to artificially create an even number of holes.
European
It’s easy to guess that the name was obtained due to the fact that such an unusual lacing method came from Europe. It is designed for shoes with 6 holes:
- Take the first step from the outside in and align both ends of the lace.
- Next, thread each half of the lace with a corner through the top pair of holes. But do this alternating: first one end goes one level up, the other two levels up, then vice versa.
- Continue this “binding” until the last holes. There you can make both a bow and an internal invisible knot.
As a result, an interesting effect is created, as if a small zigzag in the middle was added to the parallel lacing.
Complex lacing options may not work out the first time. But this is not a reason to quit such an interesting business. Add just a little practice, and we will tell you how to beautifully lace sneakers and sneakers with 5 and 6 holes in the most original ways and types.
Sawtooth method
This method is a little more complicated than the previous ones. But believe me, you can handle it quickly and skillfully:
- The first step goes from the outside to the inside and both ends of the lace are aligned.
- One part goes to the next level and goes through both holes, and the second part goes diagonally to the level above and goes horizontally there.
- Then all actions are repeated while maintaining the tilt in one direction.
- At the end you can come up with an original knot.
This method has a small disadvantage. The angles created by the laces distribute the tension unevenly and because of this, sneakers or sneakers may be slightly deformed in the area of the lacing holes.
But if the material of the shoes is strong and the rings are made of high quality, then such a disaster will not happen.
Commodity lacing
A non-standard choice for non-standard people. Such lacing will look especially impressive with classic sneakers:
- The first step is from the outside in. One end should be much longer than the other.
- The short part of the lace is immediately sent to the uppermost ring of the opposite side from the inside out.
- The long part seems to be threaded through all the holes and also goes out into the upper ring.
- You choose the tying method according to your mood.
The positive aspects of this method include the fact that it is very easy to learn and is done very quickly. But there is also a minus: the remaining free ends of the lace are of different lengths and it is quite difficult to choose them so that they align.
Lattice
A stylish solution for wide sneakers with a voluminous tongue. At first glance, such a scheme may seem confusing and complex, but once you look at it a little more closely, everything immediately becomes clear:
- The first step is done from the inside out in the bottom rings.
- Both ends of the lace are crossed and threaded into the fourth rings, that is, three levels up.
- With an “inside seam” the ends rise one level up and go out
- Crossing, they return to the second rings.
- After that, again “inner seam” and lifting one level up.
- Finally, in the last step, the ends of the lace cross again and go into the upper rings.
- Now you need to make an internal knot.
Lightning
By the name, and by the appearance of this method of lacing shoes, it is clear that we are talking about a regular zipper, which everyone has on their jackets. An original, but difficult to adjust method, suitable for true connoisseurs of sneakers and fashion details:
- The first step is done from the inside out in the bottom rings. The ends should be equal.
- The ends of the laces on each side seem to bend beyond the first line at the back and extend forward with a cross.
- The crossed ends come out from the inside to the outside in the next ring and are wrapped again from back to front.
- In this way, lacing continues until the very last rings, where you can tie a bow or knot.
Reverse loop
A very simple, but at the same time unusual option. Unfortunately, it is also not very easy to adjust. But if the shoes are already tight and hold their shape, then this drawback is not so terrible:
- The first stage is that the lace goes from the inside to the outside in the lower rings.
- Take one half of the lace and pass it like a spiral through all the rings on one side.
- The second half makes the same spiral, but clings to the already finished part.
Double cross
You can call this method a double cross. But to some it resembles spiders. A very “cunning” method, complex, but incredibly beautiful and stylish. It is quite difficult to adjust and tighten, so it will not fit all shoes. It is rather close to decor:
- The first step is to pass the lace through the bottom holes from the outside to the inside.
- Then the ends of the lace cross and are brought out from the inside in the fourth pair of rings.
- From there they cross down one level, that is, into the third pair of rings.
- Thus one spider is ready. If you are going to continue lacing, then you need to cross again and, using an internal move, rise to the sixth pair of rings, where the previous steps will be repeated.
Try to immediately tighten your laces after each action. Otherwise, if they are in a relaxed state, these knots may simply get tangled.
Double lacing
For this method, two laces are used at once. Moreover, if they are of different colors, you will get an even more entertaining decor. Young people especially love this type of lacing:
- Two small laces need to be inserted in parallel: one in the first row of rings, the second in the second. The laces move from the inside to the outside.
- Next, take the bottom lace and, crossing its ends, insert it from the inside out two rows above. The same is done with the second lace.
- After this, all actions are repeated.
- At the end of such lacing, a large, voluminous bow is very welcome. He will put the finishing touches on this idea.
Thus, it turns out that two laces repeat each other with a difference of one move. And considering that they are different colors, a very interesting duplication effect is created.
Checkers
This is a very popular lacing in some subcultures. It also uses laces of two colors. At the same time, the laces must be long enough, wide and flat enough to cover the entire area of the wide tongue of the sneakers:
- Lacing begins with the first lace. They perform simple lacing with a snake.
- The lace goes into the ring from the outside to the inside, there it rises one level and comes out strictly above the entry point.
- Then he goes to the other side and repeats these actions.
- The second color lace will be used for lacing with a snake from top to bottom.
- In this case, the second lace should create a checkerboard effect, “jumping” between the first lace.
Even the most ordinary image can be given a new interesting look. This requires only minor changes or new parts. Such changes include new lacing. The main thing is to know how to beautifully lace sneakers and sneakers with 5 and 6 holes, and we told you the original methods and types of lacing. Now all that remains is to learn how to lace up and you can please yourself and surprise others.
Subscribe to our website so you don't miss the most interesting things!
Universal methods
The main purpose of any lacing is fixation. The foot should not fidget from side to side or pinch. The slightest discomfort or pain is a reason to lace up your shoes again. Don't be upset if you have to choose simpler-looking options to do this.
Straight lacing
Straight lacing allows you to easily adjust the degree of tension and, if necessary, leave the top stitch without a bow or knot. To do this, you need to pass the lace inside on both sides. Then bring one end out through the second right hole and insert it into the second left one inside. The other is in the third right through the third left hole. Repeat to the top, leaving one end unlaced (make the last top stitch with the second end of the lace). Finally, bring both parts of the lace inside and secure. This method is sometimes used by athletes when lacing up their boots.
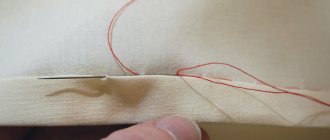
Nodal approach
If the ends are too long, the knotted lacing method will help. The lace must be threaded from below through the first loops. Weave the ends together with a simple knot and bring them out through the second holes. These steps must be repeated all the way to the top of the shoe. This fastening is very secure because each stitch is reinforced with a knot. It is suitable for fixing skates or ski boots.
Without tying
The halves of the shoes are connected with special silicone strips and secured with clamps. The characteristics of the material and the variety of colors allow you to create unique designs and patterns.
To hide the bow, it is tied under the “tongue” or leg. This way it remains invisible with any lacing method.
So that they are not visible
A more complex alternative further reduces the space allocated for decorative weaving. Minimize weaving and carry out basic manipulations away from the eyes - this is the main rule of the next method.
One of the variations involves such a popular scheme as “straight lacing”, which is performed in the mentioned sequence:
- The initial cord is fixed through the lower rings and taken inside the substrate, symmetrically relative to the sides.
- One edge is directed upwards from the right, appears from the top hole and is threaded into the left one.
- Then the ends involved in the process go up and end up outside, but each through a separate hole, are threaded onto the opposite row and then go up.
- From now on, the lacing stretches along the axis of the shoe until one of the laces reaches the last hole.
- The finishing touch is to pull the second tip through the final ring at the top. Therefore, this format will only work with a paired number of rings.
The video shows how to tie shoelaces using the straight lacing method:
The presented type of lacing is characterized by the absence of an inconspicuous diagonal arrangement of seams inside the shoe.
Another lightweight version of the stylish design is also suitable for models with a paired number and is even known as “Light lacing”:
- The tip is threaded through the bottom rings and pulled through the middle of the shoe on both sides.
- One of the edges of the lace runs along the entire length and appears immediately from the hole on the left side at the very top.
- At the same time, the second end should be directed into the upper hole, thrown to the opposite line and again pulled up through the inner wall so that it subsequently remains outside.
A different shade (from 2 colors) can simplify the procedure and decorate the final result.
Useful tips
If there is no particular desire to learn new methods of fixing knots, then you can use the recommendations for improving the standard ones. In addition, designers and manufacturers are inventing new options. For example, there are now easy-to-use silicone laces.
In order for the standard unit to be more reliable and stronger, it should be slightly modified, or rather, supplemented. Two loops are formed. One goes around the other, creating a knot. Then the whole process is repeated, one loop going around the other again. The result is a so-called double knot or bow. The method is so simple that even a child who has just learned to lace shoes can master it.
If ordinary laces cannot be firmly fixed and the knots constantly unravel, then you can use silicone analogues. Their appearance is quite original. Not only the shape is impressive, but also the bright colors. For each pair of holes on the shoe there is a separate lace, which is more like a bracelet with a lock. Each copy is threaded through two holes located on the same horizontal line, the ends are connected and secured with a special fastener. This option is very simple to implement and quite reliable. A noteworthy fact is that you can use different colors of the product for each pair of holes.
Another option for a modified standard knot is Quick Lace. This system is especially popular in professional sports. Its peculiarity is the use of a plastic retainer into which fairly thin laces are threaded. The mechanism is tightened to the required length. The ends of the laces, together with the lock, are hidden in a specially equipped pocket on the tongue of the shoe. If there is none, then you can hide the freely hanging ends under the tongue, they will not stick out and get in the way.
All the variety of devices for lacing shoes is designed for greater convenience. Everyone can choose the most acceptable option suitable for a particular case. However, sometimes you can experiment by creating fancy knots or a rainbow of silicone laces.
If you don’t want to constantly tie your shoelaces, you can choose their silicone counterparts
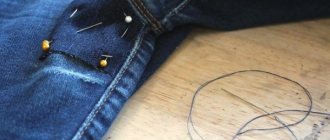
Video on how to change the entire lace in boat shoes, including along the edges
Are you tired of the colors or are the laces on your favorite boat shoes frayed? No problem – we’ll change the whole thing!
Knitting needle method
It sounds incredible, but there are a huge number of ways to tie shoelaces. In this article we will describe the most reliable and fastest of them.
Let's start with two common methods of lacing boots. I think a lot of people use one of these every day.
Standard way to tie boots Bunny ears
Let's start with the method of Ian Figen from Australia. He came up with the idea of using a very fast and reliable knot in everyday life and is now actively telling people about his method. By the way, most of the images were borrowed from Ayan's website.
Ain Figen's method
The next knot is called the surgeon's knot. It may also be called a Sherpa knot. This is no accident. The knitting method is not the simplest, but the reliability is amazing. Over several days of testing, this knot did not come undone even once.
Surgeon's knot
The best representative of the list, in my opinion, is the double slip knot. It is very easy to tie and holds up very well.
Double slip knot
Now pick up your boots and, without unnecessary delay, master the method that appeals to you most, or better yet, all at once. I hope that your children will never take seriously the words: “Your shoelace is untied!”
The ability to tie shoelaces is one of the basic self-care skills that we learn in early childhood. Having mastered it once, few people think about the fact that they can lace their shoes in a different way than the way their mother once showed them.
Completely in vain!
An ornate rope pattern on boots can become a small but memorable highlight of your everyday look.
How to get people interested in learning
The kid himself may ask to be taught how to tie his shoelaces when he sees new sneakers with images of his favorite cartoon characters or when choosing roller skates
You need to explain to him how important it is to fit your shoes correctly on your feet: this is required by safety rules. Laces tend to treacherously come undone at the most inopportune moment; if you get caught on them, you can fall
The child is also captivated by the look of the original bright lacing on dad’s sneakers or mom’s ankle boots. If there are older children in the family, they can also be involved in the process.
The boy might be interested in stories about representatives of professions who wear lace-up shoes: military, police, athletes, firefighters
Girls are already interested in the process of weaving bright ropes, just pay attention to what beautiful types of combinations can be used
Offer your child a reward: if he laces up his sneakers or boots himself, he will go to the park or circus to buy something he wants.
Before teaching you to train on real shoes, buy or make a manual from cardboard or plywood, on which the elements are attached to the image using a string.
Methods for tying shoelaces with different numbers of holes
If there are four holes in your sneakers, you can use the cross tying method. We can also use the method in the form of even strips.
The most common types of sneakers are those with five holes. In this case, the Knot or Reverse Loop technique is suitable.
Lacing in the form of a lattice or web is applicable for sneakers that have six holes. To achieve spectacular lacing, you can use thin ties.
To improve the appearance of old sports shoes, just purchase new laces and choose the most suitable lacing method. It depends on the personal preferences of a particular person.