| Place | Name | Characteristics in the rating |
| TOP 10 best adhesives for shoes |
| 1 | KENDA Farben SAR 30E | Best quality |
| 2 | Seam Grip polyurethane | Dries quickly. Bonds securely |
| 3 | Nairit 1 (88-P1) | Better strength |
| 4 | Desmokol | High reliability |
| 5 | UHU SCHUH & LEDER | Durability of adhesive seams |
| 6 | DoneDeal | Excellent gluing of dissimilar surfaces |
| 7 | Moment Marathon | Fast bonding |
| 8 | Second | The most popular glue |
| 9 | Eva | Economical consumption |
| 10 | Contact | Best price |
No matter how high-quality and expensive shoes you buy, sooner or later they will wear out and sometimes even tear. Most people in this case resort to the help of a specialist. Some people prefer to save on repairs and solve the problem themselves. About 80% of all modern shoes are made using adhesives. The repair also uses glue, which has almost completely replaced threads and nails. Professionals say that currently, adhesives are the best way to provide reliable and strong adhesion. It’s difficult to say for sure which glue for shoes is the best. This depends on the type of product and the specific task.
Without experience, it is impossible to choose the right glue for shoes. Experts recommend using products only from well-known brands. Let us list the advantages of adhesives:
- reliability and durability;
- water resistance;
- frost resistance;
- the thickness of the adhesive elements should not greatly affect the strength of adhesion;
- lack of rigidity;
- maintaining the integrity of adhesive materials;
- elasticity of seams.
With these parameters, the glue will effectively cope with its task. Of the variety of adhesives available on the market, we have selected the highest quality and most reliable ones. Feedback from real users helped us with this.
How to glue the soles of sneakers?
One of the most common problems is with sports shoes, namely sneakers. Due to intensive use, the toe may come off or the sole may puncture while jogging.
How to seal a hole?
Due to their specific nature, sports shoes (sneakers, sneakers) often have rather soft soles, so stepping on something sharp can leave a hole. The problem can be solved at home using glue. The edges of the hole must be cleaned and degreased, and then sealed with glue. In the large hole you need to additionally put a fiberglass mesh.
To ensure that the sole remains level, after filling the hole with glue, it is better to seal it with construction tape until the composition dries completely.
As for glue, the best option would be American polyurethane glue and sealant Seam Grip
. This composition is used to repair rubber boats, so you can be sure of the durability of the repair. The problem is that it cannot be found everywhere, and it costs more than other adhesives.
An alternative may be domestic epoxy glue
or imported
DoneDeal
.
How to seal the toe of a sneaker?
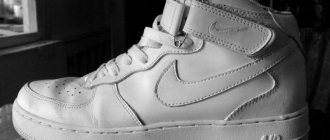
The second weak point of the sole of a sneaker is the toe. To repair, the thinning area must be treated with sandpaper and degreased. Next, you need to cut out a patch from rubber or polyurethane, sand its edges and apply glue to both surfaces. Press the patch firmly onto the sneaker for 15–20 seconds, and then leave it under pressure for another day.
Kenda Farben and Uhu Schuh
Kenda Farben is considered the best glue for shoes. It is produced in Italy. The average price per tube is 510 rubles. It is used for various purposes. In addition to textiles, leather and rubber, it works well on glass, wood and metal. The main thing is to properly prepare the bonding surfaces; their temperature should exceed 17 °C. Shoemakers enjoy using this waterproof sealant. The materials adhere instantly, which saves work time. Maximum strength is achieved after two days .
Uhu Schuh & Leder is a German brand at an affordable price . The product is suitable for sneakers, rubber soles, heels, gluing hard and soft materials, the tension between which is compensated by the elasticity of the seam. The composition repels water, resists acids, alcohol and alkalis, and can withstand a temperature range from +125 °C to -20 °C. Another plus is that the product does not dry out over time. Its price starts from 270 rubles.
There are three ways to glue the sole of a shoe:
- contact;
- inactivated solvent;
- thermal activation.
The remaining adhesive is removed quite easily - just use butanol or ethyl acetate.
To ensure high-quality adhesion, the surfaces must be washed, dried and degreased before the procedure.
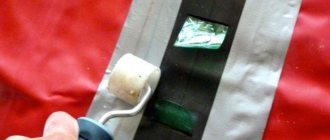
Method 3
To restore the sole you will need a soldering iron and a piece of nylon.
- First of all, remove dirt from the shoes, clean and degrease the cracked surface.
- Use a heated soldering iron inside the damaged area. The sole material will begin to bubble and become sticky.
- Next you will need to rub the melted nylon into the damaged surface. To do this, place a piece of nylon on the broken area and press it down with a soldering iron. The nylon will melt, all you have to do is fill the crack with it until it completely disappears.
Note: to straighten the melted nylon, during operation, use the handle rather than the hot nose of the soldering iron.
Method 1
To repair a broken sole, prepare:
- shoe knife;
- sandpaper;
- a degreaser such as acetone;
- instant glue that sets quickly;
- hook;
- threads
Repair technology:
- Sand the surface of the sole with sandpaper.
- Bend the sole until the crack opens. From there you will need to remove all dirt and remnants of old factory glue, using a shoe knife.
- Degrease the broken area with acetone or gasoline, apply instant glue and press the walls together. Note: shoemakers recommend using Desmakol or Nairit glue. To repair the sole, you can also use Moment rubber glue and Crazy Hands epoxy sealant.
- The crack was sealed, but the repair was not completed. In order for the shoes to be worn, the broken sole must also be stitched. Using a pencil, draw zigzag lines across the entire crack. Using a hand grinder or shoemaker's knife, make shallow furrows, about 2.5 mm, along the entire marking. Now, using a hook, sew the break, placing the stitches in the grooves made. It is advisable to perform several rows of stitches: this will be more reliable, and the top layer will protect the lower threads from abrasion.
Recovery methods
Depending on the degree of damage, the location of the crack or the volume of the hole, a person must independently choose a technique that will be relevant in a given situation.
To make it easier for a beginner to solve the problem, it is worth citing several popular methods that most experienced craftsmen resort to; relying on them, the question will no longer look so complicated.
Installing a patch
The rubber element is used in the repair of a wide variety of shoe models, from sneakers to winter boots with large treads.
Most often, such drastic measures are provided to eliminate volumetric defects, holes or significant damage that extends to the main frame of the model.
In order to apply the method and not spoil the appearance of the shoes, and also not make them uncomfortable for walking, you need to clearly measure the dimensions of the patch, then trim the base, and also adjust the element until the mixture hardens.
Gluing the area with special glue
Strong samples of fixing compounds are very popular; with their help, you can reduce the time required to perform manipulations, as well as obtain high-quality adhesion between planes.
Such adhesive models are not cheap, but the result is worth it, the composition was developed at the manufacturer specifically for shoe repair, so the structure of the solution completely fills the gap or hole. At the moment of implementing the technique, zigzag strips are cut out on the base with a knife, they will be filled with glue.
You must work with purchased products exclusively according to the instructions; there is no need to deviate from the manufacturer’s recommendations; in the process, the technician protects his hands, respiratory organs and ensures ventilation of the room.
Partial replacement of the damaged area
In difficult cases, you cannot do without cutting a certain area, but such manipulations will need to be done carefully so that the knife does not jump off and the person does not remove excess part of the material.
A polyurethane piece or rubber is applied to the free space, this element must be adjusted to size, and the edges must be perfectly cleaned; sandpaper creates a matte surface texture to which the fixing mixture adheres.
In rare cases, over time, the insert disappears, but to avoid such an excess, you need to choose the right glue and follow the advice of experienced shoemakers when performing the work.
Gluing the soles at home?
To glue the sole on yourself, you need to follow simple instructions:
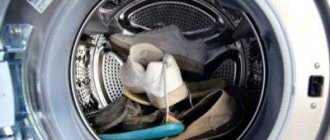
- Thoroughly clean the damaged boot and dry it completely.
- Carefully inspect the sole; if it comes off in several places, it is better to tear it off completely and re-glue it. In addition, some shoes have honeycomb soles, which require special care.
- Using a spatula, clean the surface of old glue and degrease (acetone or alcohol).
- Apply sole glue to both surfaces according to the instructions. Most often we are talking about a thin layer of glue - no more than 3 mm.
- Wait a few minutes and press the sole firmly against the shoe so that there are no gaps between them.
- Secure the boot in this position for at least 10 hours. You can put a weight on top, having first tightly stuffed the boot with paper or newspapers so that it does not lose its shape. The second option is to fasten the seam with clothespins, just be careful not to scratch the skin.
The described method is called cold. The hot method differs only in that the applied composition must be left until completely dry (about half an hour), and then heated with a hairdryer and pressed firmly onto the surface for 20 seconds. You can wear repaired shoes after two days.
Video instruction:
How to seal a sole with voids?
Quite often, demi-season and winter boots are made with honeycomb-shaped soles, in which voids appear over time. Repairing such a pair of shoes yourself is a little more difficult: the empty honeycombs need to be filled with scraps of micropore or other porous rubber; for this, most likely, you will need to bend the insole. Next, fill them with sealant. In some cases, it makes sense to tear off the insole and replace it with a new one.
After the sealant has hardened, you need to degrease the surface again and seal it using the usual method.
Which glue is better not to use?
To glue the sole, it is better to use adhesives designed specifically for this purpose. It is not recommended to use:
- ordinary PVA, since it is not waterproof, the sole will immediately peel off after getting wet;
- compositions from the “Superglue” category - the connection will be rigid, the shoes will deform, unable to cope with the heavy load, as a result the material will tear;
- adhesives for installing ceiling tiles - they cope with their main task, but leave stains, so the shoes become unwearable.
It is better to buy a suitable adhesive composition in a specialized store. It is necessary to select an option for a specific material so that the gluing is high-quality and accurate.
Contact, Desmokol and Moment
Contact is a cheap product from a domestic manufacturer, which ranks second in terms of sales volume on the market, behind Moment. Glue can be used to seal porcelain, rubber, ceramics, leather, silicone products and other materials. It fills all gaps and penetrates deep into cracks.
Desmokol is a polyurethane shoe adhesive . It has increased ductility, strength and moisture-repellent characteristics. Sold in tubes of various sizes. The product can also be purchased in the form of granules, which, when prepared at home, must be diluted with a solvent, for example, acetone. Which shoe glue is better to choose, ready-made or dry, everyone must decide for themselves.
Moment Marathon from the Irish company Henkel is an effective shoe adhesive gel that is not only easy to use, but also quite economical. For a tube weighing 3 g you will have to pay 150 rubles. Thanks to its fairly thick consistency, problems with drips never arise, and the thin spout distributes the glue strictly to the required areas.
If you still have doubts that you won’t be able to seal your shoes yourself, it’s better to take them to a workshop. However, in some cases, old boots are not worth spending money on repairing.
It is known that there are no shoes that last forever; even the highest quality shoes from the best manufacturers need repair. The best shoe glue will help to significantly extend the life of your favorite shoes, subject to careful care and timely repairs. If you are interested in which adhesive for gluing soles is best suited for your shoes, sandals, boots, we suggest that you familiarize yourself with the rating compiled based on reviews from numerous customers. The top 8 includes reliable examples of time-tested shoe adhesives. In the review article you can familiarize yourself with the positive and negative characteristics for each position in our rating.
Eva and Nairit
At home, it is better to glue shoes with the glue that shoemakers use. Eva is such a remedy. It is produced in Taiwan. The price is quite budgetary and is about 100 rubles. But this does not affect the quality of the glue. It is able to tightly glue side and corner cuts, protecting them from repeated damage. In addition, the place of gluing is almost invisible. Eva is used sparingly and copes with its tasks perfectly.
Nairit is in the ranking of the best adhesives, as evidenced by numerous customer reviews.
Due to its wide spectrum of action, it is used in various household areas. Nairit is a waterproof and durable shoe glue that is safe for hands and the respiratory system, as it does not contain toluene. Cost - from 300 rubles.