Home page » Beauty » Nails
Author of the article
Svetlana Pavlikhina
Reading time: 6 minutes
AA
Rhinestones help give your nails a bright, sophisticated look. Thanks to their use, it is possible to create an incredibly beautiful manicure. Their use does not cause any difficulties. The main thing is to learn how to glue rhinestones on nails. If you strictly follow the instructions, you will be able to achieve excellent results at home.
Mounting features
It is allowed to completely cover the nail plate with stones, creating complex patterns on several accent fingers. Everyday manicure involves the use of a minimal amount of small rhinestones.
Attaching the stones is simple. You just need to study the step-by-step master class.
By strictly following the technology, it is possible to securely fix them on the nails. Thanks to the advent of durable coatings such as shellac, the job is simplified.
The main thing is not to skimp on materials, purchase only high-quality coatings. It is noted that glass and crystal stones, although expensive, look more refined and noble than the Chinese options.
Some craftswomen manage to resort to using them several times. The main thing is to carefully remove the stones from the plates, remove the coating and glue . After this you can glue them again.
Plastic products also shine brightly, but cost less and are disposable. When removed, such stones become scratched, damaged, and become dull.
Design options
Several types of rhinestone compositions are considered the most popular this year:
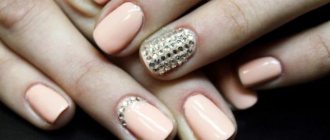
- Flower. A fairly simple way to decorate a manicure. A large rhinestone is laid out in the center, and small ones resembling petals are placed around its circumference. You can choose contrasting pebbles.
- Lunar design. Small pebbles must be glued all over the nail plate, except for the holes at the base, or vice versa, they are attached only to them.
- French manicure. Instead of the classic white varnish, the free tip can be decorated with a scattering of rhinestones or glitter.
- Dividing lines. You can simply make a vertical shiny line in the middle of the nail.
Design solutions can be seen in the video:
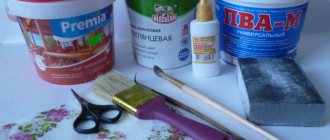
Types of glue
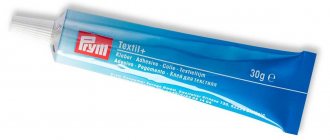
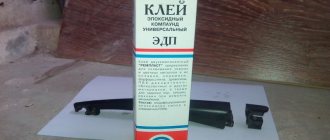
Two types of glue are used: single-phase and two-component.
The first one is similar in its characteristics to super glue, only intended for nails. Two-phase consists of epoxy resin and hardener. These components are mixed before use.
Which glue to choose
When choosing glue, you should take into account the type of rhinestones. If they are large, preference is given to the one-component option. It quickly fixes the elements in the desired position, preventing them from moving.
You need to think about the location of the stones in advance. It is impossible to adjust the design in the future.
When working with small parts, creating patterns, inscriptions, and drawings, a two-phase adhesive is used. When using it during work, it is possible to adjust the location of elements.
Can it be fixed without glue?
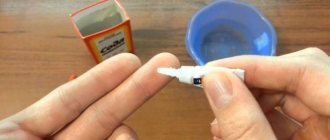
It is possible to attach pebbles to nails without glue. It can be replaced with regular clear varnish, but in this case the adhesion will be unreliable.
The method is only suitable when using plastic rhinestones. Ordinary varnish will not hold glass and crystal stones: they are heavy for it.
It is allowed to apply decorative elements to gel polish. This coating can reliably fix even large parts. The only drawback: shellac consumption increases.
Features of preparing nail plates
In order for the rhinestones to stick well, you need to prepare the surface of the nails.
To do this, perform the following steps:
- The old coating is removed from the plates.
- Cuticles are removed.
- Fingers are treated with an antiseptic.
- All nails are given the same shape.
- The surface is polished using a buff.
- A base coat of varnish is applied to the plates and dried.
Step-by-step instructions for attaching rhinestones to nails
To successfully perform a manicure, the necessary tools are prepared. The main thing is to apply the glue correctly and fix the pebbles.
Required Tools
The following equipment will be needed for this work:
- orange stick;
- thin brush;
- tweezers;
- toothpicks.
If desired, this set can be supplemented with dots and a pencil. Thanks to the use of dots, it is much more convenient to place pebbles on the surface.
The pencil is used to place decorative elements.
Performing a manicure
Procedure for working with rhinestones:
- The surface of the plates is covered with a base, then with colored varnish.
- After the coating has dried, glue is applied to the places where the decorative elements will be placed. For this purpose, use a brush.
- Pebbles are placed at the designated places using tweezers or any other device.
- Using a toothpick, adjust the location of the elements.
- Another layer of varnish is applied on top.
Gel polish attachment technology
The procedure differs little from performing a manicure on natural nails.
It is produced in several stages:
- Two layers of shellac are applied to the prepared plates.
- The coating is dried for 2 minutes under a UV lamp.
- The base is applied to a thin brush.
- The places where it is planned to place the pebbles are outlined.
- Use an orange stick to place decorations on the surface, pressing them slightly into the surface of the nail.
- The placement of elements is adjusted using a toothpick.
- The base is applied to the brush again.
- The contours of each pebble are outlined.
- The surface is dried.
- Parts of the plates free from decor are covered with topcoat.
- The nails are dried again and treated with a clinser to remove stickiness.
Application process
Now we will apply gel polish with rhinestones on the fingers that we did not cover with gel polish in the previous process.
We will need small rhinestones, an orange stick, and colored gel polish that will be used in the nail design. If you decide to decorate one nail on both hands, then first, for convenience, we decorate the nails not simultaneously, but one by one. We file the nail plate with a soft file and degrease it with alcohol.
Cover with primer and dry. Apply the first layer of colored gel polish and dry. Then we dry the second one too.
We apply it with a top coat, do not dry it, and start laying out the rhinestones. We attach the first one at the very top of the nail in the middle, then clearly down one by one in a straight line, pebble by pebble. Then the next row, then the third on the other side of the first and so on to the edges of the nail on both sides of the center line. If you need to adjust the rhinestones, do it with something thin, a toothpick, for example. After finishing laying out the pebbles, dry the resulting layer in a lamp for two minutes.
Next, you need to paint the gaps between the rhinestones with a top coat, for which you use a very thin brush, trying not to get on the rhinestones and not spoil their shine.
Then dry in a lamp for two minutes. If you are not sure of a good result, repeat again and dry. Wipe with alcohol and your manicure is complete. See what the gel polish with stasis looks like in the photo.
Expert advice
- It is not recommended to cover the rhinestones completely with topcoat; it is enough that they are applied to the topcoat and the gaps are painted over;
- The top on which the pebbles are applied must be thick, otherwise the pattern will not work out and may blur even before it is polarized;
- If you want to lay out the entire surface of the nail, then start from the center, as we described in the “chainmail” pattern. If the pebbles are of different sizes, then lay out the larger ones first and again start from the center;
- If you decide to apply pebbles with glue, you must be confident in your skill, since you can correct a pattern that has not yet hardened on the top, and the glue “sets” instantly and you have no room for error;
- To design nails with stones, it is better to use glass ones, but plastic ones are also possible, although they are duller and do not look as beautiful as rhinestones;
- pebbles measuring 1.5-2 mm will look good even on short nails. Do not use very large pebbles;
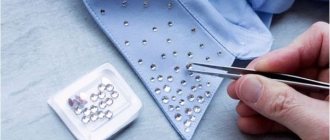
- If you want to use rectangular, square or other stones rather than round ones, remember that they should be in harmony with the pattern on the clothing or jewelry. Therefore, it is still better to use round rhinestones;
- Such a manicure with nail design will last from 15 to 20 days, if the technology was followed during application, and care was taken when wearing it. There is no need to file the nail plate, thereby disrupting the “sealing”. For household work, use gloves and do not use hot water;
- remove the stones with a manicure pusher one by one. If the pebble cannot be removed, then it is cut off with a nail file.
If you follow all the advice of manicurists, then even at home, you will be able to design your nails with ease.
Features of fastening depending on the shape of the rhinestone and the length of the nails
When performing a manicure, you should take into account the length of the nails and the shape of the decorations used.
Attaching cone rhinestones
Cone rhinestones have a sharp tip, so this manicure can cause discomfort. Parts often cling to tights and clothes . It is recommended to glue them as tightly as possible to each other.
The optimal solution is the spot use of conical parts in a large composition. 2 such elements are enough for one pattern.
For short nails
Rhinestones can be glued not only to long, but also to short nails. When performing everyday manicure, it is recommended to choose discreet shades of varnish. On each nail, 2-3 elements are enough.
Silver and bright jewelry is used, but it matches the tone of the clothing.
For a festive manicure, don’t be afraid to use bright varnishes. In this case, you can lay out the most bizarre patterns.
Even a large number of stones on short nails looks elegant. The main thing is to choose clothes in calm tones.
Tips for manicure at home
- First of all, you need to remove old nail polish (if any): to do this, you need to soak your nails in a vessel with warm water for a couple of minutes. This will soften the cuticle. You can remove regular nail polish with nail polish remover.
- The next step is to push back the cuticle. To do this, apply lotion or cuticle oil at the base of the nail to soften it. Then gently push back the cuticle with an orange stick, which has antibacterial properties. You should not cut the cuticle, as it protects your nails from infection.
- Then you should polish your nails and, if necessary, give them the desired shape. It is advisable to avoid reciprocating movements, as this weakens the nail plate and leads to its delamination.
- The edges of the nail can be made square, round or tapered, or choose a combination of square top and oval edges. Nails with a rounded shape, reflecting the shape of the cuticle and slightly extended beyond the edges of the fingers, will look stylish and discreet.
- Apply the base layer of varnish starting from the cuticle and moving the brush in one stroke to the end of the nail. In three passes, the polish should cover the entire nail. Then the finger must be placed in a UV lamp for at least 2 minutes so that the composition dries completely.
- Before applying colored gel polish, you need to stir it directly in the bottle. Do not shake the bottle of varnish while doing this, as this will create bubbles and the varnish will not be smooth when applied. It would be correct to take the bottle between your palms and quickly turn it back and forth, then the pigment will be distributed perfectly evenly.
The top also serves to attach rhinestone crystals: you need to carefully pick them up with the thin end of an orange stick and stick them on the nail plate covered with the top. Attaching heavy rhinestones in accordance with the design is quite difficult for beginners, so it is better to do a test manicure using small crystals. Dipping the stick in water and dabbing excess moisture onto a cotton ball or cotton pad will help the rhinestones stick to the tool more easily.
If during the application of varnish it gets on the skin, you can remove it with an orange stick, but in no case should you place such smudges under a lamp to dry.
Why don't they hold on?
It becomes awkward when, in an attempt to give a hand, beautiful nails lose rhinestones
Thus, the length of time that rhinestones stay on nails is of particular importance.
Each manicurist has his own tricks and subtleties that show a class of skill that can only be acquired through experience.
In many cases, when clients complain about quickly crumbling rhinestones, either not very durable glue is used (in the case when the master uses glue for fixation), or the master simply misses one of the important technological points.
There can be many such shortcomings, ranging from the lack of a sufficient amount of topcoat on the nail plate when pebbles begin to be placed on it, to insufficiently thorough treatment of the edges of each crystal with topcoat, which is a very painstaking procedure.
In any case, when performing such a complex manicure in a salon, it is worth asking about the terms for which the master can give a guarantee. If you don’t have one, you should look for another salon, and in the case where the crystals have fallen off during the warranty period, you can contact a specialist for correction.
Correction with glitter for overgrown nails
There are several ways to get rid of this problem:
- Use a durable varnish, for example, “Phenom” from the Jessica brand, used without drying in a UV lamp to paint over the free area of the nail at home;
- Apply a version of the manicure called “lunar”: draw a semicircle in the shape of a lunar disk on the regrown nail as carefully as possible, this coating looks stylish, moreover, “lunar manicure” is among the top of the latest season;
- Make a manicure correction, in which a semicircle of glitter and metallic varnish is formed on the regrown area;
- An interesting solution could be to cover the overgrown part of the nail with small rhinestones or beads - bouillons, while the manicure becomes visually more advantageous, and there is not even a hint of the correction of the overgrown area.
Using household glue
It’s not always possible to have a special glue on hand intended for manicure, so fashionistas are trying to replace it with household options. It is worthwhile to figure out whether such actions are permissible.
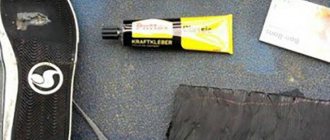
Super glue
The use of super glue is acceptable, but working with it is accompanied by difficulties. This adhesive is not able to fill large irregularities. It is used only for fixing flat elements.
In order for the adhesion to be of high quality, it is important that the glue spreads over the entire lower surface of the crystal, but does not go beyond its boundaries.
It dries very quickly and requires maximum care. Correcting the error is problematic.
Glue moment
It is not recommended to use Moment glue. It does not harm the plates and is able to provide proper adhesion, but there is a risk of damaging the decorative elements themselves, especially plastic decorations.
How to glue rhinestones beautifully
To make the inlay as beautiful as possible, you should follow a number of recommendations:
- Keep it in moderation. If all the nails are decorated with stones, the manicure looks flashy and ridiculous. It is enough to distribute the decorative elements on just a few plates or not completely cover them.
- Correctly combine the shades of varnish with the tones of decorating elements. If silver and gold crystals are suitable for any coating color, then when choosing bright details, you need to approach the choice of varnish much more seriously.
- Do not cover the stones with topcoat, otherwise they will stop playing in the light, flicker, look like ordinary glass droplets, and become dull.
- When inlaying the entire plate, you should start from its center line and tip. It is important to ensure that the strips are even, parallel to the side roller. When fixing the remaining rows, do not touch the already fixed elements, otherwise the symmetry will be broken.
Work on mistakes
Not all girls can immediately successfully glue artificial stones and get a shining manicure. There are many reasons. The most common ones are listed below.
When choosing a material
Nail experts advise purchasing only high-quality materials. When purchasing, it is important to consider other points:
- Rhinestones made of plastic quickly fade. As a result, your manicure soon loses its “zest” and looks unpresentable.
- Bulk pebbles on nails cause some inconvenience. They often get caught on surfaces and interfere with homework. But they look very nice, don’t they?
- It is important to purchase a high-quality and proven gel polish that will definitely not spoil your nails: it will not swell, crack or bubble.
- Particular attention should be paid to the topcoat. Too liquid or, on the contrary, thick is not suitable for inlay with rhinestones.
- Before applying the sticker, you need to inspect the largest elements of the future decor to see if there are any chips, cracks, or distortions. Any such flaws will clearly appear on your nail.
During inlay
Typical mistakes when gluing rhinestones are explained by inexperience and haste. To ensure that the pebbles do not come off and the manicure lasts in its original form as long as possible, experts recommend:
- Do not place the crystals too close to the edge of the nail. Ideally, there should be at least 1.5 mm left to it. Otherwise, the rhinestones will fly off and chips will remain on the surface.
- Also, do not glue them near the cuticle.
- Do not shorten the drying time of the varnish. Be patient and wait the required time (1-3 minutes depending on the power and type of lamp). This will ensure reliable adhesion of the rhinestones to the nail coating.
- If you are a beginner, then first choose a not very complex design.
- Do not spread the crystals with your fingers. Use tweezers, a magnetic pencil or other suitable tool.
These recommendations will help you create the perfect manicure that will delight you for weeks.
How to remove rhinestones from nails
The easiest way is to use a manicure pusher.
This is a kind of hatchet that allows you to easily remove decorative elements. It is enough to pry their base, and the stones immediately fly off.
If the crystals are firmly fixed, it is recommended to remove them with nail clippers. The tool is brought to the very base of the part, then pressure is applied.
Tiny elements can be easily removed using a cutter equipped with a sharp tip. They are tapped carefully from below.
Notes on style
Before getting a manicure, you need to take into account the concept of the event. It should be combined with the chosen clothes and makeup. If a girl wants to wear a manicure every day, then it is recommended to choose a style that will suit any outfit. The complexity of the manicure depends on the purpose.