So I got to polishing the taillights of my “positive”. Because Previously there was an oracal film on them, there was no need for this. For a long time I was looking for information on the drive where the process would be described in detail and I couldn’t find it, everything was somehow superficial and with a loss of nuances. That's why I'm writing a report.
There are 2 ways to polish headlights, both front and rear, namely:
1.
We take a bunch of sanding wheels of different grits, remove all scratches completely until the glass becomes frosted, etc. The process is relatively long and costly if you don’t have any attachments for a grinder, drill, etc. polishing wheels, emery wheels, 3M paste.
2.
Polishing plastic headlights using
GOI paste
and felt.
At first I was very skeptical about this type of polishing, since the technological process is much simplified from the first polishing method, but after the work done I can say with confidence that it works and works perfectly.
What do we need? - Paste GOI. You can buy it, but since I have had a piece of it in solid form since time immemorial, I didn’t have to buy it. I think that every home has such a piece from post-Soviet times. — Felt or a felt circle, which is what I actually spent money on. 24 UAH, i.e. kopecks, but it was necessary to buy because It turned out to be more difficult for me to find felt. — VD 40. Since GOI paste is still an abrasive and it needs lubrication. WD40 is perfect for this. — Any protective polish. In my case, I used Dr. Wax Fine Abrasive. Although, as practice has shown in removing small scratches from the body of a Priora, it is not abrasive at all. - flannel or other soft cloth for final polishing, but I had a borrowed foam polishing wheel. — a drill, respectively, with a speed controller and a drill attachment for polishing, which I also borrowed. The same thing can be done manually, but the process increases over time.
1. What you need for polishing 2. Preparing the car 3. Recommendations
When using the car for a long time, scratches or microcracks may appear on the headlights. The consequence is the loss of initial transparency. This leads to a decrease in the light transmission of the internal lenses and reduced visibility at night. To eliminate external defects on headlights, car owners use different polishing methods . This process restores the natural appearance and shine, regardless of the material used to cover the light housings.
Previously, glass was used in the automotive industry to make headlights. In modern cars, the material has been replaced with a more suitable one - polycarbonate. Glass has good resistance to external influences, but the polycarbonate surface is easier to restore or replace. A change in light transmission is often caused by the use of tinting agents or decorative films, after removal of which cloudiness remains.
What you need for polishing
Buying a polishing kit is not the best option, unless you want to overpay; the price for them reaches 10,000 rubles or more. Everything you need can be purchased separately for much less.
Grinder or drill. The tool must have speed control.
When polishing, it is important to ensure that the plastic does not heat up, otherwise it will begin to melt, which will lead to the final clouding of the surface of the headlight. Attachment for polishing wheels. It is best to use the currently popular Velcro attachments; they are easy to use and practical. The price of such a device starts from 100 rubles.
Self-engaging abrasive wheels of fine grain size of several gradations. You can take Trizact 3M (P3000 and P6000), Abralon (P3000 and P4000), or any other company. One circle of each gradation should be enough to process two headlights. The cost of circles from 3M is 300-400 rubles, Abralon will cost 100-200 rubles apiece.
Foam wheels for abrasive and finishing polishing. The price depends on the manufacturer; you can buy it for either 200 or 1500 rubles.
Abrasive polish. There are a huge number of offers on the market at a variety of prices. Runway (from 200 rubles), Arexon (from 400), Allegrini (from 1000) and others. You can use thin GOI paste number 1. Separately, it is worth mentioning about polishing headlights with toothpaste. The effectiveness of such a “polish” is highly questionable, and the method itself is rooted in the Soviet past, when tooth powder was commonly used everywhere.
Non-abrasive polish or varnish to seal the result. You need to choose depending on the material of the headlight - different types of varnishes are used for plastic and glass. Varnishes cost from 500 rubles and above.
Transparent glass or how to properly polish headlights on a car with your own hands?
First of all, it is necessary to determine the extent of the damage, because based on their results we will make a decision on the choice of the degree of impact on the surface of the diffuser. The depth of one of the largest scratches will determine the size of the defective layer that needs to be removed.
Roughing stage
You don’t need to particularly understand how to polish car headlights with your own hands to understand the essence of the process. It is characterized by working with coarse-grained wheels to level the surface to the maximum scratch depth. The sandpaper with the lowest index is pre-soaked in water for 10 minutes .
For example, at the initial stage of processing, P80 paper is used, then P120 and P320 are used sequentially. This approach allows you to remove deep scratches from the last finishing cycle, replacing them with a circle with a smaller index. At this stage it is important to remember:
- You need to grind carefully, wetting the disc with water and controlling the heating level of the part. The number of revolutions of the circle is 1200-1600 rpm.
- An increase in temperature in the treatment area can lead to cracks!
- When working manually, make only progressive movements.
- Complete the roughing stage by thoroughly rinsing the part with clean water.
Finishing stage
The goal of the process is to create a matte finish of slight depth. This is done using materials with fine abrasives - from P600 to P3000. The technology of work is based on the same conditions as the stage described above. At the end of the polishing procedure for automobile plastic headlights, their surface must be washed and wiped dry.
The stage of polishing and finishing the surface of the lighting device
With the mechanized method, a foam wheel is installed on the grinder. In the case of manual processing, a napkin or microfiber cloth will suffice. Following actions:
- Apply a pea-sized amount of abrasive mixture to the foam rubber.
- Using rotating movements, polish the solution over the surface. Continue working until the transparency of the glass is restored.
- Apply protective paste or varnish to the cleaned surface with a napkin.
Abrasive polishing
If the headlight is covered with scratches and scuffs, a deep polish will be required. To begin, work with abrasive wheels, from coarse to fine-grained. After each lap, thoroughly rinse and wipe the headlight and visually evaluate the result.
During processing, constantly wet the surface and do not press on the tool so as not to overheat the plastic.
The next step is to sand using a foam pad and polish. Apply it in several places on the surface of the headlight and distribute it evenly with a sanding machine. Do not linger in one place, constantly move the tool along the surface, its speed should be within 500-1000 revolutions.
Do not let the paste dry out; constantly moisten the treated area. When finished, thoroughly rinse and wipe the headlight glass again. ” alt=””> The last stage of machining will be polishing with a finishing wheel. Produced dry, using non-abrasive polish (liquid glass and the like). The headlight acquires complete transparency and shine.
Preparatory work
Before polishing the headlights yourself, you need to protect the adjacent parts of the car body. Insulating the perimeter of the radiator grille, the front edges of the wings, the hood and the top of the bumper will protect them from mechanical damage during the polishing process. Masking tape is used as a protective agent.
If sealing rubber is inserted on the body elements, it is also covered with several layers of tape.
The safest way is to remove the headlights and polish them away from the car. This option is especially effective for internal treatment of instrument surfaces. The further progress of work depends on the selected polishing agent.
Addition. Classification of varnishes
Varnishes are divided according to purpose, composition and labeling.
- For glass headlights;
- For polycarbonate;
- Protective and tinting varnishes.
One-component. Most often these are acrylic varnishes, which have poor adhesion to plastic and are only suitable for glass surfaces.
Two-component. The varnish and hardener are in different containers and mixed immediately before application. Two-component varnishes dry very quickly, so they should be diluted in small portions.
Urethane. Dries quickly and protects well. An aerosol version is suitable for headlights.
Ceramic. A relatively new class of varnishes with increased scratch resistance. Heating a surface treated with this varnish causes scratches to heal.
There are many other types of varnish (cellulose, glypthal, metallized), but for various reasons they are not suitable for protecting headlights.
LS (low solid). They are the most liquid in composition, are highly fluid, are not suitable for vertical surfaces and are not used in the automotive sector.
MS (medium solid). Medium fluidity, applied in several layers, with the obligatory drying of each.
HS (high solid). High content of solid components in the composition and a minimum of volatiles (solvents). Due to this, they are more environmentally friendly and quick-drying.
UHS (ultra high solid). Modern varnishes are applied in one layer and are resistant to damage. Requires high temperature drying. ”alt=””>
Cause of cloudiness
A decrease in the intensity of illumination provided by car headlights is due to the negative impact of the following factors:
- mechanical damage to glass in the form of scratches, cracks, chips that occur when stones fall from under the wheels, impacts from bush branches while driving;
- contamination by dust, splashes from puddles;
- yellowing characteristic of polycarbonate headlights as a result of prolonged exposure to direct sunlight;
- loss of shine due to freezing ice;
- cloudiness after using chemical cleansers.
When the first signs of damage appear, polishing should be carried out using available means.
Expressive look: getting to know the nuances of polishing headlights
Polishing headlights is a fairly simple operation at first glance, but it also has its own tricks. The service life of the optics and the cost of its restoration depend on them.
Today, most even older cars have plastic headlights. Their surface is covered with a factory protective coating. Usually its thickness is enough to painlessly polish the headlight up to four to five times. Here everything depends on the skills of the master. Although this operation, as a rule, only takes place twice during the life of the car.
The depletion of the protective layer can be seen by the appearance of a halo. If a distinct spot with yellowish edges appears on the headlight, polishing is no longer useful: without a protective layer, the plastic will inevitably become cloudy again in just a couple of weeks. In addition to replacing the optics, there is another option: applying a special protective varnish. Alas, the operation costs about 5,000 rubles per headlight. It is advisable only in cases where it is necessary to save a rarity or if the price of even a non-original version for a specific car is off the charts.
Polishing headlights takes 10–15 minutes. Before the operation begins, the optics are covered with tape so as not to damage the varnish on adjacent body elements.
The further process depends on the paste used. Most often, services prefer products from 3M and Wurth. At the first stage, the master uses a more granular paste and an appropriate polishing wheel. The speed of the machine is usually set at 1500–2000 rpm.
Next, the master uses a finishing paste and a softer polishing wheel. The rotation speed of the machine should not exceed 3000–3500 rpm, otherwise you can overheat the plastic and burn the protective layer. It swells when heated strongly and later becomes covered with cracks when it cools. In this case, you will have to remove it and cover the headlight with varnish - of course, unless the careless master also melted the plastic itself.
Technology
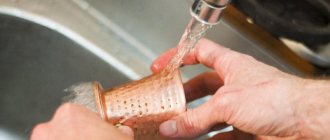
Any polishing job begins with a thorough wash. It is necessary to wash and remove not only dirt, but also all possible particles embedded in the surface. They use not only water, but also detergents and chemicals. Drying follows after washing. It is important to carry out the work in warm weather, indoors. The room must be ventilated, free from dust and direct sunlight.
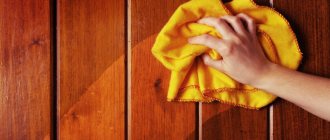
After cleaning, a felt circle comes into play, onto which abrasive is applied. In this example, GOI paste. Polish in a circular motion until the desired result is achieved. During the operation, the surface to be treated must be regularly wetted with water. Working “dry” is strictly prohibited, otherwise we will get a scratched, terrible surface. The success of the work will depend on the volume of liquid and paste.
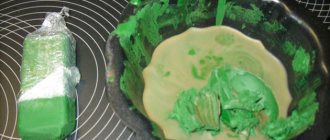
The principle of the “golden mean” works. Too much water will wash away the paste and the abrasive particles will not be able to firmly touch the glass. A large mass of paste will not give a mirror surface, but a matte one. To polish car windows, GOI paste is used, which can remove a layer of material less than 1 micron. This is GOI paste with brand “1”. For insurance, to avoid damage to the coating, a drop of vegetable oil is added to it.
This mixture is heated and stirred - the procedure significantly softens the activity of the abrasive. To remove large defects on glass, several polishing approaches can be applied. Initially, use brand “4” paste, and then move on to brand “1”. The ideal can be achieved only with the finest abrasive. You can see the features of polishing with GOI paste in the following video:
Procedure for cleaning headlights with toothpaste
Cleaning headlights with toothpaste is the easiest and most affordable way to clean up this part of your car. To perform the procedure, you will also need water and several towels, which should not be too soft. Apply a little paste on a towel, after which you need to rub it in a circular motion into the surface to be polished - stains will form that need to be washed off with water. Rinse the headlight thoroughly - and that’s it, the car shines with clean headlights again. Note that plastic is more difficult to clean than glass, since, as a rule, much more dirt accumulates on it. However, most dental care products contain pyrophosphates, soda, peroxide and brightening components - this allows, with due persistence, to remove plaque from plastic headlights too. You can verify the overall effectiveness of the method by watching a video about polishing headlights with toothpaste with your own hands.
Title: Polishing with special means Toothpaste can also be used to remove scratches on a car body, unless, of course, we are talking about deep scratches that reach the ground. In this case, polishing, of course, must be entrusted to professionals, but you can deal with minor damage yourself. In case of serious scratches on the body, even purchasing special polishing products does not guarantee ultimate success: you still need to be able to use such products correctly. When choosing a grinding paste for polishing a car body yourself, you should not try to save money - after all, by refusing the services of specialists, you have already significantly reduced costs, so it is better to buy a high-quality, albeit expensive, product. Before you start polishing your headlights, carefully study the information on the packaging of the purchased product and strictly follow the instructions and recommendations. While working, you can use a thickness gauge - this will help you avoid sanding the car’s enamel down to the ground.
Materials and tools
For high-quality polishing of car headlights you will need:
- Bucket with clean water;
- Scissors;
- Rags - 2 pcs.;
- Toothpaste;
- Masking tape;
- Polishing paste;
- Foam sponge;
- Coarse-grained skin (from 1500 to 2000).
Polishing set 3m
The 3M polishing set is designed for polishing small and unnoticeable defects of the car body - for example, dust particles. This kit is usually used to spruce up new or newly painted cars. The product is also excellent for polishing headlights – both glass and plastic. The 3m set includes the following products: 3m polishing paste, 3m polishing pad, 3m abrasive flowers, 3m polish, 3m abrasive clay, abrasive paper. Moreover, all these components are sold separately, so if you only need some of them, there is no need to purchase the entire set.
Processing the inside
An additional step that not everyone will need is polishing the inside of the headlights. This type of work is not very difficult, even if you are a beginner, once the outer covering of the headlights has been polished. Go internal.
We remove the tape that was located around the edges and dismantle the headlight. Try not to touch lamps and mirror parts. Immediately inspect the surface from the inside. If you find cracks or deep scratches, then there is no point in installing the headlight back - just replace it with a new one.
If you do not find any defects, wash the inside of the cap. You can also start sanding, only by hand. Apply sanding agent to the sandpaper and treat the inside, then rinse and polish according to the same principle.
Cleaning the inside of your headlights will take more time than cleaning the outside, but it's worth it. Return the parts to their place, and now admire the result: clean, like new headlights.
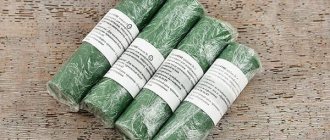
GOI pastes
GOI pastes are small bars, the color of which ranges from light to dark green. The main components of such pastes are usually chromium oxide powder and organic components. GOI polishing products are fine, medium and coarse. Polishing with a fine paste gives the surface a mirror shine, a medium one helps to achieve an even shine, and with the help of a coarse GOI, scratches remaining after grinding are removed. Thus, when choosing a GOI for polishing headlights yourself, you need to rely on the current state of their surface: if there are scratches, then you will have to use a rough GOI, if there are none, a medium one will suffice. GOI is also used for polishing the body with your own hands - thanks to the fine paste, the exterior of the car takes on a well-groomed appearance. This product is no more difficult to use than toothpaste. Place a little GOI on a soft cloth moistened with gasoline. Gasoline is needed to ensure that the product is applied more evenly, and the preferred fabrics are wool and cotton. Remember that under no circumstances should GOI be applied to the polished surface itself - only to the fabric. Next, just calmly rub the product into the headlight or body, after which all that remains is to rinse thoroughly with water, and the car will be as good as new.
Why do you need to restore the transparency of car headlights?
First of all, you need to take into account that glass diffusers are becoming less and less common in lighting fixtures of modern cars - they have been replaced by polycarbonate products. Glass is more resistant to external influences, but polishing plastic headlights is technologically simpler. Be that as it may, both types are susceptible to mechanical damage from gravel or stones flying out from under the wheels of cars in front, as well as ultraviolet rays. The results of this influence are:
- Cloudiness and yellowing.
- Minor scratches.
- Loss of presentability.
- Deterioration of luminous flux intensity.
The last reason directly affects traffic safety at night. There are practically no effective means to prevent these phenomena at the moment. All kinds of protective films do not justify their use, so the most effective method is to restore the diffuser.
Abrasive polishes
This polishing material contains abrasive substances and is usually used to remove paint defects. The use of abrasive polishes is accompanied by grinding the surface to remove a microlayer of varnish. Using an abrasive it is quite possible to get rid of old stains, scratches and abrasions. This type of polish is used exclusively in extreme cases when other means fail to cope with the task. Even service center specialists do not risk using abrasives to polish the body again, so it is especially not worth doing it yourself - you can seriously damage the body. But with the headlights, if they are in a completely unsatisfactory condition, you can try it yourself. The abrasive polish is applied with smooth, calm circular movements using a soft cloth. Be prepared for the fact that the procedure will be quite lengthy, because everything needs to be done extremely carefully so as not to damage the surface even more. You may find it more convenient and easier if you remove the headlights. This is not the most interesting or fun activity, but it is better to be patient a little than to buy new headlights. At the end, do not forget to rinse the cleaned headlights with water.
Summary
Restoration of the transparency of car front lights is carried out in order to improve their light transmission capacity, and therefore, traffic safety at night. At the same time, the appearance of the car is restored.
The polishing process is a rather painstaking job that requires patience and accuracy. If the car owner decides to restore the lenses himself, then it is important to immediately determine the extent of the damage. Correct assessment allows you to make the right decision on the choice of consumables.
Why do headlights get worse over time?
Like any part of a car, optical instruments are subject to wear and tear. This is expressed in tarnishing of glass or plastic. In this case, it is more difficult for light to penetrate through the dim coating, and its refraction changes. What leads to this?
Many people believe that regular car washing is insurance against cloudy headlights, but it's not entirely about cleanliness.
There is a similar article on this topic - Polishing the windshield from scratches.
While driving, small and not so small particles hit the surface of the headlight. As a result of impacts, small damage occurs, which becomes noticeable over time.
They cannot be removed by regular washing with water or chemicals. The only way out of the situation is to buy new headlights or polish them. The second option is much more economical, while improving the performance of optical instruments by at least 40%.