American films have made an excellent advertisement for All Saints' Day, inherited by Catholics from the ancient Celts. Russia has embraced the trappings of Halloween, including costume parties and pumpkin decorations.
In fact, the vegetable has never been directly related to the holiday; it is simply very convenient for decoration with carvings and painting. Let's figure out how to dry a whole pumpkin for Halloween so that the lanterns and souvenirs you make will bring you joy for several years.
Preparing the vegetable
How to dry a pumpkin for decoration? But in order to use this undoubtedly creative vegetable to create interior items and interesting design solutions, you need to properly prepare the pumpkin.
The most important step for this is drying. It is this that makes the pumpkin so tough that it can serve its owners as a craft for many years.
In our article we will tell you in detail about how the drying process itself occurs. How to prepare pumpkin for drying? It is very important to properly prepare the pumpkin for the drying process, and we are not talking about preliminary work before the process itself.
You can learn how and when to remove pumpkins from the garden in our other article.
You need to be very careful when choosing the pumpkin itself - after all, this is the key to proper drying. Not every pumpkin variety is suitable for making crafts from.
In special greenhouses, hundreds of decorative pumpkins , which are exactly suitable for the creations of masters.
Study information about varieties of decorative pumpkins and select them by appearance. As a rule, such a pumpkin has a more rounded shape and more pronounced bulges. The color of this pumpkin is even and brown.
Also, in addition to the fact that the pumpkin must be of a special variety, it must be completely healthy in order to adequately endure the drying process. First of all, such a pumpkin should be of a uniform color, without obvious signs of rotting or mold .
Also, the pumpkin must have a stalk . Unfortunately, drying is impossible without it. From the hole where the stalk connects to the vegetable during drying, juice may leak out and the whole process will be done down the drain. You should also evaluate the pumpkin by touch. It should not be soft, but rather more hard .
There should be no damage . Also, do not take a pumpkin that is too large to dry at home. Most likely, such drying will be doomed to failure.
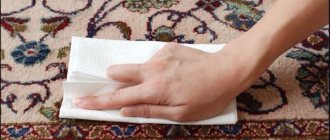
The next step in preparing the pumpkin is your own, but at home. At home, you must carefully prepare the pumpkin for the drying process. To do this, clean the pumpkin from visible dirt by gently wiping it with a cloth. Now put the pumpkin in the shower and rinse it on several sides with slightly warm water. Do not apply too much pressure as this may damage the skin of the vegetable.
After the pumpkin is washed, pat it thoroughly with a towel, removing any wet drops. Leave the pumpkin for an hour in a dark and dry room , and then blot it again with a towel and dry it for another hour. When you feel that the top surface of the vegetable is completely dry , you can proceed to the next stage.
How to dry a pumpkin for crafts? You can dry the pumpkin either whole or in parts. Depending on what purpose you are pursuing from drying, decide on the type of pumpkin. If you want to cut a vegetable, cut the pumpkin into arbitrary pieces, after removing the seeds.
How to dry pumpkin for crafts in the oven
Depending on the form in which the melon is needed - pieces or whole, we will cut it or not, but for now we will get down to preparation.
Choosing pumpkins for crafts
In this case, we will focus not on the taste of the pulp, but on the exterior and size. Since we don’t have to make a carriage out of it, at least not life-size, we select the smallest pumpkins. They will dry faster than their larger counterparts, and the likelihood of mold and mildew appearing in them will be minimized.
In addition, there must be a stalk - this will prevent cracking during the drying process.
But from large-sized pumpkins, you can cut slices of peel - they are also used for crafts.
Pre-washing and drying pumpkin
When we have decided on a suitable melon, we carefully wash the fruit and then wipe it. We leave it to dry for half an hour to forty minutes at a natural temperature, and then wipe it again with a dry cloth to make sure that there is no moisture left at all.
Drying in the oven
Place the pumpkin in a cold (!) oven, cover the rack with baking paper, and set the temperature to 80°C. Every half hour, after the stove has warmed up, we begin to turn the fruit from one side to the other for a more even distribution of heat.
We keep the pumpkin, depending on its size and the thickness of the peel, from 3 to 6 hours. Let the finished product cool completely under normal conditions. When tapping, the sound should be ringing - the resulting emptiness should be felt inside.
But if we need to dry the pumpkin in slices, we do it as follows.
How to dry pumpkin in slices in the oven
We wash the melons, wipe them, and then cut them into pieces. We cut off the seeds, and if the pulp is thin, leave it on the peel. If the layer is very thick, cut it to a thickness of 3 cm.
Wash, pat dry with a paper towel and place on a baking sheet lined with baking paper. Place in a cold oven, including preheating to 75°C. We check readiness every hour. We keep the pumpkin for at least 4-5 hours so that the peels dry completely.
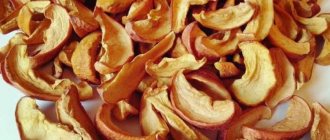
We cool the finished slices and use them to make all kinds of crafts and decorative elements.
Now you know how to dry pumpkin in the oven for a variety of purposes. Try making delicious candied fruits from it, wither it without sugar or dry it for crafts - the result will please you in any case.
Tools and devices
How to dry pumpkin? You can dry pumpkin using different means.
Depending on how you want to see the vegetable in the end, you can resort to various technical devices .
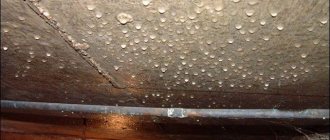
Many people dry pumpkin in the room , but few people know that this is a big risk .
During this time, the pumpkin may become moldy or begin to deteriorate. Therefore, it is better to leave the natural drying process and use new technologies.
Drying can be done either in the oven, in a convection oven, in an electric dryer or in a microwave oven. There are a lot of options - the main thing is to strictly follow the drying rules and then the desired result will not take long to arrive.
At what temperature should you dry pumpkin? Drying pumpkin can be done at different temperatures depending on the technique used in the process. So, pumpkin drying can occur at a temperature of 80 degrees in the oven .
The pumpkin should be in the center of the oven. You need to periodically turn the vegetable clockwise.
In an air fryer, the temperature of the pumpkin will be already 70 degrees. Drying in an electric dryer involves a temperature of as much as 80 degrees. The microwave oven accommodates a small percentage of the pumpkin, but it is dried at 600 watts.
The drying process in any of the above devices requires that the pumpkin be turned from side to side during the process to prevent the pumpkin from burning on one side.
Home decoration
Not everyone knows how to prepare for Halloween at home. Based on the recommendations in this article, it won’t take that much time. You can decorate your home like this:
Prepare in advance after any holiday champagne bottles and ordinary cylindrical candles. The main thing is that they fit freely into the neck. We insert one into each bottle and set it on fire. While the candle flame is burning and wax is dripping onto the bottle, such a festive interior item as Gothic candles will be made.- In addition to candles, you need to hang spiders and cobwebs throughout the house. To do this, you need to buy toy spiders in the store and stick them on doors or other pieces of furniture using tape. The web, of course, is not for sale, so we’ll make it ourselves using regular black sewing thread. You can also hang bats made from colored paper if you wish.
- To completely intimidate guests coming to the party, we recommend scattering towels with bloody prints throughout the apartment. Take old towels and, applying red gouache to your hand, make prints on them. To enhance the horror effect, make a few bloody marks using a regular brush.
- And finally: not a single holiday of evil spirits would be complete without the main decoration - a pumpkin head. The so-called Jack lamp must be present in the interior decoration of the room. And it’s best if there are several of them.
Storage
We have already talked about how to store pumpkin at home and how to store it in the cellar for consumption in our articles.
How to preserve a decorative pumpkin? If you want to use pumpkin not for the purpose of eating it, but for decorating the room, then you need to know a few very important rules.
Firstly, do not leave the pumpkin in a damp and humid room and, if possible, reduce contact with moisture to zero .
The pumpkin must be kept in a place where the temperature does not exceed 30 degrees and does not fall below ten.
How to store pumpkin crafts? It is necessary to cover them on top with some kind of coating in order to prevent spoilage of the vegetable.
For example, it could be a colorless furniture varnish or nail polish . In any case, careful protection of the vegetable from all kinds of cracking and moisture is necessary.
How to store decorative pumpkin? Pumpkin must be stored in a dark and dry place . You cannot keep dried vegetables outside in both cold and warm seasons. Also, do not forget that such vegetables react very sensitively to temperature changes , so do not allow this to happen.
Excess moisture promotes mold or rot . by rodents or insects is also common . Take a closer look at this phenomenon.
What can be made from a decorative pumpkin?
The beautiful bright orange fruits open up endless possibilities for creative people.
Many original things are made from pumpkins:
- birdhouses;
- yard decor items;
- caskets;
- pepper shakers and salt shakers;
- funny toys;
- crafts such as carriages, gnomes and so on.
Carved pumpkin decorations look especially interesting. Thanks to carving, the fruit can be turned into an antique vase, lantern and other object. For such unusual crafts, you need a sharp knife and markers. The dense surface of the pumpkins is easy to cut. Brightness is added using colorful markers.
Pumpkin can be painted with acrylic. If you take white color, the product will fit into the wedding decor. Show your imagination, and an unusual pumpkin product will decorate your home or garden.
Instructions
Dried pumpkin: how to use? If you want to dry a pumpkin that you will use as a craft, you need to do your research carefully. How to properly dry a pumpkin for crafts?
Firstly, process the vegetable exactly as we wrote in the first paragraph. Then try to rinse the pumpkin under warm water, getting rid of any surface changes. Do not injure the pumpkin or cut anything off it.
After drying the pumpkin with a towel, leave it in a well-ventilated place for a day. These actions are the beginning of the drying process itself.
The pumpkin should be loaded into the oven itself at a time when the oven has not yet warmed up . The tray with the pumpkin must be dry. Remember that the pieces must be stirred constantly. If we are talking about a whole pumpkin, then turn it over.
Entirely
How to dry a whole decorative pumpkin for crafts?
There are only two ways - using various devices for this, or by simply waiting.
Let's talk about the first method. Pumpkin has been dried in the oven for a very long time, but drying a whole pumpkin is a very difficult task .
In order for the fruit to dry well and reach its proper condition, choose not too large specimens. Also, do not forget that such a pumpkin should be prepared in advance.
Now let's do the oven. Heat the oven to a temperature of approximately sixty degrees . Place special baking paper on a baking sheet and place the pumpkin. Turn the pumpkin over periodically, allowing each side to dry. Drying can take from two to eight hours depending on the size of the vegetable.
If your oven is not designed to accommodate such a large fruit, you can do it differently. After preparing the pumpkin, leave it in a dry and dark place . Check your pumpkin periodically to spot signs of rotting .
This is usually caused by high humidity or insects. As a rule, at home, without exposure to heat, pumpkin is dried for about three months .
For Halloween
How to save a pumpkin for Halloween? If you are cooking pumpkin for Halloween, you should remember that the pumpkin should start drying several months before the holiday.
You should also remember that to make a holiday pumpkin you need to select decorative varieties of pumpkin, but not hard ones , because otherwise you will not be able to cut anything from such a fruit.
How to dry a pumpkin for Halloween? Halloween pumpkins should not be dried out too much. The inside of the pulp should remain slightly moist . Therefore, it is recommended to prepare the vegetable not just three, but two or one and a half months in advance.
Bottle shop
How to dry bottle gourd? Bottle gourds are much smaller than regular and decorative ones, which means they dry much faster . To dry such a pumpkin, you need to place it in the oven for a couple of hours at a temperature of 40 degrees or leave it for a couple of months in a dry, dark room.
Quick ways
How to quickly dry a pumpkin for crafts? If you want to quickly dry the pumpkin, use a regular home hair dryer .
If your vegetable is small, a couple of hours to dry its crust with warm air.
Remember that you need to be careful . From sudden overheating, the crust may well crack.
Drying pumpkin is not such a difficult task, so don’t be afraid to do it at home . You are sure that the methods we have listed will be useful to you in the future for creating incredible crafts and things.
Adviсe
To get an excellent result the first time, you should follow some recommendations:
- Do not use large specimens grown for food for creativity.
- The pulp of the “cucurbita” variety dries 2 times faster than the pulp of “lagenaria”.
- The lower the room temperature, the longer it will take to dry.
- If the peel peels off, it is sanded with sandpaper.
- When preparing the vegetable for Halloween, keep the flesh slightly moist. Therefore, vegetables begin to be prepared 1.5 months before the party.
Varieties of decor
Pumpkin is a great option for decoration. Let's consider options for decorating your garden and home using this fruit.
For garden decoration
In the garden this fruit will look quite organic. Let's look at how to use pumpkins to decorate your garden:
- Even in a dried state, it will look aesthetically pleasing, for example, on shelves, stands or flower beds; a border along paths made of many pumpkins will look impressive.
- From pumpkin fruits you can create a house for various birds - a birdhouse. To do this, you need to cut off the top of the whole product and install a roof in its place. Cut a large hole on the side - an entrance for birds. Use sandpaper to remove burrs from all cuts; cover it with a layer of primer for protection, and for beauty, paint it with any bright paint; moreover, you can diversify it with various patterns or designs. Then you need to attach a hook that will secure the original birdhouse to the tree.
- Magic pumpkin carriage. Of course, it will be much more difficult to make than in the fairy tale “Cinderella,” but it will become a gorgeous decoration for the garden. For the carriage you need to take a wide, whole pumpkin. You can just draw windows and doors or cut them out by hand. For the wheels, four small pumpkins are used or they are made of wood or wire.
- You can create a welcome pumpkin by simply writing or cutting out the words “welcome” and welcome.
- If you put several pumpkin fruits in a row and paint them, you will get a good caterpillar. In addition, you can also house other insects, birds or animals in your home in a similar way. You can even create your own fantasy animal.
The choice of decoration for the garden depends on the preference of the owner.