Flowers are one of the most favorite motifs for decoration. They can be found everywhere - on transparent blouses, jeans, phone cases, light skirts and nylon tights, and the list goes on. In many of these images they look just like the real thing. Naturally, flowers are one of the best gifts. Especially fresh ones. But they eventually wither and end up in the trash. However, there is a way to keep them fresh for a long time and make an original gift or decoration for the room.
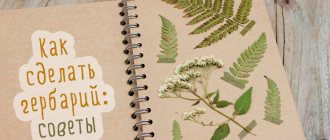
How to make a herbarium with your own hands for school: application of autumn leaves
To make a herbarium for school, you need to use your imagination and think about what kind of picture or craft you want to depict. The easiest way is to collect the leaves of trees, which acquire a variety of colors in the fall, dry them, and then arrange them on the leaf in the form of an interesting composition and glue them with glue.
From the leaves you can easily form various animals, figures and other elements.
Thus, you can make all kinds of applications.
What is a herbarium and what does it look like?
The word "herbarium" is of Latin origin and means "grass". The modern world has two different interpretations and designations for herbarium:
- A way to preserve (in order to subsequently view and present for others to view) the natural beauty of living plants outside their seasonal development period and the distribution area of each individual species. The traditional way to create herbariums is the usual drying of plucked plants, collected leaves or flowers.
- According to the second definition (more scientific), the word “herbarium” is a special center (house) where you can view entire collections of unique (possibly even disappeared from our land) representatives of the flora. Here are presented plant compositions from different parts of the globe. Each species is stored in special temperature and climatic conditions, strictly under glass and is available only for contemplation (touching with hands is prohibited!).
Compositions from dried plants, previously popular only among botanists, can now decorate almost every home or apartment.
Very often, collections of plant herbariums collected at various latitudes of the planet Earth are supplemented with an entomological collection of insects living in a given area. These dried sets are also called insect herbariums.
They are used to make paintings, bouquets, albums, and even postcards.
The purpose of the herbarium is that thanks to a special method of drying plants + insects and storing these exhibits, a person gets a unique opportunity to contemplate in its natural form and at any time the entire richness of the natural world. Such collections are especially valuable in order to get a real picture of already extinct plants.
To create such beauty, you must not only have a sense of taste and imagination, but also perseverance.
How to make a herbarium from flowers, how to dry flowers for a herbarium
Immediately after collecting flowers, you need to start preparing for the drying process. Lay it out on paper, straightening each petal.
Drying should take place under pressure. If there is no special herbarium, you can use books. It is important to lay paper on both sides of the plant; if the flowers are large, there should be several sheets. The paper should be changed every day. The entire drying process takes from 7 to 14 days.
Preliminary preparation for creating a herbarium
It is not an exaggeration to say that the preparatory part for creating a herbarium is the main and more important than the direct creation of decorative items, crafts, etc. The entire process of preparing plants can be divided into several stages, each of which has its own rules and features . We will analyze each of these stages in detail below, so that after reading, you can handle all the steps yourself and ultimately get the result you dreamed of.
Sample collection
The first step is to collect the plants that you want to see in your herbarium. You should start from the purpose for which you are creating it. Before you start collecting, you need to think carefully and decide on the answer to this question.
Advice! If you want to create a herbarium for the first time and don’t yet know what you want, you can simply go collecting plants, choosing the specimens that you like best. Perhaps during the preparation process you will come up with some idea that you want to implement.
What plants are suitable for herbariums and rules for choosing them
Any plants are suitable for creating herbariums. You can use herbs, rowan berries, bird cherry and other fruit plants that can be dried, tree leaves, flowers, tree bark, cones, if you are creating a three-dimensional composition, etc.
If the choice of plants is very wide and is not limited by any boundaries, then the situation is different with how exactly these plants should be selected. There are a number of rules that must be followed when collecting, if in the end you want to get what you had in mind:
- It is worth going to collect plants only during the day, in warm weather, without precipitation. If it has recently rained, you will have to wait 3–5 hours until the sun thoroughly dries the plants and soil.
- Before you dig up your plant, carefully check each leaf for damage from insects, weather conditions, and other factors. The plant must be completely healthy!
- If the plant implies the presence of flowers or fruits, the best option would be to look for ripe specimens.
- The farther the plant collection site is from roads and industrial areas, the better.
- It is better to collect several samples of the same plant so that later you can choose the best option. And it’s impossible to foresee everything, some of the samples can be accidentally spoiled or some shortcomings may not be noticed on them, it is better to immediately insure yourself against such disappointments.
Rules for collecting plants
Plants are collected in a certain way, never just picked. There are certain rules for all types of plants. In order to carry out the entire procedure according to the rules, you need to take the following with you to the training camp:
- small spatula,
- sharp knife,
- scissors,
- paper for drying (parchment or regular newspaper will do),
- a notepad and pen to write down the name of the plant, place, date and time of collection,
- labels for writing numbers (you can write numbers directly on the paper in which you wrap the collected plants).
Once you have found the desired plant specimen and fully tested it for suitability, properly separate it from nature. If you are making a morphological herbarium, then you will need to carefully dig up the plant right from the roots, after thoroughly shaking off excess soil and insects. If you have other goals, then you still shouldn’t just pick the sample; depending on the thickness of the stem, cut it with scissors or a knife. So, the remaining stem will recover faster, and your part will be fresher, with minimal damage, which will allow you to get higher quality material after drying. But leaves from trees can simply be carefully torn off where they grow to the branch.
With bark and berries, things are somewhat more complicated; in order not to harm the tree, you need to cut off the required twig or bark at an angle, and smear the “wound” with a special product - var. This is a special garden putty that will close the wound from harmful microbes, infections and insects and will prevent the tree from getting sick.
When I was little, there was a huge apple tree in our garden, part of which was already extending onto the roof of the house; it just needed to be sawed off. My dad and I went on a “mission.” When the huge branch lay on the ground, the tree began to seem so small and offended. I immediately remembered what old stumps from cut down trees look like - rotten old ruins that no one took care of. I told my dad about my experiences and he showed me what the relationship between man and nature should be: he took care of the tree, smearing the “wound” with a special ointment, which I wrote about above. This tree bloomed under the window of our house for a very long time and bore fruit, only when I had already grown up and left, my dad had to completely cut down the tree, as its roots began to grow so much that they could harm neighboring buildings.
If you take something from nature, be sure to give at least your care in return so as not to cause harm or serious damage!
Note! Before you go collecting plants and taking samples, be sure to ask if in the area you have your eye on for collecting, there are restrictions on any plants due to the status of rare and protected!
Drying
There are several ways to dry plants for herbariums. Some are fast, some allow you to get a better result, some allow you to dry the plant not in a flat state, but in a voluminous state, etc. Each of these methods has its own advantages and disadvantages, which we will discuss in more detail below.
Note! Before drying any plant, no matter what drying method you choose for yourself, you first need to give the sample the desired shape: straighten all the leaves and petals; if it is a flower, then you can either show it closed, or, conversely, turn its petals out like this so that after drying it appears before you in all its glory, if the plant has a lot of twigs or petals, you must straighten and arrange them on the drying surface the way you need, etc. How you lay out the plant before drying is exactly the same will look like after!
Natural drying
Drying plants naturally does not imply the use of any special devices. The samples dry on their own, staying where you place them, and you can completely forget about them. You can dry plants in this way both flat and volumetric. There is no doubt that they will dry, but you cannot avoid the disadvantages of this method. Plants dried in this way will deteriorate very quickly and will most likely lose their natural color. Samples dried in this way cannot be used for any types of crafts, since they simply may not withstand the “load” and will not meet your expectations, and such samples and products made from them will not differ in durability.
Drying plants without using any drying devices can take from several days to two to three weeks, depending on the juiciness and volume of the raw materials.
Important! No matter how you dry the plant, after it is completely dry, you should only remove it from the drying surface very carefully using tweezers. Any dry plants are very, very fragile! It is better to be overly cautious than to undo such a long and difficult period of preparation in one move.
Flat drying of plant samples under pressure
This drying method is basic in the technique of making herbariums. It is more reliable and, provided that all the rules of this method are followed, the plant will look as attractive as possible and will last for many years.
There are two types of press:
- Books. A simpler and more affordable option, especially for the amateur. Each sample must be spread out as you need on the page of an unnecessary book or on paper (parchment, newspaper, etc.), then cover it with another layer of paper on top, you will get a so-called “shirt”, insert a label with the name, date, location of the collected plant and other important information for you, and put it all very carefully under the press between the books. The main thing is that the sample does not move or get damaged in any way when you place it under the press.
- Special herbarium press. This more complex structure is designed specifically for drying plants for the herbarium. It consists of two flat boards of the same size, along the edges of which there are holes for ropes for fastening the boards. Fully prepared samples in “shirts” are carefully placed between the boards and fasten both sides together, tightly clamping the plants. Up to 50 samples can be placed in one such structure made from standard-sized boards! For better and faster drying, such a press can be taken outside in the sun during the day, and brought indoors again in the evening and until the next morning.
Note! Whatever drying method you use, you need to change the shirt for each sample once a day! For particularly juicy samples, changing 2-3 times may be necessary. This is the only way you will be able to dry the raw materials efficiently. The plant needs a “shirt” to absorb all the moisture it releases. If you do not change it to dry in time, this will immediately affect the color and shape of the sample, and its shelf life will also be significantly reduced.
Volumetric drying in bulk solids
Volumetric drying is the preservation of samples in their original form. Such plants are suitable for creating bouquets, three-dimensional panels and paintings, wreaths, etc.
In order to carry out such drying you will need the following materials:
- Bulk material for drying - silica gel (can be collected from small bags placed in bags and boxes with shoes or bought at a specialty store) / sand. If you can't find any of these materials, you can try silica gel-based cat litter in the dryer.
- Drying container.
- Raw materials.
A step-by-step guide to bulk drying of plants using bulk substances:
- Take a drying container; its size should be selected based on the volume of each sample and their quantity.
- Place the samples in the container with the tops of the plants facing down.
- Now very carefully fill the raw materials with bulk substance. This is the most difficult action; it is very important not to damage fragile plants. The substance should be prepared in such a quantity that it is possible to fill the samples completely; it is necessary that all parts of the plant are covered. It is better to have a surplus than to have a shortage.
When the plants are dry (2-3 weeks), you need to carefully remove them from the container with the filler and send them for storage or make your intended. The bulk substance that was used for drying cannot be reused, since it has already absorbed all the liquid from the raw material and is no longer suitable.
Drying raw materials with glycerin
By drying the raw material with glycerin, you can maintain the elasticity of plant parts. At the same time, the natural colors of the samples after this treatment will become darker and more saturated.
Necessary materials:
- glycerin (can be bought at a pharmacy),
- water,
- container (a glass or a small vase, 6–10 cm high) is suitable,
- raw materials,
- sharp knife.
Step by step guide to the procedure:
- For the solution, mix water and glycerin in a ratio of 3:1 (water:glycerin), pour the mixture into the prepared container.
- Take the plant to dry and make a cut along its stem, about 5 cm.
- Place the plant in a container with the solution. It is necessary that the entire length of the stem with the cut be in the liquid.
- Leave the plant in the solution for several days.
You can remove the finished sample when the plant is completely saturated with the glycerin composition. This will be visible by the noticeably darkened color. Afterwards, simply leave the plant until final drying in a dark place, protected from dust.
Ideas! If you're not happy with the color of the resulting sample, you can carefully spray paint it to get the look you want.
If you are carrying out the procedure with a flower, then you can also add food coloring to the solution of water and glycerin. The plant will absorb it along with the composition and its petals will turn the color you want.
Note! Keep in mind that as the plant is soaked over several days, the solution will gradually evaporate. In this case, simply make some fresh mixture and pour it into the container.
Quick ways to dry plants using various household appliances
There are several ways to quickly dry plants using household appliances. Unfortunately, none of them will dry the raw materials as efficiently and safely as classical methods, so you should resort to such types of drying only in very emergency situations.
Quick drying can be done at home using the following household appliances:
- Iron. Before heating the device and using it, be sure to completely drain the water; the use of any moisture, neither water nor steam, is unacceptable! After this, heat the iron to medium power and start drying: hold the iron on the sample for 15 seconds, then remove it and let it cool, also for 15 seconds. You need to repeat this circle of actions as many times as possible until the plant is completely dry. You can easily check this by slightly opening the “shirt” during one of the cooling periods.
- Oven or microwave. This is a very simple method if you know the features of your own technology. By placing the sample in the microwave at maximum power, you can dry it completely in just 1.5–3 minutes. And in the oven at medium power, it will take 10–15 minutes to dry completely. The most important thing is to make sure that the plant does not burn!
- Hair dryer. The most unsafe of these types of drying. You can, of course, use this method if you have no other option, but due to the air flow the plant will be overly fragile and overly susceptible to destruction. If you still use this method, you need to perform the procedure similar to the method with an iron: 15 seconds - heat exposure, 15 seconds - cooling. Repeat the required number of circles until completely dry.
Important! Any type of quick drying should only be done after first placing a plant sample in a “shirt”! Otherwise, you can irreversibly damage the sample, and in some cases even damage the equipment.
Features of drying some types of plants
Some plants do not fit into the general drying system for herbariums, so there are slightly different methods for them:
- Mosses and lichens. Such samples should be placed in a cardboard box and dried in the open air. Accordingly, in dry, warm weather.
- Tree bark, cones. Such raw materials can be dried in any warm place: on a stove or radiator, in sunny weather, etc. After drying, such samples can be coated with any paint or varnish.
- Flowers in blue shades. When dried, flowers of similar tones often lose their brightness. To prevent this from happening, place samples in denatured alcohol for 30 seconds before drying.
- Dandelions. To make a herbarium from this plant, attention should be paid already during collection. Take only those samples whose umbrella box has only slightly opened. Before drying, thread a thin wire through the stem and dip the flower head in boiling water for 10 seconds. After this, very carefully form the required shape and dry the sample.
If you want to increase the density of any of the dried plants, let the desired samples lie in a 4:1 solution of PVA glue and water (PVA:water).
Table: advantages and disadvantages of various drying methods
| Drying methods: | Advantages: | Flaws: |
| Natural. |
|
|
| Flat drying under a press from books. |
|
|
| Flat drying using a special device made from boards. |
|
|
| Volumetric drying in bulk substances. |
|
|
| Drying with glycerin. |
|
|
| Quick iron drying. |
|
|
| Quick drying in oven or microwave. |
|
|
| Quick blow dry. |
|
|
Video: how to properly prepare dried flowers and dry the herbarium
Paintings from dried flowers: interesting ideas for herbarium
You can make paintings from flowers, first paint the canvas, and then come up with a composition.
Suitable plants
- Herbarium leaves must be healthy and undamaged by insects.
- Carefully dig them out along with the roots; free the rhizome from the ground.
- You can make a high-quality and durable herbarium from leaves only if you collect them during the day in warm sunny weather.
- The sample must have blooming flowers, preferably fruits too.
- Don't limit yourself to just one sample. It is advisable to collect in reserve so that you can choose the best option for making an herbalist.
Necessary tools and materials for collecting material to make a herbarium of flowers: a spatula, a knife, an excursion folder (they can be made from two sheets of plywood/cardboard), newspaper “shirts” for drying, a label and a pen.
What to note on the label: name of the plant, name of the area and its designation (forest, field), date, who collected it (if there was a group trip, and if you collected it yourself or with your children, you don’t have to make such a note).
How to make a herbarium from leaves: application of autumn leaves:
A wide variety of compositions are made from leaves; for example, armed with scissors, you can create interesting applications, as in the photo below.
The leaves are cut out before drying, the desired configuration is assembled and fixed on the sheet, then placed under the press. After drying, the figures are carefully glued to paper with ordinary glue.
It’s not at all difficult to make a beautiful wreath from autumn leaves.
To do this you will need the following materials:
- dense wire;
- scissors;
- wire cutters;
- film;
- the plants themselves;
- threads
A frame with a hanging loop is made from wire. Next, the leaves are distributed in bunches and attached to the frame, cut into pieces, with film. The wreath can be decorated with any decor. Drying takes place under natural conditions.
Drying
Take a brick and place a piece of cloth on it. Now place flowers on it.
Lost weight: what Sofia Tarasova sacrificed for the sake of “VIA Gra” (new photos)
If there is little snow, there will be no harvest: December 16 is Ivan the Silent Day
It’s good to wash often: myths about shampoo and hair care that only harm
Cover the top with a second piece of fabric and place a second brick.
The result was a structure that looked like a sandwich. Now all that's left to do is put it in the microwave.
One important tip: don't try to push down on the bricks when you put the flowers between them, otherwise they will just break. Applying additional pressure will not help them smooth out, but will only damage them. Don't worry about them squashing. They will do it on their own. The heat will cause the water to evaporate and the weight of the brick will flatten them.
A student at the Vietnam Police Academy shared how she takes care of her facial skin.
Women's jeans: before you buy them, you need to pay attention to one detail
The money tree pleases with lush flowering: my secret is in caring for the leaves
DIY herbarium album
It is convenient to use a folder with files for the herbarium.
If you don't want to buy a special album for some reason, making your own is quite simple. Thick album sheets on which plants are attached using tape or glue are suitable for this. The sheets are fastened together in any convenient way, for example, using rings.
Thick cardboard can serve as a cover for the album; sheets of whatman paper and tracing paper should be placed between it, and holes should be made with a hole punch.
Place an inscription under the plant indicating its name, date and place of collection.
The cover is designed at your discretion.
How to use dried samples
After the most difficult stages of preparing the herbarium have been completed, you can begin to create original interior decorations and make beautiful crafts. Rare specimens can be added to the collection or put aside for storage until the right moment. There are many interesting ideas for using dried plants for practical and aesthetic benefits.
Creating an Album
A special album for samples can be used as a place to store them or to display collection vegetation. You can purchase a ready-made special-purpose product in a store or make it yourself. Absolutely any design - with the ability to group by color, type, size. Plants can be firmly attached or temporarily fixed.
A good herbarium album can only be made of paper. Natural materials will be better preserved if they come into contact only with tracing paper and cardboard. There can be one instance or a group on one page. If a herbarium is being created for future use, specimens can be placed in transparent files and collected in a binder.
Creation of paintings and panels
Flat wall or floor decor is one of the simplest interior decorations. A panel of dried herbs or flowers can be of any size, represent a rare single specimen or various compositions. Small paintings of yellow leaves are made in schools with the onset of autumn.
To create a flat craft, you will need a wooden photo frame, a sheet of paper, two identical A4-sized glasses and strong adhesive. We cover one glass with a white sheet and arrange the plants on it according to the planned pattern. It is easier to lay out from the middle of the sheet, gradually moving towards the edges. We cover the plants with a second glass and place them in a frame, having previously coated the edges with glue.
Postcard design
A handmade postcard made from natural materials will be the best gift. You can use voluminous flowers or flat leaves as decoration. We select a suitable size and color of cardboard and place the dried blanks on it. They must be secured with glue. To prevent the leaves from falling and becoming deformed, we cover them with self-adhesive film for books. The top layer of the card should be pressed and ironed well with the handle of scissors, getting rid of voids. We cut off the excess film around the edges.
A gift card does not have to have standard sizes. As a base, you can use a regular sheet of paper or a thin strip of bookmark. You can design it in landscape or book form, with the addition of a drawing.
Making decorative wreaths
Original interior decoration does not have to be timed to coincide with a specific holiday. This beautiful craft can be hung on a door or wall at any time. Herbarium collected in summer and autumn is used as the main parts. Properly dried samples can be attached to the ring at any time of the year.
To create an autumn wreath from dry material, you will need to stock up on a large number of bright flowers and leaves. For the frame you will need wire, thread, and cling film. Bows, beads, butterflies and other small items are suitable as additional decor. You can make a natural wreath quickly and correctly if you follow the following instructions:
- Preparing the foundation. We twist the wire into a ring several times. At this stage, it is necessary to provide a loop for hanging the finished product.
- We divide the herbariums into bouquets and attach them to the frame.
- Cut a 5 cm roll from a roll of cling film.
- We wrap dry plants one by one with film to the base, trying to add volume to the product.
If the dry preparations have lost color during storage or there simply are not enough of the necessary types for the craft, the finished wreath can be coated with paint of any color from a spray bottle.
Compositions: rules for composing from dried flowers
Plants that have an attractive appearance after drying are intentionally grown by many summer residents. They can remain on the site all winter for decorative purposes or can be picked green and dried to create stunning 3D arrangements. More often they plant lunaria, immortelle, heathers, haretail and others.
To create a composition of dried flowers you will need a low and wide pot. The container does not have to have holes at the bottom; it serves a purely decorative function. To make the plants last longer and not crumble, place a floral sponge at the bottom of the vase. Using scissors, we give the foam flora the required shape and insert plant stems into it. The design of the composition must follow the following rules:
- The largest elements should be placed first according to the plan. It's better to place them in the center.
- We distribute dried flowers of the original shape, color, or the smallest quantity, evenly.
- Insert vertical elements. The best place for spike-shaped plants is next to the most inexpressive flowers.
- Along the edges of the composition we place bushy branches, for example, heather.
- The remaining voids should be decorated with low, small plants.
DIY framed herbarium
Framing your herbarium couldn't be easier. To do this you will need a thick sheet of paper, glue and scissors.
If desired, a drawing is applied to the sheet, after which plant specimens are glued and placed in a frame.
What you need
To make a wall decoration you will need:
- frames with glass (take any size you like; you need to take two identical ones, since the picture will need two pieces of glass);
- refractory bricks (2 pcs.);
- cotton fabric or paper towels (under no circumstances should you use synthetic fabric, as it may melt);
- flowers (they can be collected from the yard, park or field; even weeds will do);
- hot glue.
Now that everything is ready, you can get to work.
DIY herbarium in glass
Using glass for a herbarium is an original and interesting solution. The easiest option is to buy ready-made glass frames that can be hung or placed on any surface. Special glass for the herbarium has a convenient lock; you just need to place the plant elements and close it.
Let's look at how to prepare plants and secure them between two glasses.
Prepare specimens of plants in accordance with the picture you have in mind. If you insert flowers into glass, the stems need to be cut as short as possible and the leaves removed so that the flower is well compressed.
To create a brighter picture and please the eye, add flowers of different colors.
Place all the elements on a paper towel; the flowers should not touch each other. Next, place under a press and leave for a week. The moisture must leave the flowers, this is important.
Once drying is complete, place the flowers on the glass.
Use glue or a hot glue gun to hold them in place.
Then cover the flowers on top with another piece of glass.
Frame it.
The herbarium under glass fits well into the interior.
How to make a herbarium under glass yourself, see the video below.
How to dry collected plants
Why a thick book is considered the best way to dry plants for a herbarium is not difficult to understand.
Firstly, between the sheets of the book the temperature is almost optimal for high-quality drying of plant elements (leaves, flowers, roots).
This variety is suitable for those people who create voluminous compositions.
Secondly, the plant placed in the book will never be exposed to sunlight.
ATTENTION! If sunlight falls on it while drying a plant at home, the color of the leaves, stem and flower changes dramatically. It simply fades in the sun, turns yellow-brown, and the shape of the plant shrinks, as if it came out of an oven! It is clear that albums or paintings cannot be made from such burnt plants.
You can use leaves from trees, flowers of different sizes, berries, and even moss or tree bark.
It takes at least 2-3 weeks to properly dry the herbarium so that the internal moisture from the leaves and stem is absorbed into the book sheets, keeping the color, shape and even the aroma of the plant unchanged. Depending on the juiciness of the selected plant, more time may be needed.
The herbarium should only be collected in sunny weather; if it has recently rained, you need to wait at least 2-3 hours.
For example, fallen leaves dry in a matter of days, because they have already lost most of their internal fluid. But a plant like a rose, which needs to be dried in a standing vertical position (in a vase) and in a dark, dry, cool place, will dry for the herbarium in more than a month.
Before harvesting, you need to carefully inspect the entire plant and make sure that there are no damage or insects that could damage it.
Photo gallery: ideas for creating herbariums
By creating a small composition of dried plants in a glass bowl, you can stylishly complement your interior and discover your creative abilities
The picture created from samples of flat and dry plants looks very beautiful and believable due to the gradually increasing volume of the composition
A great option to preserve memories for a long time is to include dried flowers in decorations.
One of the most beautiful and stylish types of herbariums are those framed in glass; they will highlight any interior without cluttering up the room.
Minimalism is in great demand today, both in the interior and in art and decorative elements. The picture shown in the photo is an excellent example of how attractive a picture with only one dried leaf can look.
A very creative idea for creating a world map from dried herbs and inflorescences; if you sign important objects, then such a flower map may well replace an ordinary one
If you follow all the rules for collecting and drying dandelions, you can create such a wonderful picture
We hope we were able to show all the beauty of herbariums. Over so many years of their existence, they have not simply ceased to be relevant, but they have gradually acquired more and more perfect and incredibly beautiful forms in art and creativity, decorating our lives. With a wise approach to the entire process, from collecting to storing and creating any products, you can quickly and easily learn a new activity and leave a piece of nature near you, as a reminder to us of the eternal and deep connection with it.