Lee cutters and kits for preparing cases for equipment
| LEE Chamfer and Deburring Tool for cleaning the case neck (90109) Price: 600 ₽ | LEE Primer Pocket Cleaner cutter for cleaning the capsule socket (90101) Price: 600 ₽ | Set of cutters Lee Case Condition Combo for trimming sleeves (90950) Price: 2100 ₽ |
| Lee Cutter with Lock Stud kit for trimming sleeves (90110) Price: 1200 RUR | Lee Large Cutter with Lock Stud kit for trimming sleeves (90401) Price: 1200 RUR | Lee Cutter with Ball Grip for trimming sleeves (90275) Price: 800 ₽ |
| Lee Zip Trim for trimming sleeves (90899) Price: 2000 RUR | Lee 3 Jaw Chuck universal cartridge case holder (90608) Price: 1900 ₽ | Adapter Lee 3 Jaw Spinner Stud for 3 Jaw Chuck (90607) Price: 900 ₽ |
| Lee Gauge/Holder kits for cutting cases to length Price: 700 ₽ / 600 ₽ |
* Mills and other devices for cutting cases to length are used in conjunction with Gage/Holder sets. Gage/Holder kits include a case length reference and a case holder.
Removing varnish
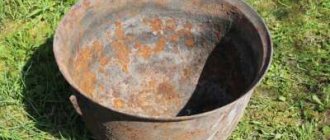
Many brass products have a varnish coating. It prevents the surface from oxidizing and maintains the excellent shine of the object. If this layer is damaged, the metal oxidizes and a new varnish is required. Removal of varnish protection can be done under hot water jet. This is the most gentle method of removing nail polish.
In addition, boiling for 3 minutes in a container without aluminum alloy is used. You can purchase special varnish removers from hardware stores. Before cleaning brass with these preparations, carefully read the instructions for use. After the final removal of the varnish layer, the surface is cleaned using one of the selected methods.
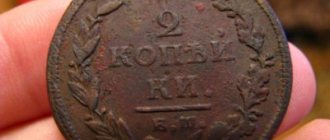
Cleaning things made of brass at home is not particularly difficult if you understand the essence of the process and follow the technology correctly. With this approach, beautiful brass products will have a magnificent appearance and will constantly please the eye.
Lee manual primers
| Manual primer LEE New Auto-Prime (90230) Price: 3500 ₽ | LEE Priming Tool Kit (90215) Price: 4500 RUR | Manual primer LEE Ergo-Prime (90250) Price: 5000 ₽ |
| Manual primer LEE Auto Bench Prime (90700) Price: 4200 ₽ | Lee shell holders for manual primers (without stem) Price: 500 ₽ |
* Manual primers are a convenient and quick way to prime cartridges without using a press. To secure the cartridge case in a manual primer, you must use a special shellholder without a leg.
Salt
Simple acetone can also restore the brass alloy to its original appearance. Acetone in its pure form or as part of a nail polish remover is suitable for cleaning. A cotton pad or soft sponge is generously moistened in the liquid and, applying force, wipe the stains on the product. You can use a similar method to clean copper objects.
How to Clean and Polish Brass
Before deoxidizing brass, make sure you really want to clean it. Just because the brass is tarnished is not a reason to start cleaning it. Sometimes there is a personal preference for dull brass. It creates an attractive accent that is often needed in decor.
Sometimes the simplest solution is really simple. First of all, you should try plain water and some soap.
Fill the sink with enough warm water to cover the item you are looking for. Add a small amount of mild dish soap (1-2 teaspoons). Leave the brass item in the water for a while. Wash the brass with a rag or a soft-bristled toothbrush if you need to get into hard-to-reach areas. Drain the sink, rinse the brass item, dry it, apply a special brass polish and make your brass shine!
With just a few ingredients, you can create a brass polish that is safe and provides the item with a pleasant lemon scent:
- Squeeze the juice of half a lemon into a plate.
- Add table salt to lemon juice until a paste forms.
- Use a clean, soft rag to apply the paste to the brass. Spread the paste in a circular motion, thoroughly rubbing it into the surface, but do not be fanatical.
- Rinse off any remaining paste with water and wipe immediately with a dry soft cloth.
Due to the abrasive properties of salt (or baking soda), you should avoid applying too much pressure while polishing.
Lee Lubricants for Cases and Bullets
| LEE Resining Lubricant for metal sleeves (90006) Price: 550 RUR | LEE Liquid Alox lubricant for greasing bullets (90177) Price: 800 RUR |
An important stage in equipping rifled cartridges is preparing the cartridge case. Perhaps about 50% of the time spent on ammunition equipment is spent on cleaning, calibrating and trimming it. Case cleaning includes: cleaning and polishing the outer and inner walls of the case, cleaning the primer seat and chamfering the case neck.
How to clean different types of plastic?
White plastic is the most picky. Rust from its surface can be removed using products that have bleaching properties, for example, hydrogen peroxide is allowed.
The situation is more complicated with colored products. Incorrect use of aggressive substances will lead to stains on the plastic.
Glossy plastic panels are resistant to contact with solvents and any abrasives. To process them, it is better to use the most gentle substances, for example, lemon juice. Otherwise, the product will lose its protective film.
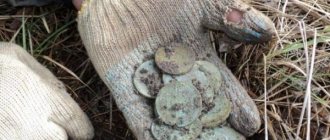
Cleaning the sleeve surfaces
A clean, shiny cartridge case should not only please the eye of an esthete, but also protect parts of the gun from premature wear. The abrasive deposit of powder gases formed on the cartridge case during a shot can scratch and wear out the chamber. A polished cartridge case wears out the chamber less and, overcoming less resistance, is fed into it faster and easier.
Steel wool
Various means are used for external and internal cleaning of the liner. Perhaps the most common is “Steel wool 0000”, where 0000 is the purity number (this is a very high value, the thickness of the thread is 0.025mm). Typically, steel wool is used to clean and polish brass sleeves. With its help you can achieve very good results. But you need to work in a respirator or a gauze bandage, because... During processing of the sleeves, the cotton wool wears out and begins to gather dust. This is especially clearly visible if you place a light sheet of paper under the sleeve being treated with cotton wool. Dust from cotton wool can irritate the mucous membranes. Sometimes a magnet is used to collect metal dust, placing it under the sleeve during processing.
Cleaning cloths and dish sponges
The most accessible means for cleaning cartridges is the hard part of a dish sponge. You can either use the sponges themselves, or look for sale for just the hard part itself. They are usually sold in 10x15cm canvases, several pieces per pack. The price of such abrasive sponges is about 50 rubles. This is a fairly budget option, but has proven itself. There are also special rags for cleaning cartridges, the so-called “Crazy Rags”. They are quite hard and have a cleaning impregnation, most likely an acid type. They cost several times more than regular abrasive sponges and clean the sleeve a little easier.
Special vibrating bowls, ultrasonic baths and rotary machines for cleaning sleeves. Cleaning using a vibrating bowl (tumbling) is perhaps the most convenient option for cleaning cartridges. I loaded the cartridges into the bowl, turned it on and went to do other things. With the help of such bowls, you can completely clean the cartridge case - from the outside, from the inside, and from the capsule socket. The principle of operation of vibrating bowls is as follows: filler is poured into the bowl, which, when vibrating, rubs against the surface of the sleeve, thereby cleaning it. There are a huge number of fillers. The most common fillers for cleaning brass cartridges are various types of ground nut shells (medium and fine grinded brass crumbs, walnut shell crumbs, etc.) and even ground durum cereals (corn, etc.).
There are also ultrasonic and rotary machines that are similar in shape. As the name suggests, ultrasonic baths clean using ultrasound. And rotary machines by rotating a drum into which metal filler and liquid cleaning agents are placed. At the moment of movement, small metal particles of filler penetrate into all bends and holes of the sleeve, thereby removing plaque and carbon deposits. Owners of rotary tumblers especially praise cleaning using a filler made of metal needles with a diameter of 0.5 mm and a length of 3 mm. Perhaps thinner.
How to Aging Brass with Vinegar - Metallover's Guide
Patination is a technique for “aging” the surface of metal or wood, which is achieved by applying dyes based on various acids. As a result, the products acquire a special charm and the spirit of antiquity.
Before carrying out manipulations, working surfaces are put in order, then treated with a special primer from a spray can, which allows the paint to better adhere to the surface.
Patination of metal requires time and patience; we will look further at how to apply patina paint to the surface and what effect can be achieved.
What you need for work
The very meaning of the word “patina” has nothing to do with the dyeing process. It is of Italian origin and refers to the film that forms on metal after prolonged interaction with oxygen.
Initially, you had to wait a long time for the metal to oxidize itself, and the result was completely unpredictable; now this technique can be reproduced at home with your own hands using the following materials:
- patina of the color you like (in powder);
- liquid solvent;
- brush (size 2-3) or sponge;
- small plastic or glass trays (do not take metal ones, they can interact with the paint);
- metal product that you want to decorate.
Pay attention to safety precautions! Patination products involve working with chemical oxidizing agents, solvents and require special care.
It is recommended not to work in confined spaces without respiratory protection. It is better to work in the fresh air, in rooms with good ventilation (with open windows, an exhaust fan on, a draft).
If acid gets on the surface of the skin, immediately rinse under running water and then apply a paste of baking soda.
If rashes, burns or any skin changes occur, consult a doctor immediately!
Protect your hands! Always patina with gloves.
Patination colors
On different metal surfaces, completely different color schemes can be achieved by patination. The most common patina color is greenish, which is produced by the oxidation of copper. On other metal surfaces, the resulting shade may be completely different:
- Rich yellow or ocher color on steel surfaces.
- Chocolate brown on brass and bronze items.
- Dark gray on silver items.
The choice of dry patina for metal work is quite varied. Powder is sold in almost every hardware store. Most common colors:
- aged silver;
- natural or oxidized copper;
- red gold.
Brighter radical colors are also available, for example, blue, lilac, red, allowing you to achieve an original effect on the surface of various metals.
Surface preparation
Decorative application of patina requires careful preparation of the surface being treated; the metal must be perfectly smooth. There should be no signs of corrosion on it; it will not allow the surface to be well primed; the top layers will quickly bubble and peel off.
All burrs must be removed, chips and potholes must be filled and sanded with sandpaper (first coarse, then finer).
The prepared product is coated with a special primer (most conveniently, from a spray can), and then metal patina paint is applied to it.
Please note that the patina effect looks best on items painted with dark, especially black paint. The painted product must dry well, otherwise the patina will not adhere well and you will not achieve the desired effect.
Patina paint application technique
There are two ways to age metal: applying patina with a brush or sponge. By placing dissolved paint on the tip of a brush, you can achieve completely different textures, directional strokes and different depths of paint. Do not wet the brush before starting work; it must be dry; a wet brush will cause smudges and drops on the metal being processed.
Do not take a brush that is too large or small - the optimal bristle size is 2-3 cm. The sponge gives a “dusty” effect, but do not press it too hard, otherwise pores will be imprinted on the surface being treated.
Keep a napkin with solvent and some of the base paint with which the product is painted at the ready. Working with the patina should be virtually error-free. Repeatedly applying patina to metal in the same place gives an unsightly “flat” effect. When painting individual elements, be careful: if you accidentally “smeared” something nearby, simply paint over this area with background paint.
Cleaning the capsule socket.
Cleaning the capsule socket is necessary to ensure proper seating of the new capsule. During the firing of the capsule, carbon deposits form on the walls of the capsule socket, which must be removed. If it is not removed, installing a new primer will be difficult and may not be installed to its full depth. Berdan-type capsules are especially sensitive to “correct” installation. The primer is triggered by the impact of the detonating composition on the anvil of the cartridge case. An increased distance between the anvil and the igniter can lead to misfire.
Cleaning the mounting hole for the capsule, as well as cleaning the walls of the sleeve, is possible manually and by machine. The automatic option - tumbling, ultrasound and rotary machines - was described above. Place the cartridge cases with the spent primers removed into the container of the device and at the end you get a clean, shiny brass surface in all the bends and recesses of the case.
To clean the capsule socket manually, special cutters are used. To clean the mounting hole for the Boxer capsule, straight cutters are used. To clean the mounting hole for the Berdan capsule, cutters with a recess in the center are used.
In addition to cutters, manufacturers of reloading products produce special brushes with steel bristles for cleaning ignition holes. Also an interesting and valid solution.
How to age brass at home
Patination is a technique for “aging” the surface of metal or wood, which is achieved by applying dyes based on various acids. As a result, the products acquire a special charm and the spirit of antiquity.
Before carrying out manipulations, working surfaces are put in order, then treated with a special primer from a spray can, which allows the paint to better adhere to the surface.
Patination of metal requires time and patience; we will look further at how to apply patina paint to the surface and what effect can be achieved.
Ways to give copper products an antique look
Over time, copper items lose their color and begin to take on a dark or green tint. This happens naturally during the process of oxidation, but modern designers actively promote vintage interior elements; it looks beautiful, sophisticated, and expensive.
Antique copper bowl
But to achieve a beautiful shade of patina, you don’t have to wait several years; you can age the product artificially. There are many ways to do this. You can choose any one that suits you best.
Basic Tools
The use of various aging methods involves the use of some tools or improvised means. But there are universal items that are used with any method:
Patination is the artificial aging of copper interior items
- the product itself, carefully processed;
- thick rubber gloves;
- safety glasses for eye safety;
- aging agent (vinegar, ammonia, prepared solutions, acetone, ammonia);
- soap or just water for cleaning;
- magnet for checking the composition;
- hot treatment (hair dryer or any other heating agent);
- brush;
- special container (bucket, tin cans, plastic jars);
- means for polishing and grinding (sponge, cloth).
Using ammonia
Before starting work, you need to process the copper item with a file (a special file for jewelry work) - such preparation helps to clean the item from dirt and put it in order. To treat with ammonia you will need: the treatment agent itself, any container with a tight-fitting lid, a cotton pad and a lid the size of it.
Table of brands of copper products of a famous antique brand
The cotton pad should be placed in a small lid, thoroughly soaked in ammonia and placed together with the copper product in an airtight container. After 10 minutes you can see how the copper item has aged. When opening the container, do not forget that you can smell a strong smell of alcohol, so it is better to use a protective bandage.
Using Vinegar
In order to age a copper item with vinegar, you need to carefully prepare it. The preparation process consists of several stages:
You can age copper in vinegar
- If the copper product is covered with a layer of varnish, then it must be removed. To do this, you need to either hold the product in a container with acetone, or carefully treat it with a brush with the same product;
- Next, the copper item needs to be poured with hot water and rinsed so that the varnish comes off completely;
- if the copper item does not have any additional coating, then it will be enough to simply wash it with soap;
- The aging process cannot be started if the product is not dry enough. To speed up drying, you can use a hair dryer, but before doing this, make sure that there are no traces of protective coating left on the copper, otherwise the copper product may catch fire.
After the preparatory stage is completed, you can begin processing with vinegar. The big advantage of this method is that you do not need to work with harmful substances and you always have vinegar on hand in the kitchen.
As with acetone, you can either dip the item in vinegar or apply it to a brush and thoroughly treat the item. Also, if you need to get a green patina, you can add a spoonful of salt to the vinegar. After the desired result is achieved, the copper item should be rinsed in warm water and gently dried with a towel.
Aging with a gray tint using sulfur liver
First you need to prepare sulfur liver. This can be done as follows:
Liver sulfur (sodium polysulfide)
- mix sulfur powder and potash in a 1:1 ratio in a tin jar, put the mixture on fire;
- after the mixture begins to melt and darken, the sintering process begins;
- After 15 minutes, remove the tin from the heat and let the mixture cool slightly.
Now you can begin preparing the solution in order to begin patination and age the copper item. Mix 3 g of salt and 3 g of cooled sulfur liver in 1 liter of water. Mix the solution thoroughly and dip the copper product into it. When the copper has acquired the required gray tint, you can remove the product, then rinse with water and dry.
Trimming and calibrating the sleeve - trimmers
Trimming the sleeve
Trimming the case is a necessary step in preparing the case for its subsequent loading. The more times you reload a case, the longer it becomes. This is the specificity of brass. Brass is a soft and malleable metal, due to which a high-quality brass sleeve does not burst, but stretches. It stretches when fired and stretches when crimped on the press. Increasing in length from equipment to equipment by hundredths of a millimeter, the sleeve begins to rest against the edge of the chamber. It is possible that the end of the chamber will bite the edge of the cartridge case holding the bullet, which will entail excessive force to hold the bullet in the case. Anything in excess is bad and should be avoided. To do this, after each compression of the sleeve (partial or complete), it is recommended to measure its length. Anything that goes beyond the norm is cut off. The length of the cartridge case should not exceed the established SAAMI standards, or even better if it is slightly lower, so that at the moment of firing the cartridge case has room to extend.
Trimming the sleeve can be done on a press; for this, there are special compatible dies and cutters with a handle. For example, Lee Quick Trim cutter and Quick Trim die. Or on a special device similar to a mini machine - a trimmer, in which the sleeve is attached. In both options, the required length of the sleeve is set, and all excess is trimmed.
Calibration of the sleeve - grooving of the neck of the sleeve for equal thickness.
For those who are committed to the “sniper” ideal, an important stage in the preparation of the cartridge case will be the groove of its neck to obtain equal thickness. This procedure is performed once and does not require repetition. All sleeves are ground to the same value. This procedure improves the quality of the cartridge and improves accuracy. To check for runout, use a digital indicator with 0.01mm divisions. But, if you are grinding a case neck, you should know that you will only need to use bushing dies. Bushings will need to be selected to fit your case neck size exactly to 0.01mm. There will be no point in using ordinary dies after turning the sleeve, because... they will not be able to provide the most accurate assembly.
Do-it-yourself patination (blackening, aging) of copper, brass and bronze
Patination of copper, as well as other methods of its decorative processing (including at home), can make products made from this metal more attractive and give them a touch of noble antiquity. Items made not only from copper, but also from its alloys such as bronze and brass can be subjected to this treatment.
Using various methods of patination of copper alloys, you can achieve completely different shades
Patination and oxidation
The surface of many metals (and copper is one of them), when interacting with the surrounding air and various chemicals, begins to become covered with a thin layer of oxides and oxides.
This process, which also leads to a change in the color of the metal surface, is called oxidation.
For the most part, the process of metal oxidation occurs naturally, but people have learned to cause it artificially, in industrial or home conditions, which is done to give the product an aged look.
Oxidation should not be confused with patination, a process whose essence lies in the fact that a thin layer of sulfur or chloride compounds is formed on the surface of the metal when interacting with various chemical elements. Patination, which, like oxidation, is accompanied by a change in the color of copper and bronze, can also be performed artificially using special compounds.
Copper aging occurs naturally over time or immediately when the surface is treated with any preparations.
If under natural conditions the process of oxidation and patination of copper or bronze can take years, then when using special solutions, patination occurs in a very short period of time.
The surface of a product placed in such a solution literally changes its color before our eyes, acquiring a touch of noble antiquity.
Using various chemical compositions, you can perform such procedures as blackening of copper, patination of objects made of copper and bronze, and blackening of brass in production and even at home.
Preparation for processing
Having decided to perform patination or oxidation, you should not only carefully study the question of how to age brass, bronze or blacken copper, but also provide the necessary safety measures.
The vast majority of chemical compounds that are used to carry out such procedures are very toxic and emit vapors that pose a significant danger to human health.
Therefore, to store such substances both in industrial and at home conditions, you should use vessels with well-ground stoppers, which will prevent toxic vapors from entering the surrounding air.
Keep chemicals out of the reach of children
The procedure itself, carried out to change the color of the surface of a product under the influence of chemicals on it, should be performed in a special cabinet to which exhaust ventilation is connected.
It should be borne in mind that the doors of such a cabinet should be slightly open during the process of oxidation or patination, which will ensure effective extraction of harmful vapors from its interior.
Products made of copper, brass and bronze should be thoroughly cleaned, degreased and washed in warm water before patination. After the patination or oxidation procedure itself, the treated objects are also washed and placed in sawdust to dry.
Using sawdust is a more gentle drying method, since performing such a procedure with a fabric material can damage the thin film of the formed patina, which has not yet been fixed with varnish.
In addition, using fabric after patination, it is almost impossible to efficiently remove moisture from the recesses on relief surfaces, and sawdust can easily be pulled out.
The varnished surface can be polished with a felt pad.
Changes in color of copper and its alloys from gray to black
The grey, dark gray or black color of copper and its alloys makes the appearance of the product more attractive and presentable.
To obtain these colors, the degree of saturation of which can be adjusted, you need the “liver of sulfur” composition that has been used for decades.
It got its name due to the fact that during the cooking process it must sinter, that is, turn into a caked mass.
To make such a composition for patination at home, you must perform the following steps:
- one part of powdered sulfur is mixed with two parts of potash;
- the resulting mixture is placed in a tin can, which then must be put on fire;
- After waiting for the powder to melt and start sintering, it is necessary to maintain this process for 15 minutes.
To prepare sulfur liver you will need soda and sulfur
During the sintering process of the powder, a blue-green flame may flare up on its surface, which does not need to be knocked down, since it will not deteriorate the quality characteristics of the sulfur liver.
After sintering is completed and completely cooled, the resulting mass should be crushed to a powder state.
This powder, if placed in a glass jar with a tight-fitting lid, can be stored for a long time.
In order to patina various metal alloys using liver sulfur, several basic methods are used. Method No. 1
This method involves the use of an aqueous solution of liver sulfur. It can be used to change the color of products made from the following materials:
- copper;
- sterling silver;
- bronze and brass.
The colors that can be used to paint the surfaces of products using this method also vary:
- copper and silver - purple, blue (very difficult to obtain), gray, brown-gray, black;
- brass and bronze – soft golden.
Testing the solution on copper, bronze and brass gives different effects
If you did not know before how to age copper and form a durable patina film on the surface of this metal, distinguished by a rich black color, use this method. To implement it, a copper product is placed in a solution consisting of a liter of water and 1–20 grams of liver sulfur powder.
To color copper light gray, the solution is prepared according to a different recipe: 2-3 grams of sodium chloride and liver sulfur are dissolved in 1 liter of water.
A copper product is placed in the resulting solution, the color change of which should be carefully monitored.
After the color of the metal acquires the desired tone, the object to be patinated must be washed with water and dried in sawdust.
The duration of treatment of copper jewelry with a solution depends on the desired blackening effect
Method No. 2
To patina copper, you can also use a solution prepared according to the following recipe: ammonia is added to a saturated aqueous solution of copper sulfate and this is done until the liquid becomes transparent and bright blue. The cleaned and degreased product to be processed is placed in such a solution for several minutes, after which it is removed and subjected to slight heating. After such manipulations, the copper should acquire a rich black color.
Method No. 3
To use this method, which also allows you to qualitatively blacken copper even at home, the object being processed must be cleaned with fine sandpaper.
Do not touch the cleaned surface with your hands to prevent grease stains from forming on it. After preliminary preparation for patination, the object is treated with a solution of platinum chloride or completely immersed in it.
A small amount of hydrochloric acid can be added to such a solution, if it does not cause an acidic reaction.
Method No. 4
A durable oxide film, distinguished by a rich black color, can be formed on the surface of a copper product by immersing it in a composition prepared from nitric acid and copper metal. To make the color change of the copper part more intense, this solution can be further heated.
Getting a patina of other colors
To form an oxide film of a different color on copper, you can even use one of the following methods at home.
Red-brown
To obtain a red-brown oxide film, the copper product is placed for several minutes in a composition prepared from one part of copper sulfate, one part of zinc chloride and two parts of water.
Using the example of one part, you can see how the shade changes depending on the duration of stay in the solution
Range from light brown to black
To obtain such a patina, a copper object must be placed in a solution consisting of one liter of water and 20 grams of ammonium sulfide. By changing the heating temperature of the processed product before patination, you can adjust the intensity of coloring.
Light brown
To give the surface of a copper product a light brown color, it is necessary to treat it with a mixture of sodium chromium (124 g/liter), nitric (15.5 g/liter) and hydrochloric (4.65 g/liter) acids, 18% ammonium sulfide ( 3–5 g/liter). This solution is applied with a brush and left for four to five hours.
Cover the surfaces of the part until you achieve the desired shade
Range from dark to warm brown
To obtain a surface of this color, the copper part is placed in a hot solution for 5–25 minutes (90–95°
), which contains ammonium persulfate (9.25 g/liter) and caustic soda (50 g/liter). The procedure is repeated 2-3 times to achieve the desired effect.
Range from olive to brown
For patination, a copper product is placed for 10–15 minutes in a heated aqueous solution of berthollet salt (50–70 g/l), copper nitrate (40–50 g/l) and ammonium chloride (80–100 g/l).
Noble white-green
The most popular method of creating a green patina is to immerse a copper object in a composition prepared from water (1 liter), copper sulfate (50 g) and potassium permanganate (5 g).
There are many more methods that allow you to create a patina of various shades of green, brown-black, golden, golden brown with crimson tarnish and others.
Chamfering a sleeve
To prepare the sleeve, it is recommended to remove the outer and internal chamfer on the neck of the sleeve. This must be done so that the bullet is crimped evenly around the circumference. If this is not done, then the force of the bullet when leaving the cartridge case neck will not be distributed equally over the entire circumference of the cartridge case neck. In this case, the bullet can follow the rifling with a slight, invisible distortion, which is quite enough for the bullet to move away from the required trajectory when shooting at long distances.
Hand cutters or automatic machines are used for chamfering.
Chamfering with a hand cutter is performed in 2 or 3 turns, this amount is quite enough to remove possible burrs that may form after the shot. The main thing is not to overdo it.
Automatic trimmers use stops that prevent you from removing more than you should.
Folk remedies
In most situations, to restore the shine of brass products, it is enough to use traditional methods. The means at hand allow you to clean objects, regardless of their shape and size, without much expense.
Oxalic acid
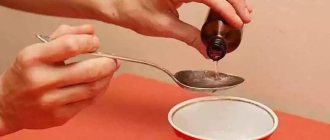
A simple detergent, one of the ingredients of which is oxalic acid, is suitable for treating brass. The substance must be applied to a sponge, carefully treat the brass surface with it and wait for the reaction to appear. When exposed to acid, a small deposit will begin to form, which can be easily washed off under the pressure of water with a brush. After washing the product, you need to sprinkle soda on it, after 20-30 minutes, wash it again and rub it until shiny.
If it is necessary to perform deep cleaning, make a mixture of oxalic acid and warm water, observing the proportions of 200 g per 10 liters. An acid solution is prepared in a deep container, a contaminated object is placed inside, until it darkens and washed. This method is suitable for combating old stains caused by the oxidation process.
Acetone
Simple acetone can also restore the brass alloy to its original appearance. Acetone in its pure form or as part of a nail polish remover is suitable for cleaning. A cotton pad or soft sponge is generously moistened in the liquid and, applying force, wipe the stains on the product. You can use a similar method to clean copper objects.
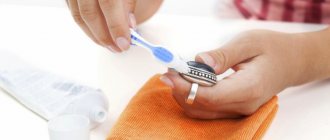
Toothpaste
A common folk technique is the use of abrasive cleaning agents, including toothpaste. Squeeze a small amount of paste from the tube onto a toothbrush or rag and wipe the dull areas on the coating until the stains are completely removed. To achieve an effective result, you need to first wash the brass product in soapy water to remove stains that have arisen for other reasons (old grease, dirt, adhering dust).
Vinegar
Lemon acid
Citric acid granules are sprinkled onto the brass coating and rubbed vigorously into the contaminated areas. You can also make a cleanser using half a lemon and a pinch of salt. The lemon is thoroughly coated in salt and the dark spots on the product are smeared. This method is suitable for removing both recent and old oxidation.
How to clean brass from oxide at home until it shines?
1 tbsp is also used. l. fine salt along with low-fat cream. The paste must be applied to the product and wiped. Hard-to-reach areas require an hour-long soaking of the composition. Then rinse with water and dry. The salt must be completely dissolved, otherwise the item may be damaged.
Expert opinion
Alexandra Poryadkina, cleanliness expert
Please contact me with any questions!
Then production began in Central Asia, from there the accessories came to Rus', where their unique shine and high quality were also appreciated. It is better to entrust the cleaning of antique items to a professional, since cleaning yourself can cause irreparable damage to the item. How to clean brass at home: 14 best treatments, how to protect it. For advice, contact me, I will definitely answer!
Sleeve lubrication
Once the case is clean and ready for loading. It is recommended to lubricate it on the outside with lubricant/grease. A lubricated sleeve will pass through all dies more easily and wear them less. There are both special lubricants (Lee Resining Lubricant) recommended and produced by manufacturers of reloading equipment, and their “folk substitutes” such as “spindle” or “castor oil”.
Case preparation is an important step in assembling a precision rifled cartridge. They should not be neglected or underestimated.
Good luck with your gear!
What should you not use to remove rust stains and why?
To remove rust stains from plastic, you cannot use the following products:
Abrasives and hard sponges. Together with the dirt, they will remove the top layer of plastic. Its surface will lose its former smoothness and attractiveness.- Products containing chlorine. This substance will cause discoloration of the surface.
- Substances containing wax. This treatment will cause the plastic to become sticky and collect dust.
- Aggressive compounds with hydrochloric or other acid. Such substances will cause the plastic to dissolve.
- Solvents for paint and varnish coatings. Their application to a plastic surface will cause its damage.
Recommendations
If you have used all the methods and none of them helped you, then you should just change the varnish. This procedure is not very difficult if you follow the plan below:
- you need to lay down a waterproof film to protect the surface you will be working on from contamination with varnish;
- wear special clothing (gloves, respirator, gown);
- moisten a paint brush in nail polish remover and cover the surface of the product with it;
- In order for the surface of the product to shine, it is necessary to polish it with special means;
- varnish with a paint brush or cotton sponge;
- let dry;
- clean with a dry cloth.
Old varnish film can be removed using hot water pressure, as well as by boiling the products in a container without aluminum impurities for 3 minutes.
You can also purchase chemicals at a household chemical store, but they should only be used after carefully reading the instructions.
The most reliable option is to contact professionals who will quickly bring your product into proper shape and help restore the shine of your brass items.
If you decide to bring a brass product into marketable condition yourself, then do not be afraid of this procedure, since the process itself is quite easy and after processing the items will have a truly magnificent appearance and will delight you and your guests.
Specialized means
- you need 50 ml. water and add 60 g of baking soda;
- Using a foam sponge, smear the resulting mixture onto the object and wait 20 minutes;
- take a lime, which you cut in half;
- Rub the item with the pulp and leave for another 40 minutes;
- wash and dry thoroughly.
If you are considering cleaning brass with products such as citric acid, hydrochloric acid and acetic acid, keep in mind that this is quite a dangerous task, so proceed with extreme caution and follow the required safety precautions.