A clogged PG is far from the only reason why printers stop printing. However, there is a high probability that this is the problem if on your device:
- white stripes appear across the movement of the paper;
- one or more colors are missing;
- nothing is printed, although the printer does not issue any warnings, and the carriage moves properly.
Causes of printer blockages
Before you clean the printer, you need to find the reason why it is clogged. Having installed it, you can choose the most effective cleaning method that gives the desired result in the shortest possible period of time.
After a long period of inactivity
If a printing device is left idle for a long time, the ink in its cartridges can dry out and form a kind of plug. This cause of blockage is considered the most common. Most of the devices installed in ordinary apartments suffer from it. This is because people rarely need to print any text or document at home.
To correct the situation, you need to clean the printer print head nozzles. You need to do this several times until the blockage disappears. If performing this operation multiple times does not help resolve the problem, you will have to flush the print head.
Due to mixing of incompatible paints
There are dozens of types of ink that are only suitable for one or another printer model. If you fill a cartridge with incompatible ink, a sediment will form that will quickly clog the nozzles. To avoid this problem, you must constantly refill the cartridges with the same ink.
As a result of printing with an empty cartridge
Any printing device warns the user about the lack of ink in the cartridges. If you ignore this warning, the nozzles will gradually begin to clog. Continuing to ignore the prompts will cause the nozzles to burn out. After this, it will be impossible to restore the print head.
When cleaning is needed
- When running a nozzle test, part of the image is skipped on the sheet, white stripes are visible when printing, colors are not reproduced correctly, or one of them is completely missing. Such signs of clogging occur when the printer is used very intensively.
- The printer did not print documents for a long time. Water-based liquid inks may dry out. For different models, the drying time of the paint varies from several days to a month. If the device has been idle for a long time, has inkjet printing technology, and after turning it on, printing has deteriorated significantly or even blank sheets are coming out, it is likely that the print head has dried out completely.
- Different types of dyes were filled in or the cartridge was filled with paint from another manufacturer. When mixing solutions of different chemical compositions, a reaction occurs inside the ink tank, which can result in rapid thickening of the ink and failure of some elements of the head. If there is a need to use another brand of ink, first thoroughly wash the cartridge, the channels through which the ink is delivered, and the head itself.
- Refilling ink. After each cartridge refill, you need to clean the print head for preventive maintenance.
Hardware cleaning
Hardware cleaning will help remove clogs in the printer nozzles. Its main advantage is that you will not need to disassemble the device to carry out the work. This method allows you to get rid of only recently occurring traffic jams. Severely dried nozzles will be difficult to clean using this method.
Algorithm of actions:
- Check the ink levels in the cartridges and refill them if necessary.
- Connect the device to the computer.
- Place a blank sheet of paper in the paper holder.
- On the computer, open the “Start” menu, in which you find “Control Panel”.
- It goes to the “Devices and Printers” section.
- On the page that opens, right-click on the name of the device to be cleaned.
- A new window will appear in which you select the “Properties” tab and the “Maintenance” section.
- Among the proposed options, choose a cleaning method.
- After clicking on the icon, the printer will begin to supply ink under high pressure. A spray of paint will break through the blockage and fix the problem.
- Once cleaning is complete, the device will prompt the user to print a test page.
Flushing fluids
Flushing fluid OPC RSL100
Specialized ink stores also sell washing liquids. For example, OCP RSL100 or more concentrated Bursten PDK . But they are quite expensive, and washing a very dry head may require a large amount of product.
You can make your own alkaline solution using the following recipe. For 7 parts distilled water, take one part:
- ammonia,
- isopropyl alcohol,
- glycerin.
Mix the resulting mixture thoroughly and strain. It makes no sense to use distilled water separately, since it is ineffective for water-based ink and does not dissolve pigment paint at all.
Flushing fluid Mister Muscle
Important : Do not wash clogs with alcohol and vodka. Dried or curdled paint releases remaining liquid into ethyl alcohol, making further soaking difficult or impossible.
Mister Muscle glass cleaner in blue or green color has proven itself to be the best. Its effect is comparable in results to specialized flushing fluids, but the price is significantly lower. You can use other window cleaners whose composition is similar to Mister Muscle and contains ammonia.
Cleaning a Canon printer manually
If the hardware method does not give positive results, then wash the nozzles manually. All actions performed are the same for most models of printing devices. In addition, the equipment body, tray and feed rollers are cleaned.
External surfaces
The easiest way is to clean the outside of the device. The user needs to remove accumulated dirt and dust.
Features of the work:
- Before cleaning, you must unplug the printer.
- To avoid damaging the plastic housing, do not use abrasive cleaners.
- Even with severe contamination, it is not recommended to use household chemicals.
- It is best to remove dust with a slightly damp cloth.
Scanner cover and feed rollers
Most Canon models combine a printer with a copier and scanner. These built-in devices should be wiped regularly with a soft, lint-free cloth. Do not use water or any cleaning agents.
It is more difficult to remove dirt from the feed rollers. To do this job, you need to do the following:
- Remove all sheets of paper from the tray.
- Connect the device to electricity.
- Press and hold the “Stop” button located on the control panel of the device.
- After this, the red indicator will start flashing.
- Count 7 such signals and release the “Stop” key.
- The feed rollers will begin to rotate.
- As soon as they stop moving, several blank sheets of paper are inserted into the tray.
- Press “Stop” again and count 7 blinks of the indicator.
- Release the button and wait for the paper to come out.
How to clean a tray
Sometimes dirt accumulates in the tray and leaves marks on the printed sheets. To fix this problem, you need to perform a cleaning procedure. This is done in the following way:
- Connect the device to the network.
- Remove all paper from the tray, leaving 1 sheet.
- It is folded in half and then leveled.
- The paper is placed in the rear tray and a test print is started.
- Press and hold the “Stop” button until the red indicator flashes 8 times.
- After this, the key is released and the paper is waited for to come out.
Signs that cleaning is needed
It is not difficult to understand that the cartridge needs cleaning or soaking. Certain signs will always indicate this.
The first sign that the ink in the cartridge has dried is a sharp decrease in the quality of the resulting printed images - text from a laser printer and color images or photographs from an inkjet printer. There may be unprinted white areas, fuzzy lines, wide horizontal or vertical stripes, and the image may be faded or unclear.
In a color printer, ink may run out or even dry unevenly, causing the printed image to have one or more colors missing while all other colors remain vibrant. Uneven drying may be due to the quality of the coloring powder itself, so it is better to buy cartridges in trusted stores with well-known brands on the market.
If the inkjet printer has not been used for a long time, but there is ink, most likely it has dried out, since a feature of inkjet printers is the need for their regular use. Without frequent printing, the ink dries out very quickly.
If the Canon cartridge is dry, the printer continues to work. It passes a blank sheet of paper through itself, makes a sound like printing, but the output sheet remains white or with barely noticeable traces of ink.
Methods for cleaning cartridges
You can clean the cartridge using hot and cold methods. In the first case, heated water will be used to achieve the desired result, and in the second, cold water will be used.
Cold cleaning
To rinse Canon cartridges with a cold method, you will need clean water, napkins, a disposable syringe, a pipette, gloves, a piece of soft cloth and any glass cleaner.
Procedure:
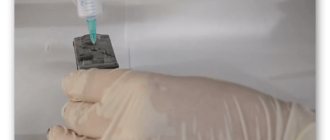
- A cloth is spread on the table and the dried cartridge is placed on it.
- Apply a small amount of glass surface cleaner to the nozzles.
- After 10 minutes, the substance is removed with a napkin.
- To remove residual moisture, the nozzles are additionally wiped with a soft cloth.
- Return the cartridge to the device and check the print quality.
If this method does not help, then immerse the cartridge nozzles in a container with a cleaning agent poured at the bottom. After 3 hours, wipe off the remaining soaked ink with a rag.
Application of the hot method
Cleaning cartridges using hot water takes longer. At the same time, the probability of successful completion of the case increases several times.
Step-by-step instruction:
- Heated water is poured into a bowl or plastic container. The height of the liquid level should be about 3 cm.
- The cartridge is placed in the water (nozzles down).
- After 3-5 minutes, replace the cooled liquid with hot one.
- You can complete the first stage of cleaning only after the water is no longer colored by ink.
- After this, detergent is diluted in hot liquid. The proportions of the components should be 1:1.
- The cartridge nozzles are placed in the solution and left there for 2 hours.
- After the specified time, wipe dry all wet areas.
Preventing problems
The problems described in this article can be easily avoided or their occurrence can be delayed for a considerable period of time. Prevention does not require financial investments, but only takes a little time. What do we have to do:
- Maintain cleanliness in the room where the printing device is located and operating. Regular wet cleaning is what you need.
- Once a month, you can carefully remove dust from under the printer cover with a vacuum cleaner. And also wipe all wet areas from paint with a dry cloth.
- Regularly carry out software maintenance of the device described in the “cold” method.
- Every few days, print out a color image or test sheet. This will protect the cartridge, or rather its nozzles, from drying out.
- For lasers, it is recommended to clean the waste bin when refilling with toner, regardless of its filling level.
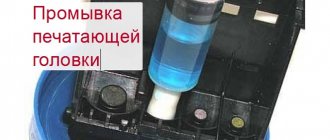
How to remove and clean the print head
The head can be washed only after removing this part of the device. This must be done as carefully as possible, since any careless action can easily damage it.
Sequence of operations:
- Raise the top cover of the device.
- Connect the device to the network and press the power button.
- Wait until the head moves to the central position.
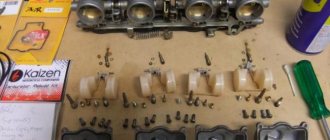
- After this, carefully open the protective cover and remove the cartridges.
- Raise the locking lever and remove the head.
To clean the seal from contamination, you need to prepare some household chemicals. It should not contain aggressive components that could damage printer parts.
Washing steps:
- A piece of bandage, folded several times, is placed at the bottom of a wide bowl.
- Pour a little cleaning product on top. It is necessary that the bandage is well saturated with it.
- The print head is placed in the container.
- Tubes intended for installation of medical droppers are put on the fittings. Their length must be at least 4 cm.
- The selected cleaning agent is poured into the tubes.
- The part is left for 2 hours.
- Periodically check the level of the poured substance.
- After the specified time, a syringe is inserted into the tube.
- With its help, the product and ink residues are drawn out.
- Repeat similar steps several more times. Do this until the drained liquid becomes clear.
- The head is wiped with a dry cloth and returned to the printer.
- Install cartridges.
- Close the device cover and turn on test printing.
Removing severe head clog
If flushing the print head is unsuccessful, then you should use a more effective cleaning method. It will take a lot of time and effort to complete all the steps provided.
Step-by-step algorithm:
- The medical tube for droppers is cut into several parts. The length of each of them should be about 6 cm.
- Tubes are inserted into all holes.
- Pour in cleaning agent.
- If the blockage does not allow liquid to penetrate inside, then repeat similar steps several more times.
- As soon as the plug is partially broken, the head is left for 2 days.
- Check the cleaning agent level every 2 hours. If necessary, top it up.
- After 2 days, the liquid mixed with ink is drawn out with a syringe.
There is another way to get rid of severe blockage. To carry out the work, you will additionally need a plastic container and several napkins. Having prepared these items, perform the following steps:
- Place 2 napkins at the bottom of the plastic container.
- A small amount of the selected detergent is poured onto them.
- The part to be cleaned is placed on top.
- It is pressed to the bottom of the container.
- Use a syringe to draw out the liquid.
- Repeat the operation 5 times, constantly adding a little cleaning agent.
Installation and configuration process
After the print head has been washed, the parts are installed in the printer and configured. Setup and calibration work is carried out based on the results of printing a test page.
The complete process consists of the following steps:
- The print head, wiped with a dry cloth, is installed in the device.
- Lower the latch and insert the cartridges.
- Close the printer cover and start a test print.
- If extraneous lines or symbols appear on the sheet, then calibrate. The same operation is performed if the print quality is poor (blurry, pale colors, stripes).
- Place at least 10 blank sheets in the tray.
- The printer is connected to the computer.
- Both devices are connected to the network.
- On the PC, find the “Start” button.
- In the menu that appears, select “Control Panel”.
- Then click on “Devices and Printers”.
- In the window that opens, select “Properties”.
- In this section, go to the “Advanced” tab.
- Place a check mark next to the words “Align manually”.
- Save the changes made.
- At the next stage, find the “Maintenance” section.
- In it, select “Head Alignment”.
- Make the necessary changes and save the settings.
Do laser printers need to be cleaned?
To clean a laser printer, you must have special equipment and knowledge. Because of this, such work should be left to professionals. In some cases, a contaminated part cannot be restored and must be replaced with a new one.
Cleaning the laser printer cartridge is rarely done. This is due to the fact that any impact on this component of the design can lead to damage to various parts of the printer.
Used powder must be disposed of immediately. Some users reuse it, which leads to contamination.
If you know the correct sequence of actions and a few important secrets, then cleaning a Canon printer at home will be a simple task. You can perform all actions quickly and without much effort.