How to remove scale from a kettle?
Cleaning neglected surfaces
- into the kettle
. - Add 1 tablespoon of baking soda powder.
- The resulting solution is brought to a boil and the water is drained.
- Then pour 1 tablespoon of lemon water.
- Again, the solution is simmered over low heat for 30 minutes.
Interesting materials:
When does a lemon from a seed bear fruit? When does medlar bear fruit? When does the nut bear fruit? When to feed Broilers meat and bone meal? When to give Mash to chickens? When to give chickens eggshells? When does the Decembrist pick up buds? When is the cheapest time to install an air conditioner? When do wild ducks start laying eggs? When to add Algaecide to the pool?
How to clean a metal strainer from tea deposits
Many people are interested in the question: how to clean a tea strainer from tea deposits. Folk remedies can come to help in solving the problem. To remove tea stains from a small sieve, you will need:
- 2 tablespoons of ammonia.
- 110 milliliters of water.
- 1 brush for cleaning teeth.
First you need to pour water and ammonia into a container and stir. Then you should immerse the strainer in the liquid and leave for 3-12 hours. After this, you need to take it out, clean it with a toothbrush and rinse thoroughly with running water.
To remove tea deposits from a larger sieve, you will need to increase the amount of these components. You can also clean the strainer using a cotton swab dipped in the prepared solution.
There are other cleaning methods, for example, you can use citric acid. Pour 2 glasses of water into the container, add 2 teaspoons of acid there and place the sieve so that it is completely in the solution. Then it needs to be boiled in this liquid until the desired result is obtained. After the procedure, the product should be rinsed with plain water.
You can also clean a metal strainer from tea deposits by boiling it in a soda solution.
How to fix a strainer mug?
The main problem that housewives face when working with this type of kitchen utensil is the displacement of the spring. You can repair the mug yourself if you understand its design. Few people have problems disassembling the structure, but putting everything back in place is a more difficult task. The algorithm for assembling a sieve mug is as follows:
- The guides are inserted into the hole under the container so that the end with the part bent at 90°C remains outside.
- The hook located inside the mug is used to hook the hole of the paddle iron.
- The bent end of the guide is inserted into a lever pushed back in the handle, which activates the entire mechanism.
- Install the springs on top of the blade part.
- The triple blade is fixed on top of the rod. After this, the rotating elements are fixed in the recesses located on the sides of the mug.
Cleaning the headphone jack on your phone
The sound in the headset may deteriorate due to accumulated dirt in the jack.
You can clean the connector as follows:
- Turn off the equipment.
- Take a cotton swab or wrap cotton wool tightly around a toothpick. Blot with alcohol.
- Wipe the nest along the inner walls, scroll several times. Clean carefully without leaving any cotton particles in the nest.
- When the internal connector is cleaned, treat the outside.
The procedure is suitable for any models.
Signs of a clogged coffee maker
When using water containing hardness salts, scale will inevitably form in the coffee maker. Both simple drip and capsule or carob coffee makers are susceptible to clogging.
The more bends and smaller the diameter of the tubes for the passage of water in the coffee maker, the greater the likelihood of scale formation. Lime scale particles clog water flow channels.
Not all coffee makers are equipped with a built-in indicator (a counter for the number of cups of coffee brewed), so you need to be able to recognize signs of limescale deposits inside the machine:
- It takes longer to prepare one serving of drink than before;
- if the tube and outlet are clogged, the stream of ready-made coffee becomes thin, causing the cup to take longer to fill;
- the taste of the drink has deteriorated;
- there is a foreign smell;
- the operating device began to make unusual sounds;
- a light gray sediment is visible in the cup;
- Electricity consumption has increased while the coffee maker is operating.
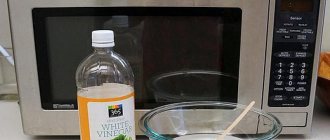
Vinegar
Recipe. Pour boiling water into a thermos, add 1 tbsp. l. vinegar essence. Leave overnight. In the morning, rinse thoroughly with water.
Reality. The method works very well. True, instead of a mixture with acid, you can simply pour 3 or 6% vinegar into the flask. Then you definitely can’t make a mistake with the concentration, because the volumes of thermoses are different for everyone.
What to do. You don't have to leave the liquid inside for the whole night. An hour's treatment will be enough. For greater effect, do not add acid to the very top. Leave about a third of the volume free, throw a small piece of hard sponge inside. Then screw on the cap and shake.
And don't be afraid of the unpleasant pungent odor. If you rinse the flask thoroughly and then dry it open, the aroma of the vinegar will quickly dissipate.
Vinegar and soda
Recipe. Pour 3% vinegar into the flask, add 3 tbsp. l. baking soda. Leave overnight, then rinse with clean water.
Reality. The advice was clearly coming from a man who had never made his own pop as a child. These two substances, reacting with each other, are completely neutralized. And why hold out on an absolutely useless liquid all night? And there are plenty of sources that rewrite this recommendation word for word, without even thinking about it. Plus, there is no warning anywhere about the strength of the reaction. It’s not enough to put a thermos in the sink, you need to put it in the bath! Because the dirty foam comes out like a fountain.
What to do. Choose one thing. Or clean the thermos with vinegar or any soda. Mixing these two components is only a transfer of time and money. Or make yourself some fizz already!
Proportions
It often happens that you seem to strictly follow the recipe, measure everything down to the gram, but the result still does not live up to expectations
The cake did not rise or was not baked, the dough was too thin or thick - sound familiar? And all it turns out is that you decided not to notice the “sift the flour” point, because, in your opinion, this is not at all important...
In fact, sifting the flour plays a major role in the size of the proportions! The fact is that when sifting, flour increases in volume. Therefore, if the recipe says “sieve 100 gr. flour”, know that after you do this, it will become more than 100 grams, and this is, of course, taken into account in the recipe. Accordingly, if you neglect this stage, you will have less flour than you should and the result will not meet your expectations.
Deviations in proportions will be especially noticeable when cooking in a slow cooker and bread maker. If you remember that “100 gr. sifted flour" and "sift 100 gr. flour" is not the same thing, delicious pastries on your table will not take long to arrive.
Why cleaning is necessary
It is this strainer that becomes so clogged with tannin, the coloring pigment contained in tea, that even systematic rinsing after each brew will not help cope with this problem. Therefore, a brown coating forms on the nose and inner walls.
Why do you have to wash the strainer - simply because the holes in it become so clogged that the sieve completely stops letting the tea leaves pass through it.
Of course, as an alternative, they may suggest using disposable tea bags for brewing, but for the most part their quality leaves much to be desired, since they mainly contain tea production waste, and not full-fledged tea.
Safety
Since ancient times, flour was sifted to get rid of foreign objects - dirt, fibers, pebbles and bugs that could be found in it.
Today we have the opportunity to buy flour that has been carefully processed and purified at factories, so many people neglect its additional purification at home and very in vain. The possibility of production defects and the human factor cannot be ruled out.
As with any other product, there may be foreign objects in flour, but unlike the times of Ancient Rus', they will not necessarily be organic - it could be a piece of plastic, metal, some kind of film, etc. Sifting flour will allow you to play it safe and protect yourself from unpleasant surprises
This is as important as washing fruits and vegetables before eating or rinsing grains before cooking.
conclusions
I shared with you the most effective ways to clean plaque and talked about proper care with which you can forget about stains and unpleasant odors. You can clearly see the cleaning process in the video in this article. And if you have other recipes, I’ll be glad to read them in the comments.
The stainless steel inside the thermos easily absorbs various odors; it is also susceptible to the formation of deposits from tea or coffee. Contamination makes storing drinks and food in these containers almost impossible. Scale, deposits from drinks and an unpleasant ingrained odor will spoil the taste of the food. It is important to know how to clean the inside of a stainless steel thermos without damaging the surface of the product and extending its service life.
Tips for removing various contaminants
Some foods leave persistent stains on dishes that are difficult to wash off. In these cases, you need to follow the tips on how to quickly wash dishes with your hands after difficult stains.
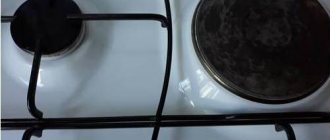
- If there are particles of burnt food or old fat deposits left on the pan, fill it with 100 ml of water and place it on the stove. Water is boiled over high heat, when it evaporates, the pan is removed from the stove and cleaned of melted fat and soaked contaminants.
- Kitchen utensils in which protein foods (milk, meat, eggs) were prepared are first washed with cool water, then with hot water. If you start washing immediately with hot water, the protein will stick to the surface even more.
- To remove unpleasant odors from cutlery (knives, forks, spoons), wipe them with soda. Do the same with cups and plates. It is better to treat the cutting board with vinegar; particles of soda scratch plastic boards and remain in the microcracks of wooden surfaces.
- Particularly persistent old stains are cleaned with a metal sponge, if this is safe for the surface of the product.
- Remains of porridge are easily removed if the pan is soaked overnight in hot water. In the morning, without any additional effort, the remaining dirt will come off by itself; all you have to do is rinse the pan with water and a cleaning agent.
In general, it is better to wash off heavy stains and grease immediately, leaving it for later, soaking it in water and detergent.
Cleaning agents
Manufacturers recommend using non-aggressive antiseptic solutions without abrasive particles. Such products effectively remove dirt and disinfect the surface.
Hydrogen peroxide
This product not only quickly dissolves stubborn dirt, but can also remove yellowed stains and return the snow-white color to your headphones. Ideal for cleaning wireless models with sensors that require a special approach.
Procedure:
- a cotton swab is soaked in peroxide and blotted with a dry cloth;
- gently wipe the surface and contour of the mesh;
- Remains of dirt and stuck pieces of sulfur are removed with a toothpick;
- cotton pads are moistened in the product and treated the outer surface of the headphones, paying special attention to stubborn dirt and yellow spots;
- cover the body with a damp cotton pad and leave for 10 minutes;
- then re-treat the surface of the case with peroxide;
- The headphones are wiped dry and left until completely dry.
Peroxide can be used to soak the meshes of dismountable headphones. Using the product, you can whiten yellowed replacement silicone ear pads.
Important! Peroxide should not be used on colored soft materials, especially artificial leather. The product may discolor or damage the finish.
Alcohol
This simple product can be used to clean not only the surface and speaker grilles, but also the components. It is best to use a solution rather than pure alcohol.
Cleaning procedure:
- they start by soaking the removable ear pads and mesh in the product for 5-10 minutes;
- if the headphone cover cannot be removed and the mesh cannot be separated, then they are treated with a cotton swab dipped in alcohol;
- the surface of the case and wires are wiped with a cotton pad, onto which a small amount of solution is applied;
- blot with a dry napkin or cloth;
- Dry the headphones for at least 2-3 hours.
Important! The substance dissolves grease and similar contaminants well and quickly evaporates from the surface of the body. But alcohol is not capable of returning the color to yellowed plastic.
The tool can be used to improve sound quality. Action plan:
- the headphones must be carefully disassembled;
- Use a soft-bristle toothbrush or a brush dipped in alcohol to carefully clean the surface;
- wipe with a dry cloth and leave until completely dry.
Note! To process radio components of the headset, only a 70% alcohol solution without impurities is used.
Chlorhexidine
The product effectively removes earwax accumulations and disinfects the surface. Chlorhexidine cannot be used on internal parts, so care must be taken to ensure that no liquid gets inside.
The substance does a good job of cleaning ear pads and wires:
- the pads should be soaked in a small amount of chlorhexidine for 10 minutes;
- The surface of the headset is treated with a cotton pad soaked in the product.
Device
The main specificity is the simplicity of the mechanism. At home, mechanical, manual sieves are used. A mug-sieve is a simple but necessary device that can be found in hardware stores without much effort. It is no coincidence that housewives choose just such a model, considering it the most convenient in everyday life.
It is designed in such a way that any housewife can easily handle the strainer mug. The design resembles a regular mug with or without a lid, ensuring an airtight seal. For ease of use, the sieve can be placed on an inverted lid.
Instead of a bottom, a sieve with star-shaped metal blades and a special recess is inserted, which makes the sifting process more efficient. The bottom is double or triple. The glass has a measuring scale with divisions from 50 to 250 mg, with which you can easily determine the required amount of flour.
The lever handle consists of two sections with a spring that drives the rotating mechanism. The bucket is comfortable to hold in your hand, which makes work less labor-intensive and more rapid. Flour is poured in, and the blades are set in motion by arbitrarily pressing the handle. The bulk ingredient passes through a sieve, pouring out into another container or onto a board. Excess debris unwanted in the dough remains in the mug.
Yellow spots on plastic
Windows, which are popular nowadays and made of such durable and easy-to-clean material, unfortunately, quickly lose their color. The reason for this is:
- ultraviolet influence of direct sunlight, which affects the material at the molecular level;
- temperature fluctuations due to weather or radiator operation;
- various impurities that react unpredictably to cleaning products.
We invite you to familiarize yourself with Toy storage: ideas, photos, boxes for toys in your own way
The following will help to return the white color: hydrogen peroxide, a solution with bleach, car cosmetics, wipes for the care of computer equipment and other products described in the article.
White
Recipe. Concentrated white is poured into the flask and left for several hours. Afterwards, rinse thoroughly with plenty of warm water.
Reality. A method for real extreme sports enthusiasts. Whiteness does not remove stains from tea in a thermos. And it doesn't even dissolve. It just discolors it. And the unpleasant odor will remain for a long time. Do you like white-scented tea? Then feel free to adopt this method.
What to do. Leave the white for other purposes. Or at least rinse the thermos thoroughly with cold water instead of warm. This will make the smell of chlorine disappear much faster.
What can't be used?
First, you need to familiarize yourself with the substances that are not recommended for use in cleaning sulfur:
- Do not clean the headphones with water. If liquid gets inside the product, the electrical circuit closes and the accessory fails. The exception is waterproof models, which are marked accordingly.
- Do not use abrasive substances.
- Do not use washing powders or dishwashing detergents.
- Bleach and solvents can damage the finish. Not recommended for use. Alcohol and vodka will help to wash white components.
- Do not clean plastic parts with nail polish remover.
Kinds
Today there is a huge variety of sieve variations on the market. This kitchen appliance has noticeably evolved in its appearance, as well as in the comfort of its use.
Sieve mug
Thus, one of the simplest, but at the same time popular and widespread mechanisms is considered to be a mechanical kitchen manual sieve with a handle, which is made in the shape of a mug. Such a device can be found in almost any kitchen supply store, and it is very inexpensive. Despite the fact that the mechanism of the mug-sieve is quite simple, it is also quite effective and copes well with its functions.
Often such a hand sieve is metal. The mug has no bottom - instead of the traditional bottom, there is the same sieve. For convenience and comfort during operation, the mug is equipped with a special handle, which, in turn, consists of two parts and has a built-in spring. In order to carry out the sifting process, you need to pour flour into the mug, and then press the handle. This press automatically activates the sieve: the flour passes through small holes and is poured out, already sifted, into a container you have prepared in advance. On the other hand, all unsifted elements and particles remain on the inner surface of the sieve.
This sieve has a number of advantages, thanks to which it has become popular among housewives. For example, it is quite easy to use due to its small size. In addition, the compactness of the device ensures cleanliness and order in the workplace. The design of the screen is quite attractive and modern. The disadvantage of the mug sieve is that it is not suitable for industrial use. It is convenient to use only if you need to sift a fairly small amount of flour.
Traditional round
A more traditional option is a large round wooden sieve. This device was used not only by our mothers and grandmothers, but also by our more distant ancestors. However, despite this, this option for sifting flour remains quite popular and can be found in many kitchens.
In its structure, a wooden sieve is nothing more than a wooden hoop, on one side of which a mesh with cells is attached. In order to perform the sifting procedure, the sieve must be moved from side to side, performing a kind of shaking motion. It is believed that a wooden sieve is the most environmentally friendly option for such a device, which will serve you for many years and will not harm the product being sifted.
The main disadvantage of such a sieve is that due to its large size and diameter it is impossible to ensure cleanliness in the workplace. Flour can fly in all directions.
Metal with handle
Another common strainer model is a metal sieve with a handle. Externally, this device may resemble a ladle. However, the bottom is not solid, but consists of a mesh with cells, which performs the sifting function. The design of this sieve is not similar to those described above. The main difference is the surface of the sieve, which is not straight, but has a recess. This recess increases efficiency and speeds up the screening process.
Thus, today on the market you can find a kitchen device for sifting flour in accordance with any wishes and needs. For example, a mug-sieve is suitable for housewives who are fond of baking, and a wooden sieve is an excellent option for sifting flour on a larger scale.
Simple rules to help make the process easier
To make the dishwashing process not only quick, but also enjoyable, you need to adhere to the following basic rules:
- One sponge rule. To make routine duties psychologically easier to perceive, the one-sponge rule is applied. A few drops of detergent are dripped onto the sponge, and it is used to wash kitchen utensils until the foam runs out. After this, they take a break and do other duties in the kitchen. This way the process will be divided into successive stages and will not seem long.
- Buy beautiful dishwashing accessories. An old, worn-out sponge not only looks untidy, but is also a breeding ground for bacteria due to overuse. The washing process will be much more enjoyable if you use beautiful and bright kitchen sponges, towels, and brushes.
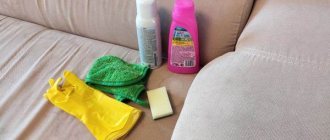
- Use rubber gloves. One of the reasons why women don’t like washing dishes is ruined manicures and the negative effects of aggressive detergents on the skin of their hands. To avoid this, you need to use rubber gloves. They should fit snugly on your hands and match their size.
- Don't clutter your sink. There should be free work space in and around the sink. If the sink is filled with dishes and dirty kitchen utensils are placed around it, there will be no room left to work.
- Empty your dishwasher and dryer promptly.
- Wash dishes while listening to music. Music inspires a person in any activity, including daily household chores. Listening to her favorite melody, the housewife forgets about the grease and dirt that she washes off, her mood is lifted, and the process is enjoyable.
Materials
Today, manufacturers produce mugs from a variety of raw materials.
Wooden ones are considered classic, but they are becoming less and less common. They are less practical and tend to absorb all sorts of aromas, which negatively affects the production of baked goods.
A budget option is a plastic sifter. It is easy to use and does not require special skills to use. The plastic should be food grade, with a smooth surface, odorless and without unnecessary joints.
Metal sieves have the best properties. A distinctive feature is strength and durability. Deformation of the body and structural elements is excluded. Easy to clean and dry quickly
This is especially important for those who need to use additional ingredients.
What is a French press used for?
French press (English french press - “French press”) is a device for brewing drinks - coffee and coffee drinks, as well as tea and herbal drinks.
Interesting materials:
How to use Ovary for cucumbers? How to use an action for Photoshop? How to apply your own color scheme to a separate slide? How to accept a follower on Instagram? How to be adopted into a family in Samp? How to take Novopasit liquid? How to pause Instagram promotion? How to train your dragon little dragons? How is the youth rank assigned? How are hotel stars assigned?
Cleaning Rules
First of all, you need to determine the type of headset. In-ear headphones are more susceptible to contamination and require frequent cleaning.
Regardless of the design of the device, manufacturers recommend adhering to the following rules:
- prepare a workplace with good lighting, which allows you to notice even the smallest dirt;
- carefully and accurately clean components without using excessive force;
- do not touch internal cables;
- use a soft, lint-free cloth;
- do not allow cleaning liquids to get inside the housing;
- Dry the audio device on a paper towel for at least 3 hours.
Note! Headphones must be cleaned regularly, at least once every 2 weeks. Otherwise, the sulfur may penetrate into the casing of the audio device and cause a serious problem.
Have you already cleaned your headphones from dirt?
Of course not yet
What should I do if water gets into my headphones?
If the headset gets into water, you must take immediate action, otherwise the product may fail.
- Shake out as much liquid as possible. Direct the auditory openings downwards. Avoid sudden movements.
- Dry with a hairdryer or other heat source. If possible, disassemble the headset.
- Leave on a paper towel until completely dry.
- Check the functionality of the headphones.
Attention! When exposed to high temperatures, the housing may be deformed.
Rules for using the dishwasher
The easiest way to wash dishes is in the dishwasher, but even here you have to follow some rules:
- Cutlery is placed in a special tray designed for forks, knives, and spoons.
- The upper tier is used for large kitchen utensils (pots, pans, cauldrons), the lower for cups and plates.
- The temperature regime is selected depending on the degree of contamination of the dishes and the fragility of the material (crystal, glass, cast iron).
- All hollow objects must be laid out upside down, since water enters the machine from the bottom up.
Not all dishes can be washed in the dishwasher; it is better to prefer hand washing wooden and plastic cutting boards, Teflon pans, cups with patterns, products with special coatings, labels
Crystal and porcelain sets are washed with care in the machine. Brittle materials require low temperatures and special conditions
In addition, copper utensils may change color after being washed in the dishwasher.