Share on social media networks:
All women repeatedly face such a problem as arrows and holes in nylon tights. This unpleasant moment happens so often that sometimes you just don’t know how to deal with it. Moreover, this simply necessary wardrobe item forces us more and more often to buy a new, better product, and this is good for our pockets. This is probably why many fashionistas find it quite difficult to say goodbye to another pair of once-loved, accidentally torn tights. Is it possible to extend their life by transforming them into a new creation? Of course! These tights can make original and chic DIY stockings, leggings, knee socks, gloves, a gag and many other interesting little things. Now we will tell you, you don’t know how to make stockings from tights with your own hands.
Tools and materials
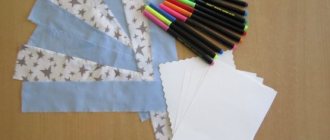
This alteration is feasible even for novice needlewomen. For it you will need a simple set of materials and tools:
- tights;
- thread and needle;
- rubber;
- scissors;
- lace, decorative ribbon and other decorations.
Fishnet tights are best . They are easy to trim and there will be no arrows.
Ordinary nylon stockings will also make stockings, but you will have to put in more effort. You can also remake warm knitted tights.
IMPORTANT! The needle for work must be thin. After all, nylon is a very delicate material. A break in one fiber will result in an arrow.
The thread is taken to match the color of the nylon or the color of the decor that will be used. It should be smooth, without knots, and strong enough. It will be even better if you take an elastic thread.
For the alteration, a wide elastic band is used so that it stays well on the leg and does not squeeze it. You can take an elastic band from the same tights, dividing it into two parts.
ATTENTION: The scissors must be sharp so that they can cut the nylon well, without chewing it or tearing it.
You can take a variety of decorations: lace to match the nylon or contrasting, wide satin ribbon or small bows from ribbons, rhinestones or multi-colored sequins, appliqués or strips of fur.
Kinds
Before sewing tights for a doll, you should decide what they should be like. In general, there are 3 types of tights, they differ in the location of the seam:
- Seam between legs. (Fig. 1, the fold lines and the seam on the back of the waistband are marked in red). Convenient when made from knee socks or socks; with a suitable waist size, it helps to avoid unnecessary seams in the waist area. But at the same time the seams are visible, which does not always look appropriate.
- Seam on the sides. This technique is used to make tights for Barbie dolls from thin material. This greatly simplifies the cutting process, since the doll is simply placed on the material, folded in half, traced along the contour, then simply stitched along the lines, and the excess is cut off. However, in this case, the cut edges show through both on the inside and outside of the leg, which spoils the appearance of the product, so this type of tights is not popular among needlewomen.
- Back seam. (Fig. 2, 1/2 of the product, round neckline - motni line).
In this case, the tights turn out to be neat, the seam on the legs is visible if the doll’s back is turned, but if done carefully, it looks like only a decoration of the product. There will be 4 seams in the waistband area: 1 at the front and 3 at the back.
Making stockings from tights step by step
When all materials and tools have been collected, you can begin to work. Just a few steps and the stockings will be ready:
- Trim the bottom of the tights. If the stockings are planned to be long, then only the panty panties themselves are cut off. If the product is just above the knee, then the length is measured and two identical stockings are cut to the width of the elastic above the mark. To measure the length correctly, you should wear tights. However, you cannot cut yourself off.
- Scorch the edge. To prevent the nylon from releasing arrows, you need to burn it with fire. To do this, it is convenient to use a candle on a stand. You need to slightly stretch the cut edge with both hands and quickly move it to the side of the fire. The movement should be smooth, without jumps. Otherwise the line will turn out uneven. Do not bring the fabric too close to the fire, it may catch fire.
IMPORTANT! It is impossible to burn two edges at once, otherwise they will stick together.
In addition to open fire, you can use a hot cut. The essence of the method is that the nylon is cut with hot scissors. A hot blade will melt the fabric when cut and immediately bake it. In this case, the scissors must have plastic or rubber handles. Holding the handles, you need to heat the blades over the fire. Cut the nylon into only one layer. This means that you cannot cut tights by folding them in half. Just cut off each stocking in a circle.
- Sew on an elastic band. It will be most convenient to make a fold for the elastic and then insert it there. To do this, you need to bend the end to the width of the elastic and sew it up, bending the burnt edge inward. The seams must be done very carefully so as not to tear the nylon. They should not be very large, otherwise the stocking will bulge. When sewing with non-elastic threads, the product must be stretched so that the seam stretches along with the elastic. Then insert it and secure it.
The second option is to sew the elastic on the wrong side. In this case, the burned edge is folded inward.
- Sew decor along the top edge. You can sew beautiful lace on top. Decorate it with ribbons or shiny rhinestones and sequins. Or, for example, sew on a rabbit's face. Everything that imagination is capable of.
The final touch can be drops of transparent silicone on the inside of the finished product. After application, the silicone should be spread over the nylon in a thin strip and allowed to dry. Thanks to this, the stockings will stay on the leg better without slipping down.
Making a garter belt
If the stockings still continue to fall off, you can additionally make a belt for them with your own hands.
For this you will need:
- wide elastic lace;
- tape 10 mm wide;
- stocking fasteners;
- thread, needle, scissors.
First you need to measure the lace according to the volume of your hips. Sew the edges together to make a ring.
TIP: If the lace is not elastic, then you need to make a clasp. These can be small buttons, hooks, pin fasteners and lacing.
Next, cut the tape into 4 pieces of 30–35 cm each. Attach one fastener and an adjustment ring to each. Sew the ribbons to the lace so that two are in front, two are in the back and in the middle of each leg. All that remains is to adjust the length of each using a ring, decorate with bows or rhinestones and the belt is ready.
Thus, by spending an hour of time, you can get an exclusive new thing that your friends will envy.
Putting leftover fabric to good use
After sewing tights from socks, there is a lot of excess fabric left. From pieces with a heel you can sew stockings or socks for a doll.
The bottom of the sock can be trimmed evenly, folded in half and sewn on one side. It turns out to be a beautiful two-layer hat.
You can also sew scarves, tops, mini-dresses, skirts, and shorts from fabric scraps.
Now you know how to sew tights for a doll with your own hands and diversify her wardrobe. The more clothes dolls have, the better for the child's development. By dressing and undressing the doll, the child learns colors, sizes, develops fine motor skills and a sense of style.
How to make stockings from tights with your own hands?
Share on social media networks:
All women repeatedly face such a problem as arrows and holes in nylon tights. This unpleasant moment happens so often that sometimes you just don’t know how to deal with it. Moreover, this simply necessary wardrobe item forces us more and more often to buy a new, better product, and this is good for our pockets. This is probably why many fashionistas find it quite difficult to say goodbye to another pair of once-loved, accidentally torn tights. Is it possible to extend their life by transforming them into a new creation? Of course! These tights can make original and chic DIY stockings, leggings, knee socks, gloves, a gag and many other interesting little things. Now we will tell you, you don’t know how to make stockings from tights with your own hands.
Preparation
To sew nylon tights for a doll, the material must first be prepared. There are 3 methods, they differ in time and final result:
- Freezing. The wet material is placed in a plastic bag, tightly closed and left in the freezer for 12-24 hours. Then defrost at room temperature and dry.
- Cook in bleach. For 0.5 water you will need 100 ml. whiteness. Cook for up to 15 minutes, then immerse in water with conditioner for 10 minutes, then wring out with a towel and dry. In this case, the tights will lighten significantly, acquire a yellowish tint, but at the same time they can easily be painted in the desired color.
- Cooking in activated carbon. For 0.5 water - 20 tablets. Cook for 10 minutes, then rinse off the coal and soak in water with conditioner to restore elasticity. Dry.
After this treatment, the material will become denser and more comfortable to work with, and fewer streaks and puffs will appear. This is especially true for dolls like Barbie. It is simply impossible to sew nylon tights for them without first preparing the material.
Let's get started
Now we will learn how to sew stockings from tights, and we will begin the process of alteration itself. It consists of several important steps:
- First, we need to turn the tights inside out. This will give the finished product a neat finish.
- Now we need to make a mark on the top of the tights that you chose yourself. We recommend cutting the tights at the very top, at the crotch level. So the stockings will definitely not be short.
- Next, we cut off the top of the tights so that we end up with two identical stockings. For this we need sharp scissors. We do the same manipulation with the second part of the tights.
Do-it-yourself nylon dolls - instructions for beginners, photo ideas
Craftswomen have found excellent uses for nylon tights. They make cute toys. Nylon dolls have become very popular these days. Since the material is affordable, and the flesh color is perfect for the base of the toy.
It is easier to give a baby doll made from such fabric the shape of a head and make facial expressions. This is how you get funny dolls that will delight any child.
Recommendations and advice from experts
You need to know some tricks on how to sew tights for a doll so that the product turns out beautiful and comfortable. Here are some of them:
- If the fabric does not stretch well, you need to leave allowances of 0.5 cm. Otherwise, the tights will be too tight.
- The bottom of the tights should be sewn diagonally to avoid wrinkles.
- Dressy tights can be sewn from mesh or tulle.
- It is better to sew fishnet tights at the back. The result is an even seam that only decorates the product.
- The elastic should not be too tight. Barbie has fairly wide hips; it will be difficult for a child to dress the doll.
- If the fabric stretches well, then you don’t need to insert an elastic band. The tights will hold up well.
Nylon doll in one hour
With this master class you can easily and quickly make a doll from stockings. It will appeal to those who are sewing such a toy for the first time.
- You will need a nylon stocking. You can cut off the toe part of the tights. We stuff it with soft (preferably white) syndepon and sew up the edge.
- To form the neck, you need to stitch with a needle in a circle and tighten. We tighten the neck area with a thick thread.
- We do the legs in the same way. We sew small circles from the bottom with an overcast stitch and tighten them. You get two convex balls.
- The arms can be made similarly to the legs or sewn separately.
- We stick a needle from below and pull it out in the navel area. We make several loops and pull out the needle at the bottom. Fasten the thread to the seam. This is how the navel turns out.
- When the body is ready, it is necessary to give the doll distinctive facial features.
- The nose is shaped the same way as the legs, only smaller.
- Select areas on the sides for the ears. We pinch with our fingers and sew several loops. You get ears.
- Sew on beady eyes. Using black thread, we make several loops, outlining eyelashes and eyebrows.
- We make several loops with red thread, indicating the mouth. Or you can draw with a permanent marker.
- Let's do a hairstyle for our doll. The hair can be made from thick yarn, textured fabric or from the edge of tights, covering the top of the head with a cap.
- We sew clothes for the doll. It is made from any fabric. The cheeks can be powdered with a pinkish tone. It all depends on your imagination.
It is necessary to work with nylon material carefully. Adjust the thread tension so as not to damage the fabric or make it tight. When stitching, it is better to use a thin needle.
What to sew from?
It all depends on the size of the toy. You can sew tights for both Barbie dolls and Monster High dolls, Russian dolls or Chinese analogues from nylon socks, stockings or tights. If the doll is larger, you can use children's socks or adult socks with a high elastic band.
For fairly large dolls, it can be difficult to choose the required size of socks, so you can use any knitted fabric, including turtlenecks and thin sweaters, as well as tights for infants (size 62-68). The main thing to remember is that the thinner the legs of the toy, the thinner the material should be.
DIY pop dolls
A simple option for creating a nylon toy. From the name it is clear that the interesting element is not only the face, but also the butt of the doll. It can become a cheerful interior decor.
Parts of the toy (head, arms, legs, butt) can be made separately and then sewed onto clothes. It turns out to be a funny doll.
How to take measurements from a doll
Each doll has its own shape and size. In order for clothes to fit well and be worn for a long time, you need to make individual patterns for each doll. To do this, you need to take measurements.
If the doll is small or very slender, measurements should be taken with regular thread. The measured length of the thread is determined accurately with a ruler. A larger doll or baby doll can be measured with a measuring tape.
Having measured the dolls once, you can create a special table and use it every time when making doll things.
To create a pattern, the following data is entered into the table:
- Height is measured from the feet to the top of the head. If the doll stands on its toes, height should be measured from the toes.
- Length from feet to base of neck.
- Length from waist to feet vertically.
- The inseam length is measured from the foot to the base of the leg.
- Sleeve length is measured from the wrist to the shoulder through the elbow.
- Chest width is the distance between your arms in front.
- Back width is the distance between your arms on your back.
- The chest circumference is measured around the torso with the arms raised up.
- Waist circumference is measured at the narrowest part of the waist. For large dolls, the waist circumference often coincides with the chest circumference. For Barbie, these data will be different.
- Hip circumference is measured at the widest part of the torso.
- Head circumference is measured at the widest part.
- Leg circumference is measured at the widest part of the leg.
- Shoulder circumference around the doll's arm in the shoulder area.
- The girth of the hand is measured at its widest point. This data is important to take into account, since dolls sometimes have splayed fingers, which complicates the dressing process.
- The length of the elephant is the distance from the front waistline to the back waistline through the groin.
Not all of this information is needed for sewing tights, but other items of clothing can be made from leftover fabric. To help you figure out what can come out of the scraps, a complete table with measurements will help.
How to sew a head for a doll from nylon master class
The most important part of a nylon toy is the head. The face determines how good the finished product will look. Therefore, the creation of the head shape and facial expressions must be approached responsibly.
Take the required amount of syndepon and roll into a tight ball. Place the resulting ball in the stocking. The fabric should be stretched. Roll another smaller ball and stick it in the middle. This will be the nose. Tie the stocking loosely at the bottom.
Place the needle at the top of the nose and tighten the thread to form the bridge of the nose. At the bottom of the nose we thread two loops for the nostrils. We tighten the loops. It turns out to be a nose.
You need to add more syndepon to the stocking for convex cheeks. Add a small oblong piece to the area of the future mouth
We pass the needle into the place where the dimple of the cheek will be. We bring it out through the eye and tighten the thread. We do the same with the other side. We straighten the syndepon. The width of the future smile depends on the distance between the cheeks.
We pass the thread between the dimples to form the upper lip. Repeat in the opposite direction and fix the lower lip. We try to constantly bring the needle into the eyes, gradually forming sockets for the eyes. We sew the lips and make a loop in the middle, so the lips look like a bow.
We make several stitches in the area of the bridge of the nose to lengthen it. Glue on the eyes and eyelashes. They can be purchased at special art and craft stores. You can use eyes from an old doll. We create a pink tone on the cheeks and lips using acrylic paints or real cosmetic powder.
Anything can be used as hair. You can wear a wig, use thick woolen threads or even floss.
Unusual use
Tights can also be used to create completely unusual but useful products.
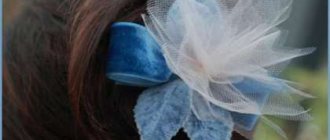
Scrunchy
To secure long hair, elastic bands made of elastic fibers are used. Such an item can be made from old colored tights, since nylon is elastic and, at the same time, a soft and delicate material that does not injure the hair.
Unique accessories
These accessories will definitely come in handy. And anyone can do them.
Anti-stress pillow
For a person who experiences severe psychological overload, psychologists and neurologists offer such an item as an anti-stress pillow.
It's easy to make from old tights. To do this, sew a bag of any size from nylon tights and stuff it with cereal or polymer crumbs.
Then it is tied with a tourniquet or cord. The surface of the pillow can be decorated with embroidery.
Washing net
When washing clothes in a washing machine, any housewife has to use special nets for delicate fabrics. You can use bags made from old tights for these purposes. Monochrome specimens in light shades are better suited.
Shade
To make a lampshade cover, openwork tights are used. The base of an old lamp, floor lamp or lampshade is used as a frame. For decoration, fringe, cords, tassels and rhinestones are used.
Women's beads
Colored, dyed, smooth or fishnet tights make interesting beads. For this you need 5–7 pieces of plastic balls with a diameter of 1.5–2.5 cm.
A pipe 1 meter long is sewn from nylon fabric, a knot is tied at a distance of 6–7 cm from the end. The ball is inserted into the pipe and the knot is tied again. Then the process is repeated until all the balls are used. The ends of the pipe are sewn together.
Photo filter
Those who are involved in photography should take note that to get an original photo with the effect of fog and mystery, you need to cover the camera lens with old plain dark tights.
Nylon tights are given a second life when they are used as material for crafts. The invention of new own styles and techniques for working with nylon makes craftswomen unique in the field of “Hand Made”.
Practicing applied creativity brings great satisfaction, especially when you can quickly achieve results. Nylon material is one of those with which it is easy to start handicrafts. I wish you success!
Doll made of nylon and plastic bottle
A plastic bottle is the basis for the doll, ensuring its stability.
- Nylon tights or flesh-colored stockings;
- flesh-colored or white threads;
- syndepon white; - sewing needle;
- plastic bottle;
- metal wire; - scissors, stationery knife;
- thick hair threads. Eyes. Fabric and decor for clothing.
- Cut off the bottom of the bottle using a utility knife. We wrap it with a layer of syndepon. Secure with tape or sew the edges. We put a stocking on the bottle so that the sock is on top.
- We form the front parts of the head, gradually adding the required amount of syndepon. A detailed description is in the section How to sew a head for a doll from nylon.
- When the base for the body and the head are ready, attach the eyes and sew on the hair.
- Let's make hands. We cut 12 pieces of wire 10 cm long. Take one piece and bend its edge into a ring. This will be a hand, and the ring is a kind of palm. Take five pieces of wire and fold them in half. These will be your fingers. We attach them to the ring, determining the height of the fingers so that it looks like a real hand.
- Wrap your hand and fingers with padding polyester. We form the thickness of the arm.
- We cover it with stocking fabric. We pull it between our fingers, stitching it with threads. The hand is ready. We do the second one in the same way. We sew the arms to the body. Thanks to the frame base, they can be bent.
- For a bottle doll, we sew a voluminous colorful skirt and a white folk-style shirt. If desired, the product can be decorated with decorative beads and rhinestones.
Nylon gnome
For the New Year holidays, you can sew wonderful gnomes that will decorate your apartment and protect the comfort of your home. The technology for making such gnomes is very similar to the technology for creating a pop doll.
Step 1. Sew the body and head, filling the nylon with small padding polyester balls. The nose and mouth are made according to the same principle as the butt. Only the body of the gnome needs to be sewn without legs.
Body and head of a gnome
Step 2. Sew a holiday shirt from any fabric you have on hand. In this case, fleece is used.
Shirt for a gnome doll
Step 3 . Sew the mittens to the made shirt and fill them together with the sleeves with padding polyester.
Sleeve with mitten filled with padding polyester
Step 4. Finish the New Year's shirt with fur.
The doll's shirt needs to be trimmed with fur
Step 5. Sew small pants for the gnome doll, preferably from red or blue fabric.
Blue pants for a gnome doll
Step 6. Roll out two small rolls of padding polyester.
Padded padding roller
Step 7: Roll them around a small stick to make a tight roll.
Sintepon is wound on a stick
Step 8. Place the prepared rollers into your panties - one in each pant leg.
The bolsters fit into pants
Step 9 . Put the finished shirt on the body of the future gnome.
The shirt is worn over the body
Step 10. Carefully sew the shirt collar to the doll's head to secure it in place.
The doll's head is sewn on
Step 11 . This is roughly what a half-finished doll should look like. This means that work is in full swing.
The gnome is half ready
Step 12. Put on your pants and carefully sew them to the body.
Pants are sewn to the body
Another photo of the process
Step 13: Attach the hair. It is advisable to use a small strip of fur for this.
Next the hair is sewn on
Step 14 . Use PVA glue to fix the hair if necessary.
Hair is securely fixed
Step 15 . It is not necessary to cover the gnome's entire head with hair, since the top of the head will be covered by a hat.
The top of the head can be left hairless
Step 16. Start making the doll's feet. To do this, cut two small circles from nylon.
Nylon circle for doll feet
Step 17. Make small bags from nylon and fill them with padding polyester.
This bag needs to be filled with padding polyester.
Step 18. Sew the finished foot to the trouser leg so that the padding polyester is not visible.
The foot is sewn to the trouser leg
Step 19. This is what the finished leg of a nylon gnome should look like.
Finished leg of a nylon gnome
Step 20 . Do the same procedure with the second leg. Make sure that the legs are the same size, otherwise it will greatly spoil the appearance of the toy.
Do the other leg in the same way.
Two legs of the future doll
Step 21 . After the gnome is shod and dressed, sew on the hat. Its color should be the same as the color of the trousers.
At the end the cap is sewn on
Step 22 . The little New Year's nylon gnome is ready! You can make several of these toys and decorate your entire apartment with them.
New Year's gnomes made from tights
DIY flower pots
In our new article, we share the best flower pot ideas! The most original and beautiful options, step-by-step manufacturing instructions, useful tips - all this can be found in this article!
DIY garter belt: Review - Instructions + Video
A garter belt is a piquant component of a woman's wardrobe, adding sexuality to a woman's look.
It is an elastic fabric tape with different fit options at the waist and hips. Not every female figure is ideal, so the belt is a little “secret” for girls in order to hide existing flaws in their build and emphasize their individuality and attractiveness. The garter belt is a beautiful boudoir item from the mid-twentieth century that has passed into the modern woman's wardrobe largely as a fetish. Although it is known that an analogue of such a belt existed back in the Middle Ages, and then this accessory was popular not only among women, but also among men!
At that time, they wore non-elastic stockings made of linen fabric (shossa), which had to be tied to the belt, since they did not stay on the body on their own.
Over time, production improved, stockings became thinner and more transparent, and different colors appeared. The cost of the product gradually decreased and the accessory became available to a wide range of buyers. In the sixties of the same century, lycra appeared. Stockings made from this material became smoother and tighter and became even more popular. But at the same time, women's tights appeared on sale.
This item of women's wardrobe quickly began to occupy a leading position among customers and stockings gradually began to fade into the background. The modern market offers a huge selection of hosiery products. They differ in materials and prints. Each woman herself chooses a priority between stockings and tights, but it is worth noting that stockings are less subject to wear, are not noticeable under any clothing, increase a woman’s self-esteem, and give her image a sexy look. Well, of course, because a woman in stockings remains one of the main male fantasies.
Today, garter belts are an exclusively female attribute. It looks perfect on any figure and makes its owner sexy.
Do it yourself
The easiest way to become the owner of a classic “linen” accessory is, of course, to buy it. The cost of belts varies widely and, according to most women, is overpriced for such a small product.
When purchasing a belt, you need to pay attention to some nuances:
- - the material from which it is made - it is desirable that it be elastic and pleasant to the body. The most common ones are satin, lace, mesh and leather.
- - the number of garters - is selected based on the intended functions of use (in most cases, their number ranges from four to twelve) - the greater the number of garters, the more comfortable the belt will feel on the body when worn, but it will take more time to remove it;
- - width of the belt - the thinner the belt, the more discomfort it will cause a woman when wearing;
- — fittings material — metal and plastic clips are common, the difference between which lies in their reliability and durability.
There are no specific rules for wearing stockings. It can be worn both at the waist and on the hips, the main thing is that it fits tightly enough and follows the curves of the female body. In order for the belt to fit tightly to the body and not slip, you need to use elastic bands or rubber fabric along with the main fabric.
Important! To attach to the belt, you need special stockings (without silicone lines).
How to fasten a belt to stockings? It is necessary to place the round part of the garter clip under the inside of the stocking (2-3 cm from its edge), and put a rubber fastener on top of the stocking, forming a lock. Now you need to adjust the length of the garters - they should not be too tight (because a sudden movement can tear the stocking), but they should not hang either (the aesthetics and sexuality of the image are lost).
An alternative purchase option would be to make the belt yourself.
We’ll talk further about how to sew a garter belt:
- First you need to decide what material the accessory will be made from. This is important, since the fabric should not cause discomfort and cause unpleasant sensations on the body. For everyday wear, stockings made from stretch fabrics are preferred, for sensual special occasions - silk and lace. It is important that a large amount of fabric for sewing a belt is not required (approximately 30-40 cm of the standard width of a fabric roll).
- It is necessary to make a pattern for the future product. To speed up the process, the pattern can be found on the Internet. We must remember that the pattern is made strictly according to specific measurements (waist and hip circumference), therefore, when using a ready-made version of the pattern, do not forget to adjust it to your size!
- Cut the fabric based on the existing pattern, be sure to leave a few centimeters for allowances.
- Then the sewing begins. There are many master classes on this topic on the Internet; there are also detailed descriptions of the process with attached photos and video materials.
In this article we consider only the main points that are worth paying attention to:
- — for a more comfortable feeling, it is recommended to add a lining to the belt (it is made using the same patterns as the main product);
- — in order for the belt to fit more tightly to the body, it is advisable to sew an elastic band on the back side; this will add not only functionality to the product, but also a piquancy to its appearance.
- — an important component of a belt is the fittings used to sew it. Currently, there are many online stores offering a large selection of accessories for women's underwear.
By making a garter belt with your own hands, you can not only save a lot of money, but also create an absolutely unique and unique piece of clothing that is right for you. The main thing is not to limit your imagination.
Sewing
First you need to sew the upper part - the waistband area. Then you can mark the seam by placing the doll on top of the workpiece, trace the outline of the leg and sew along the resulting line. However, this method is suitable for sewing “tenth” tights; the first time it is better to put the blank on the toy and already baste the seams on it, taking into account the anatomical features of the doll.
If the doll is Barbie, then the legs will be in the form of a cone, but if the toy has a pronounced foot, then additional seams may be needed. This is especially true for fairly dense materials. In this case, you need to sew tights to the ankle, then try them on again. Then there are 2 options:
- The first is a vertical seam to the floor, then a semicircular one, following the contour of the foot (from the little toe through the inside of the foot and to the outer edge of the heel).
In this case, there will be no seam on the foot, the toy will be more stable, and there will be no unnecessary folds on the instep of the foot. However, this method will not work if the shoes have only a small margin in width and length.
- The second way is to sew the side seam to the center of the foot, then sew the pant legs perpendicular to the side seam.
Since it is impossible to sew tights for a “big legged” doll without additional seams, the second method is ideal for them.
After all the seams have been made, you need to try them on without turning them inside out, if necessary, adjust them, then trim off the excess material and turn them inside out.
How to choose a belt
First, decide what material you would choose your belt from: lace or satin.
Then find your size: the belt should sit firmly on your waist and not slide down your hips. Lingerie, like clothes, is sewn according to standard patterns for ideal figures, which are rarely found in life.
You need to select a belt with stockings only according to your size and do not wear them under tight clothes; also make sure that the edge of the stockings does not peek out from under your dress or skirt.
Stockings should also be your size and height - they should not hang or wrinkle. Before buying, look at how long the stockings are - on the packaging it is marked with the letters S, M, L. Do not confuse it with the size, it is indicated by the numbers 1-2, 3-4. Even a small 1-2 will turn out to be length L.
Edge processing
To prevent the edge from fraying, it must be processed. Despite the fact that the fabric used is mostly synthetic, it is highly undesirable to melt the edges with fire. This is due to the fact that the product must stretch, and the melted edge loses this property. Therefore, it is better to use an overlocker, a zigzag stitch on a machine, or manually stitch it with an overlock stitch. If you use very thick knitwear (as on swimsuits), then such material does not need to be processed.
The presented master class will help you in your work.