- The simplest stationary driver
It is hardly possible to live in an apartment without a device for drying clothes. Such designs are not cheap, so the question of how to make a clothes dryer with your own hands is very relevant. Next, we’ll tell you in more detail about how to make a practical device using available materials.
Today, drying clothes in the house is a common occurrence.
Where and how to dry clothes
Previously, clothes were most often dried outside, stretched on a rope between two poles or trees. Many still remember similar pictures from childhood. The main inconvenience of this method is the inability to dry things in cold or rainy weather. Nowadays, apartment residents no longer hang laundry in the yard, but use a variety of devices to dry things at home.
This is how our ancestors, as well as grandparents, dried clothes
In the retail chain you can find many portable folding models of dryers (hereinafter also referred to as dryers, from the English d ryer - dryer) . In most cases, such structures are bulky and inconvenient to use. More practical are hand-made drying products, mounted on the wall or ceiling in the bathroom.
A simple drying device that attaches to a battery
Homemade homemade drayers can be attached to batteries. In this case, the laundry dries much faster after washing than on a standard dryer, and the design itself takes up very little space (see photo above). A loggia or balcony can also be used to install modern structures.
Types of dryers depending on location
Ready-made kits are varied, but even among such an assortment, the most successful designs can be distinguished.
Mobile dryers
The main “trump card” of such products is the ability to move and change position. This is very convenient for small rooms, when every centimeter of space is distributed, and there is not enough space for a full-size hanging model. Also, such dryers will help out the guests of rented housing, because the installation of the hanging structure must be discussed in advance with the owners.
Types and features of clothes dryers
All drying structures are divided into two types: portable and stationary. Portable ones are more convenient because they can be folded and put away so they don’t get in the way. It is better to place stationary drayers where they will not interfere with residents. For these products, it is best to choose a bathroom or balcony.
By type of location, dryers are divided into:
- floor - portable design options;
- wall-mounted - can be folding, sliding or stationary;
- ceiling - are a system of brackets and ropes attached to the ceiling;
- wall-ceiling - usually attached to the ceiling with brackets, and to the wall with a fixing bracket.
Mobile design designed for drying clothes above the bathtub
Portable dryer options
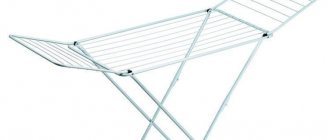
Among mobile structures, horizontal floor-mounted drying devices are popular. They take up quite a lot of space and are most suitable for those who live in a private house or in the country in the summer. There are also vertical floor-standing drayer models that take up slightly less space.
Horizontal floor dryer
Portable mini-dryers are usually attached to a bathtub or to a radiator. The first option is convenient for drying items made from delicate fabrics that should not be wrung out (water will then flow into the bath).
Recently, electric dryers have become popular, in which heating elements are located inside aluminum tubes. In this case, the laundry dries much faster.
Portable floor dryer with electric heating
Stationary drying structures
The most compact are inertial drying devices that are attached to the wall. They fold and unfold very easily, taking up very little space when folded. The only negative is that you can’t hang a lot of things on such a device. The maximum weight of laundry that can be placed for drying is 5 kg.
Sliding wall-mounted stationary device for drying clothes
Another option is a wall-mounted stationary dryer for the bathroom, made in the shape of a folding accordion. You can fold it up at any time if you want to take a shower. Such a device can be placed not only in the bathroom, but also on the balcony. But you can’t hang a lot of laundry on such a structure either, there is a weight limit.
A device for drying clothes, made in the form of a sliding accordion
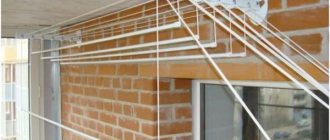
Among the ceiling devices, Liana type dryers are popular, which are convenient to use on a balcony or loggia. The big advantage of these structures is that the height of the metal strips can be adjusted with cables. If you place the slats at different heights, clothes will dry faster (see photo below).
Ceiling stationary structure for drying clothes like Liana
To do the work of installing stationary dryers yourself, you will need the following tools:
- an impact drill or hammer drill to drill holes in the wall or ceiling;
- screwdriver for fixing fasteners;
- drills, drills, screws and dowels.
We invite readers to watch the video, which clearly demonstrates the installation of a Liana-type ceiling dryer:
Radiator grille
Shoes get wet quickly but dry slowly - this depressing fact makes many people think about how to speed up this process.
Often they simply put wet boots on the radiator, but this can affect them in the most negative way. The fact is that boots dry unevenly near such a heat source. Moisture evaporates only from the outside, remaining wet inside. This leads to shoe deformation and cracking. If some parts are glued, they may simply fall off.
To avoid negative consequences, you can make your own device for drying shoes using a radiator. To do this you will need: several slats with a thickness of 0.5 cm, nails and soft synthetic fiber cloth.
You can quickly build a device using a hammer, sandpaper, an electric jigsaw and a construction stapler.
- First you need to make a diagram of the dryer.
- Then you should measure the required length from the rail and cut it.
- The internal dividers are nailed only after the side ones are attached. There should be a small distance of one centimeter between the slats.
- To avoid damaging the battery, a soft synthetic fabric is attached to the homemade dryer. A construction stapler will easily cope with this task.
- To secure the slats to the radiator, you can make hooks from leftover wood.
This drying method does not allow your favorite pair to come into contact with the surface of the radiator. Therefore, it dries evenly, without the risk of being spoiled.
What material is suitable for manufacturing
Before you start making a clothes dryer, you need to decide on the material of the product. The choice is quite large:
- Aluminum is the lightest of metals, but it is also quite fragile. This means that a drying device designed for a large amount of clothes and linen should not be made of aluminum parts. In addition, making a frame from aluminum pipes is quite problematic.
- Stainless steel is the optimal choice for powerful drying products designed for large families. The only drawback of this metal is its heavy weight. The structure must be mounted on a wall or ceiling very securely, since standard hooks may not be able to support the large mass of clothing along with the frame. It is better for beginners to refrain from using this material for making ceiling dryers themselves.
- Plastic (PVC) is a lightweight and easy-to-process material, but it is also quite fragile. Suitable only for those dryers on which few things will be dried (up to 5 kg). Another positive feature is that it does not corrode when exposed to moisture.
- Wood is an easy-to-work natural material that is also very affordable. Since wooden products are destroyed by moisture, it is necessary to coat the product with a double layer of water-repellent paint or varnish before use.
Profiles made of aluminum, stainless steel, plastic and wooden blocks from which dryers can be made
Before you design the structure and start manufacturing it, decide on the size and weight of the things you are going to dry. Count on approximately 5-6 kg of wet items per family member. Accordingly, for a family of three people you will need a device that can withstand up to 18 kg of weight.
Metal lifting structure for drying things installed on the balcony
The optimal places to place dreyers are bathrooms, balconies and loggias. Do not forget that water can drain from wet things onto the floor, so it is impractical to install drying structures in residential areas.
Important options to select
Making delicious and healthy marshmallows
For an electric dryer to become a truly good helper during the harvest season, it must be:
This will be influenced by the number and volume of pallets or surface area. Options for dryers up to 5 trays are a good choice for a small family. They are capable of drying several kilograms of food at a time. For more serious harvests, devices with 6 or more tiers are purchased. Models with 15-20 sections are capable of drying up to 15 kg of fresh food.
Allows you to dry various fruits and vegetables
Directly depends on the capacity of the device. A good option are 350-600 W models, which have sufficient capacity, efficiency, and do not consume a huge amount of energy.
You can set the desired temperature
Makes it possible to preserve all the beneficial properties and vitamins in products. Many convective devices are available with fixed 3 modes:
- 30-40С (Low) – light load
- 45-55С (Medium) – average load
- 60-75C (High) – high load
The last 2 modes are relevant for preparations from vegetables, fruits, berries, mushrooms, meat, and fish.
Plastic dryer for vegetables and fruits
Available in 2 main versions:
- metal – strong, reliable, durable; has significant weight; may get warm during operation
- plastic – light in weight, easy to clean
Plastic models are easy to assemble and disassemble, make it possible to increase the number of tiers, and are also transparent, which is convenient for monitoring the drying process.
With mechanical control
- the electronic view is equipped with a touch screen and keys for convenience; less exposed to pollution; adjustment is more precise
- mechanical appearance is reliable
Horizontal arrangement of trays is a more convenient option
- Trays are located vertically (one above the other) in many convective type electric dryers. Heating can be from above or below. The first option is more durable and easier to maintain, because... nothing gets on the heating block. Although devices with bottom heating cope well with large volumes of products
- horizontal arrangement of pallets is more convenient. Trays can be easily removed without affecting others. The heating block is located on the rear wall. It is also possible to simulate the chamber space by removing the pallets altogether. This way you can place large items, such as yogurt jars.
It is possible to make pastille
- the ability to prepare marshmallows or dry-dry meat and fish
- Thanks to the system of independent supply of hot air to each of the pallets, there is no need to swap them during drying
- There is no risk of getting over-dried food if the device has an auto-shut-off timer
- a device with overheating protection will be safer and last longer
- the adjustable height of the trays is useful, for example, for mushrooms, in order to dry them without chopping them
Good quality sofas: how to choose a universal model for relaxing and sleeping. Popular manufacturers + Reviews
Making tool
To make a clothes dryer yourself, the master must have the following tools:
- impact drill;
- screwdriver;
- sets of Phillips and flat screwdrivers;
- roulette;
- a hacksaw for wood (if the material for production is wood);
- a hacksaw for metal (if you are going to make a drayer from aluminum, stainless steel or plastic);
- sets of drills, dowels and screws.
Carpenter's tools for woodworking
Electric
A couple of decades ago, no one had heard of electric dryers, but today you can buy them in many stores. These designs consist of a bar with rays emanating from its center. The beams usually have different sizes, large ones are used for drying larger items, and small ones are used for smaller ones.
At the bottom of the electric dryer there is a device that supplies hot air. The cost of such models is higher than that of others; the main factor influencing it is the material. Typically electric dryers are:
- aluminum is the cheapest option, but it does not last long, since this substance quickly oxidizes, and rusty stains remain on clothes;
- made of stainless steel - a more expensive option, but at the same time more durable;
- steel ones are the most durable and reliable models, the only drawback of which is their high cost.
For those who are always in a hurry
Advice The most popular electric dryers are made of stainless steel, because they are more expensive than aluminum ones and have good strength. However, when purchasing, you must carefully study the instructions, since unscrupulous manufacturers may add an admixture of aluminum, so that over time the structure will begin to oxidize and become unusable.
Several options for homemade clothes dryers
How to make a clothes dryer with your own hands? Below you will find instructions for making stationary structures that even those who do not have much experience in this matter can handle. Materials for work: wood and aluminum.
The simplest stationary driver
For manufacturing you will need the following materials:
- clothesline or rope;
- two wooden planks;
- screws with a ring instead of a head;
- impact drill with drills;
- wood hacksaw;
- screwdrivers;
- roulette;
- file or sandpaper;
- long screws and dowels.
The table provides step-by-step manufacturing instructions:
| Illustration | Description |
| Cut one of the wooden planks to fit the structure. Treat the surface and ends with a file or sandpaper. Drill holes in the plank, attach it to the wall and, through these holes, mark with a drill the places where you need to drill larger diameter holes for dowels. Attach the plank to the wall with long screws, screwing them into dowels | |
| Using a tape measure, mark equal intervals on the plank and screw in the screws with rings along the marks. In order for them to fit firmly into the tree, for the entire length of the thread, use wood 30-40 mm thick. Perform all the above operations with the second plank, placing it on the opposite wall, opposite the first | |
| If you don’t want to use wood, you can skip the planks. In this case, make holes in the wall for the dowels and tighten the screws with rings, having first put decorative washers on them | |
| Thread and pull the clothesline or rope tightly as shown in the photo. This completes the work on making the dryer. In the manufacturing option shown in the photo, both methods of fastening screws with rings are used - with and without a wooden plank |
Clothes dryer for a balcony made of aluminum
To make the design you will need:
- drill with drills;
- hacksaw for metal;
- screwdrivers;
- screws.
Procedure:
| Illustration | Description |
| For manufacturing you will need an aluminum tube with a diameter of 8 mm and a U-shaped profile, the internal width of which is 10 mm | |
| The finished drying structure should look as shown in the photo. The profile is cut to length and attached to the walls in any convenient way. The main condition is the reliability of the fastening. It is best to use screws after pre-drilling holes in the profile | |
| The tubes are measured with a tape measure and cut, and they must move freely inside the profile. For a softer glide, you can crimp the ends of the tubes with heat shrink tubing. When folded, the dryer does not occupy the space of the balcony |
Readers can learn more about the manufacturing process of this design from the video:
Wall folding drayer
We present to your attention a wooden drying structure that takes up very little space when folded and is well suited for small spaces.
For production you will need:
- dowels, screws, bracket hinges;
- lock;
- 2 pin loops;
- 3 porcelain handles;
- 4 bars for the frame, preferably made of birch, as well as 4-5 wooden rods and a base made of fiberboard, thick plywood or other natural material;
- two colors of paint and epoxy glue.
To manufacture the structure you will need pin loops, dowels, screws, and bracket hinges
. Manufacturing instructions:
| Illustration | Description |
| Cut the wooden rods so that their length is slightly less than the length of the cross bars | |
| Drill holes at the ends of the longitudinal bars according to the number of rods, at an equal distance from each other | |
| Assemble the frame structure by fitting the rods into the holes using epoxy glue | |
| Secure all the bars with epoxy glue and screws or nails. Remember that the dimensions of the frame should be slightly smaller than the dimensions of the base (rectangle made of fiberboard or thick plywood) that will be mounted on the wall | |
| Paint the frame in two layers, for example white. For the base, choose a darker one, for example, dark green. | |
| After the parts of the structure are dry, connect the frame to the base with two door hinges at the bottom | |
| Drill holes in the bottom of the base and attach three porcelain handles to self-tapping screws, additionally using epoxy glue | |
| Install a locking lock on the upper parts of the frame and base | |
| On the left side, attach a swing-out lock or a strong cord to the frame, securing its other end to the base. This way the frame will not fall, hanging in an inclined state. Attach the base to the wall with screws and dowels. This completes the assembly of the dryer. |
In conclusion, I would like to note that there are many types of clothes dryers. You can come up with a design yourself, make a sketch and make your own version of the drayer, which is ideal for your apartment.
Floor structures
Sliding floor clothes dryers are a wonderful mobile design for arrangement in any room of the apartment, while when folded they do not take up much space and can be easily stored in the pantry. These dryers are quite simple to disassemble, but they vary in parameters and layout.
Among the advantages are mobility, ease of installation, variety of product range, compactness, and the ability to install dryers, as in the photo, in the bathroom and other rooms. However, fairly large structures can be heavy, but for ease of movement they are equipped with wheels.
Having once taken up the task of modernizing floor-mounted clothes dryers, designers came up with many original options that even looked like innovative installations.
Aesthetics
Many people, especially women, worry that a dryer on the balcony can ruin their reputation in the eyes of guests and create a bad impression of the comfort in the apartment. If this moment worries you too, you can apply a few simple rules and tips. They will help organize the drying of things in such a way as not to spoil the overall appearance of the apartment.
Will not spoil the appearance of the balcony
As already mentioned, the practice of drying things on the street side of the balcony has long been outdated, and besides, such behavior is considered a sign of bad taste. Few people want their clothes, and especially their underwear, to be examined by strangers, while some, without hesitation, hang them out for everyone to see. Even if it is not possible to dry everything at once, you need to adapt to your circumstances and wash less, but more often.
In order to hide wet things from the eyes of guests, you need to take care of the presence of a curtain that would cover the window between the room and the balcony . It is desirable that it be dense and not see through. Some housewives find an original solution to this problem - they place a large climbing flower on the windowsill, which completely covers the entire glass, so that no one will guess that it is not just a houseplant, but also an important part of the interior.
Saving space on the balcony
It happens that it is not possible to close the curtain: if guests come during the day, then there must be daylight in the room. In this case, a simple rule that should always be followed when hanging clothes will be useful: intimate items, underwear should be located in the center, and everything else on the sides. Then sweaters, T-shirts and other large clothing will be a kind of barrier protecting intimate clothing from prying eyes.


