Master class on making a folding book based on the fairy tale “How the girl Olya lost her health”
Natalya Ovchinnikova
Master class on making a folding book based on the fairy tale “How the girl Olya lost her health”
Master class on making a folding book for the fairy tale “How the girl Olya lost her health”, by children of senior group No. 2 of MBDOU D/s No. 20.
Educator: Ovchinnikova Natalya Vladimirovna.
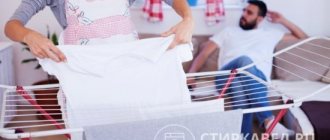
As part of the project “Proper nutrition is the key to health,” the children got acquainted with the fairy tale “How the girl Olya lost her health,” which I composed myself. After listening to the fairy tale, the guys and I decided to make a folding book; they were very interested in this idea.
The children reflected in their drawings their ideas about the heroine and the events of the fairy tale; the work was done with wax crayons, felt-tip pens and pencils.
I suggest you make the same books in your groups. After all, they are made by the hands of children. And also these books will be the best decoration of the “Book Corner”.
Folder - sliding, plot drawings (made by children, colored paper, PVA glue, glue brush, simple and curly scissors.
As well as cut strips of different fabrics (it is better to take calm tones so as not to merge with the drawings), felt-tip pens, sheets of white paper cut with curly scissors.
We glue the drawings onto the sliding folder in the same order as the text in a fairy tale. Leave some space at the bottom for text.
Then we glue strips of fabric where the sliding folder bends.
Below the picture we glue white sheets for text.
Next, glue the frame cut out with curly scissors and write the text with felt-tip pens.
And this is how the folding book turned out, made by the hands of children. And most importantly with soul and love
Thank you for your attention!
So that the child grows up healthy. For each of us, the most valuable thing is health. If you are healthy, you can easily cope with any task. “Health, not for any money.
Planning work with parents for the school year Planning work with parents for the 2014-2015 school year September • Design of information stands for the new school year • Questioning.
Source
Let's make a book together
The simplest option is a do-it-yourself folding book that folds like an accordion. It consists of pages sequentially fastened with flexible corner joints. To make a folding book you will need:
Multi-colored shiny cardboard
- thick sheets of cardboard;
- adhesive tape;
- scissors, glue;
- ruler;
- a cloth for smoothing pictures;
- text and pictures printed on a color printer.
Stationery Self-adhesive film
Think about the contents of the book. It can consist of color pictures, small and simple text that convey the content of your favorite fairy tale. Images should be bright, large and understandable to a child. Type the text on the computer in large letters. Make it with one and a half line spacing and a font size of at least 14. At 4 years old, study
Why do you need winter furniture for fishing?
The first step is to figure out why the fishermen need the furniture in question.
Main functions of folding beds and armchairs:
- protection from frost and dampness - sitting or lying on ice or cold ground is completely unsafe for health;
- heating - usually such products are made of fabric that retains heat, so the fisherman’s health will be under reliable protection;
- possibility of placement in the smallest shelters - furniture is made to dimensions that allow it to be installed in the smallest areas (single-person tent or hut);
- comfort - it’s completely uncomfortable to spend the whole day or even a day on your feet, but with the help of such products you can rest a little and continue fishing with renewed vigor;
- mobility - it is convenient to place such furniture in a tent and, if necessary, move it closer to the hole when necessary.
From the above it follows that a folding bed, armchair or chair-bed are indispensable attributes for winter fishing. Of course, such furniture has its own characteristics, which you should take a closer look at before choosing one of these options.
MATTRESSES FOR FOLDING BOODS: MATERIAL
Fillings for folding bed mattresses are now standard and usually of only 2 types:
Holcon
modern durable synthetic hypoallergenic non-flammable filler made of spiral polyester fibers.
Holcon properties:
- has no smell
- does not absorb moisture and allows air to pass through perfectly
- non-flammable
- good “springiness”, i.e. quickly returns to its original state
- hypoallergenic properties - without toxic elements (no glue, volatile toxic substances, etc.)
- heat saving is greater than that of other analogues of the same thickness and density
- long service life
- withstands dry and wet processing up to 95°C
Regenerated fiber
Regenerated fiber (RF) is essentially recycled materials from sewing, cotton or wool production. This filler can be: - cotton, - half-wool, - combined, - or synthetic.
RV is cheaper than Holcon. But it requires better self-care. Remember ordinary mattresses, for example, in a pioneer camp; many of them are still in use today. To avoid any residual odor from use, such mattresses require more regular cleaning, ventilation and drying.
Origami album
This origami book is a six-page book folded from typical origami paper (15cm x 15cm).
The size of each page will be 2.5 cm x 5 cm. This means that if you want to place two 10 x 12 photographs on each page, then the paper size must be at least 75 x 75 cm. Making an origami album starts with horizontal and vertical Z-folds.
Photo source: www.origami-make.org/origami-album.php
Wooden bed
You can make a folding bed from a single piece of wood or chipboard, and with a headrest. For this you need:
- beams of the same section as in the previous case;
- thick plywood, wooden board or chipboard according to the size of the bed;
- lifting mechanism (stepping);
- door hinges for cabinets.
The main manufacturing steps will be the same as in the previous case, only, of course, there is no need to stretch any fabric anywhere. First you need to saw off a piece of chipboard for the headrest:
- Sand all the details.
- Saturate the beams with stain and varnish - this is not necessary with the stock.
- Make a sawhorse as described in the previous case and attach the stock to it.
- Attach the headrest using several door hinges (you need at least two, but 3 or 4 is better).
- Attach a stepper lifting mechanism to the side bars of the bed and headrest (a strip or half-ring with recesses is attached to the headrest, and a pin to the bed).
Mattress
For a folding bed made of fabric, a mattress is not needed, but a pillow is needed, since the described design does not have a headrest. However, the bed sags slightly, taking the shape of the body, so it is possible that there will be no need to put anything under the head. But not everyone can sleep on a wooden bed without a mattress.
You can buy a standard mattress or make it yourself. Suitable covering fabrics:
- leather and leatherette;
- calico;
- curtain fabric of medium hardness;
- upholstery fabric;
- microfiber.
As for the filler, different options are possible. Mattresses made from sheet foam rubber are popular, but they do not last long, and sleeping on them every day is not particularly useful. You can use sea grass, polyurethane and other materials that are now found in large quantities in stores.
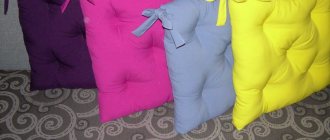
Semicircular model
Making such a folding book out of paper with your own hands is very simple. And the braid, which you can also make yourself, will serve as an excellent decor.
Important! This folding bed is multifunctional. It can be used not only in the form of children's books, but also for photo albums or even diaries.
- colored sheets of paper;
- decorative paper (available in craft stores);
- compass and pencil;
- transparent tape or glue;
- silk ribbon (or satin).
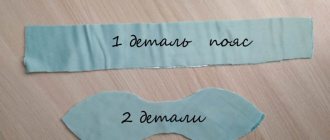
- From colored paper, cut out 2 circles with a diameter of about 10 centimeters.
- Draw 4 triangles on the already cut circles.
- We fold it in half, attaching the upper part in the form of a corner, and folding the lower part inward.
- We decorate the inside with various figures and pictures. We decorate the top part with decorative paper.
- We attach a silk braid to each page.
Important! The trick of this method is that if you pull the ribbon, the book closes itself.
Types of folding beds
Folding models can be built in different types:
- Folding design. This is the best option that saves space in the room. It is not difficult to make a folding bed yourself. Take a simple mattress with springs and place it in a wooden frame. This system is attached using hinges to a block nailed to the wall.
- Secretary bed. It is made of two racks to which the bed is attached, and the wall serves as a table cover.
- Folding model. This is one of the first models to appear, back in Soviet times. Today's folding beds are compact in size and more convenient than their predecessors. They fold quickly and easily and fit into cabinets or cabinets.
Making a folder, folding folder (for visual aids)
MATERIAL:
- hard cardboard (2mm thick) – for cardboard sides
- thick wallpaper (preferably without a pattern) - for covering material
- white, landscape paper - for the endpaper
- glue – “Master” (“PVA”) – for gluing parts
TOOLS:
- scissors
- bookbinding knife
- ruler – 50cm
- pencil
- press (bricks wrapped in paper)
The folder for visual aids is convenient to use for any subject and in extracurricular activities. But this is especially true for labor lessons, fine arts, and wherever you can show students some samples arranged in the right order on the endpapers of the folder. This could be, for example, samples of seams, fabrics, types of paper, etc. All this can be examined and touched, and, accordingly, better understood and assimilated. The size of the folder will depend on the purpose of creation and the material it will contain. The proposed size is, in my opinion, the most optimal and convenient to use.
Fishing chair - description
A fishing chair allows a person to spend a long time fishing, occupying a comfortable position, and also having everything at hand. This chair is designed to be carried in a backpack or special bag, it is comfortable and easy to assemble. Modern upholstery makes the seat warm and protects from the wind.
Advantages and disadvantages
Pros:
- little weight;
- compactness, which allows you to take the chair anywhere;
- stability in any position and place;
- thanks to the adjustment, the design is convenient to use;
- corrosion resistance.
Read Trout in winter: fish habitats, lifestyle and methods of amateur fishing
Flaws:
- the likelihood of buying a fake that will last a minimum of time;
- some models are heavy;
- you need to consider your weight when purchasing;
- high price.
How to choose a fishing chair?
There are a lot of nuances when choosing a chair, since the furniture is designed for versatility and convenience.
The main purpose of the chairs is to give a person comfort while fishing throughout the entire time.
Very often, such furniture is taken with you on multi-day fishing trips, so you should take into account that the kit will also include a backpack, sleeping bag, tent and other attributes. You should choose folding furniture based on your physical abilities, since you will have to carry paraphernalia with you.
The modern market offers a wide selection of chairs that are suitable for the weight of the fisherman. The structures are designed to withstand weights of up to 130 kg.
The volume of the chair itself depends on the weight it is designed for.
When purchasing a chair, you should pay attention to the following factors:
- Multifunctionality. The more the chair is adjustable, the more comfortable a person will feel. The most comfortable models have a folding backrest that is adjustable, as well as folding angles, a headrest for comfortable rest, and removable armrests.
- Adjustable legs. They must be independent of each other. It is this part that is responsible for installing the chair in difficult and uneven places. The best choice is the presence of telescopic legs, which allow you to change the range of installation of the chair.
- Complementing the chair with various other equipment. This could be: tables, stands, fishing rods, fastening containers. This function allows the fisherman to create a comfortable place, with all amenities nearby.
- An important factor is compactness. When buying furniture, you should remember that you will have to move it and transport it with you. That is why it should fold and not cause inconvenience. It is advisable to purchase an additional bag for transportation.
- Product material. The upholstery of the chair must have high strength characteristics, not be subject to mechanical damage and be moisture resistant.
Getting ready for work
The process of making such books is not complicated in itself.
Before you start working, you should decide what information you want to convey, accordingly, what pictures should be placed in it, what to draw the baby’s attention to. Choose images that will suit the age of your child
You can take pictures and drawings from the Internet, or you can use “surviving” fragments of children’s books.
Important! As your child flips and scans the pages, he improves his fine motor skills. There are plenty of examples of such books.
Therefore, it will not be difficult for you to choose what your baby needs. We bring to your attention the most popular and easy-to-make ways to make a folding book
There are a lot of examples of such books. Therefore, it will not be difficult for you to choose what your baby needs. We bring to your attention the most popular and easy-to-make ways to make a folding book.
Important! The topics can be very diverse: from the study of domestic animals to fragments of fairy tales
Books are useful not only to read, but also to do
If a child is not inclined to active games and prefers quiet fiddling with toys, then the opportunity to do something interesting together with adults will be good entertainment for him. Such tasks are good for developing not obvious, but important qualities in children:
Volume book with fairy tales
- fine motor skills and manual dexterity;
- rapid formation of the speech apparatus - in the brain, the centers of motor skills and speech are located nearby and stimulate each other;
- acquisition of communication and collaboration skills;
- the ability to focus one's attention on an interesting task.
Fun folding book
IMPORTANT! When the child grows up and goes to school, these skills will help him learn better. He will be less distracted in class, think logically and make the right decisions, and will quickly learn to read aloud expressively and write in beautiful handwriting.
Book made from a sheet of paper
Here's how to make an 8-page book from a piece of paper. Can be used as a notepad for notes or a mini album for children's drawings. To work, you only need scissors and one sheet of paper.
- First fold the paper and then open it like a hot dog bun.
- Then fold in half the other way as shown in the photo.
- Then fold one side back, turn it over and fold it back again, only in the other direction, so that when you open it, it looks like a W.
- Now cut the paper along the middle fold, this is the one you made with the first fold.
- Fold the paper in half so that it looks like an X at the end.
- Click on the pages to shape the book.
- Finally, you can write or draw something on the cover that you like.
This is not at all difficult to do, it is difficult to explain. Just look at the step-by-step photos, it will be much clearer.
Photo source: www.instructables.com/id/An-8-Page-Book-From-a-Piece-of-Paper/
Origami book with cover
Here is a simple example of how to make an origami book out of paper with your own hands.
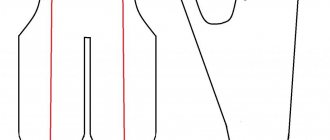
Just take a sheet of paper with the dimensions shown in the figure and fold it sequentially, as shown in the step-by-step photos. Then put on the cover and the origami book is ready.
Photo source: www.instructables.com/id/Origami-How-to-Make-a-Book-Out-of-Paper/
Mini origami book
Another example of how to make an origami mini-book with your own hands. You will need a square piece of tissue paper, scissors, a knife and a mat. First, fold the sheet in half. Then fold the edges towards the center of the fold. Turn over once to make an S shape, then repeat, that is, fold in half again and fold the edges towards the center. After this, fold the top center corners diagonally down. Open and move the triangle back (2x). Cut the folds along the center fold through all layers, then the right and left folds. Fold the pages at right angles. The origami mini-book is ready. Photo source: makinghandmadebooks.blogspot.com/2011/03/mini-origami-book.html
What you need to make a book at home
If you choose the classic version of a book with paper sheets and hardcover, you will need a careful selection of materials:
- sheets of paper with a fairly thick texture (for example, A4 office paper);
- thick cardboard (not corrugated);
- fabric or strong paper for cover and binding;
- PVA or stationery glue;
- ruler, scissors or breadboard knife.
If the book is made using non-traditional technology, then stationery folders with plastic file inserts, photo albums, and simple sketchbooks with thick covers will come in handy. Even felt or similar non-flowing dense fabrics are suitable for creating a book. They make nice, beautiful, durable books for little ones.
Read more about the technique of making a folding bed
So, you need to start making a folding bed with your own hands from the drawings. After all, a do-it-yourself folding bed, the drawings of which are not drawn up or are not prepared according to the rules, will be unsuitable for full use. First make calculations and then start assembling the structure. The sequence of actions here is as follows.
- The materials you will first need are two load-bearing boards corresponding to the length of the mattress.
- Depending on its dimensions, it is necessary to cut boards of the appropriate length. These are the future “boards”. Note that the cross bars should be slightly longer than the width of the mattress. They need to be connected to the load-bearing ones using self-tapping screws.
- Then you need to connect the back wall.
- Next, a shelf is made where the base is attached. The shelf must be secured inside the box using supports.
- Then you need to make a box for the mattress with your own hands. This will be a frame with approximate dimensions of 100x1450x1980 mm. It will need to be attached in the middle of the bottom. For production you will need 2 side and 2 end boards. You need to make folds in advance using self-tapping screws. Afterwards the frame is assembled and the bottom is nailed from a sheet of plywood.
Structures made from such materials last a long time and look attractive.
After all the above operations, done with your own hands, you can begin to make supports. When extending the bed, it is necessary to install supports made of timber with a section of 40 by 100 mm. Using prepared loops, the supports must be attached to the bottom. Next, you need to let the parts dry thoroughly. The folding/unfolding mechanism is chosen at your personal discretion.
It is easy to work with such raw materials even for an inexperienced craftsman.
It is recommended to use a decorative latch for the best fixation of the stock when closed.
At the final stage, it is advisable to decorate the product, since “naked” it will not look as attractive as we would like. For this purpose, you can use blinds that can cover the timber supports. You can also make sliding supports. This is an alternative option.
A do-it-yourself wooden cot is much more profitable than a metal version, since the former is more environmentally friendly and retains heat better.
It is recommended to use a decorative latch for the best fixation of the stock when closed. In this way, you can protect yourself from arbitrarily unfolding the bed, because it is dangerous and uncomfortable to sleep on such a bed. In view of this feature, it is necessary to ensure in advance that the folding/unfolding mechanism works properly.
When everything is collected, you can start working.
Often those who build a bed on their own from materials such as MDF worry that when the bed linen and mattress are unfolded, they will slide off. You need to stock up on 30mm wide straps on both sides for fixation. Before lifting the bed, you should fasten the Velcro.
So, you need to start making a folding bed with your own hands from the drawings.
The folding/unfolding mechanism is chosen at your personal discretion.
If desired, the finished folding bed, made by yourself, can be originally painted or decorated with decorative items
It is only important that the bed matches the interior design. If the room is in a minimalist style, then the folding bed should contain elements of this style. First make calculations and then start assembling the structure
First make calculations and then start assembling the structure.
After all the operations performed with your own hands, you can begin to make supports.
As you can see, building a bed for sleeping with your own hands is not as difficult as it might seem. A folding bed made by yourself will delight you for many years if all the rules and nuances were taken into account during creation.
Depending on its dimensions, it is necessary to cut boards of the appropriate length.
Such a product can be built for a bedroom or for a room in the country, replacing an old and non-functional sofa. The main thing is to approach work responsibly and follow the sequence of actions. Then it will be possible to produce a durable, durable product. If desired, you can use ready-made sketches, according to which it is much easier and more convenient to build a bed
The most important thing is that the structure fits freely in the room, looks functional and presentable
Then you need to make a box for the mattress with your own hands.
Fabric model
An excellent replacement for expensive store-bought folding beds, and for a baby it’s just a godsend. To create a fabric folding book, you will need:
- thick cardboard;
- textile;
- necessary accessories (beads, buttons, shreds, etc.);
- thick threads and needles.
Let's get started:
- Cut the cardboard into several equal square sheets.
- Cover each cardboard square with fabric on both sides. Secure the side part with thread.
- You decorate each page with fittings, and create appliqués from scraps.
- Secure the pages of the book with thread.
Important! When creating a fabric book, use felt. This is a fairly dense material, yet interesting to the touch.
Variety of models
A doll's bed should be environmentally friendly, safe and attractive for a child. Such items are distinguished by their reliability, ease of use, and bright design. Models can look exactly like real furniture, or they can be made in fancy shapes: oval, round, triangular. Among the varieties of products are:
- classic;
- single and double;
- rocking chairs;
- two-tier structures.
The beds are complemented by a bedside table, storage drawers, changing table or canopy. Doll furniture differs in the structure of the frame. There are options with a headboard, supporting walls, panels, with and without legs. The sizes of the beds depend on the doll’s parameters:
- classic bed for toys up to 52 cm - 55 x 35 cm;
- single for a doll up to 50 cm - 52 x 28 cm;
- traditional for toys up to 65 cm - 67 x 32 cm;
- cradle for dolls up to 52 cm - 53 x 30 cm.
- two-tier model for toys up to 50 cm - 50 x 28 cm, 48 x 28 cm.
- cradle for dolls up to 55 cm - 56 x 30 cm.
A doll bed made of cardboard or paper must be made large so that it can support the weight of the toy. Large models are made from solid wood.
ClassicSingle
Double
Rocking chair
Bunk
Double-sided model
To make the fairy tale more interesting for your child, we suggest you recreate its plot using three-dimensional pictures.
- colored paper;
- paper fairy tale characters (you can draw them yourself);
- paper blanks in the form of flowers, trees and houses (it all depends on the plot);
- glue;
- scotch.
- You should fasten the pages of the future book with glue or tape.
- We put the plot you need on each page. To make the drawing voluminous, apply glue not to the entire surface of the paper man, but to its middle. Thanks to this trick, you will get a 3D picture.
Important! Flowers, houses, paper doll clothes can be made from colored scraps of fabric. If you have a plastic beetle or butterfly lying around somewhere, you can also glue them on. For example, the stems and leaves of a flower are drawn, and the bud is made of fabric. Place your beetle or butterfly on one of the petals.
Pros and cons of a homemade folding bed
An important advantage is the budget cost of the product. You won’t have to overpay for a unique design, taxes and duties
Of course, the material also needs to be purchased, but in most cases, this is less of a waste than for a finished product.
A homemade folding bed will be cheaper.
The second advantage is the ability to make furniture according to individual measurements and design. Depending on the skills of the craftsman, the folding bed can be simple and functional or original, with complex decor.
You can make a cot in any color.
And another advantage is the guarantee of the quality of the materials used. There are few disadvantages, and for an experienced master they are completely insignificant. You will have to spend time on manufacturing; you will need a certain set of tools that may not be in the house.
What is a flip book
The folding book itself is a book that contains three-dimensional pictures. Books of this format can be on any topic. These could be educational materials or children's fairy tales.
The simplest option is a do-it-yourself folding book that folds like an accordion.
The voluminous figures that the child finds among the pages attract attention. Reading becomes more exciting and interesting.
Men's box
You will need: black cardboard, gray leatherette, scrap paper, hat elastic and black eyelets, ruler, creasing tool (not a writing pen, crochet hook), chipboard (cardboard cutouts for decoration), sewing machine, black threads, glue, decorative an inscription, a gift set - a bottle of alcohol, a screwdriver, a pack of cigarettes, a morning-after pill or other...
Master Class
- Cut a rectangle from black cardboard for a box measuring 37x27 cm. Box height - 8 cm, bottom length - 23 cm, width - 13 cm.
- Cut a rectangle from cardboard for the lid measuring 27.2x17.2 cm. Height of the lid is 3 cm, length is 23.2 cm, width is 13.2 cm.
- Cut out the corners (8x8 cm squares) from a large rectangle.
- Punch and bend along the marked lines.
- Punch the lid of the box as shown in the image.
- Cut triangles near the corners of the lid and fold along the marked lines.
- Measure each side of the box and lid, then prepare pieces of leatherette according to the resulting dimensions. Prepare parts from scrap paper in the same way, just make them slightly smaller than the leatherette parts.
- Sew the leatherette and scrap paper parts together.
- Sew one of the rectangles to the front side of the lid.
- Glue one rectangle to the bottom of the box.
- Install the eyelets and attach the elastic as shown in the image.
- Cover the inside of the box with rectangles of scrap paper.
- Install holders from grommets and elastic bands for other gift elements.
- Glue the lid of the box and cover the outside of the box and lid with stitched rectangles.
- Fill and decorate the box with lettering and a chipboard.
The men's box is ready! I recommend watching this video!
DIY folding folder
To create such a folding bed you need:
- 4 sheets of thick cardboard;
- 4 pieces of wallpaper sheets, size 26*32 centimeters;
- fabric for wallpapering;
- glue;
- 4 files;
- Double-sided tape.
Important! You can use boxed cardboard, but first you need to cut it into rectangles measuring 28*36 centimeters.
The procedure for creating crafts:
- Cut the fabric into strips measuring 36*5 centimeters (7 pieces) and 115*5 centimeters (2 pieces).
- Connecting cardboard sheets: glue the joints between the cardboard with fabric strips with a gap of about 1 centimeter.
Important! When gluing connections, take into account the distance between the sheets of cardboard, since in the future they will have to be folded.
- Next you should glue the sides. Leave for several hours to dry.
- Paste the prepared wallpaper sheets. Try to glue in the center. Leave it for another couple of hours to dry.
- Carefully trim the white edging from the files.
- Use double-sided tape to secure the files.
That's all, your DIY cardboard folding book is ready. You can now print and attach any pictures and information to files.
Important! Try to use light-colored wallpaper for the base; colorful and bright ornaments are suitable for the fabric edging.
Methodological development (1st grade) on the topic: Development of the “Folding Book” project on the topic “Numbers in Sayings.”
Preview:
To use the preview, create a Google account and sign in:
Accordion book: we make it together with children
All children love to create something with their own hands: glue, fold, cut, draw, sculpt... Very often in the children's room there is not enough space for all kinds of crafts. Well, an accordion book won’t take up much space, but it’s very interesting to make and you can come up with something new every time.
A few ideas on how to make an accordion book with your own hands with children:
- Create and illustrate your own fairy tale. If the child already knows how to write, let him sign the pictures himself, and if this is still difficult for him, you can ask an adult.
- Fill each page with a multi-colored pattern: circles, squares, spirals, etc., etc.
- Draw all family members, including uncles, aunts, cousins, brothers and all other relatives known to the baby.
- Glue dried leaves collected during a walk into a booklet and sign the name of each one.
- Trace a hand on each page and color them all differently.
- Paste photos of your pet and come up with a short story about it.
- Draw what the child ate for dinner or lunch
And on the last page or on the back it would be great to sign the year when this book was made, or the age at which the child made it. Then, many years later, when reviewing a child’s creation, it will be interesting to remember how it was created.
By making such an unusual book, you can learn how to carefully hatch, make straight and wavy lines, and also try out new felt-tip pens or pencils.
How to make homemade books
A gift book, diary or notepad can be easily made using the traditional method. Bookbinding is not difficult to master, and the main thing required is accuracy. Any book is collected like this:
- Make several thin notebooks, folding 3-4 A4 sheets. Each of them needs to be folded along the central transverse line and smoothed. Sew the assembled notebooks along the fold lines, and then make stitches across, connecting all the notebooks into a common block.
- Coat the stitched spine with glue and dry.
- For the hard cover, cut out 2 cardboard rectangles slightly larger than the pages of the block. The cover should extend beyond the edges of the pages by 3-4 mm.
- Lay out the base of the covers on fabric or paper so that between the rectangles there is a distance equal to the thickness of the block of notebooks with an allowance of about 5 mm. Trim the edges so that you can wrap them onto the inside of the cardboard by 2-3 cm. Wrap and glue.
- Cut a strip of paper to stiffen the spine. Apply glue and place it on the fabric between the cardboard rectangles, under the folded edges. Press and leave until dry.
- Assemble the book by placing a block of notebooks in the cover. Make 2 endpapers from paper: you can take decorative, thick paper (for gifts, etc.). The size of these parts is equal to A4 format; they are folded in half and glued to the back of the covers, covering the unpasted part. Apply a bead of glue to the edge of the notebook block and glue the endpaper to it as well. Do the same with the other side of the cover. Dry the finished book.
Pictures and text in a homemade book can be drawn, pasted or printed in advance, taking into account the sequence of pages in the notebooks.
It’s easier to make a baby book: from 1 small notebook, connecting all the pages along the fold with a stapler. The outer sheets will serve as covers.
Main components of the bed design
Tools needed for work: circular saw, tape measure, pencil, corner, drills, Phillips screwdrivers.
Related article: Staircase lighting with LED strip
There are four main elements that will make up a folding sofa bed:
- Mattress. Depending on needs, it can be single or double. The dimensions of the box-cabinet will depend on its size.
- Mechanisms for raising and lowering the bed. For these purposes, you can use the mechanical method and springs.
- The frame is the place where the sleeping place will be folded during the day.
- The bed on which the mattress will be placed.
Prepare the tools that will be needed during the manufacture and assembly of the bed:
- Roulette.
- Marking pencil.
- Sandpaper.
- Protective glasses.
- Drill.
- Phillips screwdrivers.
- Corner.
- Circular saw.
- Grinding corner.
Preparing for work
To make a sleeping place correctly and not redo it later, you need to know a few rules. Even before installation begins, carry out preparatory work. Think through everything down to the smallest detail, consult with a specialist.
First of all, you should make a drawing of the product. If you do not have experience with drawings, it is better to purchase a ready-made one by printing it from the Internet. For beginning craftsmen, this is an ideal solution, since the drawings are made according to precise calculations by knowledgeable people.
Measure the room in advance and select the desired drawing for your model. The drawing indicates the following parameters:
- height;
- length;
- width;
- distance between folding parts;
- dimensions of all parts.
In order to correctly determine the materials for work, you need to take into account your abilities and the availability of tools. You can buy chipboard, wood. Pine is most often used. You should prepare the tools in advance: tape measure, screwdriver, pencil, hacksaw for working with metal, self-tapping screws, glue, drill, level, hammer.
Some recommendations
For better and reliable fixation of the bed when folded, you can use a decorative latch attached to the top of the bottom. Then you will definitely protect yourself from spontaneous unfolding of the bed.
When folded, linen and mattress can slide off the bed; to secure them, use 30 mm wide straps on both sides of the bed and fasten them with Velcro before lifting the bed.
Making a bed with your own hands is not difficult, if you have all the necessary materials and accurate drawings of the future product. Since everyone makes a bed to suit the size of their mattress, the final calculations may differ slightly from these figures.
Related article: Review of the Framir door factory
Having learned how to make a folding bed (sofa), you can make a similar product for the dacha, replacing an old folding sofa or sofa with it, or preparing an additional sleeping place for guests.
The best posts
- How to make a plasterboard ceiling in the kitchen with your own hands
- Painting drywall - step-by-step instructions
- How to join drywall in corners and the process of building a decorative niche
- Sealing drywall joints - recommendations from professionals
- Epoxy resin, application
- How to seal a doorway with plasterboard - installation diagram
- DIY plasterboard ceiling installation - video tutorials and installation instructions
- How and how to glue a foam plastic ceiling plinth
How else can you make a book?
If you don't like boring sticky paper, use paper, border tape, or pre-made scrapbooking kits. They include ready-made pictures, beautiful frames and adhesive tapes. Stickers, paper, labels, rubber and silicone stamps, special markers will allow you to expand your arsenal of expressive means.
Scrapbooking kit Scrapbooking
There are also a large number of electronic scrapbooking sites on the Internet that offer interesting backgrounds and designs to print. Go to any of them, download and print the image you like. Glue it onto the cardboard before you start pinning the pages together.
Scrapbooking sheets
FOR YOUR INFORMATION! Choose sets with a children's theme. Set simple tasks for your child and ask him to help you.
A folding book made by a child with his own hands or with your help will be his first work experience and will make his hands more dexterous. In the process of communication, he will acquire useful skills and learn many new words. You will learn to understand children and find a common language with them.
Book of Seasons Book with a winter fairy tale Book with funny pictures