Since ancient times, tulle flowers have been popular among fashionistas; they decorated dresses, jackets, and hats. This gave the woman charm, mystery and aristocracy. Today, all famous brands use flowers from various types of fabric in their new clothing collections. This master class will show you step by step how you can easily make this elegant attribute with your own hands.
Very easy way
If you don't want lush tulle flowers, there is a way to make flat flowers.
To do this, draw a circle on a piece of paper and cut it out. Then fold a piece of tulle into five layers and pin the paper circle with needles and pins. Cut out the pieces. Fold four circles in half three times. Sew the resulting slices to the middle of the fifth circle. The thread can be hidden by gluing several rhinestones on top with a glue gun.
This flower can be glued to a card, hairpin or dress.
How to make a rain pompom on a stick: step-by-step instructions, design ideas, photos, videos
several ready-made rain pompoms on sticks
- In addition to rain, you need sushi sticks or pencils, tape, and a glue gun.
- Measure the required length of rain and cut off the excess.
- Cover the middle with a thin strip of tape.
- Repeat the steps as many times as necessary to obtain the desired volume.
- Distribute the resulting bunches evenly around the stick and secure with either tape or a glue gun. To be safe, use both methods at the same time.
- To add beauty to the product, cover the stick with the same rain that was used for the pompom. Wind it in a spiral in 2-3 layers and secure it with glue.
Same method, different flower
If we take the method outlined above for making tulle flowers as a basis, but add more work, you will get a wonderful craft.
How to make a flower from tulle with your own hands? The instructions are simple:
- Cut the material into equal squares (picture 1).
- Fold each piece twice to form a diamond shape and connect the layers with a needle-pin (picture 2).
- Cut out a circle of fleece that matches the color of the tulle and mark its center (picture 3).
- Sew each diamond with the top with a fold to the center of the round piece (picture 4). You need to go in a circle, gradually filling the base with tulle blanks.
- When all the tulle blanks are sewn on, decorate the middle with beads or starases (picture 5).
- Take the headband and attach the base circle to it. Sew its edges so that the flower wraps around the headband (picture 6).
The air accessory is ready!
How to fold it beautifully?
When working with thin paper napkins, it is important not only to choose the ideal material, but also to learn how to work with it as carefully as possible
Animal figures
Elegant crafts in the form of animals will decorate any table. And if you make them together with your child, you can get not only a beautiful decorative item, but also a pleasant evening with your family.
The Japanese art of origami teaches how to create complex compositions from paper. You can roll the fabric in the form of a dog or crane figurine, or you can make a frog that will even be able to jump. But such crafts are far from the simplest, so you need to start with something easier.
For example, by creating your own origami from napkins in the shape of a swan. This table decoration looks very graceful, but is not as difficult to do as it seems at first glance.
First of all, you need to carefully fold the napkin diagonally and run your hand along the fold line, smoothing it. The edges of the napkin need to be lifted and pulled towards this fold in the same way as they do when folding an airplane. Then you need to turn the craft over and repeat the same thing, only on the other side.
The resulting workpiece is folded across. The corners should touch. Now you need to bend the narrow part upward, making a swan's head out of it. The neck will turn out if you fold the figure lengthwise. The last stage is the formation of the wings, which need to be pulled out and carefully straightened.
Flower and fruit compositions
Flower arrangements look no less beautiful. You can create amazing plants and flowers from paper.
At the same time, creating such a miracle takes much less time than creating an exquisite swan:
Rose. One of the simplest flowers is a pink bud. It is made from a napkin folded in half. It is then bent into a neat triangle, which is then rolled into a neat roll. This must be repeated several times until the pink bud becomes very small. Then you need to take out small leaves, while trying to act so as not to damage the rose bud.
New Year decorations
The most obvious option for decorating a New Year's table is a Christmas tree made from napkins. To create such a craft, you only need green napkins and a step-by-step explanation.
There are several ways to make a Christmas tree out of paper. For beginners, the simplest of them is suitable.
To create a simple Christmas tree, you first need to fold the square in half twice. The edges need to be carefully folded so that there is some free space between the layers. After this, the napkin must be turned over and its edges folded into the center to again form a neat triangle. The result is a neat Christmas tree, which in itself will serve as an excellent table decoration.
Making a lush flower in five steps
How to make a flower from tulle on your head with your own hands? Very simple. The procedure is as follows:
- You will need a piece of tulle (you can use several colors), scissors and a hair tie.
- Cut several strips of tulle of equal length. The more there are and the longer they are, the more magnificent the flower will be.
- Connect the strips together.
- Connect the fingers of your left hand together and wrap the tulle blanks around them.
- Remove the tulle ring from your hand.
- Place a hair elastic on one side and tie a thread or thin strip of tulle perpendicular to the ring to connect all the parts.
- Cut the ring on both sides.
- Fluff the flower well.
All is ready!
By the way, such a tulle flower for your head can be made with a headband. Just instead of an elastic band, place a hoop on the workpiece and also tie it with a thread.
Headband decoration
If you are thinking about how to make a tulle bow on your head for a headband, just start by folding the fabric in half. Folding in several layers is acceptable. Tie the resulting rectangle in the middle with a tourniquet or ribbon, cut the connected edges of the rectangle with sharp scissors. The resulting cute bow can be sewn manually to the finished base for the headband, or you can use superglue or a special glue gun.
It is permissible to decorate the center of the bow with lace, a button, or a brooch, but the edges of the finished product can be either overcast or left in their original form, and can also be delicately ruffled with the appropriate cuts of scissors.
Volumetric flower
Tulle flowers made using this method are most conveniently used as decoration for a room or clothing.
You can get such a craft using the same method as many pom-poms.
First of all, you will need to take a sheet of cardboard. Draw two identical circles on it with a small hole in the center. Cut a long strip of tulle. Connect the two circles together and begin to wrap the diameter of the workpieces with material. The tulle does not need to be smoothed, try to have a lot of folds. Then the flower will eventually turn out lush and voluminous.
When you have wrapped the entire piece, secure the end of the tulle with a drop of glue from a glue gun. Move the material a little and insert the scissor blade between the cardboard blanks. Cut the tulle. Move the pieces apart a little and tie the tulle in that place with a ribbon or thick thread.
Now you can remove the cardboard blanks. They can be used to make other flowers of similar size. By the way, the purpose of the tulle depends on the length of the ribbon with which the tulle is tied. If it is short, then such a flower is used as a decoration for a dress or decorative items and accessories. And if it is long, then the craft can be hung from the cornice or ceiling.
Original examples of using organza flowers
As a rule, fabric flowers serve as decoration for wedding and evening dresses, hats, clutches, romantic hair accessories or in the form of a brooch. But mini-compositions have a special charm.
A boutonniere is used to decorate the groom’s suit, and individual small flowers make an excellent decoration for a box or photo frame.
If mini-flowers are planted in a cup and hung on a earring, you will get unique earrings, which can be complemented by a large brooch made in the same style.
For a little princess you can make a real (or almost real) crown. For this you will need organza, colored felt, lace, beads, and ribbons.
An accordion is assembled from a strip of organza onto a thread and a needle. Then a crown is cut out of felt.
Using transparent glue (or thread), the crown is fastened into a ring and sits in the center of the organza skirt.
The final decor is optional: beads, lace, sparkles, pendants. The crown can be attached either to a headband or to a clip-on hairpin. Your little one will be delighted!
Decorating wedding dresses is a limitless field for imagination. You can use large beads and a narrow organza ribbon to crochet a necklace or bracelet.
Using the methods described above, you can make flowers from organza, several flowers from satin ribbons, several flowers from chiffon, and assemble a luxurious wedding bouquet from all this splendor!
And the fancy organza flowers, collected into a composition on freely hanging thread-stems, will be completely unconventional.
Organza is a great material for creating delicate, elegant or chic and catchy flowers. A variety of techniques will allow even novice craftswomen to create masterpieces.
Tulle and satin ribbon
Original flowers are made from tulle and ribbons.
Master class on creating flowers:
- You will need tulle, satin ribbon, scissors, fleece, a lit candle or lighter, needles and thread to match the color of the materials, beads, and a glue gun (Illustration 1).
- Make a blank from fleece. To do this, simply cut out a circle. Its diameter depends on the size of the flower you need.
- Cut the fleece strip. Its width is equal to double the width of the satin ribbon.
- Place the ribbon and fleece together (Image 2).
- Sew the fleece to the ribbon with an accordion (Illustration 3). To do this, just make bends.
- Sew two ribbons along the entire length. Cut off the excess material and bring it to the fire (Illustration 4). The scorched edges will not crumble.
- Take a round blank and start making the blank. To do this, glue or sew the tape from the edge of the circle to its middle in a spiral (Illustration 5).
- Fill the entire workpiece like this (Illustration 6).
- Prepare a hairpin (Illustration 7).
- Glue the flower to the hairpin using a glue gun.
- Fill the middle of the flower with glue from a glue gun and pour beads there (Illustration 8).
A wonderful hairpin made of tulle and ribbons is ready!
How to make a pompom from tinsel: step-by-step instructions, design ideas, photos
girl holding tinsel pompoms in her hands
The tinsel is quite voluminous, and it is quite difficult to assemble it like yarn to create a pompom. Available means will come to the rescue, for example, straws, foam balls, and the figure-eight folding technique.
- In the first two cases, you should attach the tinsel so that there is no free space.
- If you took a foam ball, stick it in rows, starting from the middle.
- To give the pompom extra volume, wrap another row of tinsel on top. It will look especially beautiful in a different color.
- If you plan to hang the pom pom, use a glue gun to attach the string between the strands of tinsel.
Tulle and satin fabric
Instructions:
- Draw a flower with 8 petals on a piece of paper, as in picture 1.
- Place satin and tulle together in several layers.
- Attach the paper blank to the layers of fabric with a pin and cut out the parts.
- Fold the tulle and satin fabric in pairs (picture 2).
- Take one pair and roll it three times (picture 3).
- Cut out a circle of fleece and glue all the blanks onto it on top of each other (picture 4).
- Wrap the last piece several times and glue it inside the flower (picture 5).
Now all that remains is to place the finished fleece flower on the headband or elastic band.
How to make a pompom from crepe paper: step-by-step instructions, design ideas, photos
Multi-colored crepe paper pompons hang in the room
Use a lot of crepe paper to create a pompom. Due to the thinness of its sheets, the required volume is achieved by their quantity.
- Lay out the sheets and cut them to standard A4 size.
- Fold with an accordion 1.5-2 cm wide.
- Secure in the middle with strong thread or thin wire. Leave a long tail if you plan to hang the pom pom from the ceiling.
- Cut the ends of the accordion on both sides with scissors, rounding them or giving them the shape of a triangle.
- Connect the ends of the accordion and begin to level the sheets layer by layer.
- Do this without haste, carefully so as not to tear the paper.
Instructions in pictures for creating a pompom from crepe paper
Headband decoration
If you are thinking about how to make a tulle bow on your head for a headband, just start by folding the fabric in half. Folding in several layers is acceptable. Tie the resulting rectangle in the middle with a tourniquet or ribbon, cut the connected edges of the rectangle with sharp scissors. The resulting cute bow can be sewn manually to the finished base for the headband, or you can use superglue or a special glue gun.
It is permissible to decorate the center of the bow with lace, a button, or a brooch, but the edges of the finished product can be either overcast or left in their original form, and can also be delicately ruffled with the appropriate cuts of scissors.
How to make a fluffy pompom for a hat?
girl in a hat with a lush pompom
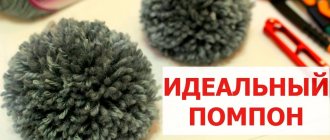
The fluffiness of a hat pompom directly depends on the diameter of the object around which you wind the yarn. The second important factor is the volume of the ball of yarn. It will correspond to the diameter of the future pompom.
In addition to the classic cardboard round blanks, you will be suitable for:
- own palm
- cardboard rectangle
- mobile phone
- plastic bottle
- glass jar
The main thing is that you can pull the thread around the winding on both sides and tie all the threads tightly.
- Cut the circle to the right and left of the fixed center.
- Align the threads, cut off those that stand out in length.
Salad decoration options
Let's look at how you can decorate various salads.
Olivie
The most popular salad in Russia has long acquired its stereotypical appearance, but let's try to dispel it and come up with something to decorate it with. Since Olivier is one of the main symbols of the New Year, this reference can also be used in the festive design of dishes.
Mimosas
Mimosa is traditionally made with an egg base and is yellow in color (as its name suggests), so the most popular way to decorate mimosa is to sprinkle grated yolk on top of an even layer of mayonnaise. In addition, you can use yellow analogues and grate the cheese; this will make the taste very unusual, but will not spoil it at all. Using an egg as the basis for decorating the salad, you can place mice or bees of a matching color on top of it.
Herrings under a fur coat
Herring under a fur coat is one of the most colorful salads at any feast, but the top layer can be further decorated. Small pieces of carrots or herring are used to lay out a beautiful pattern diagonally, which ends with dill leaves at the ends. Nuts will look beautiful against a dark background.
Crab
Crab salad can be sprinkled with corn on top, decorated with slices of crab sticks or roses made from them. Crackers or snacks can be served as an appetizer; therefore, they can be casually placed on one side of the salad bowl. An addition in the form of seafood, for example, shrimp or a couple of pieces of red fish, will also be interesting, but only as a decorative element.
Vegetable
Vegetable salads can be topped with some ingredients, for example, peas, corn, or cucumber slices. The best decoration for vegetable dishes is, of course, greens: you can put a couple of sprigs of dill, parsley or lettuce on top. Finely chopped greens will look beautiful if you generously sprinkle the top layer with it.
In addition, the salad ingredients can be laid out symmetrically from the center to the edges, and the dish can also be mixed just before serving.
