/Order/
Cleaning the kitchen is serious business. Prepare your rubber gloves and enthusiasm - in this article we will tell you how to clean the kitchen at home easily and safely for finishing facades, countertops and aprons (including wooden ones!).
But, before you start choosing a recipe, we recommend that you familiarize yourself with the following universal rules and recommendations, which are relevant for both painted/unpainted wooden kitchens and laminated, varnished, plastic facades made of MDF and chipboard.
- For those in a hurry, we advise you to go straight to the recipes using the quick navigation (at the beginning of the article).
General recommendations
- The most important rule is: ALWAYS test the cleaner on an inconspicuous area before cleaning your kitchen. Treat it, then wipe clean and dry, wait 1-2 minutes and evaluate whether the color of the coating has changed, whether the shine has disappeared, etc.
- A greasy coating on kitchen furniture is a mixture of dust with fumes and a tiny suspension of fat that forms during cooking. The older the plaque, the more difficult it is to get rid of it. Therefore, the optimal schedule for “general” cleaning of the kitchen from grease is 1-2 times a year, “major” cleaning is every 2 months using mild products and, of course, when the need arises.
- To clean hard-to-reach areas, crevices, or decorative trim, use a toothbrush dipped in the cleaner from our article. You can also clean narrow crevices with a knife wrapped in cloth.
- Do not use harsh abrasives; only baking soda, a soft toothbrush, or the hard side of a regular foam sponge are acceptable. This is especially true for wooden kitchens, as well as any painted furniture without a top protective coating.
- When cleaning the kitchen, it is better to use a new sponge with a clean abrasive side. An old, greasy sponge can do even more damage.
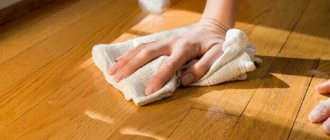
- At the end of cleaning, it is advisable to wipe the kitchen: clean with a damp microfiber cloth and dry with a clean, dry microfiber cloth. This way you will avoid streaks and residues of the cleaning product itself.
- When cleaning the kitchen, pay special attention to the cabinets above the stove.
And now some special recommendations and warnings.
| For a wooden kitchen (painted with stain, enamel or other types of paint, unpainted but treated with oil/wax/polish/special impregnations/matte varnish, etc. | For all other kitchens: glossy, varnished, plastic, laminated and painted MDF and chipboard sets |
| A wooden kitchen requires the most delicate care. Most “folk” remedies like peroxide, ammonia, alcohol or citric acid are contraindicated for it, as well as ordinary alkali-based household chemicals. | Whether you use expensive or cheap household chemicals, the main thing is that it contains alkali. It is the one that most effectively copes with grease and dirt. |
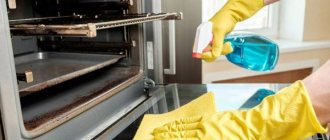
| Manufacturers of wooden kitchens recommend washing facades only with special products with neutral Ph or a solution of warm water and soap (dishwashing detergent), diluted in a ratio of 5:95. But what if the Fairy solution does not remove old fat and stubborn stains? Ideally, thorough cleaning of the kitchen should be entrusted to special cleaning services, especially if the kitchen is relatively new, with expensive finishes. Our recipes are in most cases safe for wood, but there is still some risk in them. | It is convenient to use a spray bottle to clean the kitchen. |
| When wiping the kitchen, try to move along the grain of the wood, and not against or across. This will allow you to better clean the pores of the material and act more delicately on the fibers. | Before applying cleaning agent to the contaminated area, moisten it, for example, using a spray bottle. Moisture will speed up the chemical process somewhat. reaction and will make cleaning easier. |
| The rag should not be too wet. Excess moisture is harmful to wooden surfaces. | |
| After washing and cleaning wooden furniture, do not forget to treat it with protective wax, oil or polish. |
For cleaning plumbing
Washing plumbing requires high-quality cleaning and disinfection . This is especially important for the kitchen.
Dr.Beckmann, Miracle paste 3 in 1
The paste is a universal product in concentrated form, which is suitable for caring for various surfaces.
Pros:
- universal product;
- high efficiency;
- surface polishing;
- no unpleasant odor;
- can be used even without gloves;
- good surface distribution.
Cons: high price. Cost – from 500 rubles. Read reviews here, here and here.
CHISTIN Universal
The universal preparation can be used for cleaning plumbing fixtures and washing floors. The sanitary product contains chlorine.
Advantages:
- Disinfection.
- Removing rust.
- Mold protection.
- Affordable price.
- Elimination of limescale.
- Versatility.
Flaws:
- repulsive odor;
- it takes a few minutes to take effect.
Price - about 100 rubles on average. Read reviews here, here and here.
Organic People spray Eco
A universal eco-friendly product designed for washing plumbing fixtures and tiles.
Advantages:
- versatility;
- removes lime deposits;
- removes unpleasant odor;
- hypoallergenic composition (contains citric acid and soda);
- environmentally friendly product.
Minuses:
- does not always cope with old stains the first time;
- has a pronounced fragrance.
Cost – from 180 rubles. Read reviews here, here and here.
Method 1. Express cleaning and polishing for advanced cases (soda + vegetable oil)
PURPOSE: wooden UNpainted kitchens and countertops (coated with matte varnish, oil, wax, polish, any impregnations), varnished and laminated kitchens made of MDF and chipboard, aprons made of any materials.
This recipe is especially helpful if you need to bring an old kitchen or countertop back to life with minimal time and money.
- With its help, you can, firstly, easily remove tightly adhered drops of fat, plaque and stains. Secondly, to “seal” the pores of the wood, protecting it from moisture and dirt. And thirdly, to give the facades a natural shine and brightness. Essentially, this old homemade recipe replaces both cleaner and furniture polish.
CAUTION: Painted wood kitchens and light wood kitchens (oil may yellow slightly).
CLEANING FREQUENCY: It is important that cleaning with soda-oil cleaner is carried out regularly - at least every 2 months. The fact is that oil tends to oxidize and lose its protective properties, possibly changing color.
INSTRUCTIONS:
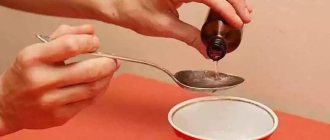
Step 1. Mix 1.5 tablespoons of baking soda with 1 tablespoon of vegetable oil (you can use more in a ratio of 1.5:1).
Step 2. Apply the resulting “scrub” to contaminated surfaces, paying special attention to cabinets in the stove area. The soda will crumble a little, and the oil will be absorbed like polish. You will see that the tree will become cleaner and a little brighter before your eyes.
Step 3: Wipe treated areas with a clean, damp microfiber or soft cloth.
Step 4. Wipe the remaining cabinets from dust and light dirt with a damp cloth. If necessary, you can treat the entire kitchen with an oil-soda solution.
How you should never wash MDF kitchens
When choosing products to care for kitchen furniture, pay attention to the composition.
You should not experiment with MDF surfaces, so exclude:
- Methyl and other compounds, only ethyl alcohol is allowed.
- Any abrasive mixtures and brushes.
- Acid, chlorine, sodium.
- Toothpaste, vegetable oil, soda.
Each of these agents has its own negative effect on the surface. It is worth considering that small scratches from brushes and abrasive compounds will be immediately noticeable, but aggressive chemicals, vegetable oil and other mixtures can “destroy” MDF gradually.
Caring for any furniture is not a difficult task if you do it regularly. Then maintaining cleanliness will take a minimum of time, otherwise you will have to use more complex products, wait until they work and then carefully scrub, and this also does not always work quickly.
Method 3. Universal recipe for deep and thorough cleaning (6% vinegar + isopropyl alcohol)
PURPOSE: For general cleaning of old grease and other complex stains of painted and unpainted wooden kitchens, laminated, varnished, plastic glossy facades made of MDF and chipboard, all types of countertops and aprons.
CLEANING FREQUENCY: 1-2 times a year.
INSTRUCTIONS:
Step 1. Mix 6% vinegar with rubbing alcohol (isopropyl) alcohol in a 7:1 ratio and add a few drops of liquid soap to the solution.
Rubbing isopropyl alcohol can be purchased at outlets that sell printer supplies, companies that sell fiber optics, and specialty online stores. You should not experiment with other types of alcohol.
Step 2: Wipe the cabinets with the mixture using a microfiber cloth.
Step 3: Now wipe the kitchen clean with a cloth soaked in warm water.
Step 4. Finally, rub a special wood furniture oil that contains beeswax into all surfaces. This action will “seal” the pores and protect your kitchen from stains, dirt, moisture and grease for a long time.
Rules for caring for glossy kitchen facades
Basic rules for caring for glossy kitchen facades:
- Daily cleaning. Do not allow grease or stains to dry. It is better to clean the kitchen every day than to make a big effort later;
- When cleaning, wring out the cloth well, and after washing, wipe the surface dry. Moisture provokes the formation of fungus and promotes swelling of the material. If the furniture is covered with PVC film, it may delaminate;
- When directly exposed to sunlight, the gloss loses its shine. You can protect the kitchen from the sun with thick curtains or blinds;
- The glossy facades of kitchen cabinets next to the oven or hob are most susceptible to contamination, so the hood should always be running when cooking;
- Use only gentle products without abrasive particles. Do not wash gloss with powders or compounds containing alcohol, acetone, ammonia, chlorine, or wax. Chlorine and alcohol discolor the paint; wax makes the surface sticky, attracting even more dust.
Method 4. Ammonia + warm water
INTENDED USE: For all types of surfaces, but with great care for wooden surfaces.
CLEANING FREQUENCY: if necessary, but not more often than once every two to three months.
INSTRUCTIONS:
Add ammonia to warm water in a 1:1 ratio, then remove dirt with a sponge or spray the product from a spray bottle, wipe the treated area clean with a damp cloth. Finally, dry the surface with a dry soft cloth or microfiber cloth.
Decorative plastic (DBSP)
Waterproof and resistant to mechanical action.
Kitchens with plastic coating must be washed with gentle detergents.
But it is defenseless against the action of chemically active substances:
- Chlorine-based products “wash out” the color from such material;
- Oxy polishes turn into a sticky film that is difficult to remove;
- With alcohol-based compositions, the gloss becomes dull;
- Detergents containing acids in their composition form dirty, indelible stains and stains - therefore, no “domestos”, “comet” and “silita”.
Glossy plastic tends to lose color brightness, so be careful when choosing detergents.
Method 5. Hydrogen peroxide + water
INTENDED USE: Only for kitchens, splashbacks and countertops made of MDF and chipboard. The product will help not only clean the kitchen of grease and dirt, but also disinfect the areas treated with it.
- It is permissible to clean a wooden kitchen with hydrogen peroxide, but only if you need to remove mold.
CLEANING FREQUENCY: If necessary.
INSTRUCTIONS:
Mix these ingredients in a 1:2 ratio, treat the desired areas with the resulting liquid using a rag (it is best to spray the product from a spray bottle).
Rating of the best grease removers in the kitchen
| Nomination | place | Name of product | price |
| The best liquids for grease in the kitchen | 1 | Grease away HG | 400 ₽ |
| 2 | Azelit GraSS | 130 ₽ | |
| 3 | Freshbubble spray | 270 ₽ | |
| The best gels for grease in the kitchen | 1 | Forte Plus Sano | 455 ₽ |
| 2 | DEC Kitchen Cleaner | 355 ₽ | |
| 3 | Gel for removing burns and grease with lemon scent FLAT | 120 ₽ | |
| The best creams for grease in the kitchen | 1 | Cream Universal green tea and lime Sanita | 127 ₽ |
| 2 | Nordland Cleansing Cream | 180 ₽ | |
| 3 | Shumanit Delikat Bagi | 310 ₽ | |
| The best grease powders for the kitchen | 1 | Kao Homing for burns and fats | 315 ₽ |
| 2 | Cleaning powder Stain removal SARMA | 55 ₽ | |
| 3 | cleaning powder for deep stains Apollo FUNS | 200 ₽ |
Method 10. Removing fat using a steamer
PURPOSE: To remove old greasy deposits on all kitchen surfaces except wooden ones (!).
INSTRUCTIONS:
If you have a clothes steamer, then you can treat the entire kitchen with it, from the facades to the apron. The method is good for its simplicity and effectiveness. After such a “bath,” the kitchen should be wiped with soapy water and then with a clean, damp and dry microfiber cloth.
- It is advisable not to steam the edges, because this is the weakest point of any furniture made from MDF and chipboard.
Polyvinyl chloride film
She is afraid of everything - high temperatures and humidity, rough mechanical and chemical action and abrasive additives.
Under no circumstances should PVC film be washed with a very damp cloth.
Also, the formation of cracks and peeling of the film can be caused by:
- Exposure to the brightest lighting devices;
- Temperature below -15°C.
To prevent the film from peeling off the facade, try to wipe the surface with a not very damp cloth.
Method 11. Removing complex stains using a melamine sponge
Surely you have already heard about melamine sponge or even tried it in action. This sponge consists of many thin melamine rubber fibers; like an eraser, it easily grabs and rolls off dirt from any surface. Contrary to myths, melamine miracle eraser is only harmful if ingested.
For this reason, we recommend not scrubbing interior shelves, drawers, and cabinets with a sponge. After cleaning, the crumbs must be carefully collected and all facades wiped clean. And, of course, the sponge should be kept away from children and animals.
PURPOSE: To remove old greasy deposits on all kitchen surfaces except wooden (!) and any countertops. Use with great care on painted facades - there are cases when the melamine sponge removed the paint along with the stains.
INSTRUCTIONS:
Wet the sponge in water, squeeze out excess moisture, then wipe the dirty areas with it. Carefully collect any accumulated dirt and discard it.
No. 5. Mustard powder
This method cannot be called universal . It is suitable for facades with a good protective coating, as well as for sinks, refrigerators, stoves, and tiles. It is not recommended to use it for cleaning wooden surfaces.
Mustard powder has been used for many decades by domestic housewives, who have realized that it perfectly dissolves fatty contaminants. To deal with greasy deposits, just moisten the contaminated area and sprinkle it with mustard powder. All that remains is to gently rub it with a dry cloth, then use a damp sponge or rag to remove it along with the particles of removed fat. The bulk of the dirt should remain on the napkin.
Acrylic plastic
It tolerates wet cleaning well and can be treated with polish. It does not fade in the sun, does not fade and is resistant to mechanical action.
Contamination from such a surface is removed quite simply. These facades can be polished if they become defective.
But it is also sensitive to the chemical composition of cleaning products.
Under no circumstances should they be washed with harsh detergents, because you can lose the shine of the glossy façade.
Problem No. 3. Scratches appeared
If the scratch is small, try the good old remedy - sunflower oil. Try soaking a cotton pad in it and wiping the surfaces.
If the chip is of “moderate severity” but does not reach the wood, you can use:
- Wax polish. Rub it thoroughly over the damaged area until it becomes smooth.
- Special spray varnish for door repair (halo-free, based on one-component acrylic). It can be purchased from door manufacturers or sellers - you are unlikely to find it in a regular repair store. The rules for its use are described on the label of the can.
In case of serious damage to varnished veneer, there is also a good solution:
- Pick up a hard wax pencil that matches the color of your facades at a hardware store (in the door or laminate department).
- Melt the pencil (or simply knead the wax with your fingers) and rub the dent until the wax completely fills it.
- Wait until the wax hardens, and then carefully remove any excess wax with a spatula or blade (not a rag!).
- Sand the area using a sander or 400-grit sandpaper.
- Cover the surface with a non-halo repair varnish (the usual one will not work, it will crumble quickly).
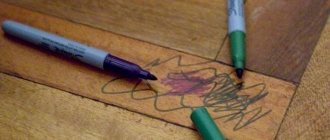
These instructions are also suitable for film facades. The most difficult thing is to choose the right color. If the film imitates wood, then you can use a set of markers for laminate flooring. In this case, there is a 100% chance of hitting the color.
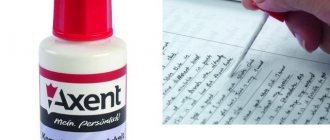
Tip: before going to the “heavy artillery” and rubbing the varnish with various polishes and waxes, try to carefully cover the chip using a thin artist’s brush and matte varnish. Perhaps the result at this stage will satisfy you.
If the scratch is so deep that the wood is touched, then before applying wax we clean the edge, mix the stain with alcohol or solvent and tint the damaged area. Then do steps 1–4 above.
If the facades of your set are made of glossy plastic, then it is almost impossible to correct its flaws. Most likely, the plastic will have to be re-glued.