How to remove stains from clothes
1.
Shaving foam can help get rid of makeup stains.
2.
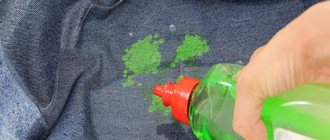
Red wine stains can be removed with white wine and baking soda.
— Immerse a piece of clothing with a dry red wine stain in a container containing a small amount of white wine.
- After this, cover the stain with a thick layer of baking soda paste and a small amount of water.
- Leave for several hours, sprinkling occasionally with water to maintain moisture.
- Rinse and wash clothes again.
Wedge with wedge
If your favorite sweater has been damaged by a moth, hide the hole by making an ironic appliqué in the shape of... a moth! Take a piece of felt as a basis: this will strengthen the affected area and at the same time hide it.
Felt is an indispensable assistant in hiding a wide variety of damage, especially when it comes to children's clothing. Well, doesn’t this red felt heart look cute, looking flirtatiously out of its pocket? Especially if you use contrasting threads for sewing (see main photo).
Other useful tips and tricks
18.
You can use a hair straightener to iron the collar.
19.
Use a straw to keep the cord from the body shirt in place without getting in or out. Just cut about 2 cm from the tube and thread a cord through the cut piece.
20.
Tights will stop creeping further if you use clear nail polish.
21.
If a thread comes out of your clothing, try stretching the fabric around the thread so that the thread comes back in.
22.
If the ears of your glasses are too loose, you can fix them with the same clear nail polish. Just apply a drop of varnish to the place where the bolts are screwed - this will help you for a while, but then it’s better to fix the bolts with a screwdriver or contact a specialist.
Decorating minor imperfections on clothes
Despite the fact that modern washing powders do an excellent job of removing many types of dirt, sometimes it is still not possible to remove a stain from a beautiful blouse or stylish sweater. Other troubles may also happen: a stain from an iron or an accidental drop of glue or bleach, a puff... You have to put your favorite thing aside for trips to the country or throw it away altogether. But have you ever thought that a stain, a puff or any other imperfection on clothing can be “played up” with the help of decorative finishing? And you can come up with a lot of options!
One of the decorative options is to make embroidery from beads or sequins.
Decorative elements can either match the fabric or contrast with it. In order for beads on clothes to look as if “this is how it should be”, support the idea as follows - do embroidery not only in the part where the flaw is located that you are trying to hide, but also, for example, along the entire line of the neckline, cuffs or pockets.
One of the decorative options is to make embroidery from beads or sequins.
Another interesting option is to make an original voluminous applique, or sew a decorative bow or flower to clothing.
Volumetric applique on clothes
Thin braid or wide lace is an excellent material for decorating clothes. By the way, both braid and lace can not only be sewn, but also attached to adhesive tape (sold in departments of various small items for cutting and sewing) using an iron.
Thin braid or wide lace is an excellent material for decorating clothes.
If you know how to embroider, you can make beautiful embroidery on a sewing machine or by hand, with thin or thick threads.
You can make beautiful embroidery
On leather products, rivets will look most appropriate, from which you can even create an interesting pattern. It is very difficult to fix them yourself, so it is better to contact a workshop. By the way, such work is often undertaken in shoe workshops.
Rivets will look most appropriate on leather products.
If you need to decorate some large flaw in your clothing, for example, a mark from an iron or the fabric is very faded, you can sew on ruffles - in one or several rows. Even if you can’t do it yourself, don’t be upset, go to a sewing workshop, they will quickly solve your problem, because for a professional this is a job of 15-20 minutes.
You can sew ruffles - in one or several rows
As you can see, you can find a way out of any situation! Moreover, thanks to some flaw that had to be decorated, your favorite thing can become even better and more interesting than it was!
Fighting fresh stains
The easiest way to remove a greasy stain from a T-shirt or dress is when it has not yet become embedded in the threads of the fabric. Fresh dirt must be covered quickly:
- salt, it must be changed until the stain is absorbed,
- starch, which also needs to be cleaned and refilled,
- talcum powder, which must be ironed and left overnight under pressure,
- chalk, which perfectly absorbs grease and copes with the problem in two hours,
- salt and ammonia, clearing any trace within an hour.
If the question arises of how to remove a greasy stain from a dress, then it must be resolved quickly. Fresh dirt can be easily removed with abrasive powders. It is recommended to scrub thin fabrics with soft cotton pads, and with hard ones you can use a brush.
Simple ideas for any style
While many people put a lot of thought and effort into decorating public spaces like the living room and kitchen, it is in the bedroom that purposeful and effective decor really makes a difference to a homeowner's well-being. -Be. In this article, we'll look at different bedroom decorating styles and techniques, including ways to decorate your bedroom for free.
View in gallery
View in gallery
Whether you're looking to decorate a nursery or master bedroom, we hope you find inspiration in these spaces.
View in gallery
Maintain proportions.
View in gallery
A child's bed is often small, which means it makes sense to keep decorations proportional to the bed. Hang wall art below, don't worry about matching and keep it simple.
Add a unique lamp.
View in gallery
A cute lamp goes a long way in a child's bedroom as it adds decoration without creating unnecessary clutter that, frankly, will likely end up on the floor or in another room altogether.
View in gallery
Note: This unique lamp is a great addition to any bedroom, be it a child's room, a guest room or a master bedroom. One tip for decorating lamps is to choose one focal point - if the lampshade is printed or bold, use a plain base, and vice versa.
Give accessible items a sophisticated "resting place."
View in gallery
Easy access to books in the basket gives your child the opportunity to read in bed, as well as the ability to easily clean up after themselves. This corner bedroom is the perfect relaxation spot for any little body.
Mixed litter.
View in gallery
Vintage quilts are charming and colorful, two important components of a child's bedroom. They can be mixed with bold patterns such as short black and white stripes to give the bedroom a modern, somewhat eclectic look.
Hang the canopy.
View in gallery
There is nothing more magical for a child than having a "fort" or other special place. A canopy bed creates an instant look of a secret garden retreat. The canopy can be fixed to the ceiling and even hung on the corner of the bed with a wonderful effect... and a million possibilities for creativity.
View in gallery
Double canopies are a fun way to create a princess feel, especially in a girls' bedroom. They are especially feminine when made from a sheer, pale material.
Fill your space with beautiful things.
.
Not to hide, but to stick out
Most often, certain areas of clothing are affected, such as around the back pockets of jeans. Make a bright patch in this place and highlight it with bright embroidery.
Another option for repairing clothes is to make a patch. Sew the fabric along the perimeter of the hole using a machine, and then add embroidered elements - stars, crosses, small flowers or anything else.
Found a violation? Report content
wood staining tips | Do it yourself
The DIYer can save money by painting unfinished furniture. But coloring is scary because it is irreversible, and the artist needs to be careful. There are also many products that can be used, including oil- and water-based stains and wood conditioners, which can be confusing. Here are some ways to avoid common coloring problems.
When handling stains, protect your eyes and skin by wearing safety glasses and disposable rubber gloves. Remember, anything that can permanently stain wood will stain your fingers. Also, wear old clothes to work, as the stain may spill out.
- Always check the stain on a piece of wood before working on furniture.
— To prevent stain from staining wood, always apply a thin coat of wood conditioner first using an inexpensive brush. Before applying the stain, allow the conditioner to dry for 15 minutes, but do not sand it; No need.
-Oil-based stains, which are the most common, consist of dyes and pigments mixed with mineral spirits. Be sure to stir the jar thoroughly before painting so that the paint and pigments rise from the bottom to get the full color of the stain. Oil-based stains will produce fumes when working on them, so always work in a well-ventilated area.
- Apply the stain with a brush or rag, depending on preference. Use a stain brush to work both with and against the grain. Don't worry about being neat; all that matters is getting a nice, even, loose coat on the wood. At this point, wipe the stain off immediately to get a lighter tone, or for a deeper tone, leave it on for five or even 10 minutes before wiping.
- Be sure to wipe off any excess stain in the direction of the wood grain. This ensures that the stain ends up on the wood rather than on the surface - and it really brings out the grain of the wood.
— To avoid smoke, use a water-based stain. One of the benefits of water-based stains is that they come in a variety of colors, even more so than oil-based stains. Apply water-based stain in the same way as oil-based stain.
-If you need the stain to be darker, go back and apply more stain.
— The stain only provides color, not finish. Always apply the finish over stained wood. Or, if time is short, get a product that combines stain and finish in one coat. The product must be brushed more thoroughly, brushing according to the texture of the wood. For this type of stain, use a higher quality brush.
— You can mix stains to create a custom color, as long as both stains are made by the same manufacturer and both are water-based or oil-based. Do not mix oil and water. Measure the amount of each spot used and write it down so you can duplicate it if necessary.
— A water-based coating can be applied to an oil stain, but only after waiting 24 hours for the mineral spirits to completely evaporate from the oil stain. If it's raining or cold outside, wait another 24 hours.
— Store old jars of stain. Stains can be expensive, and the good thing about them is that they don't tend to settle in the can like varnish does. If there is skin at the top when you open the jar, discard it. But otherwise, it is still usable.
,
Bright shreds
An interesting option is to hide the hole from prying eyes by completely covering it with embroidery and adding a few more colored rectangles nearby. This imitation of patchwork will require not so much skill as patience:
- outline the desired area with a “forward needle” stitch;
- apply a base mesh (can be diagonal);
- by passing the needle alternately over and under the warp threads, create a woven fabric.