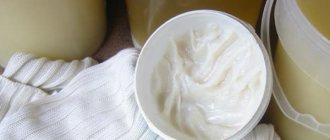
Candle base
The oldest material for candles is stearin. Nowadays it is almost never used in its pure form due to its high melting point. But it is present in almost all recipes as an additive. Modern candles are often made from paraffin, waxes, solid oils and their mixtures.
You can make a candle from cinders, but working with a base of unknown composition is far from easy.
Paraffin
It is a solid product of petroleum refining. You can buy it at the pharmacy, but it is expensive. Purified candle paraffin is available in specialty stores or craft stores. Brands P-1 or P-2 are suitable for candle making. T grades are technical, it is better not to take them.
Compared to natural waxes, it has a fairly high melting point, so it is added to waxes to make the base more refractory.
Do not heat a composition with a large amount of paraffin above 80 degrees, otherwise you will get a defect in the form of a large hole near the wick. At the same time, it is necessary to fill a paraffin candle at a temperature of the composition not lower than 75-80 degrees. Also, allow it to cool at room temperature (about 23-25 degrees). Forced cooling will cause bubbles to appear, and too low a temperature when pouring will produce “foam.”
This defect appears due to incorrectly selected temperature.
If you pour in cooled paraffin (about 65°C), you can get a candle with a “frost coating”. After complete cooling, a whitish coating will appear on the walls. In some cases it looks very decorative.
Plaque on a paraffin candle does not always harm the appearance.
If you can’t get rid of bubbles during casting, try changing the paraffin itself (manufacturer) or add up to 20% stearin.
Beeswax
Natural beeswax is sold by beekeepers and can also be found in beekeeping stores. You don't have to add flavorings to this base. Has a recognizable aroma. If you want to make a scented candle, you need to consider the base scent.
Natural wax has a recognizable smell and color
A candle made from pure beeswax will be soft. At high temperatures in summer, it can change shape. To prevent this from happening, add 10-20% paraffin or stearin. This candle material is poured into molds at 80°C.
And keep in mind that the base color of this wax (yellow) is very difficult to cover. We need very high quality dyes and in large quantities. The second option is to find clarified wax - a specially prepared material.
Soy wax
This is a relatively new substance that is becoming increasingly popular among candle makers.
Advantages:
- Natural ingredients.
- A neutral base in which dyes and flavors of any type are dissolved. Mixes well with other bases.
- Soy wax products burn approximately 50% longer than candles made from other waxes.
- When burned, it emits only carbon dioxide and water.
Flaws:
- The price is three times more than purified paraffin.
- Only container candles can be made in their pure form. For molded ones you need at least 20% paraffin/stearin.
The molded candle is removed from the mold after cooling (left), the container candle remains in the container (right)
When making a container candle in a glass glass, heat the glass and pour it into a warm container. Then the candle material will not lag behind the walls.
Soy wax is ideal for scented candles.
It has almost no aroma, but it “accepts” fragrances and aromatic oils well. Pour soy candle material at low temperature. Pure soy without additives is poured when it reaches 40-42 degrees. Otherwise, holes, cracks or bubbles will appear. For formulations with additives, select a higher temperature, but start from about 47-48°C.
For soy candles, choose shorter, wider shapes. The candles are more fusible than paraffin and, moreover, burn longer, but the candle material must burn out evenly. This only works with a larger diameter - the minimum diameter is about 6 cm .
Coconut wax
A mixture of waxes is sold as a candle material, most of which is coconut wax. Pure one is simply not suitable for these purposes, as it does not support long-term combustion.
The base color is white, with a weak characteristic aroma. It has a low melting point, so you can only make a “container” candle from it - in some kind of container. The melting point depends on the composition, but you should not heat it above 85°C. The same goes for keeping melted wax on fire for a long time.
Coconut wax is a mixture of natural waxes (usually soy)
The low melting point helps the wax separate from the walls of the cookware. The problem is solved by using opaque glass or heating the mold before pouring. In any case, the container should initially be at room temperature, and for a tight fit to the walls it should be heated to 40-50°C.
To increase the melting point, more refractory additives (stearin or paraffin) are added to coconut wax, which can be about 20%.
Palm wax
It differs in that it forms crystalline patterns on the surface, so it does not require decoration. Unfortunately, in our country it is difficult to get it.
Candle making at home from palm wax is exotic for our country
Above we have mentioned the most commonly used candle bases. Glycerin is also added to the wax to make the base more transparent, and stearin is added to raise the melting point and prolong burning. The addition of stearin is also needed to make it easier to remove the candle from the mold.
Which wax is best to use for candles?
The choice of base for a candle depends on its purpose and type. We will only talk about those that can be made at home. In most cases, these are candles for scenting, massage or as a gift.
- For a scented container candle, it is best to use beeswax, coconut wax, or soy wax. For molded aromatic add 10-20% stearin.
The choice of candle material depends on the purpose and type of candle - For molding, paraffin or a mixture of any natural wax and stearin (stearin up to 20%) is more suitable.
- To make a massage candle, use soy wax or mix it with coconut wax. You can add solid and liquid vegetable oils - they will lower the melting point and improve the effect on the skin.
- If you want to make a white candle or get a pastel shade, use white wax or stearin.
The above compositions are not a rule, these are recommendations for beginners. In general, you can mix almost all waxes. But you will have to adjust the melting temperature with each change. Even if you change the manufacturer or slightly change the composition.
Necessary materials
Before you begin work on creating a unique decorative item, you need to prepare a place for creativity, the necessary components and several necessary tools:
- vessel for melting a substance;
- container for creating a water bath;
- molds for future products;
- thin wooden sticks for stirring and attaching the wick;
- inexpensive household candles or old cinders;
- a set of soft wax pencils;
- thick cotton thread;
- decorative details for decoration.
If the product is intended to be used in aromatherapy sessions, various flavoring agents can be added to the necessary materials.
What to make a wick from
The most common type of wick used for candles is cotton. The easiest way to buy it is in a specialized store. If you do it yourself, you can twist it from cotton sewing threads, floss, or use cotton knitting thread of sufficient thickness. One thread is not enough for a candle wick. You can weave a braid from the threads, crochet it, or simply twist it into a rope. In principle, each type of wax requires its own type of wick and its diameter. Even for each composition, so they select the parameters empirically.
The thickness of the wick depends on the diameter of the candle
In any case, before pouring the candle, the cotton wick must be prepared:
- Melt some paraffin.
- Dip a piece of wick into it and leave for 5 minutes.
- Place on waxed paper or foil (it is important not to absorb fat) and level.
- Leave in the room for at least 6 hours or put in the refrigerator for an hour.
After such preparation, the wick will burn evenly. If you use it without preparation, there is a high probability that the flame will be “choked” as it will burn through too quickly.
In addition to thread wicks, there are wooden ones
There are also wooden wicks. They are made from wood veneer. They need to be dipped in oil, left there for a few minutes, placed on plastic or foil and kept for 6-8 hours. Wipe with a cloth before installation.
How to select the type and thickness of the wick
For long burning, the diameter of the wick is important. There is one important rule that beginners need to remember: the thicker the candle, the thicker the wick should be. But its specific diameter, and type, also depends on the composition of the base.
Table for selecting the diameter of the wick when casting a candle yourself
So, beeswax candles require a wick made of thicker threads. And the twist should be minimal. There may even be just folded threads, otherwise the fire will choke. For paraffin candles, make/choose wicks from thin, tightly twisted threads.
An incorrectly selected wick may cause the flame to go out.
How to choose a wick? By trial method. To make it easier, refer to the table above - it will help with your initial selection. Then, based on the combustion results, you can understand how to change the wick parameters.
- If the flame goes out due to a large puddle of wax/paraffin, the wick is too thin, try a slightly thicker one.
- If the flame smokes, the wick curls, and the candle leaks, you have used a wick that is too thick. Need something thinner.
Gradually, with experience, it will be easier to choose the right thickness and type of twist the first time.
How to install the wick
The uniformity and duration of burning of a candle largely depends on the wick. One of the important points is that it must be exactly centered and must be level. To install the wick in container candles, special holders are used. Wax is dripped into the center of the mold, and a holder with a thread attached is dipped into it. The second end of the thread is fixed exactly in the center on the upper edge of the form. This can be done using clothespins, twisting them around a pencil or holding them in hair clips. In principle, the method is not important. It is important that the wick is exactly in the center.
Using clothespins you can quickly and easily center the wick
In molded candles (which are removed from the mold after casting and cooling), you can attach the wick as described above. Another option is to make a hole in the bottom, pull the thread through and make a knot. Cover the hole with tape or drip some wax and wait until it hardens.
What to use for flavoring
To improve the aroma, aromatic substances are added to the candle base. In general, there are special fragrances for candles. It is easier to work with them if you are confident in the quality. Just add the recommended amount.
Set of scents for candles: Lemongrass, Jasmine, Flower bouquet. Recommended fragrance consumption is 6-12% of the total wax mass
For aromatization, special fragrances or aromatic oils with a high ignition temperature are used.
Many people prefer to create their own scents. In this case, you can use aromatic oils. These should be oils, not water or alcohol extracts. Another condition is that they must have a combustion temperature higher than 65°C. These are not all aromatic oils. Suitable oil extracts are geranium, peppermint, lemon mint, anise, amyris, myrrh, lemon myrtle, sandalwood, clove, rosewood, lemongrass, juniper, patchouli, ylang-ylang, lavandin (instead of lavender), patchouli, cinnamon, grape seed, bergamot .
Aroma oils are added to the already melted and colored composition when it has already begun to cool, before pouring. The quantity is counted in drops, the oils are added with vigorous stirring. It is impossible to indicate a specific number of drops. Some compositions have a more intense aroma and 3-5 drops per 100 grams of mass are enough, others are barely perceptible even with 20 drops.
Not all aromatic oils from all manufacturers have sufficient aroma, try finding another company.
Not all oil extracts in candles provide a sufficient level of aroma when burning. If you want a stronger scent, buy fragrances for candles or soap making. They generally smell stronger.
Some solid oils also have a pleasant smell. They can be used both as a base and as a flavoring. For example, coconut, shea, cocoa oils. When using them, standard candle bases account for about 20-30% in recipes.
Candle dyes
Coloring wax is not easy. Regular dyes are not suitable. Neither food, nor watercolor, nor ordinary aniline dyes for fabric. There are special ones that are sold in craft stores. These are wax-based aniline dyes. Their consumption is 3-5 grams per 1 kg of candle mass.
Special paints are needed to color wax and paraffin.
Fat-soluble dye for candles Idumshchiki, green, 10 g
Fat-soluble dye for candles Idumshchiki, red, 10 g
Fat-soluble dye for candles Idumshchiki, yellow, 10 g
Fat-soluble dye for candles Idumshchiki, orange, 10 g
To get a white color, use clarified wax or paraffin. Adding stearin will remove transparency and make it easier to remove from the mold. But to get a pure color you will still need a dye.
If you don't want to buy special paints, you can add colored wax crayons. But things are not always smooth with them. Some do not stain the composition, they simply settle down, others can dissolve the wick or cause the formation of inhomogeneities, bubbles and other defects. In any case, the dyes are placed together with the wax and melted together (if there are no other recommendations).
It’s easier to work with special wax dyes
You can also use natural dyes that contain some oils. For example, turmeric or annatto oil gives a yellow color, yarrow oil gives a blue color, and a water extract of chili pepper gives a red color. You can add cocoa - you will get both color and smell, but the powder will settle down, which will give an uneven color. But it doesn't always look bad.
Dyeing technology
Natural and synthetic dyes are used for coloring. Natural ones are made from natural ingredients and herbs. To do this, they are processed and the desired product is obtained. Synthetic ones are made from chemical elements and color the candle evenly and quickly.
However, synthetics have their drawbacks - a lack of environmental friendliness and an unpleasant odor.
Dyes also coat the candle with a greasy layer. If this doesn't bother you, then add them during melting. But if you want to get an uneven color and add some color, then add dye to the wax before pouring.
Remember that while the candle is still warm, its color will appear more saturated. Wax is endowed with its natural shade, so when you add dye, you will not get exactly the color you expected.
Some people also use coloring pencils for coloring. This should not be done. The impurity contained in them will interfere with the burning of the candle.
Forms and containers
Glass or metal containers are used to cast molded candles. Sometimes plastic glasses or jars are used. The plastic must be refractory. Glasses of sour cream or yogurt are suitable for formulations with a low melting point.
There are a variety of split molds for casting molded candles.
You can use tetrapacks (packaging for juices, milk, etc.), cans for beer, drinks. You can also pour into silicone molds - it’s even more convenient to remove products from them. There is only one condition: in order to be able to pull out the candle, the container must have vertical or expanding walls. There are also detachable molds for candles. They are made of plastic that tolerates heat well.
For easier removal, lubricate the walls of the mold with vegetable oil or special silicone grease. If the candle “does not work,” put it in the freezer for 15-20 minutes. You can also tap it on the edge of the table. Or hit it with something not very heavy. When it has “moved” you can pull the wick. But don't overdo it - the wick can be pulled out. Then everything will have to be repeated all over again.
You can make an egg, a ball, a Christmas tree, a cone, a star and even a sculpture.
Please note that you will have to throw away the container, because it is very difficult to wash it. They can, of course, be reused for casting, but they are no longer suitable for other purposes.
For non-shaped candles, transparent white or colored glass is usually used. There is no need to pull them out, so they can be any shape.
Useful tips
- it is better to use shapes that have a diameter of at least 5 centimeters (which will prevent the flame from being too close to the edges of the vessel);
- look for a transparent or colored form (the candle will look beautiful);
— the glass of your form must be durable.
To prepare you will need:
- gel;
- wick;
- flavor;
- dye.
How to make a candle: what you need and how to proceed
In addition to all the ingredients for the candles, you will need some additional materials and equipment. First, what you need for the candle itself: candle material, a wick with a holder. This is the minimum for a regular candle. Next is the fragrance and dye - for the colored aroma of the candle. This is enough to get started.
Making a handmade candle
What equipment do you need?
Melt the wax in a water bath. This should absolutely not be done over direct fire. For a water bath you will need two vessels of similar shape, but different sizes. For candle material, you can use a tin can of a suitable size, and water can be heated in any container. It is important that the container with candle material does not reach the bottom and remains “afloat”.
What do you need to make a candle?
When melting, the material cannot be overheated and cannot be underheated. It is necessary to bring it to the required temperature. So the temperature needs to be controlled. For this you will need a cooking thermometer. You also need a wooden or stainless steel stirring stick.
How and what to do
For beginner candle makers, it is better to prepare a candle mold in advance and secure the wick in it. Once again, please note that it must be strictly in the center. Place the finished form on an old saucer/plate/lid. This is in case something spills past or wax starts leaking out of an undetected hole.
First of all, secure the wick in the container
Pour water into a large container to half the volume and bring to a boil. We put the candle material in a jar or smaller container, put it in a water bath and wait until it starts to melt. As it begins to liquefy, add dyes, stir and monitor the temperature. As soon as it reaches the required level, remove the container from the water bath and cool slightly to the pouring temperature.
It is important to control the temperature
Just before you pour the wax into the mold, add flavorings and mix the composition again. Pour the mixture into the mold to the required level, but be sure to leave about 10% for topping up.
Hold the wick while pouring the wax, then fix it exactly in the middle
Leave the freshly cast candle to cool at room temperature for 8-12 hours. The exact time depends on the pouring temperature, wax, quantity/quality of dyes and flavors and other conditions. Do not try to speed up the process by placing it in the refrigerator, on the balcony or in another cool place. This leads to the appearance of defects. After it has cooled completely, you can try to pull out the candle if it is molded.
After cooling, depressions may appear near the wick
Some candles (usually stearin or with its additive) have larger or smaller depressions on the surface after cooling. This is a normal phenomenon and can be corrected by topping up. To do this, we left a certain amount of candle composition, rather than pouring it all out. After the candle has cooled, fill the crater with the molten residue and let it cool again. Larger depressions may require topping up twice or thrice.
Techniques for creating decorative effects
Multi-colored, rainbow candles
The candle mass, painted in different shades, is poured into the mold in layers. Each next one, after the previous one has solidified.
Openwork candles
Unusual lace candles are obtained if the mold is filled with crushed ice before pouring the candle mass.
Candles sealed in diameter, volumetric decorative elements
This design is very impressive. To perform it, you need two filling molds of the same configuration, but different in size.
- The smaller one is inserted into the larger mold, in the middle of which the wick is fixed. Decorative elements are placed in the space between them: coffee beans, dried berries, fruits, dried flowers, beads, and paraffin is poured.
- After the outer layer has cooled, the small mold is removed and the melted mass is poured inside.
- After complete hardening, the outer form is removed. To make the decor appear voluminously on the surface of the candle, you can lightly blow it with hot air using a hairdryer.


