Unsplash
A zipper is one of the most popular types of fasteners used to connect parts of a product, be it clothing or a bag. Since its creation at the end of the 19th century, this ingenious and at the same time quite simple mechanism has undergone a number of modifications (which took several decades!) before arriving at its modern form. But all the efforts paid off - fashion trendsetters became interested in the new type of fastener: Coco Chanel planned to use a zipper for her skirts, but the first was Elsa Schiaparelli, who began sewing rough-looking zippers into evening dresses.
10 Unusual Uses of Lightning
Despite the convenience, zippers have one significant drawback - if such a fastener breaks, the product may become unusable until the fastener is repaired or replaced, and in practice this is often not as easy as sewing on a torn button.
Problem 1 – the zipper comes apart
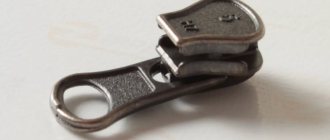
One of the most common problems with zippers is that they start to separate. Not everyone knows that this difficulty, especially at first, can be solved very easily. After all, the reason that the zipper diverges is the slider (popularly this part of the zipper is often called the “dog”): it has expanded from frequent use and has ceased to press the teeth of the snake tightly against each other. How to deal with this problem?
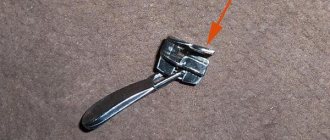
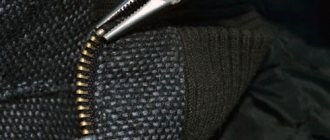
Take pliers and squeeze firmly first one side of the slider, and then the other. The main thing here is not to overdo it, otherwise the slider will stop moving altogether. Zip up. Usually such simple repairs are enough for the zipper to start working properly.
How the lock works
Lightning works on this principle:
- The latch is driven into the lightning socket;
- The pawl stretches upward to close, securely interlocking the teeth;
- If the dog goes down to open, it disengages the lock teeth.
- To prevent the zipper from spreading after closing, the eye of the dog is slightly pressed down. They simply fix it in a given position.
There are several types of lock:
- Machine. The pawl automatically fixes the position of the lock in the closed or open state. Amenable only to hand movement. Does not move up or down the zipper randomly. This dog has a special lock inside.
- Haberdashery type. It does not have a lock and can be pressed lightly in the top closed position to prevent the zipper from unfastening.
Problem 2 – replacing the zipper slider
However, sometimes even after such a procedure the slider does not cope with its duties and does not clamp the teeth. In this case, it becomes necessary to replace it. This can be done in several ways.
Method 1
At the top of the zipper there is often a stopper, thanks to which the slider does not move out of it when fastened. However, when you need to install a new slider, this latch becomes an obstacle. How to get rid of it? Take a screwdriver or any flat object and lightly pry open the stopper. You can use wire cutters. Remove it from the zipper. After installing the new slider, place the retainer in place and firmly pinch it with pliers.
Method 2
There are also limiters on the plastic zipper. However, unlike metal ones, they are disposable: once you take them out, you can’t put them back. How to replace the slider in such a situation. Take pliers or scissors and simply remove the restrictor from the clothing. After replacing the slider, you need to make sure that this place protrudes above the teeth so that it cannot slip off. This can be done using thread. Take a thread and a needle and make a few stitches in the place where the latch was. You can also install a metal stop if you have some left over from another item.
Method 3
Sometimes there is no limiter on the zipper, and the slider does not move off the fastener due to the fact that its ends are sewn into the product. How to be in this case? There is only one way out here. Take a seam ripper or small scissors and rip the edge of the garment. Remove the slider from the zipper and replace it with a new one. Then arm yourself with a needle and thread of a suitable color and sew up the ripped part.
Types of fasteners by links
In general, on clothes you can see one of three types of zippers produced by the manufacturer today:
- Spiral. Here the product is made of lightweight plastic. These are teeth made of a thin spiral, embedded in the fabric of the zipper and stitched into it. Typically, a spiral zipper is inserted into lightweight clothing or bedding items. It is not possible to repair the teeth of this type of lock.
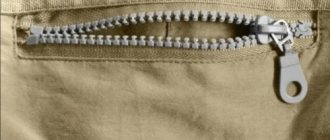
- Tractor. It has the appearance of large teeth located opposite each other, which fit groove into groove when closing. The product received this name because it looks like a caterpillar track. Made of durable plastic.
Types of lightning
- Metal. This is a type of tractor zipper. Only the teeth are made of metal and each one is separately implanted into the fabric of the zipper. More often used in outerwear, like tractor types.
Problem 3 – the edge of the zipper is frayed
Sometimes such a nuisance as a frayed edge of a zipper happens. And the problem is not only that it looks unaesthetic. In such a situation, fastening the zipper becomes more and more difficult every day. And if measures are not taken in time, the fastener will have to be completely replaced. And the solution is quite simple. As soon as you notice that the fabric at the edge of the zipper has begun to fray, carefully coat this area with epoxy glue. When the glue is completely dry, it will toughen the fabric and prevent it from further deterioration.
Damage Prevention
To prevent lightning damage, you need to follow a few simple tips:
- When washing the jacket, all zippers should be zipped and the item should be turned inside out.
- When ironing clothes with zippers made of non-heat-resistant materials, avoid getting the iron into the zipper area.
- To extend the life of the lock, it must be periodically treated with special care products, such as hydrophobic lubricant. This substance provides the fastener with water-repellent and windproof protection.
- Before pulling the slider from below, you need to insert both parts into the lock all the way.
- It is sometimes necessary to treat the teeth and lock with a soft pencil lead or other substance to lubricate the surface.
- You need to fasten the zipper without haste or force; at this moment the tape should be in a taut position.
To prevent wear, all parts of the zipper should be cleaned periodically using a small brush. It is recommended to use a toothbrush, as its fibers are quite soft and small. With careful and careful handling, any item can last for many years without a single repair.
When washing, fasten all zippers and turn the item inside out.
When ironing, avoid getting the iron into the zipper area.
To extend the life of the lock, periodically treat with care products.
Insert both parts of the slider into the lock until it stops
Treat the teeth and lock
Fasten without haste or force
Problem 5 – replacing the zipper
And the most difficult problem that can arise when using a zipper is completely replacing the fastener. In these cases, you have to rip out your clothes, and not everyone can do this at home. It is especially difficult for those who have other elements, such as buttons, next to the zipper. We want to show you how you can replace your zipper without blowing it out.
- Cut off the zipper on the side where the buttons are closest to the edge.
- Baste, and then sew one half of the zipper on this side with two lines. Its edge should be close to the buttons, without going over them, so as not to interfere with their fastening.
- On the opposite side, simply sew the new zipper onto the old part without cutting it off. Photo 3 shows the view from the reverse side.
- This is what the finished work looks like.
What life hacks for zipper repair do you use?
Reasons for lock failure
Most often, zippers break for the following reasons:
- Natural wear of the teeth due to many years of wearing clothes or shoes;
- Sharp physical impact on the lock;
- Breaking off the dog's ear and redistributing the force on the base of the runner;
- The lower part of the zipper is frayed due to the weakness of the fabric.
Most often, the teeth break, the pawl weakens, causing the zipper to diverge, or the lower edge of the retainer comes off.
Interesting: How to make a phone case
Repair features
The zipper is the most vulnerable part in any item. It is subjected to constant mechanical stress, which leads to rapid wear. Replacing a zipper requires some experience. In some cases, for example, in shoes, this can only be done by a professional using special equipment.
Jacket
You can repair a jacket yourself if you have a sewing machine. First you need to remove the old zipper. At the same time, the finishing and connecting seams are opened. On a leather jacket, the tape is glued on: it needs to be torn off. In a fabric jacket, a new fastener is inserted in place of the broken one and basted to the lining. Fasten the zipper and check its operation. The seam is sewn using a machine. Baste the upper part and sew along the old seam.
For a leather jacket, the new zipper is first glued on both sides. After drying, determine whether the zipper is installed correctly. The zipper is sewn in with one seam, covering 3 layers: trim, leather, backing. The threads used are strong, elastic (not fishing line).
Bag
If a leather bag does not fasten, it is better to have it repaired. Inexpensive bags can be repaired yourself. They are equipped with twisted zippers, which are easy to replace.
Backpack
To replace a faulty zipper, it is removed. The new fastener is straightened open and sewn on. If the zipper comes apart on one side, then trim the fabric where the lower part of the braid is sewn. Insert the tape into the runner and check the engagement of the teeth.
When the zipper diverges again, the slider is removed and its edges are pressed using pliers. Tapes with teeth are inserted into it. Secure the lower part of the zipper with threads and sew it in following the traces of the old stitch.
Jeans
Jeans have a metal zipper on the fly. Sewing a new fastener yourself can ruin the item. The repair consists of adjusting the sides of the slider to eliminate the discrepancy of the teeth.
tube
This method is suitable when the lower stop on the zipper of a jacket or sweatshirt is stuck or comes off. That part that we insert into the fastener so that we can then fasten the zipper.
What to do
If the bottom stop comes off, cut off all the old threads or pieces of fabric around the gap so that they are not in the way. Then apply clear varnish to the area to be repaired. While the varnish is drying, take a cocktail tube and cut 1-2 centimeters from it. Then cut it lengthwise so that the tube turns into a plate. The next step is to apply glue to the mounting location. On top of it you will need to place a piece of plastic folded in half.
Place the treated area of the item under a press and leave to dry for a day. Afterwards, cut off all excess and sew for safety.
New teeth
This is more painstaking work, unlike the previous ones. If you don’t want to take an item for repair, then you can practice restoring things yourself. For example, when several teeth fell out of the zipper on your favorite jeans, you can rearrange the missing parts from another zipper or buy them at a sewing store.
What to do
Move the new teeth into place using tweezers and secure with pliers.
Don't miss Don't miss How to replace a boring French manicure: 7 original ideas
If the bottom is frayed: repairing the zipper using a cocktail straw and other options
If the tip of the lock is frayed, the latch will constantly pop out. Then repairing our zipper using a regular plastic cocktail straw will help us. The frayed edge must be cut off, the edges must be melted over the fire of a candle or lighter and flattened. Cut a piece of straw about 1 cm long and place it in place of the latch. Heat and flatten with pliers.
Video from China, but still everything is clear
If you need to repair the edge, but there is no straw at hand, you can apply any instant glue to the place of the fastener, wait until it dries, and use a nail file or file to give it the desired shape.
Video
Surely many of you have had a zipper break. The zipper is a popular fastener, especially the detachable zipper, which is convenient, but unfortunately, sometimes it breaks. And it is the part that breaks that is located below and that is inserted into the mating part, where it is fixed. What to do if you don’t want to change the lock, yes, sometimes it’s not so easy (it can be sewn very awkwardly), but you want to wear a jacket with a zipper. This happens especially often with children's jackets and sweaters. The children pull the zipper, they are in a hurry, and they tear the mechanism. In order not to throw away almost new children's clothes, parents simply sew up the bottom part of the lock and have to put the jacket on first over the head, like a sweater, and only then zip it up. But this is not only inconvenient, but also not very beautiful... You can’t send a child to school in such a jacket, especially when he is already a teenager.
So, you don't want to sew up the lock at the base and are unwilling (or unable) to replace it. Well... Then let's fix it.
First, we need a piece of iron from which we will make the part we need. We also need superglue and a paper clip. Superglue is one that hardens very quickly and becomes “like glass,” very hard (based on cyacrolate, sold in small tubes of 1-2 grams).
So, we remove all excess, after soaking the fabric with superglue. It will set quickly and add rigidity. Carefully cut with pliers. (photo 1).
Now comes the main part. We cut it to size from a piece of stainless steel or tinned tin (you can take it from a condensed milk can) and roll it up as shown in photo 2.
It should fit well into the part of the lock that moves and be well fixed in the part that is located below (photo 3). Next we manage to fasten the lock (photo 4). This can be done by hand connecting each clove in sequence. Surely, everyone did this when they were trying to understand how this thing works or when the lightning “spread” in the middle.
After this, we place our piece of iron on the inside of the lock and place it on superglue (photos 5 and 6). We try to unfasten it. If you did everything well, then the lock should come unfastened, although at first, until the piece of hardware gets used, this can be done with some effort. Take your time, because... the glue may not have time to set completely. So, you unfastened the lock. Everything works, but it's not enough.
Now we need to strengthen our structure. We drill 2 small holes and insert a bracket made from a regular paper clip (photo 7, 8,).
That's all now (photo 9, 10).
We finally check the operation of our lightning. For a better look, you can touch up the sizing areas with a permanent marker. For good performance, I recommend rubbing the lock with paraffin or stearin (a regular candle) or just soap.
Some useful tips related to zippers
If the zipper lock is a little tight, rub it with a stearin candle. This advice is especially effective for metal zippers. A soft pencil lead will also help. It is enough to pass it along the zipper several times.
If the zipper often spontaneously diverges in the middle, lightly tap the lock (its edges, not the bracket to which the tongue is attached) with a small hammer.
Tapping the zipper itself, if it is metal, will also help.
The lock will become tighter, but the zipper will stop moving apart.
If the tab on the zipper comes off, it can be replaced with a regular paper clip.
If the zipper on your trousers tends to undo itself, thread a small key ring through the zipper tab and place it over the button of your trouser waistband. Such a ring can also be made from a paper clip.
Zippers on shoes suffer greatly from dampness, wet and salty snow, and slush. Which dramatically reduces their service life. Rub a piece of unsalted lard over them or use a special hydrophobic lubricant more often. And the lightning will be protected from dampness. Such lubrication will also improve its performance.
So the zipper is stuck and won't go down, and you're trapped by your item because you have to unzip it to get it off.
Take a regular pencil with a graphite tip and rub it over the teeth of the zipper. This should help. If not, you need to increase the glide, such as rubbing the teeth with soap, lip balm or detergent that reduces friction.
Using a Q-tip, apply lubricant to the zipper and teeth. Then pull the fastener down and repeat the lubrication procedure again. Continue until the clasp is completely undone.
How to fix an insertion pin
The most effective way to fix a zipper on a jacket is to take the garment to a repair shop. Professional craftsmen will replace the mechanism and the product will not lose its original appearance. This will require time and money to pay for the work.
If you need the jacket urgently, you can fix the zipper yourself. To do this you will need a cocktail tube and glue.
Step-by-step instructions for fixing the lock:
- Inspect the place where the pin is attached at the base. If the sealing tape has come off and the fabric is frayed, then treat the area with glue or nail polish. The frayed edges are carefully trimmed with scissors.
- A piece 1 cm long is cut from a cocktail tube. The ring is cut lengthwise and unfolded and bent in half.
- The end of the zipper, where the insertion pin used to be, is coated with glue on both sides. A piece of plastic tube is glued to the fabric and pressed with a weight until the glue dries.
- After drying, cut off the remains.
- The place where the plastic pin is glued is stitched. This will provide additional reliability and extend the service life.
The result is a dense pin that easily fits into the slot of the slider and the detachable stop. If the color of the plastic is very different from the background of the jacket, it is painted with nail polish.
Important! Self-repair is a temporary measure. Plastic quickly becomes unusable and stands out strongly
After the end of the season, the jacket should be taken to the studio and undergo a full repair.
You can see the repair process in detail in the video:
Screwdriver
Source: Instagram (@repairshoe)
You can also use a screwdriver if the zipper comes apart. This method is mainly used in conjunction with the first one in order to better fit the zipper onto the teeth if the zipper begins to diverge. A screwdriver, like pliers, should not be used when repairing plastic zippers.
What to do
Insert the tip of the screwdriver into the slider hole at the top. Turn it so that the lock space becomes a little larger, and then take the pliers and press lightly.

