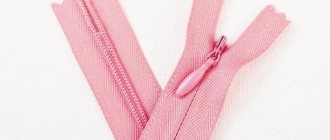
It happens that even the highest quality and most expensive sneakers begin to wear out over time and holes appear on them. This can happen for various reasons. After all, during daily wear, any shoe is affected by several factors - dirt, water, dust, and the quality of the roads we walk on.
Therefore, do not be surprised if over time the sole begins to peel off. To restore your shoes, you don't have to go to a shoe repair shop. You can do this yourself.
How to sew up sneakers if the sole comes off
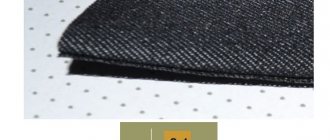
To sew up sneakers made of leather, nubuck, textile or other material, you will need nylon thread. This material is strong and reliable, so the shoes will last a long time after repair. If such a thread is not found, then you can replace it with knitting threads. It is important that the thread is degreased. The thread must be folded in half.
It is necessary to make marks on the sneakers indicating where to start repairing the product. It is recommended to start stitching from the outside of the shoe. To avoid damaging the needle, you can use an awl and a hook. Using an awl, you need to make holes into which to thread a hook and thread.
It is important that the stitches are not too wide or small, so it is recommended to maintain a distance of 8 millimeters between them. After the first stitch, you need to pull the thread under the loop that was formed from the previous step. To strengthen the seam, you can use the following techniques: sew a number of plus stitches, use cross stitching, or sew 5 stitches in the opposite direction to form a kind of fastening.
General recommendations
When planning to restore sneakers, you need to take into account that different models differ in the materials used to make sports shoes. Depending on the material, the nuances of further repairs depend. The main task of the work is to update shoes and maintain proper appearance. Without going to a workshop, you can easily glue or extend the sole, whiten the visible part of the products, and eliminate small cracks.
The toe of a sneaker is most susceptible to wear and external influences, which is why tears most often form on it. The toe section is constantly in need of repair due to increased load, so the restoration of this element should be approached with great responsibility.
Even if worn and handled carefully, sneakers will wear out faster than other shoes, especially when used for sports. Prolongation of operation is facilitated by timely repairs and compliance with preventive care measures. This reduces costs compared to purchasing a new pair of sports shoes.
Sewing sneakers on the heel
In this case, it is recommended to use threads as fastening material. To disguise a hole in the heel of sneakers, you will need a piece of fabric with high water-repellent properties. We will use this matter as a patch.
On the sneakers you need to outline a place for the patch, then make a dummy patch from a material thinner than the fabric on the patch. This copy of the patch is needed to finish the inside of the shoe. In order for the patch to stay firmly on the sneakers, you need to sew along the edge of the patch, first inside the sneakers, then along the outside.
Why does the mesh wear out and tear?
The vulnerable and short-lived part of sports shoes that often wears out is the mesh. The causes of damage are as follows:
- Features of the legs . Some people's legs have structural features that differ from the standard ones. This could be a protruding toe, a bunion, or an atypical foot shape. Where the foot presses on the shoe more than necessary, the mesh breaks faster.
- Sloppy walking . Sometimes people move quickly, do not look at their feet, often stumble or hit one foot against the other when walking. These actions ultimately lead to damage to the shoes.
- Active lifestyle . Hiking, mountain climbing, and even long walks around the city can take a toll on your sneakers, causing them to quickly lose their appearance.
- Frequent washing . If the shoes are light, you have to clean them almost every day. To prevent regular exposure to brushes and detergents from damaging the mesh, you should use special soft rags, sprays or wet wipes, and it is better to completely wash your sneakers as rarely as possible.
- Accident . No one is immune from small incidents. If a person accidentally stumbles, hits or even touches the mesh with something, it can tear, especially if it is made of thin material.
- Weather . Rain, snow, dirt and other natural factors often negatively affect the condition of the fabric of sneakers. The mesh becomes thinner and wears out faster.
- Sports . Those who love to exercise need to be prepared for damage to their sneakers. Football, volleyball and even running wear out shoes more than walking. In this case, it is better to have a special pair for physical education.
On cheap shoes, the mesh breaks faster, but the high price also does not protect against the risk of damage.
Materials
In order to make such an instrument with your own hands, you will need a number of materials and some tools.
The easiest way is to take a long self-tapping screw as a basis. This is a very popular solution, but it’s impossible to penetrate thick material like this, since it simply won’t work with a self-tapping screw. You can, of course, grind it down, but it will take a long time and is pointless.
Another option is a long nail, but it is softer than a self-tapping screw. This means that it will need to be sharpened much more often to keep it sharp.
Kinds
Before you start manufacturing, you need to decide what type you need. Let's look at what types of awls there are and what they are needed for.
- Normal, direct. The most common, very common and easy to make.
- Hook. Used to pull thread through the hole.
- With an ear. It is made in the manner of a sewing needle, but is found only in sewing workshops. Used for sewing thick material.
The size of the awl can be absolutely any; it depends only on the master’s requirements for the tool and the nature of the upcoming work.
Sole
The quality and condition of the sole affects the comfort when wearing sports shoes. With prolonged use, the sole of the sneakers wears out and becomes deformed. Stepping on stones and unpaved surfaces risks damaging the sole, causing holes to form on it.
How to seal a hole
Any holes in the sole can be repaired in different ways, depending on the base material of the sneakers and the extent of the damage. Most often, epoxy glue is used to eliminate holes, which is relatively affordable and easy to use. Holes on the sole are sealed as follows:
How to increase worn out
If the soft sole of the sneakers has worn down slightly, it can be increased to its original thickness. For this purpose, you will need to purchase microporous rubber. A blank is cut out of the material in the shape of the worn-out element, the surface is cleaned with sandpaper and glued to the shoes.
It is better to use a special kind of shoe glue as glue to ensure reliable adhesion.
Replacement
A sole with a lot of damage is easier to replace with a new one. This will significantly reduce the time spent on repairing each damaged area. The replacement sole, as well as for extension, is cut out of microporous rubber. The sneaker is applied to the cardboard and the outline is outlined, and then it is transferred to the prepared material and the blank is cut out.
How to repair the top
The features of repairing the upper part of the sneakers directly depend on the material used. If shoes are made of suede, natural or artificial leather, then the material wears out over time and cracks at break points. To restore the appearance, patches made of thin and elastic material can be glued or sewn onto cracked and cracked areas. Before applying patches, the old material is torn off.
The use of patches on the upper part of the sneakers ruins the original appearance of the shoes, so it is better to prevent cracks from occurring. To maintain shoes in good condition, natural leather should be periodically lubricated with cream, and suede should be cleaned with a dry, stiff brush, trying to lift the pile. To clean the upper part of your sneakers from dirt, you should use a damp cloth rather than washing your shoes under running water.
DIY tread repair
The most vulnerable are the protectors located on the heels of shoes. To restore them, you will need a hard piece of rubber, which can be taken from the sole of unnecessary shoes. Among the tools and additional devices that will be useful for work are: shoe glue, a sharp knife, and coarse sandpaper. The tread repair process is as follows:
- A patch is cut out of a piece of hard rubber and fitted in place of the damaged or worn out tread.
- Using a knife and sandpaper, make a wedge-shaped patch.
- The surfaces that will be glued are treated with sandpaper to roughen them, and then wiped with a solvent and allowed to dry.
- The adhesive composition is applied in two layers to the patch and the future location of the protector. The drying time of the first layer should be about 20 minutes, the second - 4-6 hours.
- After the glue has dried, the surfaces are heated over the stove until a smell appears, applied to each other, squeezed tightly and held until cool and fixed.
Sneakers with retreads can be worn immediately after the repair is completed. If possible, it is recommended to wait a day before use to provide additional reliability.
Needles
After the hole is formed, the awl is grabbed in the right hand with the little finger. The right needle lies between the middle and index fingers. The left needle, from the wrong side, is threaded through the hole that has just appeared with the left hand.
The right needle is held with the thumb and index finger and placed behind the left needle, forming a cross.
The left needle is now pulled completely out of the hole. The thumb and index finger hold the needle. The ring finger, in the area of the eye of the needle, holds the thread, preventing it from falling out. The index finger and thumb of the left hand straighten the thread, preventing it from tangling as it passes through the hole. When the thread is pulled through, the right needle is threaded through the same hole. The right needle thread lies behind the left needle thread.
The thread threaded with the left needle is slightly stretched as the right needle passes through.
How to fix a backdrop
Damage to the back of sneakers manifests itself in different ways: the fabric tears, the inner lining comes out, and discomfort appears in the heel.
When repairing shoes at home, you can take the following steps:
- Carefully cut off the torn edges in the area where the lining is located.
- Select a piece of thin leather that is soft to the touch and cut the blank in the shape of a small horseshoe. This shape is required to cover the entire surface of the heel of the sneaker.
- Treat the leather blank with shoe glue, thoroughly covering the entire surface, especially the edges.
- Carefully apply the patch to the heel of the shoe and place any suitable size object inside the sneaker to spread and press the fabric tightly.
- Leave the shoes for several hours for the final fixation of the patch.
How to properly care and wear
To extend the service life and maintain the proper appearance of your sneakers, you need to follow a number of simple rules. In particular:
- Take off and put on sneakers unlaced. If you do not untie the laces, the resistance on the heel will increase, which will cause its deformation.
- Only wear shoes that are the right size. Otherwise, abrasion will occur faster.
- Use the correct type of running shoes. For running, training and everyday life, appropriate types of shoes have been developed, so you should not limit yourself to one pair, but choose a separate option for each type of activity.
- Buy quality shoes. Attempts to save money often lead to accelerated wear and tear and the appearance of a large number of defects, as a result of which you have to constantly carry out restoration or throw away the sneakers.
The easiest and most reliable way
We have figured out the main types of tools and their purpose. There is no point in listing all the existing manufacturing methods, there are a huge number of them, everything depends only on the imagination of the master himself.
We will give the simplest, and at the same time reliable method. For it we need an ordinary long self-tapping screw, made of good steel, so that it does not bend. We will use a wooden block as a handle. Its width should be equal to the width of your palm, so that it is comfortable to hold.
The least popular option is steel wire, which is quite hard and very easy to sharpen. Literally anything can be used as a handle. The main thing is that it is strong, and the awl itself sits in it very firmly. Otherwise, it may slip out of the socket and injure the master.
A wooden block must first be carefully ground to the size of your hand and then processed so as not to plant a splinter on yourself. Next, you can make the pen unique by carving a pattern on it, or burning your initials.
The next step will be drilling a hole in the handle directly for the awl itself. Please note that the diameter of the hole must be the same as the diameter of the self-tapping screw. If it is larger, the awl simply will not hold.
We screw an awl into the drilled hole; it should fit tightly and not move. Then we cut off the cap from it. The final step is sanding. In order not to reduce the strength characteristics, it is necessary not to sharpen the edges too much, but to make the point with edges, about 3-4. After this, bring it to perfection with sandpaper, and the awl will be ready.
You can use the tool immediately by testing it directly at work. Next, we’ll look at how to make such an instrument as a gift for someone.