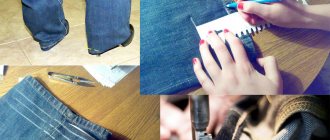
An unwanted dress length can ruin the mood of any girl. Be it festive or pleasure. When a problem needs to be solved quickly, and going to a tailor takes a lot of time and money, you can hem the dress yourself at home. However, this process causes fear and uncertainty.
In fact, if you study the recommendations and follow certain rules, this process will not take much time. If you are ready to take a risk and hem the dress yourself, then this article is for you.
Various fabrics
As mentioned above, the technique of work and the choice of tools depend on the fabric. So, for linen, synthetics and cotton, you need to carefully consider the choice of scissors due to the high cutting resistance of the fabric, while for wool it is several times lower.
For thick fabrics, thicker threads and needles are used, and for thinner ones, vice versa.
The color of the fabric and thread should be as similar as possible so that the seam is not so noticeable.
There are fabrics that shrink after washing, so the product or only the area where it will be cut must first be subjected to a wet-heat treatment.
For silk and other fabrics that tend to fray, you need to leave a larger allowance, which will require an overlocker to process. Many professionals say that the edges of such fabrics should be finished at the basting stage.
Preparing the dress and necessary equipment
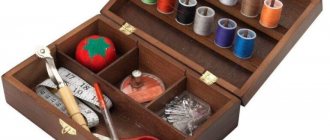
To hem the hem of the dress you will need:
- needle;
- threads;
- scissors;
- ruler;
- sewing pins;
- chalk pencil;
- iron.
Threads and needles must match the thickness of the fabric. Thick ones are used for dense fabrics, medium thickness ones are used for suiting, and thin ones are used for silk, chiffon, and chintz.
Before you start sewing, you need to prepare the dress:
- Smooth out the dress, try it on and decide on the desired length. If you plan to wear it with heels, then don't forget to wear them.
- Once you have decided on the length, take off your shoes and use a ruler to measure the length you need to cut. You may need an assistant in this matter.
- Remove the dress and turn it inside out. Place it on a flat surface and use a ruler and chalk pencil to measure the excess length at the hem.
- Next, draw a line along the hem along the marks.
- If you plan to sew with a hem, be sure to leave a few inches for it. To do this, draw another line below the first one. Otherwise the dress will be shorter.
- Carefully cut with scissors along the resulting second line.
Hemming on a sewing machine
Hemming a T-shirt, sweatshirt, top or anything else using a sewing machine is very easy. Need to:
- Measure the required length, mark and cut.
- Fold the T-shirt at the bottom, determining the distance at which the seam will be.
- Place the folded product under the machine foot with the wrong side up.
- Straighten and align so that the edge of the T-shirt is under the left needle.
- Install the stopper and start stitching so that the fabric does not tighten.
- Tie an end knot and hide it.
Manual hemming method
The fastest and cheapest option is to hem the T-shirt yourself at home.
If your product is made of dense fabric that does not fray, then you can safely trim it. And if there is a risk that the fabric may “move” or fall apart, then it is better to pre-process the edge with an overlocker.
After cutting, the bottom of the T-shirt must be finished with a hidden cross-shaped seam, which is usually called a “goat”.
Goat seam
This type of seam is quite simple to make; even a novice seamstress can handle it. One or two threads (at your discretion) are grabbed with a needle from below and above the cut allowance. In this case, you need to carefully ensure that the seam is not visible from the outside.
The item you are going to trim and hem must be clean and ironed.
see also
Every girl from childhood begins to mentally draw her wedding dress! In it she is the most magnificent and irresistible! The Ladies Atelier will help make your dream come true! Sewing a wedding dress of any complexity for you! Feel like a queen!
Girls! Your appearance should be shocking and impressive! After all, you are the best! Especially for you, dear ones, tailoring an exclusive and unique prom dress! Welcome!
Warm and soft, comfortable and gentle. All this about knitted clothes. Every woman in her soul envies craftswomen who know how to knit. In the Ladies' Atelier of Elena Trufanova you can order absolutely any knitted product, regardless of style and complexity.
Source
How to hem a neckline
Sometimes, due to prolonged wear and frequent washing, the neck of a T-shirt can stretch and look different than when purchased. On the Internet you can find a lot of tips on how to hem a neckline. We will talk about several below.
What you will need:
- pins;
- hand needle for knitwear with a blunt tip;
- or a sewing machine.
Collar hemming method No. 1
Progress:
- Turn the T-shirt inside out.
- Fold the edge of the collar and pin it with pins.
- Sew by hand or on a sewing machine.
It is important that in the end your seam is elastic!
Collar hemming method No. 2
There is another option for hemming a T-shirt collar, which involves cutting it off and then re-sewing it back on.
- Pull the collar away from the T-shirt.
- Spread the shoulder collar about two centimeters.
- Carefully smooth out the entire fabric.
- Cut the seam from the trim strip.
- Stretch the bar by ironing it.
- Finish any of the long edges with an overlocker.
- Place the T-shirt and placket with right sides facing each other.
- Baste so that the neckline and raw edge match.
- Cut off the rest of the strip.
- Sew the placket to the fabric.
- Unscrew the bar and baste.
- Sew the strip and topstitch it at a distance of half a centimeter.
- Sew and finish the shoulder seam area.
Finishing the edge of a dress without hemming
To finish the edge of a dress without a hem, you do not need to leave extra length. Measure and immediately cut off the unnecessary part. Processing can be done in several ways.
Using an overlocker
The easiest way is to use an overlocker. With its help, you can easily and beautifully process the edge of any material, both thin and thick. If you don’t have an overlocker, but have a sewing machine, you can select the “zigzag” function on it.
Before you start sewing, first carefully trim the edge so that the cut is even and the threads do not stick out. For this work it is better to use sharp scissors. If you sew on a machine, you can step back from the edge by 3-4 mm, stitch in a zigzag pattern, and then cut off the excess fabric.
Using bias tape
Bias tape is a strip of fabric cut on the bias. You can use it to finish the edge of a dress, and it is also good for finishing internal seams, especially for fabrics whose edges fray. The trim can be chosen both in color and varied, see how appropriate it will be. You can also use lace.
To sew bias tape to the hem of the dress, measure the length you need and leave 0.5 cm from the edge. Place the strip of fabric facing the edge of the dress. Pin the binding to the fabric or carefully baste it with thread. The bias tape should lie flat, do not pull it out, otherwise the fabric will ripple. Then sew a regular stitch along the edge, retreating half a centimeter. Remove pins and iron.
Turn the bias tape right side out and iron again. On the wrong side, you need to fold the bias tape to the edge of the seam allowance to fix it in this position, iron or baste it with thread.
If the bias tape begins to wave, then measure 2.5 cm with a ruler and cut off the excess fabric.
Next, turn it right side out and fold the binding over again, baste it with thread and sew it with a straight stitch, departing 1 mm from the edge. Remove the basting and iron.
You can see it more clearly in the video:
How to hem a T-shirt on the sides
Without using a sewing machine, a topstitcher and an overlocker, it is very difficult to hem a T-shirt on the sides. The last two tools can be replaced with a sewing machine that has an overlock stitch.
Instructions:
- Mark on the sides the places where the seams will later be.
- Trim the overlock seam at the sides and armhole, but do not cut the fabric.
- Mark the place where the seam will be (it is better to use a template).
- Fold the product in half, align the cutting lines and pin everything together.
- Mark the future armhole line.
- Pin together the back, hem and armhole.
- Fold the T-shirt along the seams at the shoulders and pin it in place.
- Cut off the excess fabric, leaving an allowance of about 0.7-0.8 centimeters.
- Fold the sleeves together, pinching them at the bottom.
- Mark the highest point on the rim line with chalk or soap.
- Make marks on the front and transfer them to the second sleeve.
- Remove the pins.
- Align the cuffs and armholes, as well as the cuff point and shoulder seams.
- Sew all seams.
It is better to sew the seams on the sides and sleeves in one go.
How to hem a T-shirt at the shoulders
Sewing a T-shirt at the shoulders is easy, since you don’t even have to rip the fabric.
Hemming steps:
- Mark the length you need from shoulder to collar;
- Draw a line with chalk or soap to the end of the armpit line.
- Fold the T-shirt in half.
- Trim off excess fabric.
- Pin the sleeve, front and back that you cut off.
- Sew these parts and press thoroughly.


