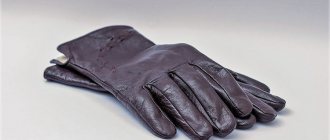
Washing everyday items does not raise any unnecessary questions, but there are items in your wardrobe that require consultation. Knowing how to wash leather accessories is important in the spring, when gloves get dirty when worn and require cleaning. Caring for leather items is different from other materials. To avoid damaging your item with inept care, read the care instructions.
Cleaning products at home is a troublesome task; machine washing is not recommended. Applies to manual procedures, ironing, processing at high temperatures.
Leather materials are not allowed:
- squeeze;
- immerse in water entirely, soak;
- wash in hot water;
- dry in special equipment.
If you're not sure you can handle washing, take your leather items to the dry cleaner. Getting a lot of water on the skin makes it rough, hard, and deformed.
The less water when washing, the better for the product.
Do not use ordinary household chemicals. Aggressive substances contained in washing powder, washing gel, and conditioner can cause cracks in the skin and make it wrinkle. Some chemicals can change the color of a product and permanently ruin it. Wrinkled, roughened accessories cannot be restored.
Methods for cleaning leather gloves
There are different ways to wash leather products. Depends on color and density. Black or brown gloves can be easily cleaned with a solution consisting of ammonia, cold water, hydrogen peroxide, and washing powder. The components are mixed and applied to a sponge. Wipe areas of contamination and remove any remaining cleaning agent. You cannot completely immerse accessories in the solution; they may shrink in size and will look unattractive.
The second option for cleaning dark products at home is to treat the material with a vinegar-based soap solution. Wipe the skin with the product and leave to dry in the fresh air. It is prohibited to use batteries, hair dryers or irons for drying.
White gloves are more difficult to clean; using a soap solution and insufficient rinsing can leave yellow stains. To remove stains from white items, you need to prepare a solution based on soda and milk. Apply the product, leave for 5 minutes, clean with a dry paper towel. You can use ammonia with hydrogen peroxide. The liquid is applied to the stains, after 3 minutes, rinsed with cold water.
The onions will remove excess dirt between the seams. Go through the seams with the cut of the onion and rinse.
Gloves get dirty everywhere. The principle of internal cleaning depends on what material the lining is made of. If there is fur inside, do not get it wet. You can use baby powder. Pour inside, shake the product, turn it inside out, shake. Fabric backings are cleaned with soapy water. Products without lining, wiped from the inside with ammonia or lemon juice, will help remove leather fat deposited on the walls, and eliminate other types of contaminants.
You can wash the suede type of finish with shampoo. You need to add 1 tsp. shampoo and 3 tsp. water. Remove excess moisture with a dry, soft cloth or paper towels.
Where can I go to get my gloves reduced?
If you don’t want to experiment with a thing or have doubts that you will get a decent result, then you need to contact a specialized studio. Choose only those that work with leather items.
Here they can offer or recommend two main methods. The first is the chemical effect on the skin structure. The second method is simply to alter the product to your size.
DIY oriental dance belt
What is a comb?
Bringing shine back to gloves
To restore the appearance of the accessory, it is necessary to treat it with castor oil or glycerin. Apply the product in a thin layer and rub into the material. The oil makes the skin elastic, shiny, soft. The substance restores the shine and effectiveness of things well. If you don’t have castor oil, glycerin will do as hand cream. After applying the product, wipe the product with a dry cloth or paper napkin.
If there are scratches or minor damage on the accessory, they can be hidden by aerosols produced by the manufacturer of leather shoes and clothing.
For dark gloves, coffee grounds are a great help. Apply to the defect site and rub into the material. Use a sponge to remove the grounds.
You can restore the shine of white gloves with bread crumbs or Vaseline. The products are applied to the product with a cotton swab, then washed off with a dry towel. Orange peel or drying in the fresh air will get rid of the unpleasant odor. Multi-colored products will be restored by egg white. Beat it until foamy and apply. After drying, wipe the gloves with a cotton swab dipped in milk or sunflower oil.
Option No. 8. Waterproof gloves from a bag
These gloves will come in handy for doing some dirty work. They can be made from any package.
Step 1 . Prepare everything you need - thick film (for example, a garbage bag), a stationery knife, an electric soldering iron and a marker.
Step 2 . In our example, we use a regular garbage bag.
Using a trash bag
Step 3 . This bag is already two-layer, so there is no need to fold it in half.
The package is placed on a flat surface
Step 4 . Place the bag on a flat surface, place your palm on it, fingers spread. Trace your hand with a marker, retreating about 5-7 mm from it.
The hand is outlined with a marker
Step 5 . Trace the outline with the tip of a heated soldering iron. This way you will burn through the film and connect both layers in parallel. Don't forget to place cardboard under the film first.
The circuit is traced with a hot soldering iron
Step 6 . Circle everything except the bottom - cut a line there with a stationery knife. The finished glove can be easily removed from the film.
The line is cut from below with a knife
On a note! Instead of a soldering iron, you can use an old knife, heating its tip over the fire. You can make as many of these gloves as you like at one time.
Trying on a finished glove
Make the cuffs long enough to protect the sleeves from splashes.
What tools to use
Washing leather gloves at home is not easy. If you have professional care products, washing will not be difficult. It is recommended to use products from the LEATHER CARE KIT series. The set includes cleaning products, further protection of the skin from minor damage, sponges, restorative agents, and polishing. Among other household laundry detergents, the following are popular:
- LEATHER SOAP - cleaning soap;
- INK REMOVER FOR LEATHER– pencil for removing individual stains;
- Antiquax Leather Cleaner – spray.
The products will help to effectively clean leather gloves from stubborn dirt.
At home, you can wash leather gloves with baby soap or laundry soap. Do not use powdery substances when washing items made from delicate materials. Abrasive particles leave marks and instead of helping, they will cause harm.
Option No. 7. Fingerless gloves (mittens) made from socks
Step 1 . Find suitable socks, ideally these should be knee socks. Choose some interesting pattern that will look nice on your gloves. For example, stripes like this.
Prepare knee socks with an interesting pattern
Step 2 . Cut the entire foot of the sock in a straight line (right above the heel). Set the bottom part aside; you won't need it.
Cut off the foot of the sock
Step 3 . Place your hand on the sock trim (as in the photo below), mark where your thumb is located (usually about 5 cm from the top edge of the glove).
Trimming by hand
Step 4 . Armed with scissors, make a slot for the thumb (13 mm is enough).
A vertical cut is created
Step 5 . Try on the future glove by inserting your thumb into the slot. If you need to enlarge the slot, you can do it at this stage. Also, give it an oval shape.
Trying on a glove
Step 6 . Fold the cut edge of the glove inward by about 1 cm. Using tailor's pins, secure the hem, then sew with a zigzag or knit stitch. Or do it by hand using running stitches.
The hem of the glove is sewn
Step 7 . Hem the edges of the thumb hole. Tuck them inside by about 0.5 cm, and hem the resulting hem with running stitches.
Cut the slots for the thumb
Step 8 . Make the second glove in the same way. During production, try on the mitts from time to time so that they turn out identical.
Ready-made mitts from socks
Video - How to sew fleece mitts
What to do if gloves shrink after washing
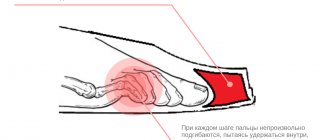
The ideal shape of gloves is often disrupted by washing. Prolonged soaking and use of high temperature water provokes a decrease in size. You can carefully stretch it, but do it in the transverse direction, otherwise the accessory will come apart at the seams.
To stretch the leather, wrap the product in a towel soaked in cold water for 3 hours. Then pour a small amount of cologne or alcohol into the inside and put it on. The hand should remain in the glove until the liquid dries completely.
Baby cream will help increase the size of the product. It should be applied to the inside of the item if there is no lining. If there is fur inside, it will not be possible to adjust the size of the gloves. Glycerin stretches the skin well after washing, you need to lubricate your hand with the product and put on a glove.
If the accessory has shrunk in the finger compartment, the size will not be restored.
To ensure that leather accessories retain their original appearance for a long time, wash and store them correctly. Keeping gloves in your closet is of great importance. Do not pull plastic bags over the top, you risk inviting mold. The skin does not like direct sunlight or excessive heat, as it will lose color and stretch. The best option for storage would be fabric bags or cases; they maintain normal temperature, do not form condensation, and do not allow moths to pass through.
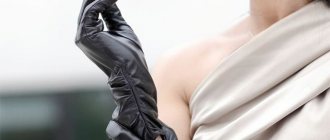
You can stretch your favorite leather gloves to fit your hand, despite the fact that the final idea of buying them did not inspire positive feelings - in general, you obviously regretted that you bought them in the wrong size.
The first thing you need to do before purchasing is to try on the gloves. But often we receive some wardrobe items and accessories as gifts, and it would be somehow awkward to refuse a person in person. Stretching gloves made of genuine leather is as easy as shelling pears, believe me. Leather is an extremely suitable material for this. It, unlike dermantine, easily absorbs moisture, allows the skin to breathe, and is also stretchable, but does not deform under the influence of such interventions.
Several techniques on how to stretch genuine leather gloves:
- An essential way to stretch gloves is by using alcohol. Use a cotton pad to lubricate the inside of the gloves, then put them on your hand to stretch them. You should use this technique only if you are not allergic to alcohol or your skin is not too sensitive to the effects of such an active substance.
- It can be stretched using ordinary water, which greatly facilitates all our efforts. To do this, wrap your gloves in a damp towel for a couple of hours. The skin will absorb moisture and become a little moisturized. Once this step is completed, the next step involves putting the gloves on your hands and wearing them until they are dry.
- Do not use oil to stretch gloves. You can find many ways to stretch genuine leather gloves using oil, but this method is not applicable for gloves that are decorated with fur, otherwise you will ruin it. In this case, it is better to use a non-greasy hand cream or a special cream for stretching leather products, applying it only locally: to those areas where there is skin but no fur.
- A great way to stretch genuine leather gloves is to put them on a pair of gloves made of a different material. It will be a similar method as with tight leather shoes, when you put on wool socks or just several pairs of thick socks, and your leather shoes on top of them. By the way, in this case, you can also hold the gloves in this form under hot air to speed up the stretching process.
If you are somehow frightened by the proposed methods, and you do not risk conducting experiments with your own hands, although they, I assure you, will not harm the aesthetic appearance and condition of your gloves at all, you can contact any place where they work with leather products, or repair of accessories, where you, a person who deals with this professionally, will help you stretch the gloves to the required size using a special mechanical device.
The only thing that might make you think is that you will have to pay for this service, while the methods listed above are free and available at home, but you often have to pay for beauty, so do not spare any effort or time to achieve convenience - this is for your good luck, friends.
Reading time: 2 minutes
How to wash leather gloves without spoiling the texture of the product and bring them back to their original condition, as when they were purchased? Often this question is asked not immediately after the purchase, but when it comes time to wash the accessories. Everyone knows that machine cleaning is undesirable, as leather or suede may deteriorate. Therefore, we want to give some recommendations and videos,
which will help you carry out comprehensive cleaning of expensive and fancy fabrics.
To wash leather gloves, it is enough to avoid alcohol solutions and direct contact with detergents containing this component. Leather items and accessories should not be exposed to professional chemicals or bleach particles, as they can corrode the paint on the surface of the gloves. Much depends on the color palette - natural red leather does not exist in nature, just like black. Therefore, the entire cleaning process will be reduced to hand washing. There are general recommendations that apply to any type of leather products.
Soap solutions are more gentle on leather products. It is better to expose bags or gloves, belts or laces to such solutions, as other components can have a negative effect on the surface of the leather and its texture.
Sponges or rags should be soft but durable. It is not advisable to use abrasives and foam sponges for washing dishes. They can scratch the surface and damage the protective layer of the leather. A soft cloth cleans the surface better without causing material rupture or microcracks.
Acid has always had a negative effect on the skin, especially when treated with oxide solutions. Any product contains components that allow the surface to burn and split. If we talk about human skin, as an animal tissue, it is easily deformed when exposed to acid.
Their structure is not so dangerous due to their mechanical properties - they do not crush the top layer of gloves, do not damage the shell of the layer, and do not destroy the membrane. If regular dry powder gets into your pores, it will be difficult to wash it out later. With liquid powder everything is much simpler.
Never wash gloves in cold water or wear them in the rain. Hot water does not cause any harm; on the contrary, real leather does not deteriorate from thermal effects.
The correctly selected drying mode will allow you to carefully restore it to its original form. It is important not to use thermal units such as a hair dryer or radiator. Drying should take place under the usual conditions for leather products - a minimum of UV rays and a maximum of circulating air.
Now you know whether it is possible to wash leather gloves, and how to do it, following simple rules. However, everything is not always so simple, because leather is a capricious material, and because of this you need to choose special washing methods for different shades. In this question, we will also suggest modern ideas and options for caring for accessories made from natural ingredients, and also tell you how washing colored leather differs.
Dark skin
This is a fundamental point when it is necessary to say separately about washing dark leather products. Since they are the majority, the question regarding the color scheme and care according to this principle is somewhat different. Preference is given everywhere to such dark things, especially in the choice of:
- hats;
- Gloves;
- Belts;
- Bags.
Often they pay attention to the dressing - the husky is handled delicately. Light-colored items are easier to wash, but black and brown items do not cause any hassle in cleaning and care. To wash the outside of black leather gloves, use the following method:
| First you need to make a solution of ammonia by mixing a glass of water with 1 spoon of ammonia. |
| The active substance, powder, is added to the stirred solution. It is better to use the liquid type for black items, delicate washing and other “gentle” products. To the solution you need to take 5 parts of powder from the volume of ammonia. |
| An element that breaks down dirt and neutralizes bacteria can be compared to hydrogen peroxide. It removes traces of dirt and removes dust outside. |
| The entire mixture is mixed and added to a sponge or cotton pad. Excess liquid is squeezed out, and dirty areas are wiped with detergent. Use a clean cotton swab dipped in clean water to wash off any remaining product. |
Tip: You can’t completely immerse the gloves in water; the fabric is too delicate and it could get damaged. The outer layer is deformed, the size is lost and the appearance of the accessory changes.
Lighter gloves can be washed with soap and running water. The fact is that for the production of gray and brown colors, burgundy and blue, a different technology is used for working with colored leather cuttings. This helps make accessories less fussy during cleaning processes. To wash them use:
Simple baby soap is not so dangerous for things, so they wipe the entire surface of the skin with it.
To avoid rubbing off the skin after each wash, apply soap with another cloth. This way the product does not spoil the skin, dirt is removed with a cloth, and there is no need to rub the fabric, as when hand washing socks and scarves.
You can wash off the soap under running water or using a cloth. It is safe for skin, especially black skin. However, it is better to supply warm water - it will not wash off the paint and spoil the product.
If leather gloves have lost their appearance, they can be restored with vinegar. Add a little tartaric or malic acid to the water with which you will wash off the soap and dirt. The skin will become elastic and beautiful, shine or a brighter and richer shade will appear.
Gloves of this color cannot be dried in the sun, not even under direct ultraviolet rays. It is better to place them in a cold, ventilated area.
After washing, castor oil is applied to the surface of the gloves to maintain cleanliness and brightness of color. You need to make sure that the gloves are completely dry, then the oil will give the desired effect.
Sometimes you can replace the oil with Vaseline or professional leather care creams. This will saturate the skin and give it a fresh look.
Laika should be wiped with glycerin or warm milk, depending on the color of the product. It is impossible to wet the skin, especially from a type that is easily deformed. Any thing can be damaged if it is not used correctly.
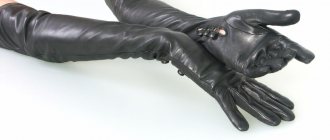
Bright skin
Lighter shades of leather gloves are easier to wash, but harder to wash and remove stains. However, the fair half of humanity still sometimes prefers to wear such accessories with one or another outfit. However, it is worth noting that some people confuse pigment colors ( red, yellow
) with white and light tones, choosing a completely inappropriate option as a washing method. We recommend not subjecting light-colored gloves to water procedures - this may lead to the appearance of yellow stains.
| To clean white gloves, it is better to use a folk remedy. Boil the milk and add 3 tbsp to it. l. baking soda. Stir the mixture and apply the solution pointwise to the contaminated areas using a white cloth. Remember that fabric can also fade, and for safety reasons, only apply the solution in white patches for safety reasons. |
| Just as in the case of black gloves, white leather accessories are cleaned with ammonia, only the proportion is different. Add 2 parts alcohol to 8 parts water. Wipe dirty areas and remove any residue with a clean sponge. It will absorb excess moisture. |
| Hydrogen peroxide can be used in its pure form if the gloves have cracked and greasy areas. |
| Concentrated store-bought lemon juice will remove dirt and black spots. If you accidentally spill coffee or tea on your white gloves, lemon juice is the best cleaning product. There is no need to dilute it with water or other aqueous solutions. |
Tip: If the gloves are made of white kid, they will not be exposed to these substances. The best remedy is lemon juice. It must be applied using a cotton pad.
Suede
Another question that interests housewives is how to wash suede gloves at home? To solve this problem, household chemicals are used. Most often used:
- Baby soap;
- Shampoos;
- Dish detergents.
You should also pay attention to components such as:
Initially, prepare a soap solution by adding shampoo or soap to warm water. Foam formation is important here, which is why shampoos are most often used.
Gloves are dipped into foam, slightly introducing the products into the water. This is how they wash suede, sometimes wearing gloves on their hands. This makes it easier to wash away dirt and stains from the surface.
To remove heavy dirt and pigment spots, additionally use soft-bristled brushes or dishwashing sponges. This replaces strong abrasives and scourers.
After washing, the products are thoroughly washed under running water. Dirt is removed several times, it all depends on the degree of stubborn stains.
Suede can be dried at room temperature, but to maintain its shape, gloves are placed on a mannequin. An alternative option would be a frame made of wire and cardboard. You can prepare a similar stand at home so that the gloves do not deform under the influence of weight when wet.
After complete drying, the suede is treated with a special brush with rubber tips. This allows you to restore the pile, which could stick together after exposure to soap solutions.
Thus, it became clear whether suede gloves can be washed and dried after the procedure. And then we will consider the pressing question of how to wash the inside of gloves when there is a lining.
Option #3. DIY knitted gloves
The next option we'll look at are these cute knitted gloves.
Knitted gloves pattern.pdf
The pattern of such gloves looks like this.
What does the pattern of such gloves look like?
The outer lines are 4 mm wide (these are allowances). The lines that align on the glove and thumb are highlighted equally or have the same color.
In our example, an overlock type sewing machine was used; the author sewed with one needle, removing the thread extender. Thanks to this, the overlock stitch turned out to be quite narrow. The material used is two-thread Loop footer.
Step 1 . First, attach your thumb to the glove. Connect the section highlighted in green on the pattern.
The slice highlighted in green is connected
The base of the finger is sewn
Step 2 . After this, sew the base of the finger to the glove.
Step 3 . Connect your finger as in the photo below.
Thumb connects
Finger connection
Step 4 . Bring your top fingers together. Cut out a strip of 2x55 cm along the grain thread.
- The thickness of the strip can be increased if the fabric is thick. But in our example, the knitwear is relatively thin.
- You can make a strip from pieces of fabric, but in this case the seams should be in the places of the membranes.
Take the strip and start connecting your fingers with it, starting from the top of the index finger and ending with the top of the little finger. Sew at the base of the fingers the entire width (that is, 2 cm), tapering towards the top. In the photo you can see that at the base the strip is flush with the cut, and at the tops it protrudes beyond the edges.
Fingers are connected by a strip
Protruding edges trimmed
Step 5 . Do the fitting. If everything is fine, trim the protruding edges of the strip.
Step 6 . Machine stitch one side to join the strip to the pattern. On each membrane, bend the next finger (this will create a straight line) and sew a line.
The stitching is done on a machine
Opposite sections are collected with needles
Step 7 . Gather the opposite sections with needles so that when laying a stitch, you don’t catch anything unnecessary on the tops.
Step 8 . Go around the other side in the same way.
The other side does the same
The seams should hold the parts together well.
Step 9 . Check the security of the seams. If the stitching is done poorly and holes appear somewhere, lay another stitch on top to eliminate the defect.
Step 10 . Fold the bottom of each glove twice, then sew a straight machine stitch.
The bottom of the gloves is turned up
Another photo of the finished gloves
Step 11 . If the knitted gloves were made as a gift, package them beautifully.
Looks good on the hand
Nicely packaged gloves
Video - An easy way to sew fabric gloves
Cleaning from the inside
Leather and suede gloves can be turned inside out to wash the inner layer of the accessory without touching the outer layer. But how to wash leather gloves from the inside so that the fabric does not get too wet, and drying is optimally fast for this type of cleaning. Most often, the manufacturer provides a manual and the instructions indicate which cleaning methods are suitable for which types of leather gloves. But in order to wash the fabric inside separately, you need to make a solution.
Using peroxide, you need to remove stains and immediately apply spot remover to those places where there is dirt.
Remove any remaining product after cleaning and then proceed with the main wash.
Use a brush and a damp cloth to dry the gloves with powder. In this case, a dry detergent will do. Try to wash it off quickly so that the gasket inside does not get wet.
You can dry the gloves only from the wrong side. Therefore, do not rush to turn them back inside.
This way, you can easily clean the gloves either just inside or completely on both sides. It is not recommended to wash at the same time, as moisture can pass out to the top layer, and this will spoil the effect after washing. Incorrect and poor-quality cleaning can damage the outer coating, and you will have to buy new gloves. Their price is relatively low, but it is better to avoid force majeure circumstances instead of constantly updating your wardrobe of accessories.
Option number 4. DIY suede gloves
An old suede jacket can easily be transformed into beautiful, comfortable and soft gloves. But the most important thing is that no one else will have such gloves!
On a note! To begin with, we advise you to practice by trying to make a glove from muslin or cotton.
To make such a stylish accessory with your own hands, you will need:
- suede leather;
- sewing machine;
- pattern paper;
- a simple pencil;
- threads of a suitable color;
- scissors.
Step 1 . Fold a piece of paper in half, place your hand on it so that your thumb remains outside the rectangle (see photo). There should be a small space between the edge of the sheet and your index finger. Spreading your fingers slightly, outline your palm with a pencil, leaving about 3 mm on the side of the little finger and above the tips. Try to keep parallel lines between your fingers.
Trace your palm with a pencil
Step 2 . Mark the location of the thumb (for us these are points B and C). Next, draw a line vertically from point A, and horizontal lines along B and C. All that remains is to draw an oval - the location of the future hole.
Preparing the pattern
Step 3 . Cut out the pattern according to the markings.
Cut out pattern
Step 4 . Prepare the pattern for the gusset as follows. Place each finger (except the thumb) on the edge of the paper, trace and cut out.
Each finger needs to be circled
On a note! You can emphasize the color of the gloves using threads of contrasting colors. You can decorate the accessory with embroidery and bows.
Step 5 . Connect your fingers to the gussets (little finger to ring finger, ring finger to middle finger, etc.). Trace each pair with a pencil. Mark each of your fingers.
Connect the corresponding fingers to the gussets
Step 6 . Draw a curve at the bottom of each insert, then start cutting out the pattern. This is where 3 gussets should look like.
A curve is drawn at the bottom of each insert.
Step 7 . Proceed with the pattern for the thumb. Attach it to the paper, circle it, and draw a “wing” to the right in the middle. This is only half of the pattern. After adding a little seam allowance at the tip (this finger doesn't have a gusset), fold the paper in half and draw the outline of what you just drew.
Thumb Pattern
Step 8 . Before you start working with leather, practice - make a glove, say, from cotton and check if the pattern is correct. Moreover, it is advisable to use threads of a contrasting color - it is more convenient.
Step 9 . If everything is fine with the pattern, pin it to the skin on the back side. Trim and sew with a broken stitch, leaving approximately 3 mm from the edge. Adjust the shape of the fingers if necessary.
Pattern pinned to leather
When finished sewing, turn the glove inside out and try it on.
Inverted Glove
Step 10 . Fold the thumb pieces in half (lengthwise), then sew them together. Don't touch the bottom. Turn the part inside out, having previously trimmed the corner.
Step 11 . Pin the piece to the glove, aligning the seam with the seam of the index finger. Try on the product and adjust if necessary. After this, sew on the thumb. Finally, sew the sides and hem the bottom.
Facilities
Below we offer a photo list of detergents and those intended for the care of leather products. They are sold in shopping centers, supermarkets, shoe stores, and are available to every buyer who owns gloves made of suede or leather.
Product for nubuck and suede Leather deodorant Leather lotion-balm Moisturizing balm Suede gel Oil for suede and nubuck Water-repellent spray for suede Dry clean for suede For nubuck and white suede Shoe paint Shoe mousse
So we learned how to carefully and thoroughly clean leather gloves of different colors and types. If you choose between accessories for this purpose, give preference to black or pure white. It is always easier to wash neutral shades, and the video in this article
will tell you how other women cope with this task, and how they take care of their things, shoes and accessories.
New leather gloves
They should fit snugly on your hands, because over time this material will stretch and they may become too big for you. But what to do if you already have this problem? Unfortunately, it is very difficult to reduce them without losing quality, and if there is such an opportunity, then it is better to give them to someone for whom they will fit. If you still want to try to work on their size, then try doing this.
Option #5. Winter children's gloves
To make them you will need very thick knitwear. If you need warmer gloves, you will also need fleece. In our example, gloves are made for not very cold winters and off-seasons.
Children's glove made of thick knitwear
First of all, prepare a pattern according to the size of the child’s hand. Mark where your thumb will be located and measure its length. Mark the depth of each finger in turn, connecting the upper and lower marks. Here is an example of the finished pattern.
Pattern of children's winter gloves
Place the fabric on the edge of the little finger (fold), trace the pattern. In the example, the bend location is marked with a dotted line. Cut an oval hole and sew a pre-prepared thumb element to it. When sewing in a finger, start with the mark in the middle, aligning the mark with the seam of the thumb.
Sewn-in thumb
How to sew a thumb
If you are planning any applique, sew it on now. Next, sew a lace (a strip of fleece is a good option) around the perimeter of all the fingers. The example uses a flat shoelace. Sew with a thick thread - first on one side, then on the other.
The photo shows the front and back of the glove.
Front side of the glove
Wrong side of the glove
After this, turn the glove inside out. If the child's fingers are small, it will be quite difficult to twist them - in this case, use the blunt side of a pencil or something similar.
You can make cuffs like on a jacket - this way the gloves will hold on better. To make a cuff, cut a narrow strip of fabric, sew it into rings, fold it in half and sew it to the product.
The finished gloves turned out warm
Important point! The end of the lace needs to go somewhere. If it is not fixed and processed, then, of course, it will fall apart. On the other hand, the treated tip will be prickly, so you should not leave it. You can, as in our example, sew on a small applique.
How to hide the tip of a red lace
Another photo of the inside of the glove
Actually, the children's gloves are ready. It's even easier to sew winter mittens - here's a good free pattern.
Pattern and stages of sewing children's mittens.pdf
Instructions
The easiest option and, perhaps, the most reliable is to give away your leather gloves
in the studio to specialists. They can simply remake this product or change the size using dry cleaning.
Buy thin cotton gloves
and insert them into your leather ones.
In this case, leather gloves,
although they will not become smaller, will not be too big for you.
Try sewing an elastic band inside a leather product on your wrist that will not allow them to fly off your hand, and you will get the feeling of gloves that are almost normal in size. This method is only suitable if the gloves have a lining.
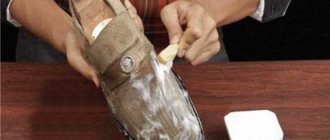
Wash your gloves
from suede or pigskin in hair shampoo or using lanolin soap.
While rinsing, add a few drops of olive oil to the water - this will make them softer. Then dry the gloves
with them straightened out in a warm place. But keep in mind that it is not recommended to dry them on a hot radiator to prevent the leather from cracking.
Suede gloves
Wash twice in hot water soapy water. They should not be rinsed or twisted. Simply wring them out by wrapping them in a dry towel. Then place them flat out in a warm place until completely dry. The soap that remains on the gloves (because you didn't rinse them) will make them soft, but after drying, knead them with your hands.
Wet leather gloves
in water, then dry and wipe with glycerin or castor oil. You can use any rich cream instead, or, even better, colorless shoe polish.
Slightly modified version: without drying the gloves
completely, saturate the skin with castor oil, and to make it soak better, add a little ammonia.
Some people recommend lubricating your gloves
a mixture of castor oil (50 g) with egg white. Try lubricating your skin with fish oil as well. The composition suits the skin well, but, unfortunately, has an unpleasant odor.
You can try placing genuine leather gloves in a pan of hot water and boiling them for a few minutes. After this, products made from good material will definitely shrink, but the leather will lose some of its tannins and natural fats and, as a result, may lose its strength and elasticity. To remedy the situation, lubricate your gloves
castor or olive oil, hold them for a few minutes, and then remove excess fat with a cloth. Unfortunately, if the leather on the gloves is of poor quality, it may crack during the boiling stage.
Laika gloves should not be wetted with water, as they may lose their appearance. You can try to reduce their size a little by dipping them in gasoline for a few minutes, preferably the purest type - aviation gasoline, rubbing vigorously, rinsing in a new portion of fuel and squeezing well. Then gloves
straighten them without stretching them, wipe them with a linen cloth and sprinkle generously with talcum powder.
Helpful advice
Remember that any of these methods can render your gloves unusable, so before you wet, wash, or boil them, think again. It might be better to just buy a more suitable size.
- – glycerin;
- - Castor oil;
- – ammonia;
- - egg white;
- - fish fat;
- – gasoline;
- – talc.
- - gloves
- – wool detergent
- – glycerin or castor oil
- – whisk from a mixer
- 5 pieces of wire with a diameter of 5 mm, each 10 cm + finger length;
- Leather glove;
- Scotch tape or satin ribbon and glue;
- Paint to match the glove.
- how to sew leather gloves
How to calculate the dimensions of a pattern?
Before you start sewing gloves, you must make their patterns. And for this, in turn, it is necessary to correctly calculate the dimensions of the gloves and the drawing. How the calculation is performed:
- the pads of the gloves should be 3 cm wider than the hand;
- The width of the thumb section should be 2.5 times larger than the thumb itself. There will be difficulties with removing gloves if the department is narrower;
- As for the width of all fingers, it should be increased by 2 times for each of them.
Calculation of glove pattern sizes
On a note! All types of gloves have their own characteristics, not only for wearing, but also for sewing. The difference lies both in the pattern construction technology and in the choice of materials. Below we will look at how to sew different types of gloves, analyze patterns and provide step-by-step instructions with photos.
Ways to stretch the skin
To begin manipulation, you can resort to several methods. To do this, you will need a high-fat baby cream, alcohol-based cologne, a specialized targeted product, or a damp towel.
Fat cream
- If you use a simple rich cream, you can achieve good results and stretch the leather product. This composition has a gentle effect on the structure of the material without damaging it.
- Apply cream generously to the leather product. Wait 2-3 minutes. In the allotted time, the composition will saturate the material and soften it. The skin becomes more supple and elastic.
- After the manipulation, carefully put gloves on your hands. Wait 10-15 minutes. Next, excess fatty composition must be removed. Remove the product and place it for further storage. An alternative can be glycerin, but the effect will be less effective, the composition is poorly absorbed into the skin.
Cologne with alcohol
- Use an inexpensive alcohol-containing product for such purposes. Eau de toilette or old perfume may be suitable for the procedure.
- Treat the leather product with the mixture. Put gloves on your hands and wait for them to dry completely. The procedure may take up to half an hour.
- After the specified time has elapsed, remove the product made from natural material and place it in a suitable storage location.
Wet towel
- The method is very popular. In this case, you can easily achieve the desired result. Leather products can be stretched when wet.
- Use a clean terry towel. Wet the cloth generously and wring it out thoroughly. The towel must have sufficient moisture.
- Lay the leather item on a towel. Wrap the gloves in a damp cloth. Leave the product in this form for 2-3 hours. After the skin has softened, you should put on the gloves and wait until they dry completely. Next, store the attribute.
Directional means
- If you do not want to take risks, but are trying to achieve the desired result without unnecessary actions and consequences, you can resort to the help of special means.
- The compounds can be purchased at any shoe store. The product is most often offered in the form of a spray. Gloves can be increased by 1 size.
- Distribute the composition over the inside of the product. Put gloves on your hands and wait a quarter of an hour. Then follow the instructions described above.
- Before starting the procedure, it is important to know several important facts about natural material. To prevent leather gloves from losing their quality and original appearance, they can only be stretched 1 size.
- If you decide to stretch the product more, the skin will lose its elasticity and presentable appearance. In most cases, the attribute begins to come apart at the seams.
- Keep in mind that the skin only stretches in width; such manipulations in length are useless. If the product is new, do not rush and try to stretch the gloves using various means. Try putting them on and wearing them for a while.
- Always try on gloves before purchasing, and in the future you will not have to resort to similar procedures. If you feel uncomfortable, this is not your model. You shouldn't hope for the best.
You can stretch the skin yourself at home. If the product was purchased a long time ago, the methods described above will greatly help you. Otherwise, you should always carefully select the model and size. Consider the physiological characteristics of your hands. Try to purchase products in good stores, so you can get a guarantee for the product and the opportunity to issue a return within a certain time.