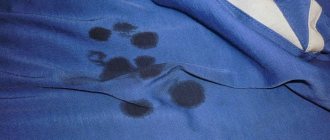
Adhesive plaster can be found in almost every first aid kit. In some cases, it is very helpful: when you need to close a callus on your foot, attach a piece of cotton wool or a bandage with a medicinal substance to the wound. It also leaves characteristic stains that are difficult to remove. In the manufacture of both adhesive tape and adhesive plaster, various components are used that are difficult to wash off: natural and synthetic rubbers, polymers, oils, fillers and medicinal substances. Of course, you can just wait a little: the stains will come off after several washing procedures. But sometimes it is necessary to get them out as quickly as possible. Then folk recipes will help. There is no clear answer on how to quickly and effectively remove adhesive tape marks on skin and clothing, but there are effective folk methods that can help.
How to Remove Band-Aid Stains from Baby Skin
Children's epidermis is very vulnerable, exposure to any means will lead to bad consequences: burns, rashes, irritations, etc. For this reason, when choosing a product for removing adhesive from a patch from a child's skin, the composition and its effect are taken into account. First, the patch is painlessly removed, and then the glue is washed off. If one method fails, you should not immediately use the second; the skin should rest.
Vodka
Vodka has a more gentle effect on the baby's skin than alcohol, but it is not safe. When it gets into a wound, it causes severe burning and redness. Using such material, you must carefully carry out the procedure for washing off the glue:
- take ready-made vodka or dilute alcohol in a 1:1 ratio;
- Gently apply a finger moistened with vodka in places where glue accumulates, avoid getting it into the wound;
- After a few minutes, wipe with a paper napkin;
- lubricate with baby cream.
If redness appears at the treatment site, rinse with running water and apply antiallergic ointment.
Vegetable oil
Vegetable oils can affect glue, which, in turn, loses their stickiness or completely dissolves over time.
The use of baby and vegetable oils is safest for children's skin. Oils specially designed for children's skin will cope with the removal of adhesive painlessly and with beneficial effects. But ordinary vegetable oils (olive, corn, sunflower) will perform the task just as well. For the procedure you will need: bandage or cotton wool, vegetable oil, wet wipe.
Sequencing:
- moisten the bandage with oil (a small amount is enough, otherwise it will start spreading over the skin);
- apply to the child’s skin in the area where the glue accumulates;
- wait 15 minutes;
- Remove everything with a damp cloth.
This process is safe and can be done many times. To make the procedure interesting for children and not be capricious, you can add food pigment to the oil, which will color the glue. Thus, the oil will get rid of the problem and distract the child from a boring procedure.
Tools that will help
A trace of glue from the patch remains from untimely removal of the material, from exposure to direct sunlight and constant wetting. If possible, the adhesive base is removed when using materials with a natural composition. But many manufacturers of the patch add substances to the adhesive base that can only be removed using chemical compounds.
Tools that can cope with this difficult task are divided into:
- improvised materials (always available in the house - vegetable oil, hot water, steam);
- cosmetic (mixture for nail polish remover, waterproof cosmetics);
- special (ethanol, solvent, fatty ointment).
When choosing products, you are interested in how quickly they will work, so as not to spend a lot of time on the procedure.
The main thing in using the products is that the epidermis should not be subjected to strong mechanical stress, as this will lead to rupture of the skin.
Vaseline or fatty cream
To easily remove the adhesive base from the patch, it is better to use Vaseline or a greasy cream. This method will not harm the skin, having a dense thickness and will not spread over the body.
With this method it is necessary:
- Apply a 1–2 mm layer of Vaseline to the skin area or apply a little Vaseline to a cotton pad and then apply to the skin;
- stand for 15–20 minutes;
- remove Vaseline by wiping with a washcloth or towel.
The only unpleasant thing about working with Vaseline is that it is oily, but this fact has a beneficial effect on the skin epithelium.
Do not allow the skin to rub too hard, as this will cause damage and irritation of the skin.
Nail polish remover
To remove any remaining adhesive layer, use a nail polish remover mixture containing acetone. Acetone, a component of the liquid, acts as a chemical solvent, so it copes with the removal of some types of glue. There is acetone in its pure form, it has the same properties. To remove it you need:
- Apply a small amount of liquid with a cotton pad.
- Wait a minute.
- Wipe with a dry cotton pad or cloth.
- Rinse the treated part of the cover and hands thoroughly with running water.
- Apply baby cream.
There are liquids on sale without acetone; they are unable to remove the adhesive base, but will only take time, effort and harm the epidermis.
Liquid with acetone is very drying to the skin and can lead to irritation. The substance is highly flammable, so the procedure is carried out away from heat devices and open flames.
Before using the product, a test is done on a small area of the skin to identify an allergic reaction.
Liquid for removing waterproof cosmetics
A two-phase mixture is produced from hydrophytic, oil solutions and alcohol vapor. It is produced by numerous cosmetics manufacturers and is available for sale. The procedure for removing marks from the patch is simple: just soak a cotton pad with lotion and wipe the skin. This method is the safest, since the product is intended for treating the face.
It is better to choose odorless liquids, since manufacturers use substances for aromatization that can cause pain and rashes on the irritated epidermis.
Alcohol perfume
Treating your skin with perfume will allow you to enjoy a pleasant aroma. Perfume that has been used before is chosen to avoid allergic reactions.
- when saving material, it is enough to apply perfume to the place with glue with your finger;
- wait a few minutes;
- rub with a cloth;
- apply cream.
In this way, you can treat this area with several procedures.
Reason for bandage sticking
Among the provoking factors that serve as the root cause of ingrowth or adhesion of dressings are:
- The natural process of secreting intercellular fluid for wound healing (blood and “ichor”). Soaking gauze or cotton wool causes the dressing to dry to the crust.
- Initially, improper treatment of the damaged area using alcohol and alcohol-containing antiseptics creates initial dryness and activation of compensatory mechanisms for fluid secretion.
- Incorrect application of sterile material to the wound. With a pressure bandage that interferes with normal blood circulation and lymphatic drainage, stagnation occurs in the intercellular space with swelling of the surface and sticking of the bandage.
- The use of loose tissue, particles of which can penetrate into the affected area, is soldered during the healing process, which creates further difficulties - you have to peel off the tourniquet from the wound.
- The presence of extensive adhesion and inflammation with the addition of a secondary infection, complications with the formation of pus, and penetration of pyogenic effusion into the tissue over the wound.
- Hard to reach places
How to apply a bandage correctly so that the bandage does not stick
To prevent the risk of ingrown dressing material that may stick, you should follow some simple rules for applying a dressing and treating a wound:
- compliance with the rules of asepsis and antiseptics eliminates the risk of suppuration, impregnation with pus, and adhesion to the skin;
- if the wound is small, do not immediately bandage it; it must be treated with an antiseptic and allowed to dry to prevent tissue adhesion;
- after treatment with an antiseptic, you can apply an ointment - it will create a barrier, soften the area, absorb intercellular fluid, and prevent the risk of the gauze or bandage drying out;
- Do not apply lint-like materials to wet wounds, as this increases the risk of particles that may stick to the wound.
If you have difficulty peeling off the bandage, you should seek medical help to prevent re-damage, prevent infection, and speed up wound healing. The article has been verified by the editors
Subtleties of removing the patch in animals
I would also like to talk about how to remove the patch from a dog’s ears, because very often many owners face this problem after ear cropping, the process of giving the desired shape to the cartilage, or as a result of surgery. Each animal has a covering of wool, to which adhesive products stick no less strongly than to human hair. Thus, the tightened cover gives the animal discomfort and restricts freedom of movement, like a cage from which you want to get rid of it as quickly as possible.
You can free the dog's ear from the patch using the same scheme that works with a person. But very often, in order not to bother, many dog owners free the ear by cutting off the hair on it. Of course, it grows back over time, but why torture an animal when there are more humane methods?
As practice shows, for some people it is not difficult to remove the patch: they jerk the product sharply, remove it and forget about it. But for a child and people with sensitive skin or a low pain threshold, this is a whole problem, which is accompanied by unpleasant discomfort and subsequent irritation. But, as our article proves, you can find a way out of any situation, and by following our simple tips, you will not feel pain.
What happens if you don't shoot?
If you do not remove a bandage that is stuck and do not try to peel it off the wound, two complications may develop:
- The cellular mechanisms of immune defense gradually push the foreign material out during the healing process, the bandage along with the crust will fall off, and the damage will heal naturally.
- With deep wounds, the adherent area can become overgrown with granulations, which requires surgical intervention and causes complications in the form of an inflammatory reaction and suppuration of soft tissues.
Subtleties of removing the patch in animals
I would also like to talk about how to remove the patch from a dog’s ears, because very often many owners face this problem after ear cropping, the process of giving the desired shape to the cartilage, or as a result of surgery. Each animal has a covering of wool, to which adhesive products stick no less strongly than to human hair. Thus, the tightened cover gives the animal discomfort and restricts freedom of movement, like a cage from which you want to get rid of it as quickly as possible.
You can free the dog's ear from the patch using the same scheme that works with a person. But very often, in order not to bother, many dog owners free the ear by cutting off the hair on it. Of course, it grows back over time, but why torture an animal when there are more humane methods?
As practice shows, for some people it is not difficult to remove the patch: they jerk the product sharply, remove it and forget about it. But for a child and people with sensitive skin or a low pain threshold, this is a whole problem, which is accompanied by unpleasant discomfort and subsequent irritation. But, as our article proves, you can find a way out of any situation, and by following our simple tips, you will not feel pain.
An adhesive plaster is an indispensable thing in everyday life and medicine. And everything would be fine, but its adhesive base sticks quite firmly to the skin. Peel off the patch
“dry” is very painful, so it is recommended to soak the fabric-based glue first: with medical alcohol, olive oil, baby massage oil or warm water. If there was nothing at hand and you had to peel off the patch
“dry”, do it sharply, in one movement. Then it will sting, but this will make the torture easier for yourself. Down with blasphemous methods, let’s soak it off. So…
