Progress does not stand still! Previously, we could not even dream that one kitchen appliance could handle most types of cooking, but now such a miracle machine can be found in almost every home. Many housewives have already become convinced that a multicooker is simply an irreplaceable assistant in the kitchen! Baked goods cooked in a slow cooker are especially tasty. Fluffy biscuits, casseroles, open pies and many other types of baked goods can be made even by a novice cook if you use this technique. But how to remove the finished pie or biscuit from the multicooker? It turns out that the easiest way to remove baked goods from a multicooker is to use the steaming stand that comes with your device.
After the multicooker has finished operating, insert a plastic steamer container into its bowl.
After this, you need to turn the bowl upside down, holding the container with an oven mitt. Then carefully remove the bowl.
Your pie or casserole will end up on a steamer container, from where you can carefully turn it onto a plate.
This way, the baked goods will be in the correct position on the plate and will not become deformed when trying to remove them from the bowl with your hands or a spatula.
Do the same if you need to turn the baked goods over in the slow cooker to continue baking the other side of the pie or loaf of bread. Use a plastic tray, from which you transfer the baked goods back into the bowl with the desired side.
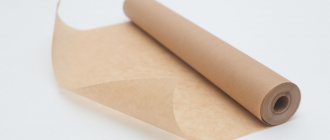
If you decide to cook and are afraid of damaging its outer side with a steamer container, use another tip. Before placing the cake in the bowl, cut out two strips of parchment (baking paper). Place them crosswise on the bottom of the bowl. Now you can fill or place the baking product. After the program has completed, it is easy to remove the cake from the multicooker by grasping the edges of the parchment strips.
Homemade pies can turn a housewife into a real chef in the eyes of her loved ones. But it happens that the cake desperately refuses to get out of the mold. In order to pull it out without losing its appearance, you can use several techniques.
Choose your recipe
How to use a silicone baking pan
All silicone molds are different in shape, size, practicality and convenience. Their main advantage is ease of care and use, food does not stick to them, and the dessert is easy to remove while maintaining its shape. In order for it to last a long time and maintain its service life, you need to follow some rules of use:
- Wash dishes after each use. Otherwise, food debris will stick to its walls and dry out. It will be more difficult to get rid of them in the future.
- Clean only with soft sponges. It is forbidden to use hard brushes, they will damage the entire surface.
- You can simply remove small cupcakes from the mold by turning it down and lightly pressing on the bottom. The pies are easy to remove using wooden spatulas. But if you pick it up with sharp metal objects, it will damage the baking dish.
Be sure to wash it thoroughly with detergent after purchase. This measure is necessary to remove the chemical layer from the surface that may have been applied during the manufacturing process of the molds.
Can be baked in a silicone mold in a gas oven or electric oven. It is prohibited to place them on the burner.
Do I need to grease before baking?
There is no need to specially lubricate the silicone mold. Its inner surface is protected by a non-stick layer. But if the material from which the dishes are made is of low quality, then it needs to be lubricated if the dough burns. But, you can only lubricate the mold with vegetable oil or odorless butter.
Cooks recommend treating the mold before preparing dessert and when it is used for the first time after purchase. A fatty product “activates” the non-stick property. It will need to be lubricated every time even if it is processed in the dishwasher with the addition of detergents.
What to put in the oven
Many housewives make a mistake when baking cupcakes or a pie in a silicone mold in the oven - they place it directly on the wire rack. This cannot be done, since the material will be severely deformed after the first use and will subsequently become unsuitable for creating culinary delights.
Silicone dishes must be placed on a glass or ceramic tray or baking sheet. Molds with large sides can be placed in a saucepan or deep frying pan. But, it is worth considering that its edges are not adjacent to it to prevent melting.
How to grease the bottom and walls of a baking dish if there is no oil
As a standard, you can grease any baking dish with butter or vegetable oil. But if he is not at home, then there may be several alternative options:
Bulk products should be carefully distributed in a thin layer over the entire bottom. Baked goods will not only not burn, but will also look beautiful. Lightly grease the bottom and edges of the pan with a small piece of margarine or lard. At home, you can prepare a special mixture for lubricating utensils intended for baking by mixing butter, flour and lard in equal quantities. According to experienced chefs, it is ideal and facilitates easy separation of baked goods from the pan.
There are many different silicone molds, differing in material and technical requirements. Before using it, you should read the instructions for use, which should indicate a list of products that can be used to lubricate it.
Remove baked goods from a glass or springform metal pan
Metal and glass molds must be greased with oil before pouring the dough. You need to cover both the bottom and sides well. An additional layer of breadcrumbs, flour or semolina will provide additional protection against the dough sticking to the pan.
To obtain a crispy crust on the bottom, for example, when baking charlotte, you need to use granulated sugar.
To easily remove the cake from the pan, you can place the bowl with the dough in a container of hot water or briefly wrap it in a damp towel. Due to the temperature, the metal of the springform pan expands slightly, and the cake can be taken out quite easily.
You can try taking out the cake by tilting the pan a little - about 45 degrees. This way, the baked goods will end up upside down on the dish. You need to hold the edges of the mold, helping yourself a little with a spatula. This way the cake or pie will be intact.
Found a violation? Report content
How to remove a cake from the mold without it breaking?
How to remove cupcakes from silicone or iron molds so that they remain intact?
Should the cupcakes be taken out while they are hot or should they wait until they cool?
How can you remove a cake that is stuck to the pan?
You need to leave the cake in the pan for 15-20 minutes so that it “sets.” You shouldn’t hold it longer so that the bottom doesn’t stick to the bottom.
Then, if the cake does not come out of the mold, the bottom of the mold should be lowered into cold water - then the cake will come out easily.
And for the future, the bottom of the mold should be well coated with butter or margarine and sprinkled with flour or semolina (as an option, you can also sprinkle with breadcrumbs and crushed nuts) and spread evenly over the entire surface. Or place parchment paper on the bottom of the pan.
You can pull the silicone mold in your hands in different directions and down/up, as if “kneading” it, and the baked goods will come out easily.
While your baked goods are hot, try keeping them in the container you baked in, or rather, the bottom of the container in the cold. This can be done by lowering the container into ice water or placing it in ice or on a wet towel.
To avoid such problems in the future, coat the inside of the mold with lard. It is guaranteed that the cake will not stick if you lubricate not the mold itself, but the sheets of notebook, cut them into the required shape and line them before placing the dough in the mold.
My neighbor boasted that she doesn’t have such “accidents” with cupcakes, because she always greases the molds with butter. Butter doesn’t help me (maybe it all depends on the manufacturer or the material from which the muffin tins are made), and only lard helps me. It has a specific smell, but you don’t need to take a lot of it. And after baking, the finished products will not acquire this smell.
Paper muffin tins and silicone molds are sold. If you have extra funds, try baking with them as well. People praise.
Yes, this is a fairly common problem - the dough sticks to the pan and doesn’t want to come out. I've struggled with this more than once. I made the following decision for myself:
The best way to remove cupcakes from the mold (whether small or large) is to line the mold with parchment and then remove it from the mold along with it. Yes, there is a lot of consumption of baking paper. but no torment for you. Even if the dough sticks to the parchment, you can sprinkle it with water and everything will “come off.”
In general, water is the only savior. Therefore, the easiest way is to place the mold on a wet towel for 10 minutes, and then try to turn it over and shake it out. Be sure to run a knife or spatula along the sides first to loosen the sides of the cake. It will be easier this way.
More tips for the future:
Generously grease the pan with fat (vegetable or butter) and sprinkle semolina, flour, and breadcrumbs on top. This will make it easier to remove the cupcakes. But my favorite is parchment. There are no problems even with the most capricious test.
To make the cake come out easily, you need to bake it either in a silicone mold, or pre-lubricate a metal one with oil.
Then I sprinkle it with breadcrumbs. Yesterday I went to a friend’s house and she was baking charlotte, so she didn’t grease it with butter.
Well, we left the mold to cool a little and then lowered the bottom into cold water.
This way they were able to pull out the charlotte without breaking it. The same goes for cupcakes.
By the way, instead of butter, you can use margarine or regular, odorless sunflower oil.
I pour it into a saucer, then dip a silicone brush into it and coat the mold.
Then I take out the cake without any problems. I don't grease only silicone molds.
The cake tends to stick to the sides or bottom of the pan, making it more difficult to remove. To easily remove the cake after baking, you should take care in advance and follow simple rules.
It’s better to use silicone molds, even inexpensive ones like Polish ones. Baked goods come out well in them and come off easily, freeing the molds.
But with other molds, whether they have grooved edges or regular ones, the dough may stick to metal or ceramics.
Therefore, for easier removal, you should coat the inside with oil before adding the dough. Only butter is suitable, as well as margarine, internal fat, and not vegetable fat.
When the cupcakes are ready, they are not kept in the mold for long. They are not shaken out when they have already cooled down, but not hot, but slightly cooled. Let stand for no more than 10 minutes and cool. To easily remove the baked goods, place them bottom up and place a cool towel soaked in water on top. Next, turn it over and let it come out: the baked goods come off easily. You can place the bottom on top of a towel soaked in water.
You can do this in advance: cover it with baking paper and grease it. Or coat with oil and sprinkle the bottom with breading or semolina, crushed nuts.
And the easiest way is to bake in disposable paper molds: you don’t have to take them out at all.
How to remove a cake from a silicone mold?
Silicone molds are quite convenient because they do not need to be greased with oil first. It is important to simply sprinkle them with water. You need to remove the cake from the mold, after letting it stand for 5-7 minutes.
Then you just need to tilt the pan a little to the side and the baked goods will fall out on their own, without even having to put in any effort. If the cake still sticks to the silicone mold, you need to bend it outward a little, as the material bends easily.
How to choose a silicone baking dish
https://youtube.com/watch?v=aXGCvQ-skrk
The first thing you should pay attention to when buying utensils is what material it is made of. It is worth examining the product, it should not emit an unpleasant odor
It is better if the manufacturer is the USA or Belarus. You can do a simple test by slightly bending the dishes. If no white spot appears at the bend, this indicates good quality of the material. It’s worth looking at its color; the more neutral it is, the less dyes were used in its production. You should also choose a mold depending on what will be cooked in it - muffins, cakes, cookies, larks or bread.
For cupcakes
Molds designed for cupcakes or muffins have a perfectly flat bottom, with a diameter of 5 to 8 centimeters. The walls can be either perfectly smooth or corrugated. Total height up to 9 centimeters. This type of cookware is available in two types:
- a flat single shape on which 6, 8, 10 or 12 cells are formed;
- separate small molds for each culinary delight.
The flat shape is easy to use, since all the elements are in one bundle. The housewife does not have to worry about them turning over during cooking. In addition, there are also large molds designed for large muffins or Easter cakes. In appearance, they are shaped like a small bucket. The diameter of the bottom is from 10 to 17 centimeters, the height can be different.
For cakes
Silicone dishes for cakes can be either a standard round or rectangular shape, or in the shape of a heart, star, fish, diamond, both with a flat bottom and with recesses to create a pattern that will be formed on the top of the finished cake. It is recommended that the cookware be protected with an additional non-stick layer, which will make it easier to remove the finished product; you just need to turn the mold over and carefully remove it from the sponge cake.
For cookies
There are silicone molds for creating cookies, but only those that do not require rolling out. Accordingly, you can only make fluffy flour products, including cookies, muffins, baskets or gingerbreads. They can be produced in any shape and different sizes, individually or on one sheet with several cells.
For early risers
It is important for mothers to prepare a dessert that will not only be tasty and healthy, but also beautiful. Silicone dishes in the form of larks or other interesting birds are often found on sale.
Simply pour the batter into them and bake for 30 minutes at 180 degrees. There is no need to additionally lubricate the mold; the finished cookies will lag behind its walls perfectly without it.
For baking bread
Utensils for making bread look standard - they have a rectangular or oval shape with a strictly flat bottom and walls. In rare cases, you can find grooved dishes. Its length can be different, the largest reaches 50 centimeters, which is intended for preparing baguettes.
Instructions
Leave the cake in the pan until completely cooled. Firstly, do not rush to remove the pan from the oven immediately after turning it off. Always leave it in for fifteen to twenty minutes. This way you will save the cake from settling. Secondly, put the pie on the table and forget about it for at least half an hour. A cooled, or better yet completely cooled, cake comes out of shape
, without leaving pieces in it from its sides.
Cover the cake with a dry towel, placing it on a wet one. When removing the cake from the oven, place it not on the table or cutting board, but on a towel pre-moistened with cold water. It is advisable not to wring it out at all. Wrap a wet towel around the bottom or sides of the pan.
, cover with dry on top.
After fifteen minutes you can easily remove the cake from the pan
.
Run a wooden spatula around the edge, leaving a gap between the pan and the cake. This method is good when the sides of the pie are stuck. Do not use a knife as this will damage the mold.
Turn the cake pan over and tap it. Place upside down on a plate and beat the top with a wooden spatula. The pie will be on the plate in just three minutes.
Place the mold in cold water. Fill a basin with water and lower the mold into it after cooling slightly. Be careful - moisture should not get on the baked goods, otherwise it will spoil.
Use silicone or springform molds
, they allow you to reduce cake sticking to a minimum. The first ones do not need to be greased with oil or sprinkled with flour.
note
Sticky dough may indicate incorrect cooking temperatures. Check the recipe carefully before placing the cake in the oven.
What to do if the cake sticks to the pan?
Cold water helps a lot. You can take any vessel larger than the baking pan or a wet towel and wrap the cake pan in it. If this is a dish, then pour water so that it does not overflow the edges of the pan and wet your cake. 10 minutes and everything will come unstuck!
In the future, to prevent the cake from sticking, firstly, you can grease the mold with butter and sprinkle with grated crackers or semolina, and secondly, just buy a silicone mold - it definitely won’t stick!
What to do if the cake sticks to the pan? It can be very disappointing when a beautiful and fluffy cake, which you spent a lot of time preparing, sticks (burns) to the pan.
In this situation, the simplest and most correct solution would be the following option: let the cake cool and then carefully and without loss, separate the cake from the mold using a wooden spatula. This way you will not damage the surface of the mold and will be able to save most of the cake, plus the separation process will be much easier than if you do it right away.
I found two more useful tips on the Internet for removing burnt cake from the pan. Hold the sheet of cake over steam or let it cool slightly and then put it in the refrigerator. These replaceable steps will help you quickly separate the cake from the pan.
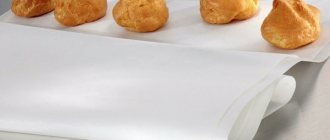
To prevent baked goods from sticking to the pan, cooks recommend using parchment paper or a silicone mat; no vegetable oil is needed for lubrication.
★★★★★★
To ensure that the cake comes out of the mold easily when baking, before placing/pouring the dough into the mold, you need to take the necessary measures to prevent sticking. Moreover, the technology for processing a baking sheet or any other shape will be different in each individual case. It all depends not only on the material and quality of the baking dish, but also on the thickness and composition of the baked dough.
Of course, you can also lay cooking paper in the pan, grease it with oil, and dust the surface of the pan with flour. However, a situation may still arise when large-sized baked goods, especially those made from batter, do not want to separate. This sometimes happens with souffles and various casseroles.
I cannot agree with some of the advice from previous answers. Because from my own experience I know that plunging a large baking sheet with a ready-made hot cake into cold water is difficult and useless. And waiting for the stuck cake to cool completely and then trying to pick it out of the mold with a wooden spatula is even more inconvenient and wrong - during cooling it will stick to the mold even more strongly.
So, the question is: what to do if the cake has already stuck to the pan?
In such cases, I proceed as follows. Having removed the hot baking sheet from the oven, using a spatula, I slightly separate the cake from the mold along the perimeter - and immediately cover it with two or three dry towels. And then I cover it with a multi-layer newspaper blanket, for example the popular “From Hand to Hand” thick blanket.
Then I wait for the cake to cool completely and remove it from the pan with ease. Be healthy.
I was baking a biscuit and looked online for some questions. I found a list with very useful and necessary information about baking. I am sharing with you!
The sponge cake is ready when it becomes soft and easily pulls away from a wooden skewer.
The sponge cake will not fall off if, after baking, you turn it over onto a wire rack and let it cool without removing it from the pan.
The sponge cake must be removed from the mold when it has cooled, and pies made from yeast dough after baking are immediately laid out and cooled without a mold.
The sponge cake will not dry out if you put a cut apple in a cardboard box with it.
Baking paper will not warp if you grease the baking tray with oil, and then place the paper on it and press it.
In a single-crust pie, fold the edges of the dough to prevent the filling from leaking out. In a two-layer pie, the raised edges are sealed together. To achieve a simple edge, lift the edges of the dough evenly around the perimeter of the pan, flush with it. Dip the tines of a fork into the flour and gently press in a circle around the inside of the dough. (This can also be done with the rounded part of a spoon). To make a simple scallop, lift the edge of the dough 1 to 1.5 cm around the side of the pan. Grasp the outer rim of the pie with your right hand. Pull the dough toward the center of the pie with your index finger, pressing away from the center of the pan with your left thumb to create a V shape. Repeat this step along the entire edge of the pie.
Berry pies should not have too much filling - the pie will turn out wet and the juice will flow. Five large apples or a glass of berries are quite enough for one pie. It is recommended to sprinkle the finished cake with powdered sugar.
When baking pies in the oven, the tops sometimes bake faster than the bottoms and may burn. To prevent this from happening, the top of the pie must be covered with paper soaked in water.
Products should be baked on evenly greased baking sheets, sheets, or molds, otherwise the products will stick to them.
The baked product should be kept on a baking sheet or in a mold until it cools, only then taken out and decorated.
The baked goods will turn golden brown if you brush them with a small amount of warm milk 10 minutes before they are ready.
A tall sponge cake is usually cut into 2-3 layers lengthwise. The baked biscuit needs to cool completely. Make cuts on the sides of the biscuit with a knife. Take a thick thread, fold it in half, insert it into the notches, cross the ends of the thread in front of you and pull them in different directions. Then the cake will be cut evenly.
A hot dough product should be filled with cold syrup, and a cooled dough product should be filled with hot syrup.
It is better not to cut a hot pie. But if you still need to do this, it is recommended to hold the knife in hot water, and then quickly wipe and cut.
Ready-made flour products made from yeast dough should not be left on baking sheets for a long time, as this will cause the bottom crust of the products to become wet and acquire the smell of the metal sheet.
The finished cake cannot be immediately taken out into the cold, as it may settle due to a sharp temperature change.
To bake a frozen pie, preheat the oven. Unwrap the pie, place the pan or pan with the pie on a baking sheet and cut holes in the top crust (if the pie has two layers). Bake the pie undefrosted, adding 15-20 minutes to the baking time indicated in the recipe.
To freeze a baked cake, cool it completely after baking and wrap it tightly in cellophane. If frozen, it can be stored for up to three months. Thaw at room temperature for 30 minutes. Unwrap the cake and bake it for 30 minutes in an oven preheated to 180°C.
To prepare a variety of puddings, casseroles and dough products, either special molds or pots and deep frying pans are used. In order for the finished product to have a beautiful, evenly fried surface, not stick to the mold and not deform when removed from it, the mold must be lubricated with an even layer of fat. The most suitable fat for lubricating molds is odorless fat - lard, refined vegetable oil or ghee.
In order for the cakes to come out of the mold well and easily, it must be greased with cold butter and sprinkled with flour.
The oven must be preheated for 10-15 minutes before placing dough products in it.
If the oven is set to the desired temperature, do not open the cabinet door frequently until the baked product is completely ready.
If the finished cake sticks to the baking sheet, you need to hold the baking sheet over steam or wrap it in a damp towel for a few minutes.
If the cookies burn during baking, you need to cool them, then run a fine grater over them several times and sprinkle powdered sugar on top.
If the cake in the oven begins to burn on one side, you need to place a bowl of water under the baking sheet.
If the cake does not come out of the mold, place it in cold water for a few seconds or hold it over steam.
If the cake is stuck to the pan, take a string and run it under the cake.
If the soufflé is in the oven, do not open the door. Otherwise, the soufflé will fall under the influence of the air flow.
If the dough burns in the oven, place a fireproof bowl with water in it.
If the dough has risen but the oven has not yet warmed up, you can stop the dough from rising by covering it with well-moistened paper.
Freezing unbaked fruit pies preserves their fresh flavor. Prepare the fruit filling as usual, adding an extra spoonful of “thickener” for each pie. Cover the pie with the second layer, but do not cut any holes in it. Wrap the pie in cellophane and freeze. In this form, the pie can be stored for up to three months.
Dried cookies will become soft again if you put them in an airtight jar and add a piece of apple.
Dough products must first be greased with butter and then sprinkled with sugar, and not vice versa, otherwise the sugar will dissolve and be absorbed into the butter.
The baked pie should not be immediately removed from the mold; you need to let it cool slightly. But you can’t leave it on the baking sheet for a long time - this makes the cake moist and smells like iron.
The baked dough is easier to remove from the mold if it is cooled slightly.
The quality of a baked product can be determined by its weight: the lighter, the better baked.
The cake crust should not be baked at high temperatures, as it will burn on top and the middle will remain raw; Bake at a moderate temperature, preheating the oven.
The crackers will stay crisp if you put them in an airtight container and put them in the refrigerator.
You can only fill cakes with thick, cooled cream. Cocoa powder is added to the chocolate buttercream along with vanilla powder at the end of whipping.
Don’t be afraid to deviate from the strict recipe, experiment; If some components are missing, try replacing them with others.
There is no need to grease the sheet on which the pastry is baked - it is better to moisten the sheet with water. In order for the dough to bake better, there is no need to roll it out over the entire area of the sheet.
Do not put the crust in a hot oven, otherwise it will be hard on the outside and soggy on the inside. Preheat the oven, but do not heat it, bake the cake over low heat. Place the finished cake on a wet, cold towel without removing it from the mold, and it will easily come out of the mold. Do not take the cake out into the cold - it may settle.
Do not put the pie in the oven immediately - let it rise for 15-20 minutes. It will rise and become more magnificent. After that, brush it with a raw egg and bake.
Do not slam the oven door - the cake may settle.
Do not brush the edges of puff pastry products with egg - they will harden during baking and the dough will not rise.
Never try a new recipe on the eve of a holiday, because it may not work out, and then you will be disappointed. It’s better to try the recipe you like in advance, and if everything works out, you can safely bake for guests.
Egg yolks add a special shine to baked goods. You need to grease the dough evenly with a soft brush so as not to wrinkle the product and so that the grease does not drip onto the sheets.
The dough must be completely proofed before baking; if the proofing is not complete, it does not rise well, and products made from it do not bake for a long time.
Allow the cake to cool before cutting. If this is not possible, then you need to warm the knife in hot water, wipe it and quickly cut the pie.
The cake can be easily removed from the mold if it is immediately placed on a wet cloth from the oven.
The pie can be decorated in an original way with scraps of dough. Shape the scraps, roll out the dough again and cut it using decorative grooves of various shapes. Brush the rim of the pie plate, or the top crust if the pie has two layers, with beaten egg or water and arrange the dough shapes nicely, pressing them lightly.
The pie will not burn if you place a sheet of coarse salt sprinkled on it under the baking sheet with the dough.
Pies will not dry out for a long time if you keep them in a clay dish covered with a napkin.
A potato cut in half and placed on a fork can be used as a brush for greasing the pan when baking pancakes.
Donuts and pies are best fried in the following mixture: 30% lard, the same amount of beef and 40% vegetable oil.
Before putting the pie in the oven, you need to let it rise for 15-20 minutes, then brush with egg white.
When baking fluffy cookies (meringue), be sure to place a sheet of clean paper on a baking sheet.
When baking flour products with fillings containing a lot of moisture, in the initial period the oven door needs to be opened slightly to allow the steam accumulated in the cabinet to escape.
When baking pies, grease the pan and sprinkle with semolina. This way the dough will not stick to the walls, and when it is baked, it will easily move away from the mold.
When preparing a soufflé, grease only the bottom of the mold. The walls of the mold can only be greased up to the middle of the height, otherwise the soufflé will fall off.
Cut pie will stay fresh longer if you store it in a container with a slice of apple.
The crumbly cake is easy to cut by dipping a knife into boiling water for a minute.
Sweet dishes always complement lunch or dinner; they should not cause feelings of oversaturation.
The soufflé is best cooked in a water bath. It turns out especially tender.
The soufflé increases greatly in volume. Therefore, the form must be filled to 3/4 of the height.
The soufflé increases in volume well if you put a small pan of water in the oven along with the soufflé.
Cut the warm fluffy cake with a hot knife - then it won’t wrinkle. You can use a thick thread or fishing line: taking it with both hands, carefully separate the desired piece.
The dough will bake better if you leave voids around the pie on the baking sheet.
Flour products will have a beautiful golden brown crust if you brush them with beaten egg or yolks 5-10 minutes before baking. This should be done with a soft brush and very carefully so as not to wrinkle the products.
Confectionery products packed in packs and boxes remain fresh for a long time.
Bread will stay fresh longer if you put a slice of apple in the bread bin. Bread and rolls can also be kept fresh longer by keeping them in the freezer.
Stale pies and bread can be refreshed by moistening them with water and warming them in the oven.
To ensure that the biscuit is easily removed from the mold, it is recommended to line the bottom and sides with parchment.
To ensure that the top and bottom crusts of the baked pie are soft, you need to place it on a soft napkin and cover it tightly on top. If the crust of the pie is very dry, you need to put it on a damp napkin and cover it with a dry one on top.
In order not to grease the pan when baking pancakes, you need to pour a little vegetable oil into the prepared dough and mix (one tablespoon of oil per 2 kg of dough).
To determine the readiness of the dough without removing the product from the oven, just stick a thin wooden match into the dough and immediately remove it; If there is dough on the match, it means the product is not baked yet.
To refresh dried buns or cookies, you need to put them on a baking sheet and sprinkle them with water, or dip them in milk for a second, then place the baking sheet on a large vessel with water and put them in the oven for a few minutes. Under the influence of steam, the products will become as fresh. You can dip the buns in milk and place them in a slightly heated oven.
To keep the cake soft and fluffy, while it is still hot, cover it with a thick cloth.
To make the pie delicious, do not open the oven for the first 15 minutes.
To prevent the pie with cottage cheese from settling after baking, you need to carefully remove it from the oven and cut it 2 cm deep around the perimeter of the mold.
To prevent pies from drying out, it is better to store them in a clay dish, covered with a napkin, or in a plastic bag.
In order to avoid swelling and tearing when baking kulebyak and rolls, the product must be pierced in 2-3 places.
So that when preparing kulebyaki with two or three types of fillings, the bottom layer on the inside does not turn out wet, you must first put a less wet filling on the dough, and on it a juicier one - meat, fish or mushroom - seasoned with a thick sauce. For this purpose, very thin pancakes baked from unleavened dough are sometimes placed on the dough under the minced meat and on it.
To cut a hot pie, you need to first hold the knife in hot water and quickly wipe it off.
In order for a layer cake with fruit filling to bake better, you need to pierce the bottom layer of dough in several places.
To prevent the dough from burning when baking in the oven, you need to pour a little salt under the pan.
To find out if the cake is ready, you need to stick a wooden stick into it. If the stick is dry, the pie is ready.
The cake will definitely stick to the pan unless you use a high-fat recipe or line the pan with paper in advance. A little patience and intelligence will help you solve this problem, but you can also resort to other methods of removing the cake.
cooking method
Corn flour cake is prepared very quickly and from a minimal set of ingredients. That is why he is the first contender to be included in the family’s permanent menu. In addition, this cake can become a lifesaver, for example, when guests suddenly arrive. We take the butter out of the refrigerator in advance - it should melt until soft and easily beat with a mixer, without forming lumps. Break the egg into a mixer bowl and beat until white and thickened mass in volume. Then add granulated sugar to the egg and continue beating. All sugar crystals should completely dissolve. Pour kefir into the resulting mass and add softened butter. If the butter has not yet melted on its own, then melt it and cool. You can melt the butter on the stove or in the microwave using the “Defrost” setting. Beat again. Mix corn flour in a separate bowl with the specified amount of baking powder. To obtain the perfect texture for the finished cake, the cornmeal must be finely ground. If you couldn’t get one, you can grind coarse flour or even regular corn grits using an electric coffee grinder. Gradually add a mixture of corn flour and baking powder into the future dough, stirring each time. Combine into a single mass using a mixer. Grease the mold with butter, you can lightly sprinkle it with corn flour. Place the dough in the mold and smooth the surface with a spoon or silicone spatula. Bake in an oven preheated to 180 degrees for 30-40 minutes. We control readiness using a wooden skewer; the time may vary depending on the thickness of the cake and the volume of the baking dish. As soon as the cake is ready, take it out of the oven and cool it in the pan to maintain its integrity. After cooling, turn it over onto a plate and serve. Enjoy your tea!
How to wash and store silicone molds
Silicone molds are very easy to clean with warm water, a sponge and mild dishwashing detergent. Do not use any harsh chemicals to avoid causing unexpected chemical reactions. Do not scrub silicone molds with metal brushes or brushes. If a piece of dough sticks somewhere, just soak the mold for a while in plain water and detergent; all dirt will come off easily.
You can store the molds in any kitchen cabinet or pantry; they tolerate temperature changes well and do not deform. In addition, the forms can be bent and rolled to save space, and they will immediately return to their original form as soon as you unfold them again.
How to work with silicone molds
Silicone molds are recognized as the most convenient for baking. The elastic walls can be easily stretched by prying the edges of the cake with a wooden spatula. Also, the material does not require constant lubrication with oil.
Turning the cake over and hitting the bottom with a spatula is not the best solution. The upper part will most likely come off, but the lower part will remain. If you want to shake out a hot cake, lower the bottom of the pan into a bowl of cold water for a few seconds - the temperature difference will help the dessert “bounce”.
However, the best option is to wait 15-20 minutes for the cake to cool slightly. This way the dough won't settle, and you won't risk getting too burned. First, make sure that the bottom comes off well, then turn the cake over onto a plate and lightly tap the sides, moving from the bottom.
To ensure that the cupcakes are quickly removed from the molds, use paper blanks. They also make it convenient to enjoy baked goods outside the home.
If the edges of the cake are very burnt, carefully cut them off with a sharp knife. Do the same with the bottom part. If it is impossible to maintain the integrity of the cake, cut it directly in the mold into squares and take them out one by one.
How to properly remove baked goods from the pan
When I go to confectionery forums, the general trend is touching. The man asks: “How to remove the cake from the mold?” I immediately imagine how on his kitchen table there is a cake in an old Soviet baking sheet, and behind him his family with hungry eyes are waiting for dessert. But the dough stuck and doesn’t want to come out.
In response to a request, they most often write something like advice to lubricate the mold with oil. Probably right on top of the pie.
So let's first discuss what to do here and now to save the finished baked goods. And first of all, I advise you to just wait a little. If you have the choice of removing the cake from the pan hot or cold, always follow the second option:
- When the dough cools, it will settle a little and become denser. Perhaps it will come unstuck from the mold itself. And if not, then there will be much less chance of damaging the cake with your manipulations.
- When the temperature changes, the dimensions of the mold, especially metal ones, also change. This can also help remove baked goods painlessly.
- A cold dessert will definitely not settle while you work on it.
So don’t even think about whether you should take out the dessert right away or not. Even in the case of a delicate, airy sponge cake, it is better to wait until it cools down and then remove it from the mold. In the worst case scenario, you can even freeze it. Even if the cake becomes a little sticky or dry around the edges, these parts are easy to cut off. But if the hot cake falls into pieces, it can no longer be saved.
But cooling is not the only way. Depending on the type of form, there are several other methods that can be used.
Made from silicone mold
To be honest, I have never encountered a situation where baked goods stuck to a silicone mold or Teflon mat so much that it could not be removed without damaging it. Of course, grains of dough may remain on the walls, but this is not fatal and only happens with delicate baked goods. A dense yeast cake will never stick like that.
If the dessert still gets stuck, all I can advise is to let it cool and then carefully tear off the silicone. Just please do not use sharp objects for this. The shape will cut through easily. Instead, it is better to press a little on the bottom with your hands or carefully peel off the edge a little at a time. In a pinch, you can use a rounded spatula or butter knife to loosen the sides and bottom of the baked goods.
The silicone mold is lubricated only once - before the first use. In the future, fats are not used, precisely because nothing sticks to the silicone.
From a metal mold
Let's talk about the worst possible option: an old Soviet sooty baking sheet. Naturally, one-piece. You won't be able to take it apart or turn it inside out, like silicone. But you can still get the pie out if it still sticks. There are several ways to do this:
- Soak the pie. More precisely the form. To do this, the bottom of the cooled baking sheet is lowered into a bowl of hot water. The metal will expand slightly due to the temperature change, and the dough will come unstuck.
- Steam. Place the baking sheet and mug of boiling water in the oven, cupboard, or other closed space. The steam will lift the edges of the dough slightly, making it easier to remove.
- Knock out. Turn the baking sheet over and tilt it at an angle of 45° over a wire rack or tray. Gently knock on the form, bend it a little if you have the strength.
- Cut off. Using a sharp knife, run along the edges, pressing tightly against the walls of the mold. Carefully separate the bottom with a silicone spatula, moving in a circle and gradually pushing the tool closer to the middle.
You can try the methods individually or combine them. It is quite difficult to damage a metal baking sheet, so you can safely use force.
Made from glass or ceramic mold
According to the advice of some comedians, the easiest way to remove a cake from a glass mold is to use a hammer. Then all you have to do is pick out the shards from the dough and remember to order a new one.
But seriously, glass and ceramics are quite fragile. Therefore, it is not recommended to hit them on the table or try to knock on the bottom. Pieces of the mold can easily break off from the edges, or a crack will appear.
Temperature differences are also ineffective. Glass and ceramics do not expand from heat. Therefore, the best solution would be to carefully use a knife and a silicone spatula. For better preservation, it is better to remove the pie from the glass form after cooling, or better yet, freezing. Leave it in the freezer for 4-6 hours, and then carefully separate it from the ceramic baking tray.
From a springform
The general separation technique resembles working with a regular metal baking sheet. Therefore, it is better to let the baked goods cool, and then heat the walls of the mold, and then carefully separate the dough from the ring. But there are also nuances:
- Do not soak the mold in water. The liquid will leak into the joints and ruin the dessert. Instead, it is better to wrap the mold in a hot towel, soaking it in boiling water.
- You can't knock on the bottom. If the cake is tender, you can press the circle inside by pressing the dough in the middle and tearing out any stuck bits from the edges.
- Metal knives and spatula are prohibited. Especially if the form is cheap. You will easily scratch the non-stick coating. Therefore, we only use a silicone spatula or a wooden skewer.
It is easier to remove a sponge cake from a springform pan than from a regular baking sheet. All you have to do is separate the walls of the ring without trying to crawl under the bottom and injuring the delicate cake.
I recommend using a baking ring instead of a springform pan and lining the bottom with several layers of foil. In this case, it is enough to move the knife around, pressing it to the edges and that’s it.
How to bake in a silicone mold in the oven
To bake a delicious, aromatic and beautiful dessert for the whole family and guests, you need to know how to handle silicone baking dishes correctly. This process consists of several steps, you need:
- Set the temperature range from 170 to 220 degrees, depending on the culinary recipe. At temperatures above 220 degrees, the oven is not recommended; the mold can quickly become deformed. Before you put the baked goods on to cook, the oven must warm up thoroughly.
- Before use, rinse the dishes with warm water and wipe dry. Place on the base and only then fill with dough.
- Place the tray with silicone molds in the oven for the required time and close the oven door. It is not recommended to open it during cooking; if cold air penetrates inside the equipment, the dough will rise worse.
- After finishing cooking, take out the base and place it on the table to cool. Only after the silicone has cooled completely can you remove the baked goods from it.
After cooking, you need to rinse the dishes with warm water and dry thoroughly with a kitchen towel. During the cooking process, it is worth considering that silicone material has good thermal conductivity, so cooking will be completed 18-20% faster than when cooking in a metal baking dish. It is also worth considering what kind of equipment you use for cooking – gas or electric.
Gas oven
The peculiarity of a gas oven is the uneven distribution of heat. The heat is supplied from below, so the lower part of the dish is cooked faster than the upper part. It is recommended to place the dishes in the upper position. The silicone must be on a base or baking sheet, since the material may begin to melt from direct exposure to fire; it must be placed away from the walls, top and any heating elements.
Electric oven
In an electric oven, cooking in silicone dishes is easier, since the heating process occurs evenly in it. Therefore, it is recommended to place the base or tray in the middle position. Many modern stoves have a “grill” cooking mode with maximum heating. You cannot cook with it in such a container.
When preparing dessert, it is important to observe the temperature regime. If it is higher than normal, then the baked goods will quickly begin to burn and turn black, and the dishes themselves will begin to melt and deform.
Steps
Lift up the pie
- Using a rounded knife, loosen the cake from the pan around the edges.
Use a palette knife if you have one, or substitute a thin butter knife. Place a knife vertically between the edge of the pie and the baking sheet, then press down firmly. Gradually slide a knife around the circumference of the cake to loosen the edges from the pan. Do this as close to the edge as possible so that as little of the cake as possible remains on the baking sheet.
- You may want to try other methods first if the cake is for a special occasion, as this will result in minor damage to the cake.
- If the cake is burnt around the edges, separate it with a sawing motion so that you can easily remove it later. You may have to go around the edges four or five times.
- Separate the bottom of the cake using a flexible silicone spatula.
Press the spatula against the edge of the pan just as you did with the knife. But this time, push the spatula deeper as you move around. This should be enough to separate the base of the cake from the pan.
- Do not try to force the cake out if it is firmly stuck. Use one of the following methods.
You can use a pizza peel instead of a silicone one. Rinse it with hot water first, as the heat and moisture will help the cake release better.
Place a large plate on top of the pie. Hold them tightly together and carefully turn them upside down. Shake lightly to release cake.
- You can also invert it onto a wire rack. Place something to catch the crumbs.
If you damage your pie, skip to the section of the article that describes the process for repairing it.
Tap the base to loosen the cake. Hold the cake directly above the plate and at a 45% angle. If this doesn't work, turn the pan over and hit it on the countertop.
Leave the cake upside down for a while.
If the cake doesn't budge, you may be able to do just fine once the pan has cooled. Invert the pan onto a plate and cross your fingers.
Roll the cake or use a spatula as a lever (not recommended).
In most cases, you should try one of the methods listed below. If you don't have time or opportunity, you can remove the pie by using force. Please note that this will usually result in damage to the product.
- Hold the cake with your hands or a spatula while you shape the pan.
and/or
Pry the cake with a rounded knife. This time you need to hold the knife at an angle, towards the center of the cake, to separate the base.
Apply heat, steam or cold
- Pour hot water into a deep tray.
The tray should be wide enough to accommodate your pie pan. Cover its bottom with a layer of 6 mm of hot tap water.
- If you don't have a container that size, soak a kitchen towel in hot water and wrap it around the base of the pan.
- Place the cake pan in a container of water.
The heat will expand the metal pan slightly, allowing it to move away from the edges of the cake. To do this, leave the pan in the water for a few minutes. Try to remove the pie using the above methods.
Try steaming the cake.
The steam humidifies the air and “lifts” your cake, which helps you get it out. Boil water in a small saucepan or kettle and then pour into a mug. Place the mug and pie pan in the microwave, cupboard, or other enclosed space. Leave it there for a few minutes and then try to remove the pie again.
- The microwave oven has the right volume to hold the steam. Don't turn it on.
- Place ice on the pie pan.
Turn the baking sheet upside down and cover the pie. Place a bowl of ice on the base of the pan and leave it there for a few minutes. Then try to remove the pie using the methods described earlier.
Freeze the pie.
Allow the cake to cool completely at room temperature for an hour. Freeze it for six hours. This will reduce the chance of the cake breaking and also make it easier to remove from the pan. Run a butter knife around the circumference of the pie to release the edges from the pan, even if you have already done this before freezing. Turn the mold upside down and tap the base to achieve the desired result.
How to fix a broken pie
Cut off the burnt layer.
If the pie is burnt, carefully cut off that portion with a pie knife or large bread knife. Don't try to correct a crooked pie line by cutting off part of it again. This action will most likely crumble your cake. Fill the damaged area with glaze as described below.
Add small pieces to the base of the pie.
If a few pieces break off, stick them to the bottom of the pie. If your cake is moist enough, they will hold up fairly well, especially if it's still hot.
- Cover small damaged areas with icing.
Take the frosting and spread it over the surface of the cake. The mixture will fill all the holes and smooth out any jagged edges.
- Liquid sugar icing is very fluid, so the layer will be too thin and will not cover all the imperfections.
- Glue all the cake pieces together using frosting.
To recreate a completely destroyed cake, you will need a very sticky frosting that can stick all the pieces together. You can use caramel frosting, dulce de leche, or try this recipe:
- Mix 1 cup condensed milk, 3 teaspoons (15 ml) cocoa powder and 2 teaspoons (10 ml) butter.
Cook the ingredients over medium heat, stirring constantly. Stop the process when the consistency becomes thick and sticky.
- Palette knife or butter knife
- Flexible silicone spatula or pizza paddle.
- Tray
- Warm water
- Washcloth
- Make sure the cake doesn't stick next time. The easiest way is to grease the pan with a little butter or baking spray. Coat the pan with a thin layer of flour, shaking the pan until completely coated, then discard any excess. Grease the remaining unfilled areas with oil and sprinkle with a pinch of flour.
- Run a palette knife under any cookies or biscuits that are stuck to the baking sheet. If this does not help, put the pan back in the oven for 30-120 seconds and try again after a while.