Installation Tips
It is not enough to simply hang the product. It is important to make it look good.
Orientation
Vertical canvases visually raise the ceilings, so the best place for placement is narrow walls. Horizontally placed products visually lengthen the surface. Such canvases will look organically above pieces of furniture.
Vertical picture
Horizontal painting
Tilt angle
To hang a picture at an angle, attach a strong thread or twine to the back of the piece. Install a hook into the wall and hang the canvas on it. The looser the string is, the greater the angle of inclination.
How to hang a picture at an angle
Grouping rules
If the canvases are the same size, you can hang them in a row at an equal distance from each other. It is acceptable to place elements at different levels.
Create a unique composition from different sized canvases. There are no strict rules - the main thing is that there is no dissonance. Arrange the canvases on the floor, evaluate the result, then move the group to the wall.
Group products by color scheme, execution technique and theme. A mismatched ensemble will look ridiculous.
Advice! If you are placing a group of three paintings, remember that the central painting should be the main one.
How to place several paintings side by side. Photo examples
Backlight
Lighting will help focus attention on the decor. Options:
- LED strips. Place them around the perimeter of the frame on the back side of the product.
- Incandescent lamps and fluorescent light sources. Place them above the canvases.
Lighting for paintings
Important! The maximum lighting setting for painting is 150 lux.
Fastening in “serious” ways
In this paragraph we will look at ways to fasten objects or a series of objects that have significant weight, without using nails. It is worth noting that dismantling some elements will be difficult and will leave behind characteristic marks . In this regard, it will be necessary to update the wall covering.
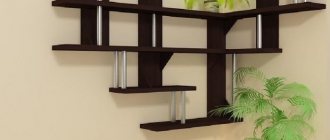
No. 11. Picture board
This method is used when you don’t mind the floor and ceiling , but you do mind the walls. Please note right away that if you have a suspended or suspended ceiling, then this method is not for you . Unless, of course, this was foreseen in advance. It is worth noting that using an entire separate wall to place objects will help achieve unique interior solutions.
Such a board can become the center of the room and set the rest of its furnishings. Compositions that are designed to tell about something look more harmonious and thoughtful. For example, a series of landscape photographs taken at different times of the year, which convey the brightest moments of each month and tell the story of the decline and rebirth of nature. Or a series of black and white portrait photos of a married couple, which depict the story of their acquaintance and the most significant moments. Or the story of a person dear to you growing up. to highlight such an element using spot lighting . And it’s even easier to build such a structure. You can use real wooden boards, knocked together into a single sheet of the required size. More affordable options involve the use of laminated or sanded chipboard or MDF.
You can paint the surface yourself in a suitable color. For fastening, you need special brackets , which are sold at any hardware store.
- You immediately need to mark the floor , and then transfer it using a plumb line or laser level to the ceiling . This way you will avoid distortion.
- Now you need to make holes in the floor and ceiling . They do not have to be located opposite each other.
- Dowels are inserted into the holes and a pin is screwed in . You need to screw the bracket onto it. The brackets must be able to be adjusted in thickness using a clamp.
- Now insert the sheet into all the brackets on the floor and ceiling at the same time. At this stage you will need an assistant. While one person holds the sheet, the second should clamp it in the brackets.
- Then you need to check the deviation of the plane from the vertical position using a level.
It is best to place 5-10 cm from the wall in order to emphasize the individuality of this object and direct maximum attention to it. If you have already decided on the order in which objects will be placed on the board, then it is better and more convenient to make fastenings for them before installation. If not, you will have to use the stairs.
What to hang a picture on: options for different types of walls
Traditional fastening methods involve drilling into the walls or hammering nails. Let's consider the options.
Mounting on a plasterboard wall
Drywall is a rather fragile material. It is easy to insert a nail or self-tapping screw into it, but there is no guarantee that the coating will withstand massive sheets. Before placing heavy elements, strengthen the structure with a frame. If possible, secure the canvas mount to a load-bearing wall. Optimal fastening options: dowel-nails, expansion anchors.
Wooden wall
The simplest method of fastening is a regular nail. Hammer it into the wall. If you want to be careful, pre-drill a small hole along the diameter of the fastener.
Concrete wall
To insert the mount into the wall, you must first make a hole using a drill. Fix the dowel into the recess and screw in the bolt hook.
Another option is an expansion anchor. Its protruding part may be a nut or a hook.
How to hang a picture on a brick wall
To make a hole in the brick, use a tool with a diamond drill bit. Install an expansion bolt or dowel with an anchor into the wall. This system is convenient for attaching canvases to a stretcher.
Advice! Bolts and anchors can be replaced with hardened nails. Hammer them into the wall using a regular hammer.
Methods for fastening light objects without nails
Weightless items such as banners or posters, calendars or daily schedules, photographs without frames and other thin elements can be mounted on the wall most quickly and reliably using the following methods.
No. 1. Double sided tape
Double-sided tape will be optimal solution for placing objects on plasterboard walls . This can be explained very simply - such fasteners do not violate the integrity of the gypsum board, which has a positive effect on its strength indicators. By the way, this figure decreases with each new hole that you make in such a surface.
The most aesthetically pleasing item will look if it is glued along all four edges , which will prevent them from bending. To fix a small strips no more than 1 cm wide along the edges . The larger the format, the longer the pieces of tape should be. Mark the location of the poster on the wall in advance and check its evenness. Neglecting this point and relying “by eye”, you may need to tear off the glued element in order to correct its position. In this case, you can tear both the object itself and tear off a piece of wallpaper or paintwork from the wall.
The protective layer on the second sticky side must be removed immediately before gluing . This way you won’t leave fingerprints on the sticky layer and dust won’t have time to settle on it while you “try on” the photo on the wall. The wall surface must be dry, smooth, clean, free of dust and other particles. If after some time you need to remove a strip of tape from a decent-sized wall without damaging its cladding, you need to carefully peel off a small section , starting from the corner, and slowly pull the rest of the strip down at a 90-degree angle to its orientation.
You can immediately use fabric-based double-sided tape, which can be removed without leaving a trace at any angle and from any surface. There is such a variety as foam tape, which can withstand much greater loads. It can be used to mount small paintings or photographs in plastic frames.
No. 2. Push pins
Push pins are also great for securely attaching lightweight items. There are many types of buttons, the heads of which are decorated. Thus, this visible fastener will not only not spoil the appearance of the poster or photo, but will also help decorate and even complement it. Push pins will adhere well to plastered walls, as well as walls covered with wallpaper, paint or decorative plaster. They are easy to stick into such a surface.
But in the case of concrete walls, difficulties may arise . If the layer of plaster under the wallpaper is already old and begins to crumble, the puncture sites may become too loose, and the buttons will periodically fall out. Take this into account when choosing this method of mounting in the children's room . You may not immediately notice the missing button, but your child can easily prick himself with it.
After dismantling such a fastening, barely noticeable traces will remain in the form of small holes . To remove them, just run your finger over the wallpaper and smooth it out at the puncture site. Thus, buttons are good if a private change of scenery is required.
Now let's get back to the concrete walls. possible to attach the same photo to them using the buttons . You just have to spoil the wallpaper a little. To do this, you need to choose buttons with a flat, thin cap .
Using a stationery knife, you need to make a horizontal cut in the wallpaper , the length of which is equal to the diameter of the cap with a small margin. Now make the same transverse cut . You will get a small cross . Using a knife, carefully separate the wallpaper from the wall and bend the corners. In the resulting free space, lean the button with its cap against the wall, after dropping a drop of superglue on it so that the tip is facing you. Now put a small drop of glue on each corner of the folded wallpaper and fold it back. When the glue dries, you will get a fairly strong fastening in the form of a small point protruding from the plane of the wall. All that remains is to pin the desired element on it. This method is good if you are not afraid of damaging the surface. After installation, you can hide the tip with a ball of foam or a piece of wine cork.
No. 3. Paper clip
A paper clip can also easily and quickly turn into a fastening element for light pictures or frames . To do this, it needs to be slightly altered. We will paste a paper clip under the wallpaper, as in the previous version. Only the cut will look a little different. The horizontal line should be slightly longer than the length of the paper clip, and the perpendicular line should be slightly larger than its width. A transverse cut is necessary to freely insert the paper clip into the wallpaper. You need to bend the edges and peel off the wallpaper from the wall along the entire length of the cut. The paper clip itself must be bent so that it resembles the letter “L”. It's like you used it to fasten a large stack of papers together and then took it off.
Place
one of the edges behind the wallpaper and see if it fits completely into the cut. If everything is fine, take out the paper clip, add a drop of glue , position the paper clip completely and press the wallpaper firmly into place. The glue should fill the entire void and be sure to get onto the paper clip. Leave the improvised fastener to dry for a day , and then feel free to hang the picture on it. The edges of the wallpaper will stick well and traces of the cut will be almost invisible, especially if the wallpaper has a texture.
At first it may seem that such fasteners are not particularly reliable , but in practice you will be pleasantly surprised . If you still have doubts, you can make several of these hooks. If the moment comes when you have to remove the paper clip, you don’t need to pull it out along with the wallpaper. Just bite it off at the very base with sharp nippers. Using the same principle, you can use a fishing or clothing hook . All stages of work will be similar.
No. 4. Sewing pins
Sewing pins are one of the neatest methods of fastening, which causes the least damage to the surface of the walls. Lean the photo against the wall and pierce it with a pin at a slight angle to the plane of the wall. Her leg should go behind the wallpaper, but not stick into the wall. Instead of pins, you can use a regular sewing needle. It will be less noticeable. Such fasteners can withstand weight up to 500 grams .
No. 5. Decorative tape
Decorative tape or decorative cord can also be used as a fastening element. With its help, you can arrange small paintings or photos in a more original way. In the desired place you need to make one of the above hooks .
Take a ribbon with finished edges, fold it in half and tie it on a hook . You will have two ends hanging freely. We will place the paintings on them. If you don’t really like the knot in the middle of the wall from an aesthetic point of view, you can tie a neat bow and another knot so that the bow does not come undone under the weight of objects. You can fasten the bow separately and then simply glue it onto the knot.
options for decorating the place where the ribbon is attached, ranging from artificial flowers to beautiful beads. Start from the general interior.
To secure the paintings to the ends of the tape , you need to apply a little glue to their reverse side . And for reliability, you can cut strips of thick paper and additionally glue them over the tape. By alternating the height of the decorative elements, you can create a very unusual collage.
In these simple ways you can attach small plates made of lightweight materials, photo cards or small paintings in plastic frames. If you make several fasteners of the same type on one line, and on the back side of the picture stretch a fishing line or nylon thread into the ears along the edges , then by hanging it in this way on all fastenings at the same time, you can significantly increase the strength of the fastening , and the permissible weight will increase several times.
How to hang a picture, portrait without drilling the wall
Don't know how to mount a picture on the wall if you don't want to pick up a drill? We tell you 8 proven methods.
Liquid Nails
Use polymer glue or liquid nails if you are sure that the canvas will not have to be re-hanged in the near future. Installation sequence:
- Clean the wall surface thoroughly.
- Degrease the frame, apply a few drops of glue along the entire perimeter.
- Press the painting firmly onto the surface and let the structure dry.
Liquid nails for attaching paintings
Pins for tailors
Needles with a round eye are suitable for attaching lightweight fabrics with ropes on the back surface. Drive a pin under the wallpaper and hang the twine over the eyelet. If you need to place a panel or photograph without a frame, simply secure the structure with needles in the corners.
Tailor's pins for attaching a picture
Coat hooks or paper clip
This fastening method is also intended for light canvases. Procedure:
- Unbend the product, make the sharp part of the paperclip look like a hook.
- Make a small cross-shaped cut on the wallpaper.
- Insert the paperclip into the cut, leaving the bent part on the outside.
- Secure the structure with glue.
- Wait for the glue to dry completely, then hang the picture.
Pushpins
The procedure is similar to the method with paper clips. It is necessary to insert the base of the button into the cut in the wallpaper and secure it with glue. After drying, you can hang a picture on the protruding sharp part. The method is relevant for panels or photos without a frame.
Push pins for attaching the picture
Wine corks
For installation you will need 1-2 plugs. Instructions:
- Cut the cork into circles 1-1.5 cm wide.
- Mark on the wall the places where you plan to mount the picture, and glue the pieces of cork with superglue.
- Stick a thin nail into each circle.
- Wait for the structure to dry, hang the canvas in the frame on the nails.
Wine corks for attaching paintings
Spider hooks for pictures
The products are a plastic structure with protruding metal spikes. Such fastenings of paintings to the wall can support canvases weighing 1.5-9 kg, depending on the parameters of the hooks. “Spiders” are attached to the base using nails.
Spider hooks for attaching paintings
Double-sided tape
This is a good tool for attaching light panels and photographs. Glue one strip to the wall, the second to the frame. Connect the planes, press firmly for secure fixation.
Double-sided tape for attaching the picture
Velcro Command
To hang a picture, press the Command strips together from the fastener side until you hear an audible click. Remove protective stickers from the surface of the fasteners. Glue the elements to the frame from the back side, press the product tightly against the wall.
Velcro commands for attaching the picture
Molding
Molding is a long wooden or plastic strip that is fixed to the wall parallel to the floor. It is convenient to hang a picture on a rope. Place the baseboard at the required height, drive in screws or decorative nails, then secure the panels with tight laces.
Molding on the wall for mounting a picture
Idea! Instead of molding, you can use a thin rod mounted on brackets.
Picture hangers
Paintings are different, and here we are not talking about the technique in which it was made, or the plot, but we are talking about its size and weight, as well as the material of the frame.
Let's consider the most popular types of fittings for baguette frames:
- triangular pendants
- eye screw
- crocodile mount
- D-shaped suspension
- 3M Command mount
- various threads, fishing lines and wires
Triangular pendants
Triangular pendants are suitable for attaching to thin picture frames whose weight does not exceed two kilograms. Such fittings are attached to the baguette using small nails. In stores there are various versions of triangular pendants, differing in the width of the base.
Eye screw
The eye screw no longer needs to be secured to the frame with nails; it is simply screwed into the baguette frame using a screwdriver, having previously made a small hole. These screws are made from a special alloy that ensures their strength and are not intended to be screwed directly into the wall, although at first glance it may seem that they can be used as an anchor bolt with a ring. When choosing the screw size, you must be guided by the width of the baguette, the size of the frame and the weight of the painting. When in doubt, it is better to choose a thicker screw, but also remember that a fastener that is too thick can split the frame.
Crocodile mount
This type of suspension received its name due to the presence of teeth reminiscent of a crocodile. They are not just decorative in nature, but have practical significance: with their help you can adjust the horizontal position of the canvas on the wall. They also help set the angle of the painting for more convenient viewing of the image.
It is used for canvases in wooden frames and gallery-stretched canvases. This suspension is attached using two small screws that are screwed into the baguette. The crocodile mount is convenient to use for modular paintings. With horizontal adjustment, you can correct inaccuracies in wall mount placement and maintain image integrity.
D-shaped suspension
D-shaped pendants are most often made of steel with a brass or nickel plated (accordingly, you can choose a gold or silver pendant).
Such fasteners differ in size: small rings are used for fastening to small frames; they have only one hole, which is attached with a screw to the baguette or to the back of the frame using a special forked rivet.
For heavy frames, the D-rings already have two holes for attaching a screw, ensuring the reliability of the structure.
3M Command Mount
They are adhesive Velcro fasteners; they are very easily attached both to the wall and to the picture itself. A standard pair of Velcro fasteners can withstand a weight of up to 1.8 kg; there are options on sale that can withstand even greater weight. The main advantage of this type of fastening is ease of use, since there is no need to drill or screw anything. If necessary, Velcro can be easily removed from the wall without leaving any marks.
Various threads, cords, fishing lines and wires
A variety of threads, cords, cables, fishing lines and even wire are used as suspension. However, these materials must be carefully secured to the baguette or frame backing, and the ability of the material to support the weight of the picture is assessed. To fasten threads and similar materials, a furniture stapler and various adhesives (for example, epoxy glue) are used.
How to hang a heavy, large picture on the wall
To prevent the product from falling off the wall after manipulation, you need to decide on the fastenings. Step-by-step instruction:
- Check the weight of the painting. If the weight is less than 22 kg, use bolts or anchors for installation. To secure the fasteners, drill several holes on the supporting surface.
- If the painting weighs more than 22 kg, use plywood as an element that strengthens the structure. The sheet can be attached to the wall with nails or self-tapping screws.
- If you need to place products on a hollow wall, use Molly bolts. Drill holes in the wall, insert fasteners, tighten with a drill until fully secured.
anchor bolt
Bolt Molly
Drilling option
If you don’t want to turn the wall into a sieve, but two or three holes seem like a completely acceptable “evil,” you can use two ways to hang pictures:
- on a solid panel (board, laminated MDF or chipboard, other solid sheet-type material);
- fishing line, tape, rope, cord, wire or other relatively flexible suspension on one or more attachments.
In the first case, you can easily hang a modular picture of 5 parts (or another number of fragments). A board is attached horizontally to the wall, nails are driven into it or screws are screwed in at the required distance and height. Fragments of the modular image are hung on these fasteners. By the way, a board (or boards) can also become part of the decoration of the room.
If this method does not suit you, but you still need to hang several paintings on a concrete wall, you can use a flexible hanger - horizontal or vertical. The horizontal one will inevitably sag, shifting the suspended images to the middle. Therefore, it is better to use vertical types mounted on a rail - a pipe or strip fixed to the wall at the ends. Unfortunately, with this method, the paintings will not adhere to the wall, and accordingly, they may begin to move when air moves. But there will be no extra holes in the wall!
How to hang modular paintings evenly
Modular paintings are narrative canvases made from several elements. Step-by-step algorithm for placing on the wall:
- Determine how the modules will be located relative to each other, reproduce the composition on the floor.
- Mark mounting locations on the wall. The optimal distance between parts of the canvas is 2-3 cm.
- Secure the products using Velcro, nails, bolts or any other convenient method.
Mounting a modular picture on the wall
Important! Some versions of modular fabrics are equipped with threads to connect elements. Take this into account when attaching.
Instead of canvases, you can place posters on the walls. We invite you to familiarize yourself with the ready-made diagrams of their location.
Professional solution
If “artisanal” hanging methods are not satisfactory and you want to know how to properly install the fasteners – following the example of art galleries – it’s worth remembering special hanging systems.
They consist of three main elements - a rail, a strong fishing line or cable, and a hook with a regulator. Thanks to this regulator, you can set the desired position of the hook - at a greater or lesser distance from the rail.
The systems are complemented by connecting, end and corner elements, which makes it possible to position the rail along the entire perimeter of the room, not excluding corners, bay windows and protrusions.
For large and heavy images, craftsmen advise using two hooks: this helps to hang the frame evenly and is especially suitable for heavy products.
Liquid Nails
Liquid nails are a special glue that securely connects surfaces. Simply apply liquid nails to the back of the frame in small dots (if the painting is heavy, you can coat the entire frame). Then press the painting flat against the wall surface and hold for a few seconds.
This is interesting: A small kitchen is not a problem! Expanding the boundaries
Velcro Command
The special technology of Command Velcro allows you to glue them to almost any surface and easily hang pictures weighing up to 2 kg on them. The advantage of this brand of Velcro is that it can be easily removed without damaging the walls. They are sold as a set of several strips: one strip is glued to the frame, the other to the wall. The more stripes, the heavier the painting can be.
Double-sided tape
This method is suitable for walls with thin paper wallpaper or plasterboard partitions. Just apply regular double-sided tape to the edges of the frame and attach it to the wall. True, the disadvantage of this method is that the tape can leave marks on the wall; To prevent this from happening, it is recommended to hold the tape at an angle of 90 degrees relative to the wall when removing the painting.
Types of fastenings
Due to the fact that the word “fastening” can carry different meanings, the reader finds on the Internet and other sources not exactly what he would like to learn more about.
Considering fastening as the process of placing a picture on the wall, you should pay attention to exactly how the picture will be fixed. These methods have their own classification. But by fastening we also mean a device or the device itself, with the help of which a picture can be mounted on the wall.
This is a completely different classification. Let's touch on both of these issues so that there are no unclear points left.
We understand perfectly well that framing a painting gives it a complete aesthetic appearance, but it is not always necessary to place the work in a frame. Therefore, we will talk about drawings, photos or paintings of various formats, with and without frames.
The fastening, as a device, must perform the functions assigned to it. In connection with the above, we will divide all devices into two large groups.
- The first group includes all possible devices that are designed to place a picture on the wall and that are mounted on a picture frame, on a canvas or on another frame.
- The second group will be formed by the elements with which the frame is held on the wall. In hardware stores, these elements are called fasteners. These include various nails, screws, self-tapping screws, and adhesive tapes.
How to choose a place
Determining the right room and location for your canvas or photograph is very important.
In the bedroom
When choosing a place to attach the canvas in the bedroom, it is important to consider the size and style of the room’s interior. Often canvases in the bedroom are placed above the head of the bed. This is true if the headboard is not high. On the wall opposite the bed, you can place a canvas with relaxing motifs for better sleep, or with a dynamic pattern for better awakening. To make the ceiling appear higher, you can hang elongated vertical pictures above the nightstands on either side of the bed.
Children painted the walls with wax crayons: a life hack on how to clean wallpaper with a hairdryer
In the corridor
Here, too, everything depends on the size of the room. An important rule is that the size of the painting should not exceed a third of the size of the wall. Lighting will help make the design even better in the hallway.
In the living room
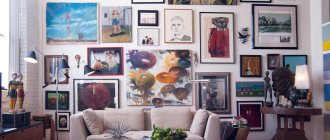
When determining a place for an image, it is worth remembering that this is also a decoration, and with its help the design of the room changes and is visually enlarged. For example, if the living room is too dark, this problem can be solved by hanging a light composition. The location above the sofa looks very advantageous.
In the kitchen
A composition of several frames will look best in the kitchen. But they need to be hung on the lightest side; in the shadow the lines will be distorted. A suitable height is at eye level. If you want to place the canvases on opposite walls, then make sure that the lower edges are at the same level.
Wine cork and clove
What is necessary:
- an ordinary wine cork;
- carnations;
- glue “Moment” (or equivalent);
- knife.
Peculiarities:
- only for light images;
- average degree of reliability.
Execution algorithm:
- take any cork from a wine bottle and cut it into circles with a thickness of at least 10 millimeters;
- glue the resulting fragments to the wall and insert a nail of suitable length into them (it should not go into the wall);
- the image is hung on nails, its weight is evenly distributed over all four corners.
Be careful: very heavy paintings require a different method of mounting on the wall.