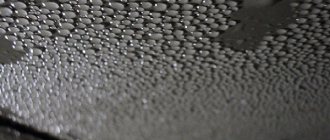
For most summer residents and country residents, dampness in the cellar is a huge problem. The reason for the increase in humidity is considered to be poor-quality thermal or waterproofing. Another reason may be the lack of a ventilation system.
Whatever the reason, a wet basement is not suitable for storing food. Therefore, moisture needs to be removed and condensation removed. Today we will tell you how to dry the cellar, disinfect it and prepare it for planting the harvest.
- Lime vapor
How to dry a cellar
For drying, choose a dry sunny day. First of all, we remove all the products and boxes remaining there from the room; we also need to remove the shelves, disassemble the racks and pallets. Next, you need to sweep out all the debris and sand. If there is water, it needs to be pumped out.
All existing structures are cleaned with hot water with the addition of soap and baking soda. Next, all parts are treated with a solution of lime and copper sulfate. This will help get rid of fungus, mold and harmful bacteria. After this, all the parts are left to dry in the sun for several days.
Note: The places where the furniture stood are thoroughly washed to remove dirt and mold. For greater effect, you can use a mixture of salt and sulfuric acid, which is left inside for three hours.
After this, we open the doors, all ventilation pipes and hatches to dry the room.
How to quickly dry a cellar from dampness with ventilation
There is a certain algorithm for drying underground storage, which depends, first of all, on the presence of ventilation in it. Let's consider how this process occurs in rooms with ventilation systems or openings.
Heating the cellar
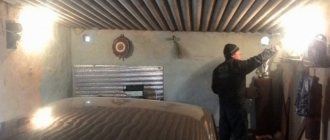
If the weather is warm outside, and the dampness needs to be removed now and ventilation does not help, you need to heat the air. To do this, take an old metal bucket and make holes in the bottom and walls. Then they securely attach it to the cable and pour coals into the bucket. The coals are ignited and a constant combustion is established. A bucket of smoldering coals is lowered onto a cable into the basement and secured so that it hangs above the floor, and the room itself is closed (Figure 1).
Waterproofing a damp room
In order not to think about how to dry the cellar in the garage and not to decide how to get rid of water in the basement of the garage, and also to avoid problems in the future, you need to take care of the waterproofing of the cellar during construction, using waterproofing additives that enhance the moisture-proof properties of the building material used. If moisture does begin to appear, do not be too upset; there are effective ways to deal with it.
Application of external drainage
This method consists of draining groundwater outside the building, into the sewer system (see also How country sewerage is performed when the groundwater level is high), if, of course, its location allows this. After all, it is not possible to protect the basement of a large house or a corporate garage from groundwater in this way; more precisely, it is too expensive and unprofitable.
It would be preferable to carry out external drainage at the initial stage of construction, but if the moment was missed, then the water can be diverted from an already used cellar. Everything can be seen in photos and videos.
Scheme for manufacturing external drainage
Method of performing external drainage
The method of performing the work is not so complicated, it can be done with your own hands, and then the price will be much lower. So:
- A trench 40-50 cm wide is dug around the cellar, which should be approximately half a meter below the floor level;
- Every two meters, up to the first layer of sand, wells are drilled into which pre-prepared plastic tubes are inserted. They are covered with a finely meshed metal grill (to prevent sand from getting into them). When drilling, they should not be drilled too deep into the sand to prevent sewage water from entering the system;
- The bottom and walls of the dug trench must be covered with geotextiles. This material will avoid flooding;
- Next, you can start filling the trench. You can use gravel or crushed stone for this. The strewn layer should slightly exceed the line of the lower base of the basement wall;
- The filled trench must be tightly covered with the same geotextile, turning this structure into a drainage pipe, which, due to its location along the entire perimeter of the cellar, will prevent and reliably protect against the accumulation of groundwater;
- Next, we pour all the soil into the trench, compacting all layers tightly.
Application of internal drainage
Using this method will help dry out a large basement in a short period of time. It consists of collecting all wastewater through interconnected pipes, which are placed around the entire perimeter of the room being drained.
Today, in specialized stores you can find a large selection of pipes for use when installing internal drainage, differing in size, rigidity and perforation. The most common pipes are 110 mm in diameter.
The pipe has special holes located at the same distance from each other.
Scheme of internal drainage
How to dry a cellar from dampness without ventilation
If a ventilation system was not installed during the construction of the basement, it is necessary to install some kind of pipes. They can be installed in the wall or ceiling. You can also purchase a fan with a supply and exhaust mechanism.
After flooding, you first need to pump out the water. Then take everything out, dry it with the doors and hatches open, and whitewash it with lime. After this, you can use the methods described below.
A cellar without ventilation can be dried using hydrophilic materials:
- Slaked lime – destroys fungus and removes moisture. Placed on shelves and along walls.
- Dry sawdust helps reduce humidity.
- Calcium chloride tends to absorb moisture. You lay it out, assemble it after a day, heat it up and can use it again.
- Dry cardboard boxes are used to prevent condensation on the ceiling.
You can purchase special equipment - a household dehumidifier, which can also effectively cope with the problem of high humidity.
Dehumidifying air using improvised methods
If the air in the garage is damp, and purchasing a dehumidifier is not yet possible, then the following methods can be used as a temporary solution:
- silica gel balls poured into containers and placed in different places in the garage. Some craftsmen pour them into a bottle, and to make the air circulate better, attach a small fan. Silica gel can be dried and reused;
- white moss in powder form, placed in containers around the room, work in the same way as silica gel. It actively absorbs moisture;
- Calcium hydroxide has good absorbing properties;
- Another option is clay brick. It is heated well in the oven and placed in the garage. As the brick cools, it absorbs moisture. For high-quality drainage, you will need several of these bricks, and you must work carefully so as not to get burned;
- some advise using hydrochloric and sulfuric acids, but the possible risk of burns and poisoning is higher than the likely benefits of the methods, so they should not even be considered.
You can check the effectiveness of such improvised dehumidifiers using a hygrometer. The simplest devices cost a penny, but they measure the humidity level quite accurately.
When using these homemade dehumidifiers, remember that a device specifically designed for dehumidification will always work much more efficiently, especially if it is chosen correctly.
Tags:Garage
Disinfection and control of fungi and mold
After drying, they begin to combat the main problem of underground storage facilities - mold and mildew. There are several effective methods for this, which we will describe below.
Lime vapor
Lime is a quick and inexpensive way to get rid of fungus. It is used to combat fungal colonies and for prevention.
Before starting work, the premises are pre-treated with disinfectin. The drug is diluted in water, then applied to all painted surfaces.
Figure 2. Disinfectant treatment with lime
There are two folk recipes that can be used to clean fungus from a basement with lime:
- Lime mixture with copper sulfate. To do this, take two buckets of water, 1 kg of slaked lime and 100 g of vitriol. Apply using a spray bottle (Figure 2).
- Mixture with formaldehyde. For a bucket of water, use 200g of formaldehyde and 500g of bleach. The resulting solution is used to lubricate all surfaces inside the basement. The room should then be dried and ventilated.
Sulfur (smoke) bomb
Sulfur gas vapor is considered an effective method for removing fungus. To use a sulfur bomb, you need to block the air supply to the room, place the bomb in a tin basin and set it on fire. Then quickly exit and close the doors tightly (Figure 3).
Figure 3. Disinfection of the cellar with sulfur bomb vapors
Be careful, as sulfur smoke is dangerous to people and animals. After 12 hours, the room must be thoroughly ventilated and treated with slaked lime.
Mold Remover
There are cases of white fluffy mold appearing. This is a type of fungus. To combat it, use the methods described above, and you can also use a foam remover.
By applying the product to the site where the fungus appears, the mold immediately begins to curl. Subsequently, it does not appear on the treated area.
Floor bedding
If your basement has an earthen floor, you can lay thick plastic film on it (this will prevent excess moisture from appearing).
To do this, make wooden grates and place them on the floor. Scatter pieces of slaked lime over the film. This will help prevent fungi and thus reduce moisture.
Prevention Methods
In order not to encounter moisture in the cellar, it is worth considering the following conditions when designing the room:
- When choosing wall materials, preference should be given to hydrophobic materials characterized by poor water conduction properties. Such materials include concrete grade M 400 and higher. You can also use additives in plain concrete to increase its water-repellent qualities.
- The use of external waterproofing prevents the penetration of groundwater from the outside.
- Installing a blind area around the garage will drain water resulting from rain or melting snow.
- Ventilation pipes should be located in the cellar. The channel for air flow should be almost at the height of the floor (more than 10 cm). The exhaust pipe is located under the ceiling surface (10 cm below). Equipping the outside of the pipes with an umbrella will prevent precipitation from getting inside the cellar. To create a large traction force, the air ducts should be made in a straight shape. If it is not possible to install pipes in a straight position, the side outlet is located at an angle of at least 60° with respect to the horizon. The slope should have a length of no more than 100 cm.
- Having a vapor barrier between the basement and the room above will prevent moisture from entering.
- If there is an earthen floor, the penetration of moisture into the cellar increases. When compacting and covering the floor with plastic film, humidity levels are reduced. Installing a concrete floor with waterproofing will protect against condensation.
- The presence of waterproofing and vapor barrier of the walls will reduce the hygroscopicity of the material. External insulation is carried out by coating the outer sides with mastic. Cement-based compounds are used for internal insulation.
How to dry a cellar after flooding
Drying should begin immediately after flooding, as mold forms quickly. First you need to pump out the water in a way accessible to you. Next, take out all the furniture elements. The cover and ventilation hatches should be opened.
Once most of the water has been removed, fans can be installed in the cellar and directed at the walls of the room. If possible, use a dehumidifier.
The dried-out room should be treated against fungus using copper sulfate or using a ready-made anti-mold product. The walls should be whitewashed with lime. Remember to use rubber boots and gloves while drying to avoid getting electrocuted.
A quick and easy way to dry a basement is shown in the video.
How to dry a cellar in a garage from condensation
To get rid of high humidity in the garage, you should install a good ventilation system:
- Install one pipe for inflow, the second for outflow;
- Mount one pipe (through the ceiling or wall) with an exhaust fan.
If condensation has already penetrated into the garage, you can use several proven methods for removing moisture:
- Spread slaked lime along the perimeter of the walls and on the shelves. This will get rid of fungus and reduce moisture.
- Place dry cardboard boxes on the floor. Change as moisture accumulates.
- Scatter dry sawdust on the floor and change it when it gets wet.
You can also use dehumidifiers. For this purpose, the device model should be selected with medium power. After the walls have dried, they should be whitewashed with lime.
Carry out preventive drying every spring. After heavy summer and autumn rains, the room should also be dried. If you carry out preventive work, you will not be afraid of the fungus.
Storage floor design
The main reason for waterlogging of the cellar is closely located groundwater. Initial proper floor installation will prevent the problem of excessive moisture in the basement. There are several ways to install a waterproofing floor.
Most often the floor remains earthen. Water from the lower layers penetrates through capillaries to the floor surface. To prevent the need to dry out the cellar from dampness, the earthen floor is leveled, compacted and covered with a thick film or roofing felt.
To protect the coating from tears or breakage, wooden boards are used (possible reasons for damage to the coating: foot pressure, installation of boxes with sharp corners, careless displacement of heavy objects). An earthen floor can be reinforced by packing clay, that is, covering the entire floor with a compacted mixture of clay and sand. This operation, which allows you to dry the basement by creating a natural barrier for moisture to escape, is carried out in four steps:
- One layer of crushed stone or broken brick is poured onto the previously leveled earthen floor of the cellar, and the space between the stones is filled with a thick mixture of clay with the addition of sand (clay is taken with a good percentage of fat content, and the floor level should rise by 15 cm after pouring).
- The clay is compacted very tightly.
- Sprinkle sand onto the compacted floor and rub it in. Remove excess with a broom and dustpan.
- The created clay floor must be thoroughly dried for two to four weeks.
The most profitable way to improve the waterproofing of the floor and avoid regularly drying out the cellar is to make it concrete and with a good drainage system. True, this is the most expensive method, requiring special knowledge and skills.
If after all the manipulations with the floor the level of humidity in the basement or garage decreases significantly, then you will no longer need to worry every year about how to dry the cellar from moisture (especially during the spring rise of groundwater).