Increased levels of humidity in the walls are a very unfavorable phenomenon that can damage your home. Generally, horizontal insulation of foundations or walls is incorrect. Moisture in the home is also unfavorable due to its impact on the health of residents.
A damp wall and warm air create ideal conditions for the development of dangerous fungi and mold. This is why it is so important to dry out buildings with too high humidity levels.
Innovative method of injection waterproofing technology
In the industry of waterproofing protection of all types of structures, one of the most promising and newest technologies is the injection method of isolating structures from the effects and penetration of water. This technology greatly reduces, even stops, the process of capillary suction. The injection method is well suited even for buildings built from porous materials. But, we note that such a protection measure is quite expensive and requires its implementation by professionals, since it requires not only special professional equipment, but also skills.
The essence of injection waterproofing is to create a double-action complex: an external moisture-proof polymer membrane and behind it an impervious curtain. The advantage of the insulation method under consideration is that there is no need to open the foundation from the outside and remove the lining inside the room.
Polymer resins and acrylate gels are used as waterproofing substances in the form of foam. The insulator is inserted through expansion packers, which are mounted into drilled holes with a diameter of 1.2 cm to 4 cm. Holes for the packers are drilled across the entire surface of the room at intervals of 20-80 cm. The insulators are inserted into the packers using a special construction pump under pressure.
Polymer waterproofing agents are environmentally friendly, have a low level of viscosity, due to which the substance has the ability to penetrate into any cavities, the slightest cracks, seams of foundations and walls.
Injection or invasive methods for drying buildings
Generally speaking, injection involves the creation of a special sealing or hydrophobic barrier. This barrier is created by removing moisture and introducing special preparations in its place.
We can say with confidence that injection is an effective method for drying foundations in used buildings.
Crystal injection
Crystal injection - used to dry capillary moisture that is drawn from the ground into the foundation.
Capillary moisture occurs due to the accumulation of water in capillaries (microchannels in building materials). Water moves along with capillaries through the building, causing the walls to become damp.
Crystal injection involves extruding special injection channels into the wall. A mixture of water, Portland cement and silica activator is poured into the ducts.
Crystal injection works based on a diffusion activator that spreads within a few centimeters of the channel.
Thus, a certain vertical isolation of the foundations is created. It is worth adding that crystalline injection is characterized by very high drying efficiency.
Particularly recommended for drying poorly insulated substrates made in old buildings. The price for drying an apartment using crystal injection is determined individually.
Heat injection
Thermal injection - looks very similar to crystal injections. Can be used to release capillary moisture.
Holes of the appropriate diameter are drilled in the wall. Then a stream of hot air is introduced into them, which is intended to dehumidify and dry the walls.
After initial drying, the holes are filled with methyl silicone resins, forming a powerful moisture barrier. This type of injection is very effective.
However, its biggest advantage remains its speed. Drying the walls takes only a few hours. The price for drying old buildings using this method depends on the degree of humidity, the specifics of the walls, as well as the size of the foundations.
Causes of problems
- insufficient ventilation of the room;
- defects associated with the construction of the house - improperly laid floors and clogging of ventilation with debris. As a result, a temperature difference occurs and condensation forms;
- the presence of groundwater lying nearby;
- The groundwater situation worsens in the off-season. To minimize problems associated with basement flooding and increased dampness, it is necessary to consider reliable drainage - a system that absorbs water before it enters the room;
- the presence of cracks and holes in the foundation that allow moisture to enter.
This problem is also associated with deviations from construction technology. Over time, damaged foundation walls may begin to collapse.
Is it possible to leave an aerated concrete house without heating?
What happens if you leave an aerated concrete house without heating for the winter? This question is asked by people who want to leave home for the winter, saving on heating costs, or by people who want to build a summer house out of aerated concrete.
In winter, a country house is used infrequently, since people usually come to it on weekends and holidays. And here the question arises - what will happen to the aerated concrete itself if it is frozen and defrosted.
Let's start with the fact that nothing bad will happen to the aerated concrete itself if the necessary foundation is built, which will allow the house to be operated without problems during freezing and defrosting. Such a foundation should not freeze under the house so that the forces of frost heaving do not bend the foundation, otherwise cracks will appear in the aerated concrete. The backfill of the foundation should be made of non-heaving materials, and do not forget about the drainage system.
What foundations are suitable for aerated concrete cottages?
- Pile foundations on a grillage.
- Recessed strip foundation with external insulation.
- Shallow strip with insulated blind area.
- Insulated monolithic slab with insulated blind area.
Now regarding engineering systems. To leave a house without heating during the winter, the house must have an antifreeze heating system that does not freeze, or dry heating sources such as fan heaters and electric convectors. You also need to take care of the water supply and sewerage systems, which must be drained in the winter so that frost does not break the pipes.
Now let's discuss the humidity in a house made of aerated concrete. If a house made of aerated concrete was built recently, then there is a lot of moisture in its walls, and it takes about two to four seasons for the aerated concrete to dry out sufficiently. The thing is that at the factory, autoclaved aerated concrete undergoes high-temperature steam treatment, saturating the aerated concrete with water. To prevent humidity in the house, you need to dry the aerated concrete for at least a year, and then the house will be very comfortable.
There is no need to worry that wet aerated concrete walls will begin to collapse in the cold, since even very wet aerated concrete can withstand many freeze/defrost cycles. The frost resistance of high-quality autoclaved aerated concrete is F50. So, even if there is a condensation zone in aerated concrete, it will not damage the walls when it freezes.
What to do in an unfinished aerated concrete house? It is very advisable to have time to make a roof so that snow does not get inside the house. If you didn’t have time to make the roof, be sure to cover the entire upper part of the masonry with film so that water and snow do not fall on them, and also cover the window sill openings.
It will be very useful to take measures to ensure that the soil under the house does not freeze or become waterlogged. For example, temporarily laying polystyrene foam and film on the floor, this will significantly reduce frost heaving under the foundation.
Let's summarize. If the foundation and blind area of an aerated concrete house are made correctly and do not freeze, and the heating system uses antifreeze or air heating, then such a house can quite normally be left without heating. You also need to drain water from water pipes and sewers so that they do not burst from frost.
Causes of dampness
Before fixing the problem, you need to understand its causes. Otherwise, all the measures taken will be useless.
Causes of dampness:
- Poor quality blind area;
- High groundwater level;
- Poor ventilation.
If the blind area is of poor quality, then precipitation will begin to accumulate under the foundation of the house. Moisture will seep into the subfloor through small cracks. Penetration by capillary method is also possible
That is why it is important to do high-quality waterproofing in a timely manner.
The outer surface of the foundation can be treated with bitumen mastic. You can put roofing felt or any other roll waterproofing on top of it. At the joints, the material will also need to be treated with bitumen. You can add attractiveness with finishing.
Horizontal waterproofing is required between the foundation and the plinth.
In autumn and spring, the basement may flood due to high groundwater levels. The problem can be solved with the help of a high-quality drainage system. It is recommended to use its equipment when building a house.
If there is poor ventilation in the underground, then warm and humid air will penetrate there from other rooms. Then, in the form of steam, it will begin to settle on the walls and ceilings of the basement. Because of this, the tree will begin to collapse.
Why does dampness occur in a frame house?
Increased humidity can be caused by several reasons:
- Initially raw building materials. If the timber, insulation or sheathing were damp, then they will certainly become a source of mold development. Houses are mainly built in spring and summer, which is the time of heavy rainfall. Due to precipitation, unprotected structures become wet and absorb moisture. Moisture by itself will not escape from the materials, so they must be dried.
- Flooding. A newly built house can become a “victim” of a burst of water supply, heating or sewer pipes. Unfortunately, no one is immune from this.
- Flooding with groundwater during spring floods. If the groundwater is shallow, when the snow melts in the spring, it can rise and flood buildings. As a result, water can penetrate through the foundation into the frame house, causing an increase in the percentage of humidity.
- Violation of waterproofing installation technology. If water protection is not performed correctly, moisture from precipitation will penetrate the house, soak into wooden structures, and over time manifest itself in the form of fungus and mold. Such problems require first troubleshooting, and then mandatory drying using drying equipment.
- Violation of construction technology. Frame houses are built quickly and quite simply, but mistakes during construction are not uncommon. Often the roof becomes a “vulnerable” place. Even small mistakes during its construction can lead to moisture from precipitation penetrating into the rooms. It is necessary to dry the premises after the violations have been eliminated.
Additional services
What to do if the insulation on the roof is wet?
There may be several reasons why the insulation on the roof was wet...
Drying attics and roofs
Attics and roofs are some of the most vulnerable places to moisture...
How to dry walls after flooding
For many, flooding is a nightmare that no one would like to experience.
How to dry insulation on a roof?
We will dry all types of insulation: mineral wool, glass wool, stone wool, penoplex, etc.
How to warm up the cellar
Of course, the option with a candle is far from the only one. There are a huge number of ways to deal with excessive humidity. For example, warming up. Today in stores you can find all kinds of special heating devices. They allow you to both dry out the cellar and use them in everyday life for other purposes.
The most popular device is a heat gun. With its help you can warm up the walls of the cellar very well. To do this, you just need to point it in the right direction and leave it that way for a while. Despite the fact that this method is quite easy, not everyone uses it. And then the question arises again, how to dry the cellar outside.
Previously, a fire was simply lit for this procedure. But, of course, this is not the safest option. It was replaced by an easy-to-use device - a roaster. It won't be difficult to do it. It is enough to take a metal bucket, make legs for it or simply place bricks along the edges and punch small holes at the bottom. Afterwards, you need to load wood chips into this structure and ignite it. When the flame burns well, you can add large logs to the fire.
The brazier is placed in the cellar. The flame from it will not only dry out all the walls, but will also drive out the old, stagnant air, and the smoke will kill all the fungi and bacteria that lived there before. This procedure is more effective than a regular fire, and also much safer.
How to dry a frame house in winter?
To effectively dry a room, you must first determine the cause of the increase in humidity. Once the source has been eliminated, drying can begin.
Important! Do not use household heaters, dehumidifying air conditioners, or heat guns for dehumidification. All this equipment is not intended for professional drying of premises! They can only maintain a normal indoor microclimate, but not normalize it at high humidity. To completely eliminate excess moisture, it is necessary to use special drying machines.
Unlike household appliances, professional equipment draws moisture out of materials rather than drying them superficially. One or several (depending on the scale of the problem) machines are installed in the room. To dry the floor, walls or ceiling, you do not have to dismantle the decorative coverings. You can dry not only rooms, but also furniture and building materials.
The best option is to dry the frame house after construction. Even if construction was completed in winter. The time of year has no effect on drying technology. If you are told that it is more effective to dry your house in the summer, do not believe it, this is a myth. On the contrary, if you decide to delay drying until the warm season, the dampness situation may worsen over the winter. And then you will have to make much more effort to eliminate the consequences and spend much more money.
Eliminating moisture in the underground
The problem needs to be resolved in a comprehensive manner. Only a versatile approach will help you get rid of moisture in the underground forever.
Ways to eliminate moisture in the underground:
Internal and external waterproofing of the foundation and plinth. It is better to concrete the floor. All indoor surfaces must be treated with waterproofing material. The joints are not easy to process. That is why the material is overlapped. And then the seams are treated with bitumen mastic. High-quality ventilation. Traditional ventilation for a large basement is usually not enough. Because of this, condensation may settle on the floors. To eliminate the problem, first dry the underground in a wooden house using special fans. Ventilation pipes can be replaced with larger diameter communications
It is important to position natural ventilation correctly. Arrangement of a drainage system. It is in its absence or poor quality that problems can arise.
It is better to entrust the work to a specialist. They will be able to correctly determine the level of groundwater, select high-quality materials and correctly lay pipes. Application of polyethylene. This is the simplest way, but not very effective. This option is suitable for a small underground. It is enough to simply lay a monolithic piece of film on the ground floor. As a result, the moisture will not be able to rise higher, it will settle as condensation on the film and go back into the ground.
If a problem occurs systematically, immediate action must be taken. First you need to dry the subfloor, and then you can begin measures to eliminate the problem. But it’s better when everything is arranged at the construction stage.
Reduce air humidity: is it really possible to do it yourself?
Of course, the sources of excess moisture must be detected and eliminated, but how to dry indoor air at home if the moisture comes from inside? What moisture repellants should I use and how can I remove moisture from a room quickly and effectively? Let's figure it out.
Air Dryer
An excellent remedy for moisture in an apartment is a dehumidifier. A room dehumidifier does an excellent job of eliminating excess moisture in an apartment, house, garage, cellar, country house, and even in a car. You can place the dehumidifier in a bathhouse or sauna - it will do the job there too.
Drying the air with this product is a temporary procedure. While the dehumidifier is running, the percentage of humidity in the room will be adjusted downward. Therefore, purchasing indoor air drying is important for quickly removing excess humidity. As a rule, kitchens, bathrooms, laundries, and swimming pools are the first to suffer from it. In addition, in our country, a dehumidifier is also useful in the summer and autumn. It will help compensate for the lack of sufficient air circulation in storage areas: attics, dressing rooms, storage rooms, basements.
A dehumidifier is a real helper in case of increased humidity.
Today you can buy one of four types of dehumidifiers. The first ones are similar in configuration to compressors in refrigerators, hence the name - co-compressor. Thanks to the available hydrostats, they cope perfectly with the assigned tasks even in very large rooms and buildings. However, there are also significant drawbacks: they produce unpleasant and loud noise, and also have impressive parameters.
The second type of unit is a quieter dehumidifier, but its performance is lower than that of the models discussed above. For example, they use Peltier models. They have a high-quality thermoelectric converter.
The third type is absolutely environmentally friendly, because... equipped with an adsorbent. With its help, moisture is easily absorbed from the air. In general, such dehumidifiers are mobile and self-sufficient: they do not run on electricity, do not make sounds, and are safe. If you have a compact room, then such a device will be very useful. However, you need to monitor how full the cassettes are and change them on time.
Then there are rotary units that remove moisture from the air. They combine the principles of functioning of the first and third types simultaneously. They appeared on sale relatively recently.
Ventilation
To know why ventilation is needed, it is important to understand how air circulates in the room. As you know, the more often ventilation occurs in damp rooms and buildings, the more active the natural air exchange is. What you need to know so that during the autumn-winter period you do not lose excess heat due to this regular procedure.
If you are only periodically in a problem area, ventilation should be at least twice a day. The duration of the procedure is up to 10 minutes. If your stay there is permanent, then much more often.
At the same time, adopt the through method: wide open windows and doors completely renew the air. This is more reliable and effective than half-measures with them - only half or partially open all the time. In addition, the latter sometimes leads to mold and mildew.
A wall-mounted air conditioner is also a good alternative to an air purifier.
Hood, air conditioner
A hood and air conditioner will help reduce the humidity in the room. An air conditioner will help you combat humidity by circulating air indoors as well as air flowing from outside. Excess moisture condenses and is removed outside. An air conditioner can be a truly optimal solution, just like a dehumidifier in an apartment, when you want to ensure high-quality air exchange at high humidity. Such room dehumidifiers are divided into exhaust, supply or reversible.
Dehumidifying the air in the ventilation is another way to reduce humidity in the apartment. Exhaust devices are installed in the air duct of the required room (usually a bathroom, toilet, kitchen). They do an excellent job and do not leave an environment for mold to grow.
The kitchen suffers greatly from humidity. As a rule, this is the wettest room in the apartment. A hood is simply vital here to dry out the steam when cooking. It’s up to you to decide which one to install: flow-through or circulation. They have proven themselves to be excellent, because... solve several problems at once: eliminate odors, as well as humidity and create a healthy microenvironment. The flow hood is directly connected to the ventilation shaft. In the case where there is no ventilation duct in the kitchen, the only way out is to install a circulation unit that operates on replaceable filter cassettes. It is important to understand that drying the air in the kitchen with high humidity is simply necessary!
Follow our advice and forget about your problems
In addition, there are supply fans. They not only make the air clean, but are also able to heat it to the desired temperature. They, in turn, are divided into window, roof, and wall.
And of course, supply and exhaust fans are loved by consumers. Their principle is simple: uninterrupted circulation of fresh (external) and contaminated or wet (internal).
Heated towel rail
A heated towel rail can also be considered as a good alternative for those looking for how to reduce humidity in the bathroom. A heated towel rail, in addition to its main purpose, warms up the bathroom and prevents condensation and moisture from accumulating on the mirrors. This means the air is dry and dangerous. Three models have become widespread: water, electric, and combined.
Heated towel rail - good for the bath
Water heated towel rails are powered by a heating system. However, during the summer shutdown period they will be useless. But in another way, they are very economical.
An electric heated towel rail maintains the exact temperature in the room that is needed. There is a thermostat for this.
And the most interesting option is combined heated towel rails.
In general, when going to the store to buy, make sure that the product you like has an anti-corrosion coating. Otherwise, even a very expensive model will not last several years.
Humidity can be a problem for pool owners
Cleaning the ventilation
Unfortunately, not every modern house can boast of a good ventilation duct. With proper installation, the draft will be sufficient so that the air circulates and is of normal humidity, and not high. In addition, various defects in the general ventilation system cause trouble: poor tightness, abrasion of the walls or cross-section of the duct itself. Sometimes the weather plays a role: the wind can make it easier or more difficult to function. In a private house, be sure to periodically check the serviceability of the air duct: problems or incorrect installation on the roof will have a very bad effect on air circulation.
With properly functioning ventilation, there is always clean and fresh air in the room
First thing
Where can you start all the work? First of all, you need to take everything that is stored inside into fresh air:
- pallets;
- racks;
- bins;
- boxes;
- shelves.
All these storage tools must be cleaned and washed thoroughly with warm water with soap and soda. After which the structures must be completely dried and ventilated in fresh air.
For the purpose of disinfection, all wooden structures are treated with a solution of copper sulfate, and then whitened. If you don’t trust the old “old-fashioned” method, then you can purchase a special antifungal composition that will also do an excellent job with this difficult task.
After carrying out the procedures, you can begin treating the walls and floor of the cellar. First of all, they must be washed and treated with a solution of copper sulfate to prevent the formation of mold. Only after completing these steps can you begin to dry the cellar.
How to dry profiled timber
In order not to wait months for shrinkage, it is recommended to dry the timber before starting construction. This can happen naturally or in a convection chamber. If the humidity is minimal (about 12%), the building will hardly shrink. Therefore, it can be finished immediately after assembly is completed.
After six months, it is allowed to install windows and doors, begin facade work, etc. If the timber was dried in a chamber, antiseptic solutions should be applied to it to avoid the appearance of mold, fungi, and harmful insects.
Expensive drying method
Many people believe that it is easier to pay money than to do the work themselves. They came up with a special way to dry the basement - using injections. This is the most complex and expensive method of all those presented above, which consists of introducing special waterproofing agents into the soil with a pump. These injections are made around the entire perimeter of the cellar and prevent moisture from penetrating into it.
The cellar is undoubtedly one of the most important rooms in the household. Its construction must be carefully thought out. But if, nevertheless, the cellar urgently needs to be dried, then in this case only improving the waterproofing and installing a newer ventilation system will help.
Any living space requires maintaining an optimal level of humidity
Particular attention must be paid to controlling the level of humidity in basements and garage cellars. To do this, they are equipped with good ventilation and waterproofing.
But what to do if water does appear in the cellar? In this case, garage owners need to immediately take measures to dry out the cellar. How to do this correctly, and what methods exist for drying cellars from moisture - read our article.
I am building a house from aerated concrete at sub-zero temperatures. Sharing tips
Beginning of October 2022 It was raining and there were slight frosts at night. And 06.10.2020 there was this picture:
If you sweep away the snow from the masonry, you can continue working. But if there is a temperature below zero, won’t this affect the strength of the mineral glue? I asked the manufacturer a question. It turned out that everyone has winter glue in their line. For Sibit it looks like this:
The inscription on the bag is “winter” and minor changes in the design of the picture. They can work in conditions where the temperature is not lower than -10 degrees. It differs from the summer one by the addition of anti-frost additives.
I was told examples where builders used summer glue in their work in winter. And the next day the block could be moved - the glue froze and did not set.
I purchased winter glue in advance and used it before the onset of night frosts.
What I noticed while working with him. Because glue at temperatures around zero loses moisture very little, and aerated concrete is wet after snow (does not draw water out of the glue), then literally the next day the glue in the smudges became strong (and, therefore, in the masonry). Summer glue gains strength over several days in the heat. His smudges still crumbled after a day if you pressed on them.
Important note: when laying, you need to remove not only snow, but also ice from the blocks. Ideally, there would be no ice at all. Quality teams use a gas torch before laying the row in such cases. In my case, the snow melted during the day, there was no ice on the blocks.
Preparation Protection and disinfection of the structure
The easiest way to disinfect a cellar
is whitewashing with lime. It is carried out with a solution of copper sulfate in a proportion of 100 grams per bucket.
To protect structures located in this room from mold and putrefactive fungus
A ten percent solution of copper or iron sulfate will be effective. With the same solution, before drying, you need to thoroughly rinse all the walls, and also treat the earthen floors.
In warm sunny weather, it is recommended to regularly ventilate the cellar. With the onset of warm days, it is recommended to lubricate walls that are not covered with wallpaper with a composition of laundry soap. Take 5 liters of water, dissolve 0.5 kg of laundry soap, bring the solution to a boil, and then apply it cold evenly to the wall.
To prevent dampness from destroying the entire crop, the cellar walls must be dried. During the rainy season in the cool autumn, hoping that the cellar will dry out on its own is very careless.
How long does aerated concrete dry, features of the material
Autoclaved aerated concrete is produced in autoclaves, which are huge steam boilers with temperatures over 150 degrees and high pressure (about 12 atmospheres).
During this treatment, aerated concrete quickly gains strength, but is also saturated with moisture. That is, fresh aerated concrete absorbs about 40% of its mass of water. Low-density aerated concrete (D300, D400) absorbs more moisture, denser aerated concrete is correspondingly less moisturized.
In other words, aerated concrete is brought to the construction site very wet, and its wet density is higher than stated. For example, fresh aerated concrete of density D400 can weigh not 400 kg, but 550 kg. So keep this in mind.
But what to do with this excess moisture? Just keep laying blocks, the aerated concrete wall will gradually dry out. The main amount of moisture leaves the aerated concrete in the first 2-6 months, then the drying process continues, but at a slower pace, until the humidity reaches 4-6%.
The rate of moisture removal from the thickness of aerated concrete depends on the following factors:
- Density of aerated concrete.
- Wall thickness.
- Wind speed.
- Ambient temperature.
- Amount of precipitation.
- Finish type.
On average, aerated concrete dries completely:
- 200 mm thick in 2 years.
- 300 mm in 2.5 years.
- 400 mm – 3 years.
It is worth noting that these indicators are valid only if the aerated concrete is not finished with dense plaster, since it has low vapor permeability, which slows down the evaporation of moisture from the thickness of the wall.
Let's draw conclusions about the drying of aerated concrete:
- Drying speed depends on many factors.
- The equilibrium moisture content of aerated concrete is 5-6%.
- When aerated concrete is dry, it retains heat better.
- It is better to build walls from aerated concrete in the spring.
- Leave the walls for six months without external decoration so that the aerated concrete has time to dry.
- Use plaster with high vapor permeability.
On this topic, it will be useful to learn about the following: dew point in the wall, condensation and moisture accumulation of aerated concrete. You will learn about all this in the video from Gleb Green.
Installing waterproofing in a damp basement
In order for drying the basement in the garage to be effective, it is necessary to take care of the arrangement of external and internal insulation. You can create it yourself, without involving specialists. You can purchase materials for external and internal drainage at a hardware store.
The arrangement of external drainage (Diagram 3) in the cellar involves the creation of a system for removing excess moisture outside the room. It is best to equip the exterior during the construction stage of the garage, but you can waterproof the already finished room if the humidity level increases significantly. The principle of creating external waterproofing is as follows:
- A trench is dug along the outer perimeter of the building (it should be 50 cm lower than the floor level in the cellar);
- Along the entire length of the dug trench, drainage is installed in the form of plastic pipes (for them, wells with a depth of up to the first layer of sand must be prepared in advance). The upper part of the drains must be covered with a metal mesh (this will prevent contamination of the entire system);
- Geotextile waterproofing material is laid at the bottom of the trench (it should also extend onto the walls);
- The finished drainage channel is filled with crushed stone to a height of 40 cm. The layer of crushed stone should be greater than the floor line in the cellar;
- The embankment is well compacted.
Scheme 3
Internal drainage (Scheme 4) will dry the cellar much faster. To equip it, you need the following materials: geotextile waterproofing, crushed stone and gravel, drainage pipes, drainage pump, PVC container, sand. Pipes are laid around the perimeter of the room to collect excess water. The diameter of these pipes may vary, but it is best to choose designs with a diameter of 110 mm. It is better to arrange the internal drainage system in the basement of the garage during the construction stage. Otherwise, you will have to dismantle the floor in order to lay all the structural elements of the system.
Internal drainage in a garage cellar is laid in accordance with the following scheme:
- Dig a trench about 50 cm deep around the entire perimeter of the room;
- The bottom is compacted well, then a geoseptic is laid on it (this material perfectly absorbs moisture, thereby performing the function of waterproofing);
- A layer of fine-grained material (gravel, crushed stone) 20 cm thick is placed in the trench;
- Pipes are laid on top of the embankment, maintaining an inclination angle of 3 mm;
- A layer of gravel is again poured over the laid pipes, but of a medium fraction. The material is well compacted and a layer of geotextile is placed on it;
- The final action in this case will be backfilling the trench with sand and soil (removed during digging) and thoroughly compacting it.
Scheme 4
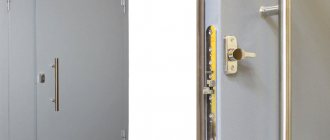
There is another method for effectively drying a cellar in the basement - injection protection (Scheme 5). This method is one of the most expensive, but at the same time it is most effective. When using this method, waterproofing in the cellar is installed using injections. Naturally, to perform such work you will need specialized equipment. The injection drying method is recommended for garages built from concrete, brick and foam blocks. The injection drying technology looks like this:
- Holes with a diameter of 1.5 to 4 mm are drilled along the entire perimeter of the damp basement. A distance of 20-80 cm must be maintained between adjacent holes. In each case, the parameter will be different and depend on the level of humidity, wall thickness and soil characteristics;
- Special elements are inserted into the prepared holes, through which liquid waterproofing or polymers are introduced with a pump;
- The advantages of such waterproofing are obvious. There is no need to dismantle wall cladding or break building structures. In addition, work on arranging waterproofing in this way can be carried out in any weather, at any time of the year.
Do you know how long it actually takes for aerated concrete to dry?
When building houses, extensions and utility rooms from aerated concrete blocks, it is necessary to take into account such characteristics as strength, density, thermal conductivity, and noise insulation properties. An equally important parameter is hygroscopicity - the ability to absorb and retain water. Damp walls in a house are a source of mold, mildew, and an atmosphere unfavorable to human health, so we are often asked how long it takes for an aerated block to dry.
There are two answers to this question. The first concerns the manufacturing process. The second is a completed building.
How long does it take for aerated blocks to dry?
The answer to the question of how long it takes for aerated concrete to dry after production is easier to give. The mixture poured into a special mold hardens in 2-4 hours, after which the gas block is cut into individual “bricks”. After they have gained strength for 6-8 hours, they can be removed from the molds and placed on pallets. They should lie for at least 2-3 days in a well-ventilated area without direct sunlight. During this period, the material gains about 50% strength and can be sent to the construction site. It will gain its final strength in the brickwork.
Attention!
A cube of aerated concrete D500 weighs 500 kg.
If you don't cover it with a protective film and leave it in the rain, its weight can increase by a third. At the same time, you cannot dry aerated blocks under the scorching sun. Since the aerated concrete mixture is hygroscopic, its layers dry unevenly. In the sun, the outer layer dries quickly, and the inner layer dries slowly. This may cause cracks to appear. As a rule, non-autoclaved aerated concrete is dried using electrical heating.
Hygroscopicity of aerated concrete: myths and truth
Indeed, aerated concrete is hygroscopic and can absorb water. In its normal state, a block of aerated concrete weighs 15-30 kg; when hydrated, it can gain an additional 30% of its weight, that is, from 7 to 12 kg. At the same time, its strength and other characteristics deteriorate. However, to seriously change their properties, aerated concrete blocks must lie in water for several days! An already built house cannot find itself in such conditions.
As for the rains, which Russia is especially rich in in the autumn and spring months, they cannot cause much damage to the building. The house should dry in natural conditions: it is good to immediately insulate it and do the finishing. Then the walls are not afraid of moisture and snow.
If the “box” of aerated concrete blocks could not be completed on time, it is necessary to take simple precautions and protect the building from excessive moisture. What can be done:
— organize water drainage during rain (especially for cornices, window openings, ceilings on which moisture can accumulate);
- protect aerated concrete walls with external finishing (for example, plaster);
- cover the finished but unused aerated concrete blocks with waterproof material (film, roofing felt).
If a building made of aerated concrete has a roof, it is not afraid of rain. But even if the construction is not finished, there is no need to worry: in such conditions, aerated concrete is not capable of getting wet to a critical state.
Important!
Requirements for the humidity of finished gas blocks are contained in GOST 21520-89.
The release humidity of cellular blocks made from sand should not exceed (by weight) 25%.
How long does it take for an aerated concrete house to dry after construction?
No less important is the question of how long it takes for aerated concrete masonry to dry in an already constructed building. It is impossible to give a definite answer to this question, since the time depends on the quality of the material itself, the method of moistening it during construction, and the weather conditions of the selected region. In sunny Uzbekistan and warm Kyrgyzstan the process proceeds faster. In Kazakhstan, temperature changes can slow it down. Of course, it is better if the house is built before the start of the rainy season and the onset of cold weather - then you can protect it with external decoration.
Note!
To avoid a situation where finished materials get wet in the rain and the construction process does not begin, experienced teams organize the process of manufacturing aerated blocks directly at the construction site.
This can be done by purchasing a stationary line for the production of aerated concrete, choosing the appropriate option in the catalog on our website .
Traditional methods of drying a cellar
After disinfection and treatment of all surfaces of the cellar, you can safely open ventilation hatches and pipes. The air in this room becomes heavy over time, so you can’t rely on natural ventilation under the influence of draft.
The most popular folk methods of drying a cellar, which you can try yourself:
- Using an iron stove;
- Drying using a roasting pan;
- Using candles (to increase natural cravings).
Using an iron stove
Drying the cellar/basement with an iron stove is a rather labor-intensive method, but effective. If the household has a suitable stove, then simply heat it in the cellar.
Drying the cellar with a brazier
The most preferred option for quickly drying the cellar is to use a roasting pan. The process is carried out a few days after natural drying. A Dutch oven is very easy to make yourself. You can use, for example, an old bucket.
The bucket is placed in the center of the room and the fire is constantly maintained in it until the cellar is completely dry.
Small wood chips are used to light the brazier.
When the flame flares up and gets stronger, you can put larger firewood in the bucket. The heat quickly displaces damp and stagnant air from the cellar.
Using a candle
An ordinary candle in one single copy will also help to increase air draft in the cellar. However, this drying method requires extending the ventilation pipe installed in the basement almost to the floor (see the figure on the right). After this, a lit candle is placed under the inlet of the pipe. It can be placed in a regular canned food jar.
To create an initial impulse directly in the pipe, it is recommended to light a sheet of paper. This will quickly create the necessary draft in the pipe, which will subsequently be supported by the candle flame. You can completely dry the cellar in this way within three days. Constantly replace spark plugs.
When the cellar is completely dry, you can bring all the removed shelves and racks into it. These items must be checked for dirt and fungi. If lesions are noticed, a solution of copper sulfate will help get rid of them.
You can dry the cellar in the garage, or located directly under the house, in no time. To do this, use the heat of the fire and a variety of simple devices. In order for vegetables and seams to be stored in the cellar all winter, it must be dried in advance.
A damp cellar is the most common problem in country houses. The reasons for the appearance of excess dampness in such a room are very prosaic and lie in the poor quality of its waterproofing. Also, in the absence of air exchange (ventilation), due to the storage of a large volume of fruits and vegetables in a limited area, excess moisture may form, which will subsequently condense on all enclosing structures.
Of course, storing vegetables and fruits in such a cellar is extremely unjustified, because being in constant moisture, the products will quickly become unusable and spoil in less than a month. Based on this, our review today will examine the question of how to dry the cellar and perform this procedure most effectively.
Dampness in a house made of aerated concrete: causes and solutions
We are accustomed to listening to advertising and trusting building materials manufacturers. In addition to advertising, you need to listen to other people’s experiences so as not to make mistakes. Let's talk about houses made of aerated concrete and the problems that arise after construction. Advertising insists that aerated concrete is the best material for construction.
Building from this material is easy and simple. The material has high fire resistance, is accurate in size, and is affordable.
There are also several disadvantages. Aerated concrete absorbs water well, and moisture can fill the blocks almost completely. If you do not expose the material to moisture, then everything will be fine with thermal conductivity and the blocks will be intact.
There are rumors that it is difficult to heat a house made of aerated concrete for the first 2 years after construction. Excess moisture disappears over time and a house made of aerated concrete will be heated without excessive fuel consumption. To avoid dampness and mold in the house, you need to use plaster with good vapor permeability.
Many people are faced with the question of whether or not to glue a vertical seam. At low temperatures, condensation occurs and the humidity of aerated concrete increases in a vertical joint without glue, and eventually the walls freeze.
How to avoid dampness in a house made of aerated concrete?
The laying of blocks must begin at 50 cm from the ground level. The porous material is afraid of moisture. Moisture is a consequence of insufficient insulation of the foundation, walls, blind area or soil under the floor. Solution: properly insulate the bottom of the house.
They need to be foamed. If you use a thermal imager, then these places are empty and then moisture will accumulate and freeze the walls. If the blocks have already been laid, then you can punch holes in the wall and simply foam them. Then the foam is cut off and the walls are puttied.
Use vapor-permeable materials for external insulation. It may be mineral wool, but not penoplex or expanded polystyrene. We protect the insulation on top with moisture-proof material. Afterwards comes the finishing of the house.
The blind area also needs waterproofing around the perimeter.
It is important to provide ventilation so that an aerated concrete house can breathe. Ventilation with heat recovery can be used. This is ventilation with air heating. If ventilation is not done, moisture will accumulate in the coldest places in the house (on the floor, walls).
Before plastering, it is necessary to prime the walls twice. The first time, dilute the primer with water and carefully walk over all the walls. If you don’t want there to be no cracks on the plastered walls, then it’s better to do this. Putty the walls with a thin layer of gypsum putty, glue the fiberglass canvas and then putty the fiberglass with finishing putty.
How to dry a cellar: tips from homeowners
A damp cellar is the most common problem in country houses. The reasons for the appearance of excess dampness in such a room are very prosaic and lie in the poor quality of its waterproofing. Also, in the absence of air exchange (ventilation), due to the storage of a large volume of fruits and vegetables in a limited area, excess moisture may form, which will subsequently condense on all enclosing structures.
Of course, storing vegetables and fruits in such a cellar is extremely unjustified, because being in constant moisture, the products will quickly become unusable and spoil in less than a month. Based on this, our review today will examine the question of how to dry the cellar and perform this procedure most effectively.
Furniture items
A few examples of furnishing a kitchen combined with a living room:
- 1. Sofa. It becomes an object that zones space. The sofa is placed with its back facing the place where food is prepared. In small rooms (less than 20 sq m) a corner is placed, which is placed against a wall installed perpendicular or parallel to the kitchen.
- 2. Set. According to designers, minimalist models without elaborate details look modern. The service, vases or glasses are placed on an open shelf. You can buy a fashionable display case for them. Furniture is placed near the wall. If the space is large (20 sq. m, 25 sq. m or 30 sq. m), then in the central part you can install an island, which also has sections for kitchen appliances.
- 3. Furniture set. The style should be combined with the design of both rooms. In small rooms, a compact table and chairs made of transparent material or painted in light colors look good. You can add a table with a round top to your living room interior. In spacious rooms, the kit is installed near the wall or in the central part. An elongated rectangular dining table would look good here.
Methods for drying a cellar in a garage
The constant accumulation of moisture in the cellar negatively affects the condition of the entire structure. There are several methods you can use to dry out the cellar in your garage. The most effective of these are candles and a brazier (metal oven, photo 1).
Important! Before you start drying out the cellar, you need to carry out a good inspection of it, remove the shelves, take out the interfering equipment and supplies upstairs. When all the garbage has been removed from it, the room is dried with outside air to remove excess moisture, and then a method is chosen to normalize the humidity level
There are two most well-known ways to deal with excess moisture in a garage basement.
Attention! If there is a lot of water in the basement, then before drying it must be pumped out with a pump or scooped out manually
It is important to determine what is the source of water in the cellar. Poor insulation may be to blame
But it may also be that the room was built next to a spring. In this case, you need to divert the water to the side using a pump and equip the cellar with good waterproofing
Poor insulation may be to blame. But it may also be that the room was built next to a spring. In this case, you need to divert the water to the side using a pump and provide good waterproofing in the cellar.
Is it possible to use dehumidification for frame houses after construction in winter?
Winter construction, of course, is less preferable than spring-summer construction, but sometimes you can’t do without it. The main disadvantage of construction in winter is not only low temperatures, but also the abundance of snow and freezing of unfinished structures. With the arrival of warmth, snow and ice begin to melt, moisture is absorbed into the materials of the ceiling, walls, and floor. Therefore, drying frame houses after winter construction is necessary and mandatory.
Even if visually it seems to you that everything is in order, “from the inside” the situation may be different. To avoid problems with dampness and unnecessary repair costs, call dehumidifiers immediately after construction is completed. Proper drying will save you from a number of problems, and you can immediately move into your new home.
Backfilling the underground room
Excess space in the underground can be filled with special material. But first you need to make the right choice. Backfilling can negatively affect ventilation, so other methods of thermal insulation are also offered.
Most often, the subfloor is covered with expanded clay. This is baked clay. The material is light in weight, so it is easy to work with.
Rules for filling the subfloor with expanded clay:
- It is necessary to maintain an interval between the floor and the material of 20-50 mm;
- The material should not interfere with ventilation;
- Expanded clay should be as dry as possible so that the boards do not begin to rot.
Many people are interested in how to fill the underground floor in a wooden house so that the protection is as effective as possible. The basement can be filled with a mixture of wood chips. Mineral wool is often used. Protection using polystyrene foam is very effective.
Is ventilation needed in a private house to get rid of dampness after winter?
Of course, ventilation plays a very important role in maintaining a normal indoor microclimate. But she precisely supports it, and does not create it. That is, if there is dampness in your home, ventilation will not be able to eliminate this problem. It only ensures normal air circulation, but does not draw out moisture.
Drying a house, relying on ventilation, is the same as drying it using ventilation; the efficiency is almost the same, that is, zero. However, after professional drying, ventilation will help maintain a normal microclimate.
Loft
This year the style remains in demand. It is often used to equip kitchens combined with a living room. This combination gives more free space, which will only emphasize all the details of the loft.
Today, such a definition as “classic style” is used less and less by designers. Loft - any interior design in which various technical elements are not hidden, but emphasized.
For example, stylists play with brickwork, wires or concrete walls. The photographs clearly show how successful it can look like a living room that is combined with a kitchen.
For loft, rough and heterogeneous surfaces and rough materials are selected. In apartments decorated in this style, wall lamps are installed. In this case, the light is directed along the walls.
Due to this, shadows fall so that uneven surfaces look three-dimensional. At first, loft was viewed with caution, but it quickly became popular. Designers do not hide finishing materials and even fake them. To imitate a concrete surface and smudges, decorative plaster is used.
Styles
There are many current trends and design ideas. The kitchen-living room in a modern style looks simple and minimalistic.
At the same time, it is not necessary to strictly adhere to any style; you can take its main idea as a basis and cleverly play with it with accessories and other details.