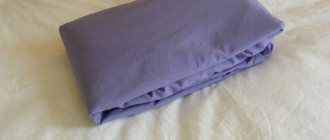
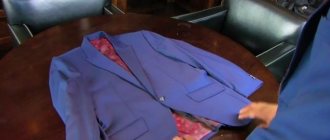
A modern stylish man needs not only to know how to wear a suit, but also to correctly place accents using accessories. They allow him to express his individuality, isolate his own image, make it brighter and more chic. One of these accessories is the pache scarf, because it was for this that the breast pocket of the jacket was invented.
REFERENCE!
Translated from French, “pochette” means “to carry in your pocket.”
Reasons to wear a pocket square
- A pocket square adds variety in color and brings life to your look.
- A pocket square is the perfect complement to your tie.
- A pocket square instantly adds a touch of sophistication and elegance to your look.
- Using a pocket square allows you to both support the dress code and emphasize the informality of your outfit.
- This is perhaps the best "sophisticated" accessory that won't break the bank.
- Folding the same pocket square in different ways allows you to wear the same suit but still have a different look every day.
- After all, a pocket square is a piece that will allow you to create a personal style that is unique to you.
By the way, if you have not yet purchased a pocket square for yourself or as a gift, go to our online store Bowandtie Shop Gallery in the section on pocket squares and handkerchiefs. We always have men's scarves in stock and at affordable prices.
SHAWLS IN A JACKET POCKET IN OUR ONLINE STORE
GO TO STORE
Which to choose? Color and size matter
There is always a connection between the pasha and the tie. Items do not have to be made in the same color scheme or with the same print (some stylists even suggest playing with contrasts, carefully avoiding a common palette), but they should have points of intersection . Ideal option: accessories are in harmony with each other in terms of color and material, but are not exact copies.
Important! Velvet goes well with silk, and wool goes well with cashmere. However, if you wish, you can do without a tie altogether. Pasha is suitable for semi-formal and friendly meetings, the status of which is emphasized by the unbuttoned collar of the shirt.
Among the universal options are products in a white shade . They are neutral and refreshing. Many people believe that at status events and celebrations at the level of marriage, a pocket square of this particular type should be used. However, snow-white can conflict with a bright or simply informal tie. The salvation will be an almost white accessory with a colored edging that resembles the pattern on the second accessory used.
There is no consensus regarding size . Some stylists and manufacturers insist that the standard is 42x42 cm. Others prefer 30x30. However, in reality, these products do not always look good. You should start not from the framework established by someone, but from a specific pocket and its depth, as well as from the design method.
When adding these two parameters, the result should be an accessory that looks out a little . If the pocket protrudes greatly due to the fact that it had to be folded many times, otherwise it simply would not fit, it sinks, dangles or protrudes significantly upward, then the size is chosen incorrectly.
Important! If the item is “sunk” in the jacket, but there is no way to change it or give up the idea of complementing the look with a stylish accessory, an ordinary napkin will save the situation. It is placed at the bottom of the pocket and serves as a reliable “foundation”.
Method number 1 is classic, simple and elegant.
This method of folding a scarf is called “Presidential”. It is one of the easiest ways to fold a scarf. This method is best suited for formal meetings and is used with a classic black tie. Typically, a classic pocket square is made from silk or linen.
Method No. 1 “Presidential”
Instructions:
- Place the pocket square on any surface, with the flat side facing you.
- Fold the scarf exactly in half.
- Fold the bottom corner of the scarf, leaving a small space at the top (about 2-3 cm), depending on the depth of your pocket.
- Place the pocket square in your jacket pocket and straighten the fabric to avoid wrinkles. Attention! The scarf should not hang out of the pocket, folding in half.
Method number 2 – “With one corner”
Another popular way to fold a pocket square is “One Corner”. It fits any type of dress code. I recommend using a colored scarf, not white.
Method No. 2 “With one corner”
Instructions:
- Place the pocket square on a flat, clean surface, with the angle facing you.
- Fold the scarf in half.
- Fold the left edge slightly beyond the center.
- Same thing on the opposite side.
- Finally, place the pocket square in your jacket pocket.
How to fold a scarf into a jacket pocket for a wedding
- Fold the fabric in half and arrange it like a square or diamond.
- The bottom of the product must be folded upward to obtain a neat fold. This way you can make a few more folds as you wish.
- Fold the accessory in half horizontally.
- The resulting structure is placed in the pocket with the curve upward.
Method #3 – Interesting & Difficult
If you want to stand out a little or add a less formal touch to your look, I recommend this method of folding a pocket square. Sometimes called "Two corners on top" It matches any scarf with a checkered pattern. In addition, you can use not only silk, but also scarves made from other fabrics. Personally, I choose scarves with patterns or “monograms”. It looks very unusual and at the same time fits a formal dress code.
Method No. 3 “Two corners from above”
Instructions:
- Place the pocket square on a flat, clean surface, with the angle facing you.
- Take the bottom corner and pull it towards the top, placing it so that you get two corners or “mountains”.
- Fold the left edge slightly beyond the center.
- Same thing on the opposite side.
- Finally, place the pocket square in your jacket pocket, carefully tucking out the top edges.
Steps
Part 1 of 3:
Choosing fabric for a handkerchief
- Part 2 of 3:
Turning and ironing the edges of the fabric
- 1
If necessary, iron the fabric first before cutting out the scarf and tucking in the edges.
If the fabric is wrinkled and does not lie flat, it must first be ironed. This will ensure a neat finished product at the very end of the job. Lay the fabric out on a flat, horizontal surface, such as an ironing board or table lined with a clean, dry towel. Run the heated iron back and forth over the fabric several times to smooth it out. X Source of information
- If you are afraid of damaging the fabric when ironing, iron it through a special napkin or an old T-shirt or towel. This step is especially important for delicate fabrics such as silk, chiffon and lace.
- 2
Cut out a square of fabric measuring 30 cm x 30 cm.
From it you will get a scarf measuring approximately 28 cm x 28 cm. If you wish, you can cut out a scarf of a slightly larger or smaller size. The piece of fabric you cut out simply needs to be 2 cm larger on both sides than the desired size of the scarf. X Source of information
- The most common standard size for a pocket square is 30cm x 30cm. If you want a pocket square that can be worn in your jacket's breast pocket, cut out a 32cm x 32cm square piece. X Information source
- If you want the hem seam around the perimeter of the scarf to be wider or narrower than the standard 5 mm, or you decide to limit yourself to only a single hem of the fabric instead of the classic double, then be sure to take this point into account when cutting. For example, if you are going to make a double heel 1 cm wide, then in total the square of fabric you cut out on both sides should be 4 cm larger than the desired size of the scarf.
- 3
Fold one edge of the scarf twice by 5 mm.
If you need a narrower or wider hem around the perimeter of the scarf, fold the fabric to the width you need. For example, if you need to make a hem seam 1 cm wide, then you should fold the fabric on all four sides twice by 1 cm.
Place the square of fabric wrong side up. Measure 5mm from the edge of one side and turn it over to the wrong side, then repeat the fold to hide the raw cut inside the folds.
- 4
If necessary, pin the hem together with tailor's pins.
If you're not worried about the tailor's pins leaving noticeable holes in the fabric, use pins to secure the hem of the fabric. Place the pins perpendicular to the fold to make it easier to remove them as you sew. Use a pin for every 5-7cm of folded edge. X Source of information
Try not to use pins on delicate fabrics such as silk, chiffon and satin.
- 5
Iron the folded fabric to secure the folds.
Keep in mind that this step is optional, but it will result in a scarf with neater edges.
Iron the edge of the scarf that you just folded over. If you are working with a delicate fabric, you will probably need to iron it using a napkin or T-shirt laid over the edge of the fabric, with the iron set to the lowest appropriate temperature.
- 6
Repeat the process on all four sides.
After you have folded and ironed one side of the scarf, do the same with the next side. Repeat steps until all four sides of the handkerchief have been folded and ironed.
Set your iron to the lowest temperature appropriate for the fabric you choose. This will also prevent damage to the material.
Part 3 of 3:
Making a hem seam
Method number 4 – “Crown”
This type of pocket square fold is sometimes called the “three corners up” or “crown” fold. Ideal for patterned and colored pocket squares. While this style would work better with formal wear, I think pairing it with a blazer or cardigan will make your look just as sophisticated.
Method No. 4 “Crown”
Instructions:
- Place the pocket square on a flat, clean surface, with the angle facing you.
- Take the bottom corner and pull it towards the top, placing it so that you get two corners or “mountains”.
- Take the left edge and pull it towards the top so that you have three corners or “mountains”.
- The remaining right corner must be folded exactly 90 degrees and, with effort, prevent the scarf from turning back.
- Place the pocket square in your jacket pocket.
Method No. 5 – “Donut” or informal method
This method of folding a pocket square is sometimes called the “Pumpkin” fold. It is ideal for a more casual outfit (Casual if you like or Business-casual). In my opinion it works best on a patterned scarf or as a square design. Suitable for a checkered shirt or a shirt with polka dots, with patterns (we also call such shirts “with cucumbers”). Folding a scarf this way is unlikely to go well with formal wear or a formal suit.
Method No. 5 “Donut”
Instructions:
- Place the pocket square on a flat surface.
- Now “pinch” the pocket square in the center and pull it up.
- Pull out the scarf as shown in picture No. 3.
- Next, turn the scarf upside down.
- Finally, place the pocket square in your pocket and fold up the loose ends. It will look quite uneven, but that's how it should be.
