04/24/2018Category: HandmadeAuthor: Andrey
Solid fur hats and hats are now being replaced by knitted hats of various styles. Sometimes they look rustic. And then someone remembered their childhood and sewed a pompom to the hat. The hat and its owner immediately began to look completely new - fresh and original. Now fashionistas from six to sixty are sporting knitted hats with pompoms and cones, and all sorts of pom-poms you will see on hats!
- 2 How to make a pompom yourself
- 3 Where to get fur for a pompom
- 4 How to work with fur
- 5 Algorithm for making a fur pompom
- 6 Attach the pompom
- 7 Master class on making a fur pompom - video
- 8 Cute things made from fur pom poms
Fur pompom on a knitted hat - beautiful and stylish
With a pompom, a simple hat has become chic.
When choosing a headdress for the cold season of 2022, all fashion sites unanimously recommend paying attention to hats with cones or pompoms. Surprisingly, they suit everyone! What may be in favor of a fur pom-pom rather than a thread bump is that a fur accessory still looks more respectable and not as reckless as just a bump on a hat.
A pompom will be a great way out if your hat just needs to be freshened up. In this case, the main thing is to guess the fur, color scheme and general appearance of your pompom.
Agree, choosing a hat is always a difficult task, and if you need to select both a hat and a pom-pom, you will completely break your head. It is much easier to update a favorite old hat with a pompom or sew a self-made pompom to a new hat. This, by the way, will be cheaper.
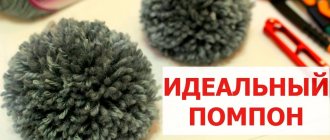
Yarn pompom: step-by-step instructions and tips for making
Yarn pom poms are very easy to make, we will look at several ways to create them.
Note! The size of the pompom depends on the distance of the thread from the core to the edge, and its volume depends on the number of circles wound.
Method No. 1
The simplest option.
- Using your thumb, pinch the end of the thread and wrap it around your fingers.
Here the size of the pompom depends on the number of fingers
- Cut the thread.
- Tie the wound threads across and cut on both sides of the middle.
- Fluff the pompom and trim its edges to make an even ball.
Where to get fur for a pompom
- Option one. Buy skins from a fur studio or a hat sewing workshop. But this will cost you a lot and they won’t sell you a piece of skin (for one pompom).
- Option two. Rip open your mother's old hat, collar or other unnecessary fur.
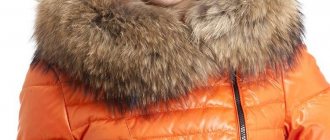
- Option three. As a way out, many people use fur trims that are attached to the hoods of jackets and coats. Many people quickly get bored with them and it’s not at all a pity to use them for such a good cause as sewing a pom-pom.
Pom-poms made of natural fur
Natural fur decorations on a hat and scarf look very beautiful. To make them you will need very little time and a small piece of fur. True, buying a whole skin just for one pompom is expensive. But, if you have fur collars from old coats and jackets, then the problem is easier to solve: sew such a fluffy decoration from them with your own hands.
First you need to tear the lining away from the collar. And here it may turn out that the collar is not made of a whole skin, but of many carefully selected pieces.
When cutting out the desired pieces, you can cut the threads that sew the pieces of fur together. It is important to immediately strengthen these places by sewing them with a furrier’s stitch.
If the width of the existing collar is not sufficient, then you can sew a fur panel of the required size by choosing the direction of the pile of the skin and its length.
You need to cut the fur from the flesh side, using a blade or a special sharp knife. The cut should not go through the fibers.
When the preparatory work is completed, you can begin making the pompom.
What we need:
- fur flap;
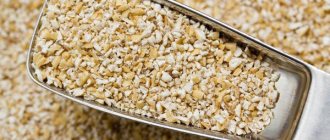
- round base - can be a foam ball (sold in craft stores), crumpled paper wrapped in woolen threads, a ball sewn from padding polyester or batting;
- thread, needle, blade, scissors.
How to make a fur pompom with your own hands
We cut out a round fur blank for the future decoration.
If necessary, adjust the dimensions of the round base. This can be done by winding knitting threads around it.
The diameter of the base should be such that the fur circle is slightly stretched when wrapping the base.
We sew the fur circle around the perimeter with threads of a suitable color. You can use regular sewing threads, but in several folds.
Then we pull the thread, tightening the fur around the base. We should not have any unevenness or roughness left on the seam. We get a pompom for a hat, the seam of which can only be found by touch.
Sew the finished pompoms onto the hat or the edges of a knitted scarf.
How to work with fur
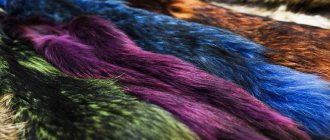
Any fur (mink, rabbit, fox, raccoon, etc.) is suitable for making a fur pompom. Of course, the fluffier the fur, the more beautiful the pompom will be. Long fur makes stylish pom-poms, but it is more difficult to work with such fur. The main thing you must make sure of before starting work is that there is no lint coming out of your piece. This piece should not be used.
You can pre-wash your workpiece by preparing the following solution: in a liter of warm water, dissolve 1 teaspoon of ammonia, 2–3 teaspoons of salt, 1 teaspoon of hair shampoo, 2 teaspoons of soda. Soak the fur in the solution and gently brush it with a small brush. Rinse with plenty of water and let dry naturally.
Another feature of working with fur is that it is inconvenient to cut with scissors. To avoid damaging the fibers and to cut the workpiece into the desired shape more evenly, use a stationery knife or, if you don’t have one, a regular blade.
Pompom on a string
This manufacturing option is useful if you are going to hang the pompom on ribbons.
To make such a pom-pom from fur with your own hands, we repeat the previous sequence of actions: cut it out, sew the edge, tighten it slightly.
But before we put a lump of sealant in the middle, we tie it with a ribbon. Its length should be sufficient to complete the further task (hanging, tying, etc.)
We tighten the threads of the firmware, letting the tails of the tape out.
After fully tightening and fixing the threads, we get a pompom suspended on ribbons.
Algorithm for making a fur pompom
A fur pompom is made like this
- First, a pattern for the product is made (if you are an experienced craftswoman, you can do without it). Using scissors, a circle of the required diameter is cut out of cardboard, usually from 10 to 20 cm, depending on the volume of the pompom you are comfortable with.
- Next, the pattern is applied to the wrong side of the fur and a blank of the required size is cut out.
- Then, using a strong thread, you need to overcast the workpiece over the edge and leave the ends of the thread free.
- With these ends of the thread, the workpiece is pulled into a bag, but not completely.
- Then the filler is taken and inserted into the bag with the ends of the thread released. If you are making a small pompom, you can fill it by pushing the filler inside using a stick, knitting needle or other suitable tool. Alternatively, you can tie the filling in the middle with a narrow ribbon or braid, the ends of which should remain outside when pulled together. Then, with the help of them, the pompom is secured to the hat.
- After this, the future pom-pom is finally pulled together, the threads are secured, if there is a hole left, it is sewn together.
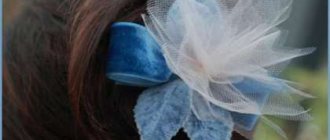
How to make a brooch from a pompom: description, photo
Pompoms make excellent animals for various animals. Moreover, fur only adds naturalness to the product. This is the easiest way to make a brooch - sew on eyes and make a mouth for the animal you like.
- By the way, such brooches can even be attached to hair clips. It will look very original.
On a note! A scarf made of pompoms looks very rich and even luxurious. Yes, keep in mind that the work will be painstaking. And you will need a lot of material, because the scarf should wrap well around your neck.
- Don’t be afraid to experiment and use your imagination – you can add ears and even a body to animals.
- In general, a small pompom in a composition with stones will look beautiful.
- Or make a flower (from stones or beads), and take the pompom by the core.
Pompom brooch
- You can even make a flower from them. Or make another arrangement using pompoms. The main thing is to turn on your fantasy and imagination.
- Use felt as an additional (or main) material. It is easy to work with and the decorations are very colorful.
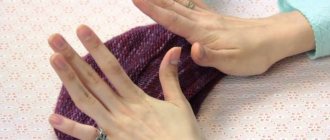
Attaching the pompom
- We thread one end of the thread (or ribbon) into the eye of the needle. We pierce the crown of the hat and pull the thread inside.
- In the same way we thread the second end of the thread inside.
- We firmly pull the pompom to the top of the head (this is important, otherwise it will hang unsightly on the hat) and tie a bow. If you want, you can make a knot first and then a bow.
With this method of securing the pom-pom, it can be easily removed to wash the hat or change the pom-pom to another. You can simply sew a pompom to a hat using this thread.
Some people attach the pom pom to the hat using a button. In this case, it is important to choose the right size button so that it does not peek out from under the pompom and at the same time holds it firmly. When you select the button, you will need to sew one half of it to the hat and the other to the pompom.
Preparatory stage
Before creating a pompom, you must first select and prepare the material.
Fur selection
When it comes to wearing, faux and natural fur are not very different from each other, but it’s still worth knowing a few features of each in order to make the right choice.
Features of faux fur:
- easier to work with compared to natural ones;
- it is easier to care for and can often even be washed in a washing machine;
Features of natural fur:
- among natural furs, otter, sable and mink are considered the most durable, and hare fur wears out the fastest;
- The easiest to work with will be mink and fox furs, they are pliable, have a thin core (the base on which the fur is attached), and the fur is not very long, so it does not interfere with work.
Advice! To check the quality of the fur, be it natural or artificial, run your hand over it, as if combing with your fingers. The more lint remains on your hand after this action, the poorer the quality of the fur you tested.
Washing and drying natural fur
New fur does not need to be washed, but if you decide to use a piece from an old fur coat, for example, then washing is a necessary preparation step.
For this, a special detergent for washing fur or a solution that you can make yourself is suitable. To do this you will need:
- washing powder - 5 g,
- ammonia - 5 g,
- salt - 15 g,
- soda - 10 g.
Mix all ingredients and dissolve in 1 liter of water at room temperature. Then, using a soft brush, carefully apply the solution to the entire surface of the fur and the inside, massage for 1 minute and rinse thoroughly under running water.
Note! The fur should dry naturally, at room temperature. You cannot dry it with a hairdryer or battery, as it can dry out, and the inner core will “shrink” from the high temperature and the cut will be irrevocably damaged.
Painting
If the old fur needs updating or you are not satisfied with the shade of the new one, you can dye it. This is done using a special dye, which can be found in specialized stores, or with regular hair dye.
Before using paint, test it on a small piece. To avoid surprises if the resulting color is not what you expected
Coloring is carried out in just a few steps:
- Treat the flesh with glycerin, petroleum jelly or any other fatty cream so that it does not dry out during the process.
- Paint the fur according to the instructions for the chosen paint.
- Rinse well under running water and then place in a warm vinegar solution (use 1 tablespoon of vinegar per 1 liter of water) to consolidate the result.
- Now re-treat the fur with the cream that you used in the first stage, and then pin the fur with buttons to any hard surface and let it dry. This way it will not shrink during the drying process.
To make the fur softer and more moisturized, between the dyeing stage and vinegar rinsing, you can treat it with any hair balm.
Video: how to dye fur at home
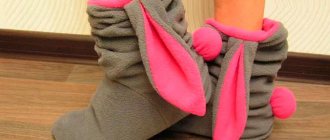
Chic option for the winter
A chic, warm set of hat and scarf for the winter.
You can go to the store and buy a fashionable headdress there. After all, there is now a huge selection of different models. Or you can knit such a hat with your own hands. It knits quite quickly and easily. When choosing a pattern, everything depends only on your imagination. In addition, the finished product will fit perfectly on the head, and the cost savings will be obvious. Let's knit a warm winter hat with a large pompom for women.
You will need: - Eskimo yarn from Drops (100% wool 50mt/50g); - sock knitting needles No. 8. Density: 11 sts = 10 cm
Patterns: - elastic band 1 x 3 (knit 1, purl 3); - garter stitch (when knitting in the round, 1 row - knit, 1 row - purl) Decrease hint: knit 5 stitches. (K1, K1, P1, K1, K1), then slip the 2nd stitch over the right sp. over the 1st loop, the 3rd over the 1st, the 4th also and the 5th - you decreased 4 stitches.
Description of knitting a hat
- Cast on 64 stitches, bind into circle and place 16 stitches per needle. Knit with an elastic band 1 x 3 to a height of 7 cm.
- Proceed to the main pattern: * K1, 1 pet. garter stitch, p1, 1 st. garter stitch * - repeat until the end.
- When you knit a 22 cm hat, decrease 16 stitches like this: * decrease 4 stitches. (hint above), 11 sts with the main pattern * - repeat to the end (= 48 sts).
- After 25 cm from the cast-on edge, decrease another 16 stitches: * decrease 4 stitches. (hint above), 7 sts with main pattern * (= 32 sts).
- Through a row - knit 2 stitches at a time (= 16 stitches).
- Pull the yarn through the remaining loops and reinforce.
Scarf: Size - 30 x 150 cm. You will need 350 grams of similar yarn.
- On knitting needles No. 9, cast on 33 sts and knit 8 r. handkerchief knitted (for straight knitting, all stitches in all rows are knit).
- Distribute the loops like this (right side): 4 stitches. knitting, * 1 knit, 1 p.plate knit., 1 purl., 1 p.plate knit. * - to the end, 1 knit, 4 p. scarf knit.
- After 146 cm, go to garter stitch - 8 rows.
Master class: buboes in the form of flowers
These soft, fluffy flower balls look unusual, and they are a little more difficult to make than simple one-color ones.
You can use leftover threads in bright colors. You will also need cardboard blanks shaped like horseshoes (4 pieces) and four metal stationery clips.
- It is necessary to visually divide the ornament into two parts from the center to the edges and in layers, sequentially wind yarn of different colors onto the templates.
- First - the middle of yellow.
- After - a wide layer of pink.
- Then a thin layer of green.
- Everything is covered with white strands
- Now we take the second pair of horseshoes and make another exactly the same blank.
- Using stationery clips we connect them to each other.
- Next, cut the yarn along the outer edge of the template.
- Tie the bubo across with a fixing thread.
- Carefully remove the cardboard.
- Fluff, trim.
Based on the techniques shown in this master class, you can make buboes in the form of other flowers, as well as fruits, vegetables, and berries.