Electrolux washing machines are distinguished by their stylish design, functionality, and high build quality.
The device incorporates the latest achievements of developers in terms of electronics, allowing you to control the washing process from the moment you load the laundry until the end of the working cycle.
You can appreciate all the advantages of Electrolux washing machines only if you use the household appliance correctly.
We will tell you further about how to properly use an Electrolux washing machine.
What to do after?
Once the washing is finished, you must:
unload washed laundry from the drum of the washing machine;- Wipe the rubber cuff from moisture with a clean cloth (additionally check the seal for stuck small items of clothing);
- slightly open the detergent dispenser (if there is any undissolved powder left in the tray, it must be removed);
- open the hatch door slightly for ventilation (ventilation of the inner surface of the drum prevents the formation of an unpleasant musty odor).
Do not try to open the hatch door immediately after the sound signal for the end of the wash. The UBL keeps the door closed for another 2-3 minutes. Sudden movements or tugging can break the lock.
What other functions are there?
Different Electrolux models may be equipped with additional icons that are not present in other models - developers are constantly improving the devices, adding something, removing something. So, for example, you can see the following signs on some branded cars:
- Iron is an option - easy ironing. Of course, there is nothing like an iron there, it’s just that the drum, rotating in a special way, prevents creasing.
- A square with a weight with a number drawn inside it notifies the user about the maximum load of the drum.
- A square with a circle inscribed in it - imbalance control.
- A square with water and soap bubbles indicates foam control.
A square with sound waves and the words “very quiet” - this icon indicates that the machine is unusually silent.
Removing the “stuffing” of the case
The final stage of work will be the removal of the tank-drum assembly from the body of the Electrolux washing machine. When you reach it, you will need to call a friend, since pulling out such a large knot alone is not easy. But before that, you still need to remove quite a large number of parts.
- disconnect the terminals of the motor power wires;
- Turn the pulley with one hand and remove the belt with the other;
- unscrew the screws holding the motor;
- move the motor away from you and remove it;
- remove the wiring from the pump, unscrew its screws, turn clockwise and remove;
- remove the wiring from the heating element and temperature sensor, unscrew the central nut (between the contacts of the heating element), lubricate the sealing rubber of the heater with WD-40, grasp the contacts and remove the heating element using a rocking motion;
- dismantle the counterweights by first unscrewing the screws that hold them in place;
- remove the fasteners holding the shock absorbers, remove them, leave the springs for now;
- disconnect the dispenser pipes and the filling valve wiring;
- separate the tube from the water level sensor and remove the pressure switch.
After these manipulations, you can begin to remove the tank with the drum from the machine body. To do this, you need to hold the tank with your hands (you will need the help of a friend) and remove the upper springs. Next we take out the tank.
Most Electrolux models contain solid plastic containers, welded using a special technology. Therefore, in order to disassemble the drum, the container will have to be cut with a hacksaw, and then screwed together and glued with sealant. If you have a collapsible tank, you only need to open the latches and unscrew the screws.
If you disassemble the drum with your own hands, you will need two hammers, a chisel and a long bolt (to knock out the bearing). A specially purchased device for removing bearings (removal pullers) will make the task easier, but you can do without it, although it will not be easy.
- We unscrew the special screw, which is located in the center of the pulley.
- We use a hacksaw to saw a plastic container or unscrew it if it is collapsible.
- We remove the tank halves to the side.
- We check the condition of the cross and unscrew it.
- We knock out the old bearings from the shaft, clean the seat and press in new bearings.
The machine is assembled after repair in the reverse order, but taking into account the nuances that we will describe in a separate publication. Removing old bearings and installing new ones is not an easy task. If, after a number of attempts, you were unable to go through one or another stage of disassembling the machine on your own, it is better to enlist the help of a specialist.
Interesting:
- How to place a washing machine in the bathroom
- Washing machine in a small bathroom - design features
- Furniture for the washing machine in the bathroom
- Electrolux washing machine fault repair
- Bathroom in Khrushchev with washing machine
- Where to put a washing machine in a small bathroom
Reader comments
Share your opinion - leave a comment
Starting a household appliance
The process of preparing for washing is completed, the desired mode has been selected, there are a few more steps left to perform before starting the washing machine:
- Select the required temperature mode (varies from 30°C to 95°C). So light, delicate items are washed at a temperature no higher than 30C, cotton items -40°C-60°C. A temperature maximum of 95°C is used for very soiled bed linen or bath items.
- Set the required number of spin revolutions. As a rule, when selecting a washing mode, the program automatically sets the desired spin parameter, but if necessary, it can be changed using the corresponding button on the control panel.
- Pour washing powder into the detergent dispenser compartment.
Where to put the powder: on the left side of the powder receptacle there is a compartment for the main wash, on the right side - for pre-wash, in the center - a compartment for conditioner and rinse aid.
Information about the amount of washing powder required for one wash can be found on the packaging of the detergent. You should not exceed the recommended standards . Otherwise, saving powder will reduce the quality of washing, and increasing the rate will lead to excessive foam formation, which can damage the Electrolux washing machine.
After all the preparatory measures have been completed, you can start washing. To do this, press the “Start/Pause” button. The indicator on the control panel will stop flashing, and the machine will start the initial stage of washing - drawing water into the tank.
Adviсe
By installing the washing machine on a rubber mat, you can significantly reduce the noise and vibration of the body during the washing process.
At the end of the full washing cycle, the household appliance must be unplugged from the outlet (sudden surges in the network voltage can lead to serious repairs to the control module).
Do not pack the washing machine drum tightly. Otherwise, overloaded household appliances will break down very quickly.
Clothing with rivets and other metal fittings must be turned inside out before loading into the drum. This will help protect the inside of the tank from scratches and dents, and your clothes from being snagged or torn.
A special measuring spoon will help you accurately measure the required amount of dry (or liquid) washing powder. If a situation arises that requires adjustment of the specified parameters (for example, it is necessary to change the water temperature), the “Start/Pause” button is pressed again. The green indicator starts flashing and the running process is suspended.
Preparing for washing
Preparation for the washing process proceeds according to the following scheme:
- The household appliance is connected to the power supply (separately installed, grounded outlet). The Start/Pause or Power button indicator on the control panel should light up.
- Sort dirty laundry. Everything that requires washing is divided into groups: according to degree of contamination, color and material of manufacture. It is unacceptable to wash colored and white items together (the result is damaged, faded clothes). Hand-embroidered items and hand-knitted items are washed separately.
- Load the drum of the washing machine. The maximum amount of dirty laundry (weight) that can be loaded into the drum depends on the model of the washing machine (the necessary information can be found in the data sheet of the household appliance).
For synthetic items, the maximum loading level does not exceed a third of the drum volume, for knitted woolen items - a maximum of half the tank. With a maximum load of products made from natural, dense fabrics, there should be enough free space in the drum to fit the palm of your hand.
Recommendations
During the first launch of LG, the following expert advice will be useful:
- The cycle must be started by heating the water.
- If everything went well with the first wash start, then subsequent runs can be carried out using any programs with items loaded into the drum.
- You should not try to wash all the things at once - it is better not to tamp the machine down to capacity. This will ensure not only better processing quality, but also protect the nodes from overload.
- There is no need to rush to get rid of the washing machine packaging. It may be needed if repairs or returns are necessary due to a manufacturing defect.
- The removed shipping bolts should be kept in case the washer needs to be transported in the future.
- Caring for the washing machine between washes must be of high quality and mandatory, including airing the drum.
- Periodically using the washing machine's self-cleaning function and cleaning the drain filter will help extend its life.
How to care for equipment?
Regular, proper care will help extend the trouble-free operation of your Electrolux washing machine.
So the drum and powder compartment are wiped at least once a week with a soft sponge using baking soda paste (the dry powder is diluted with warm water until it becomes a thick paste). Such actions help clean surfaces from limescale and other impurities from hard tap water.
Don't forget about the rubber cuff around the hatch. It is in its folds that the largest amount of dirt collects, which can be cleaned with a soft toothbrush and baking soda paste.
The rubber seal cannot be cleaned with chlorine-containing compounds (for example, Belize). Otherwise, the cuff will very quickly lose its elasticity and become covered with cracks.
The drain filter and water inlet filter require special attention. To avoid problems with draining waste fluid, it is necessary to clean the drain filter once every ten days. You can find it in the lower part of the hull behind a small hatch.
The drain filter is unscrewed (counterclockwise movements), cleaned of hair, threads and other debris, and then installed in its original place.
Covered with a layer of impurity particles from tap water, the water inlet filter blocks the process of water entering the washing machine. How to clean it? To do this, on the back panel of the washing machine body, unscrew the fastening nut of the inlet hose, from which, using a flat screwdriver, carefully remove a small metal mesh - the inlet filter. The mesh is cleaned under water pressure with a toothbrush , and then installed in its original place.
Once a week, wipe the body of the washing machine with a soft cloth or sponge moistened with soapy water.
Errors (on screen) and what to do about them?
The self-diagnosis system, which is equipped with most models of Electrolux washing machines, helps to quickly determine the cause of the problem and restore the normal functioning of household appliances. The error code displayed on the information display on the control panel will tell you what exactly caused the malfunction:
Error E01 (EA1), E02 (EA2), E04 (EA4), EA5 . Problem: The washing machine does not spin the drum. What to do: check the drive belt, test the drum self-positioning device.- Error E03 . Problem: The washing machine does not heat the water. What to do: test the heating element relay and heating element with a multimeter (replace if necessary).
- Error EA6 (typical for top-loading washing machines). Problem: The drum does not rotate. What to do: check the drive belt, restart the wash.
- Error E10 (in some models E11) . Problem: lack of water supply to the tank. What to do: check the water pressure in the tap, inspect the hose for breaks and kinks, test the fill valve.
- Error E13 . Problem: leaks in the system. What to do: disconnect the washing machine from the power supply, call a specialist for detailed diagnostics and repairs.
- Error E20, E21 (C2), E23, E24 . Problem: no water drainage. What to do: check the drain hose and the drain pump impeller for blockages, test the drain pump.
- Error E31, E32, E33, E34, E35, E38 . Problem: the tank is not completely filled with water or the water level exceeds the permissible limit. What to do: test (replace if necessary) the pressure switch, clean clogged areas of the sensor.
- Error E40, E41, E42, E43, E44, E45 . Problem: The machine does not start the washing process. What to do: check the tightness of the hatch closure, the integrity of the rubber cuff, test the functionality of the UBL, restart the wash.
- Error E50, E51, E53, E54, E55 . Problem: The washing machine does not spin the drum. What to do: restart the washing machine, check the functionality of the triac, motor (brushes), tachometer, Hall sensor.
- Error E52, E56, E59 . Problem: the tachometer is malfunctioning. What to do: restart the washing machine, ring the controller circuit, test the tachometer (replace if necessary).
- Error E57, E58 . Problem: the washing machine does not emit any rotation signals, the washing process is blocked. What to do: check the voltage in the network (most often this problem is associated with very high voltage in the network), test the control module.
- Error E61, E62, E66, E68, E69, E3A, E71, E74 . Problem: the machine does not heat the water or the temperature of the heated water exceeds the value set by the program. What to do: check the contacts of the heating element and temperature sensor (replace faulty elements).
- Error E90, E91, E93, E94, E95, E96, E97 . Problem: The washing machine does not respond to specified commands from the control panel. What to do: test the control unit elements, clean or replace the electronic boards if necessary.
- Error EH2 . Problem: The mains voltage is too high. What to do: check the power supply.
- Error EH3 . Problem: The mains voltage is too low. What to do: check the power supply. If necessary, install a voltage stabilizer.
If troubleshooting the error yourself does not lead to the desired result, it is better to entrust the repair of the washing machine to the service center specialists.
Mode selection
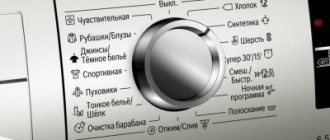
There are many symbols on the control panel - encrypted meanings of the main washing modes and additional functions of the Electrolux washing machine.
Main modes:
Auxiliary programs (selected depending on the type of laundry):
Additionally, the display of the control panel of the washing machine displays information about how much time is left until the end of the wash, the number of spin revolutions, and the water temperature in the tank set by the selected program.
Video review of the modes of the Electrolux washing machine:
Where to put powder in the washing machine for pre- and main wash
Before loading laundry into the washing machine, you need to sort it by color, type of fabric, and degree of soiling. For especially severe cases, washing machines have programs with preliminary (additional) washing. These cycles should not be used for daily washing, since long cycles are not suitable for many types of fabrics.
Options for placing trays in different types/brands of machines
The machines from this company have a classic 3-section tray division. The right compartment is for pre-wash, the left for the main wash. The manufacturer identifies the conditioner container in blue.
Top-loading machines have the following arrangement of receivers: on the left is a compartment for pre-wash, in the middle for rinse aid, on the right for the main wash.
Washing machines are equipped with a 3-section tray. The left compartment is for the main wash, the right is for the additional wash. The air conditioning section is painted blue.
The leftmost section is for additional washing, the middle one for the main wash. The compartment with the flower serves as a rinse aid receptacle.
Compartment markings
The structure of the receiving tray in different models may have its own characteristics. But the symbols of the sections themselves are unified:
- The pre-wash compartment may be marked with a unit (Roman or Arabic) or the letter A.
- The main wash container has the largest volume in the tray and is designated by a two (Roman or Arabic) or the letter B.
- The rinse aid receptacle is most often marked with a flower (less often with the number 3).
In many models, the design of the tray provides an additional bath, which is inserted into the pre-wash container. It is used as a bleach or stain remover.
Is it possible to pour powder into a drum?
Any modern washing machine has a tray for detergents. It is this compartment, according to the manufacturer’s plan, that should ensure the flow of powder into the drum with dirty laundry. But sometimes it can be poured directly into the machine.
This exception is suitable for powders that are very foamy. Basically, these are soap-based products with poor solubility in cold water, and the manufacturer necessarily warns about this feature of the product on the packaging.
Among the powders that can be poured into the drum are for washing children's clothes. They have a special gentle formula and are not washed off so well with water from the receiving tray.
Proponents of pouring powder directly into the drum claim that this improves the quality of washing and saves detergents. Opponents are inclined to think that the powder in this mode comes into contact with the laundry undiluted and can spoil the products.
Manufacturers of washing machines do not give clear prohibitions on pouring powder directly into the drum. Unlike using bleaches and stain removers in this way, they can only be loaded into the receiving tray.
